




Prepare, Blend, and Analyze Talkdesk Data in Alteryx Designer (ODBC)

The CData ODBC driver for Talkdesk enables access to live data from Talkdesk under the ODBC standard, allowing you work with Talkdesk data in a wide variety of BI, reporting, and ETL tools and directly, using familiar SQL queries. This article shows how to connect to Talkdesk data using an ODBC connection in Alteryx Designer to perform self-service BI, data preparation, data blending, and advanced analytics.
The CData ODBC drivers offer unmatched performance for interacting with live Talkdesk data in Alteryx Designer due to optimized data processing built into the driver. When you issue complex SQL queries from Alteryx Designer to Talkdesk, the driver pushes supported SQL operations, like filters and aggregations, directly to Talkdesk and utilizes the embedded SQL engine to process unsupported operations (often SQL functions and JOIN operations) client-side. With built-in dynamic metadata querying, you can visualize and analyze Talkdesk data using native Alteryx data field types.
Connect to Talkdesk Data
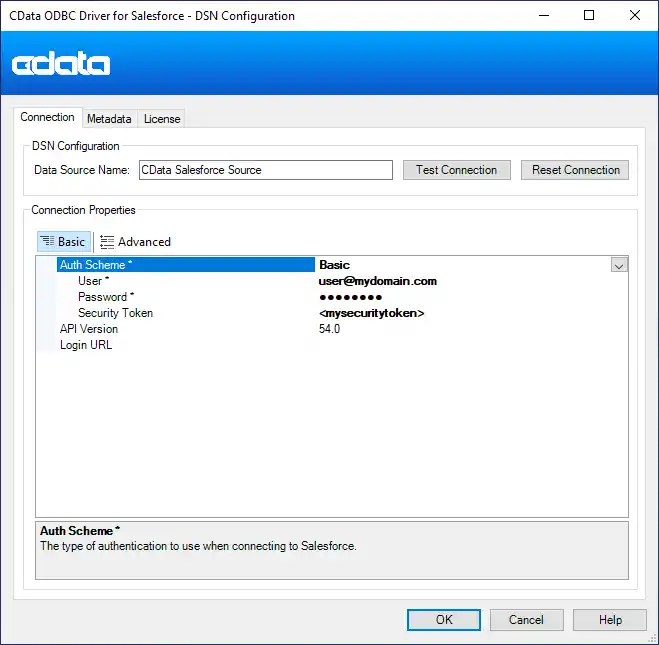
- If you have not already done so, provide values for the required connection properties in the data source name (DSN). You can configure the DSN using the built-in Microsoft ODBC Data Source Administrator. This is also the last step of the driver installation. See the "Getting Started" chapter in the Help documentation for a guide to using the Microsoft ODBC Data Source Administrator to create and configure a DSN.
Talkdesk uses the OAuth 2.0 Client Credentials grant. There is no browser-based authorization step and no callback URL.
Set the following connection properties:
- AccountName: The name of your Talkdesk account.
- Region: The region where your Talkdesk instance is deployed. Supported values are US (default), EU, CA, AU, UK, and FedRamp.
- OAuthClientId: The Client Id assigned when you registered your custom OAuth application.
- OAuthClientSecret: The Client Secret assigned to your custom OAuth application.
Creating a Custom OAuth Application
- Log in to your Talkdesk account and select OAuth Clients from the navigation menu.
- Click Create OAuth Client and give the client a descriptive name.
- Set Grant Type to Client Credentials.
- Click Add scopes and select the scopes for the data you want to access.
- Click Create and copy the Client Id and Client Secret.
When you connect, the driver automatically requests an access token from Talkdesk, caches it, and refreshes it when it expires. Make sure the scopes selected for the application match the views you plan to query, or the token request can fail.
When you configure the DSN, you may also want to set the Max Rows connection property. This will limit the number of rows returned, which is especially helpful for improving performance when designing reports and visualizations.
- Open Alteryx Designer and create a new workflow.
- If your application is set to run in DCM Mode Only by default, you need to change it to DCM Mode Optional to enable the CData ODBC Driver connection:
- Open Options > User Settings > Edit User Settings
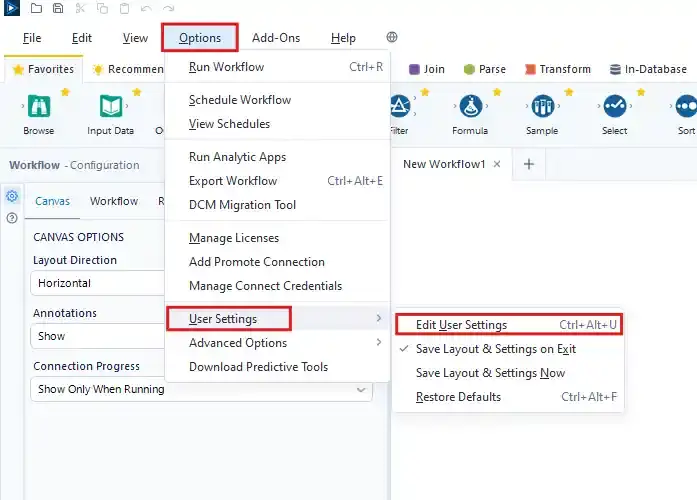
- Set the DCM Mode to "DCM Optional" and SDK Access Mode to "Allow" or "AllowAll"

- Open Options > User Settings > Edit User Settings
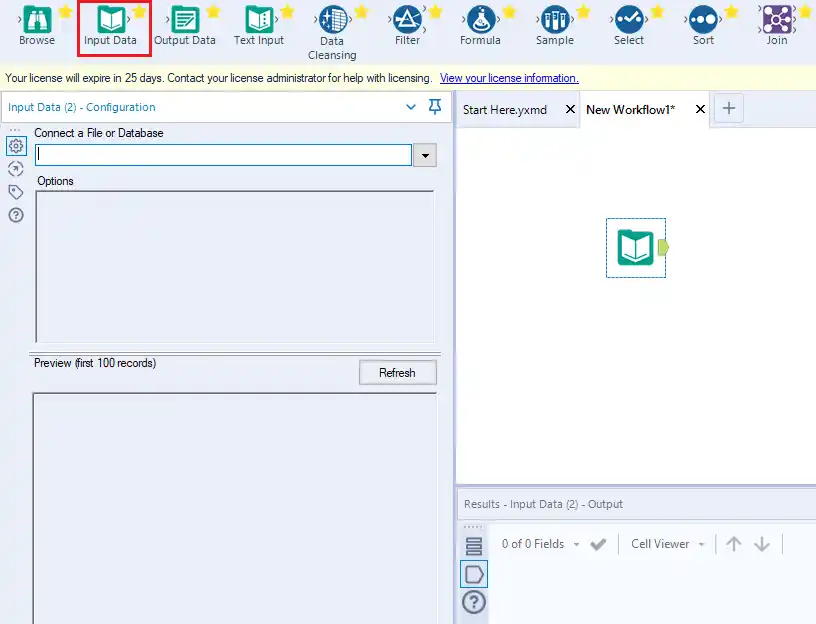
- Drag and drop a new input data tool onto the workflow.
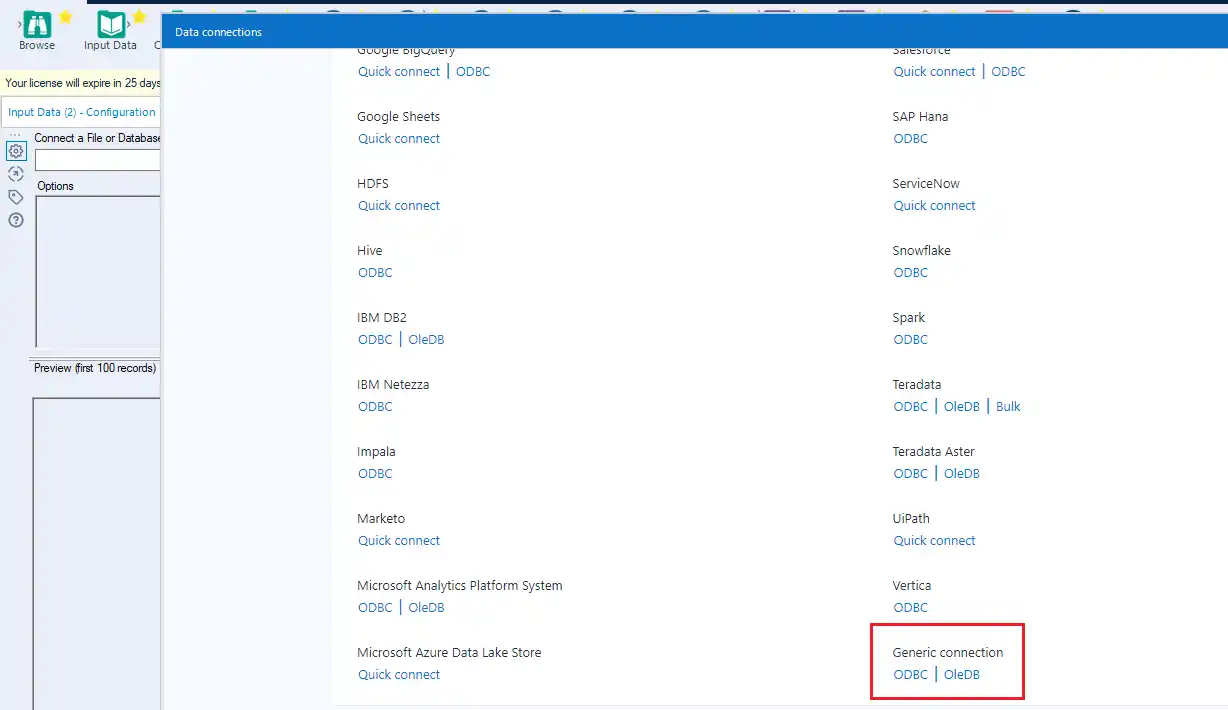
- Click the drop down under Connect a File or Database and select the Data sources tab.
- Navigate tot he end of the page and click on "ODBC" under "Generic connection"
- Select the DSN (CData Talkdesk Source) that you configured for use in Alteryx.
- In the wizard that opens, drag, and drop the table to be queried in the "Query Builder box." Select the fields by checking the boxes that you wish to include in your query. Where possible, the complex queries generated by the filters and aggregations will be pushed down to Talkdesk, while any unsupported operations (which can include SQL functions and JOIN operations) will be managed client-side by the CData SQL engine embedded in the connector.


If you wish to further customize your dataset, you can open the SQL Editor and modify the query manually, adding clauses, aggregations, and other operations to ensure that you are retrieving exactly the Talkdesk data you want .
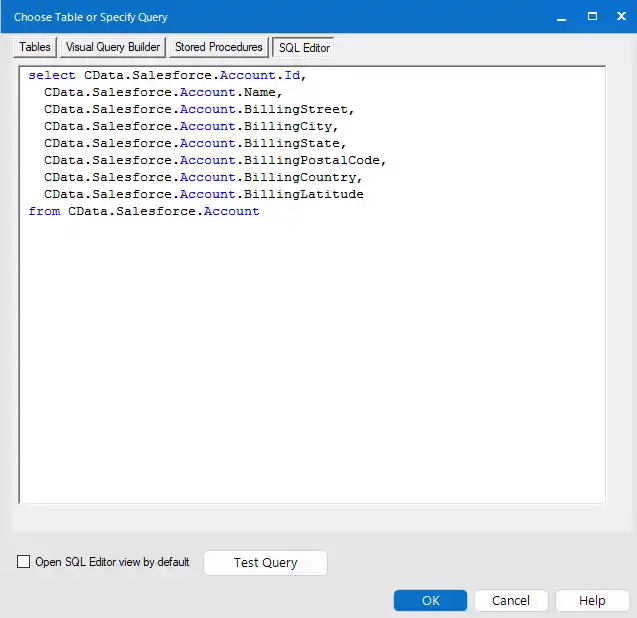
With the query defined, you are ready to work with Talkdesk data in Alteryx Designer.

Perform Self-Service Analytics on Talkdesk Data
You are now ready to create a workflow to prepare, blend, and analyze Talkdesk data. The CData ODBC Driver performs dynamic metadata discovery, presenting data using Alteryx data field types and allowing you to leverage the Designer's tools to manipulate data as needed and build meaningful datasets. In the example below, you will cleanse and browse data.
- Add a data cleansing tool to the workflow and check the boxes in Replace Nulls to replace null text fields with blanks and replace null numeric fields with 0. You can also check the box in Remove Unwanted Characters to remove leading and trailing whitespace.
- Add a browse data tool to the workflow.
- Click to run the workflow (CTRL+R).
- Browse your cleansed Talkdesk data in the results view.

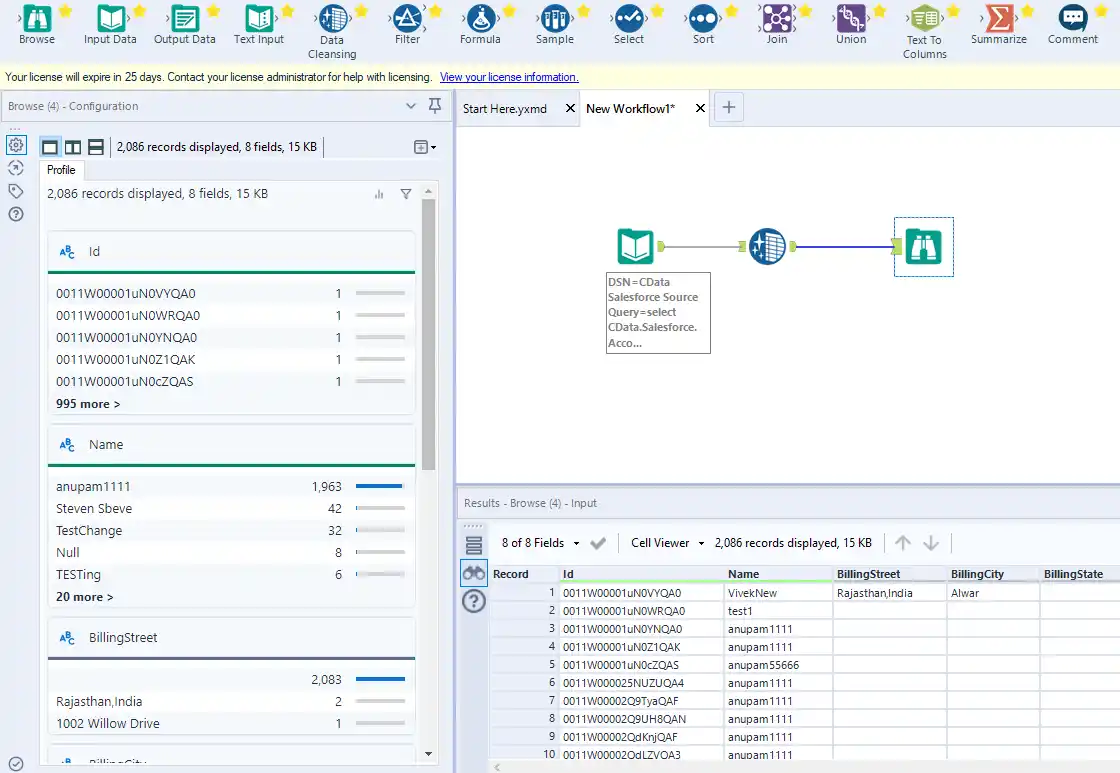
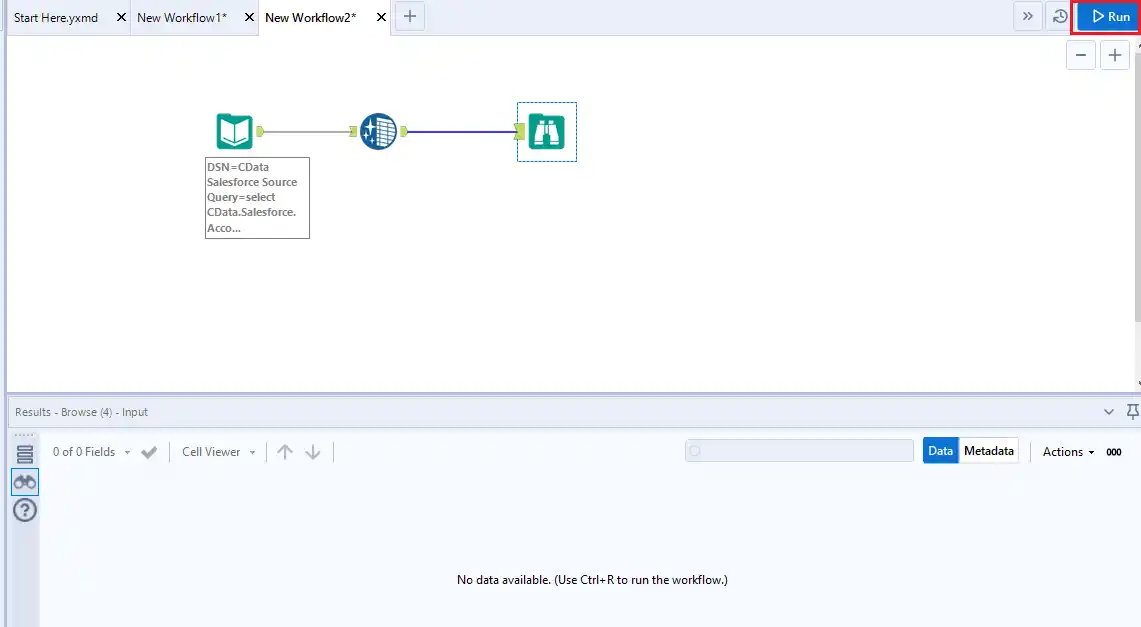

Thanks to built-in, high-performance data processing, you will be able to quickly cleanse, transform, and/or analyze your Talkdesk data with Alteryx.
Ready to get started?
Download a free trial of the Talkdesk ODBC Driver to get started:
Download NowLearn more:
 Talkdesk ODBC Driver
The Talkdesk ODBC Driver is a powerful tool that allows you to connect with live data from Talkdesk, directly from any applications that support ODBC connectivity.
Access Talkdesk data like you would a database - read Talkdesk Accounts, Attributes, BillingAccounts, Callbacks, Campaigns, Cases, Contacts, GuardianUsers, Invoices, Products, Subscriptions, Teams, Users, Wallets, etc. through a standard ODBC Driver interface.