




Using the CData ODBC Driver for Talkdesk in PyCharm

The CData ODBC Drivers can be used in any environment that supports loading an ODBC Driver. In this tutorial we will explore using the CData ODBC Driver for Talkdesk from within PyCharm. Included are steps for adding the CData ODBC Driver as a data source, as well as basic PyCharm code to query the data source and display results.
To begin, this tutorial will assume that you have already installed the CData ODBC Driver for Talkdesk as well as PyCharm.
Add Pyodbc to the Project
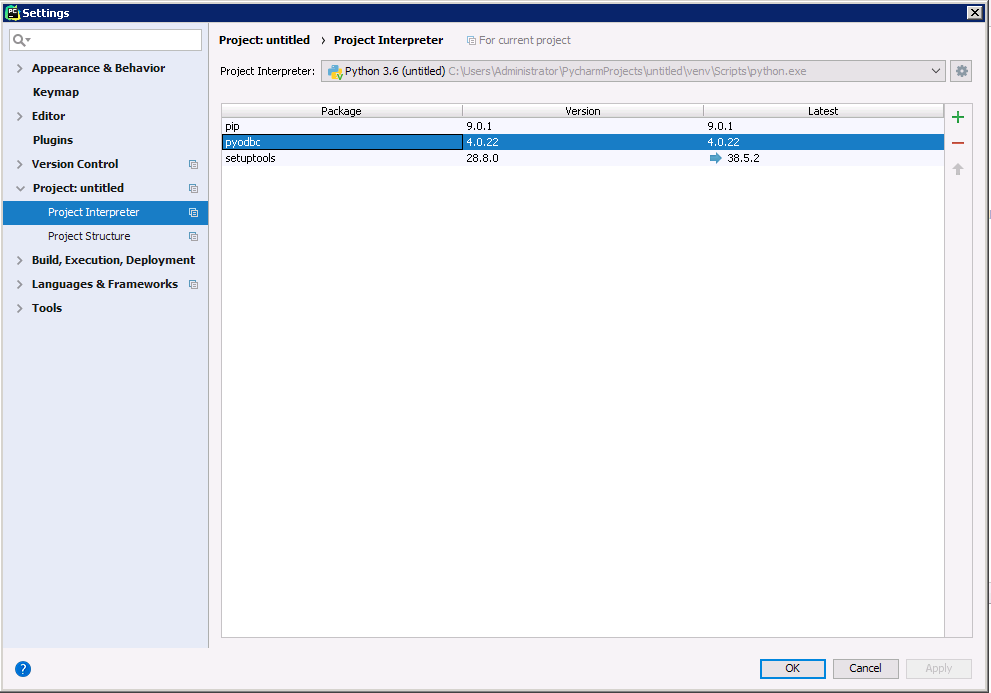
Follow the steps below to add the pyodbc module to your project.
- Click File -> Settings to open the project settings window.
- Click Project Interpreter from the Project: YourProjectName menu.
- To add pyodbc, click the + button and enter pyodbc.
- Click Install Package to install pyodbc.
Connect to Talkdesk
You can now connect with an ODBC connection string or a DSN. See the Getting Started section in the CData driver documentation for a guide to creating a DSN on your OS.
Talkdesk uses the OAuth 2.0 Client Credentials grant. There is no browser-based authorization step and no callback URL.
Set the following connection properties:
- AccountName: The name of your Talkdesk account.
- Region: The region where your Talkdesk instance is deployed. Supported values are US (default), EU, CA, AU, UK, and FedRamp.
- OAuthClientId: The Client Id assigned when you registered your custom OAuth application.
- OAuthClientSecret: The Client Secret assigned to your custom OAuth application.
Creating a Custom OAuth Application
- Log in to your Talkdesk account and select OAuth Clients from the navigation menu.
- Click Create OAuth Client and give the client a descriptive name.
- Set Grant Type to Client Credentials.
- Click Add scopes and select the scopes for the data you want to access.
- Click Create and copy the Client Id and Client Secret.
When you connect, the driver automatically requests an access token from Talkdesk, caches it, and refreshes it when it expires. Make sure the scopes selected for the application match the views you plan to query, or the token request can fail.
Below is the syntax for a DSN:
[CData Talkdesk Source]
Driver = CData ODBC Driver for Talkdesk
Description = My Description
AccountName = myAccount
Region = US
OAuthClientId = myClientId
OAuthClientSecret = myClientSecret
Execute SQL to Talkdesk
Instantiate a Cursor and use the execute method of the Cursor class to execute any SQL statement.
import pyodbc

cnxn = pyodbc.connect('DRIVER={CData ODBC Driver for Talkdesk};AccountName = myAccount;Region = US;OAuthClientId = myClientId;OAuthClientSecret = myClientSecret;')
cursor = cnxn.cursor()
cursor.execute("SELECT Id, Name FROM Users WHERE Active = 'true'")
rows = cursor.fetchall()
for row in rows:
  print(row.Id, row.Name)
After connecting to Talkdesk in PyCharm using the CData ODBC Driver, you will be able to build Python apps with access to Talkdesk data as if it were a standard database. If you have any questions, comments, or feedback regarding this tutorial, please contact us at [email protected].
Ready to get started?
Download a free trial of the Talkdesk ODBC Driver to get started:
Download NowLearn more:
 Talkdesk ODBC Driver
The Talkdesk ODBC Driver is a powerful tool that allows you to connect with live data from Talkdesk, directly from any applications that support ODBC connectivity.
Access Talkdesk data like you would a database - read Talkdesk Accounts, Attributes, BillingAccounts, Callbacks, Campaigns, Cases, Contacts, GuardianUsers, Invoices, Products, Subscriptions, Teams, Users, Wallets, etc. through a standard ODBC Driver interface.