




Build Semantic Layer Views for UKG Pro WFM Data in APOS Live Data Gateway

APOS Live Data Gateway (LDG) is a data connection and data transformation solution that enables live data connectivity and expanded data source options for SAP Analytics Cloud and other SAP solutions. When paired with CData Connectors, users can build semantic layer views for live UKG Pro WFM data, enabling real-time analytics on UKG Pro WFM just like working with a relational database.
With built-in optimized data processing, the CData Connector offers unmatched performance for interacting with live UKG Pro WFM data. When you issue complex SQL queries to UKG Pro WFM, the driver pushes supported SQL operations, like filters and aggregations, directly to UKG Pro WFM and utilizes the embedded SQL engine to process unsupported operations client-side (often SQL functions and JOIN operations). Its built-in dynamic metadata querying allows you to work with and analyze UKG Pro WFM data using native data types.
Download and Install the Connector Files
In order to access UKG Pro WFM data through the APOS Live Data Gateway, you will need to download the connector files from APOS and install them on the machine hosting the Live Data Gateway. An APOS representative can deliver the necessary files.
- Install the CData DLL file (System.Data.CData.API.dll) to the APOS Live Data Gateway installation directory (C:\Program Files\Live Data Gateway\Admin\ by default).
- Install the CData JAR file (cdata.jdbc.api.jar) to the ConnectionTest_lib folder in the installation directory (C:\Program Files\Live Data Gateway\Admin\ConnectionTest_lib\ by default).
- Install the CData JAR file (cdata.jdbc.api.jar) to the lib folder in the Web UI installation directory (e.g.: C:\LDG_WebUI\lib\)
Configuring the UKG Pro WFM Connection String
Before establishing the connection to UKG Pro WFM from the APOS Live Data Gateway, you need to configure the UKG Pro WFM JDBC Connection String.
Built-in Connection String Designer
For assistance in constructing the JDBC Connection String, use the connection string designer built into the UKG Pro WFM JDBC Driver. Either double-click the JAR file or execute the jar file from the command-line.
java -jar cdata.jdbc.api.jar
Fill in the connection properties and copy the connection string to the clipboard.
Start by setting the Profile connection property to the location of the UKGProWFM Profile on disk (e.g. C:\profiles\UKGProWFM.apip). Next, set the ProfileSettings connection property to the connection string for UKGProWFM (see below).
UKGProWFM API Profile Settings
UKG Pro Workforce Management uses OAuth 2.0 with the Resource Owner Password Credentials grant (grant_type=password) to authorize access to the API. Unlike most OAuth-based profiles, this does not use a browser redirect/authorization-code step: the driver exchanges your UKG Pro WFM username, password, client ID, and client secret directly for an access token.
Set the following connection properties to authenticate:
- AuthScheme: Set this to OAuthPassword.
- Host: Set this to the hostname of your UKG Pro Workforce Management datacenter/tenant (for example, yourcompany.mykronos.com). Do not include the protocol (https://) or a trailing slash.
- OAuthClientId: Set this to the client ID issued for your UKG Pro Workforce Management OAuth application.
- OAuthClientSecret: Set this to the client secret issued for your UKG Pro Workforce Management OAuth application.
- User: Set this to your UKG Pro Workforce Management username.
- Password: Set this to your UKG Pro Workforce Management password.
Access tokens are obtained from https://{Host}/api/authentication/access_token. Refresh tokens issued by UKG Pro Workforce Management expire after 7 days; if a refresh attempt fails because the refresh token itself has expired, the driver must re-authenticate with your User/Password credentials to obtain a new access token.

Your connection string will look similar to the following:
jdbc:API:Profile=C:\profiles\UKGProWFM.apip;AuthScheme=OAuthPassword;ProfileSettings='Host=yourcompany.mykronos.com;User=your_username;Password=your_password;';OAuthClientId=your_client_id;OAuthClientSecret=your_client_secret;
Connecting to UKG Pro WFM & Creating a Semantic Layer View
After installing the connector files and configuring the connection string, you are ready to connect to UKG Pro WFM in the Live Data Gateway Admin tool and build a semantic layer view in the Live Data Gateway Web UI.
Configuring the Connection to UKG Pro WFM
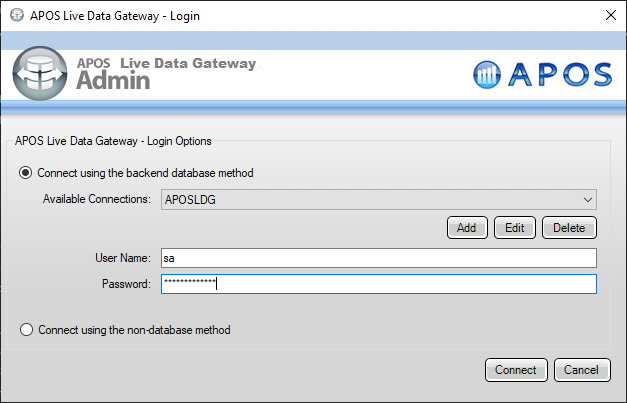
- Log into your APOS Live Data Gateway Manager
- If you haven't already, update your APOS LDG license file
- Click File -> Configurations
- Click on the "..." Menu for the License
- Select the license file from the APOS team that includes your CData Connector license
- In the APOS Live Data Gateway Manager, click "Add"
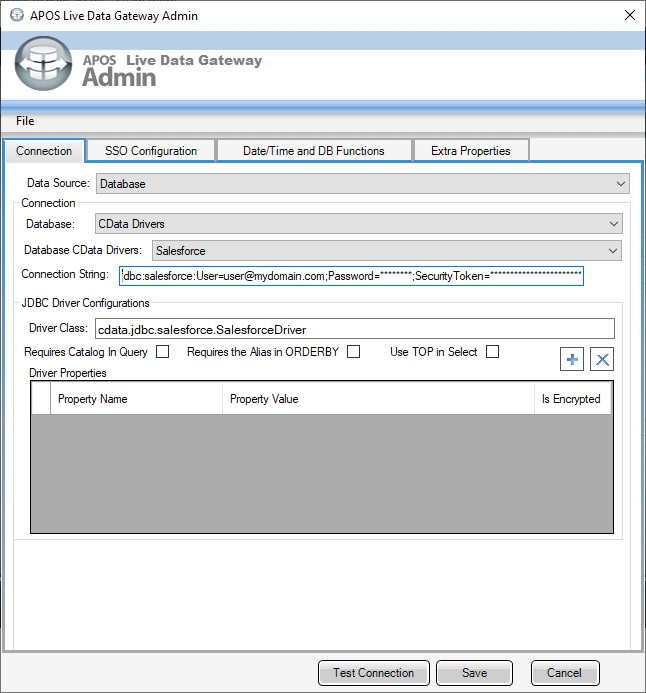
- In the APOS Live Data Gateway On the Connection tab, configure the connection:
- Set Data Source to "Database"
- Set Database to "CData Drivers"
- Set Database CData Drivers to "UKG Pro WFM"
- Set Connection String to the connection string configured earlier (e.g.:
jdbc:API:Profile=C:\profiles\UKGProWFM.apip;AuthScheme=OAuthPassword;ProfileSettings='Host=yourcompany.mykronos.com;User=your_username;Password=your_password;';OAuthClientId=your_client_id;OAuthClientSecret=your_client_secret; - Set Driver Class to "cdata.jdbc.api.APIDriver" (this should be set by default)
- Click Test Connection
- Click Save
- Give your connection a unique prefix (e.g. "api")
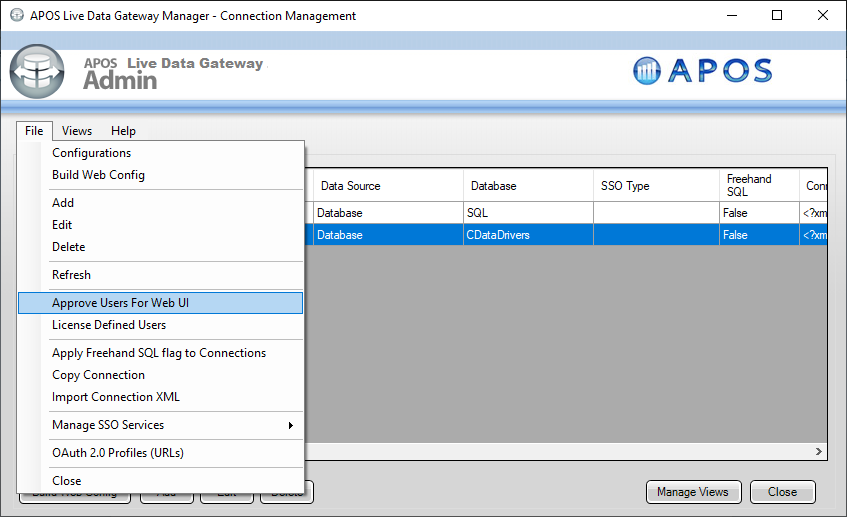
- Highlight the newly created connection and click File -> "Approve Users For Web UI"
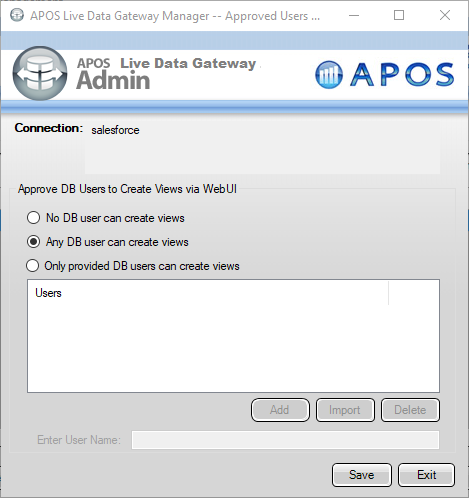
- Approve the appropriate DB users to create views and click "Save"
At this point, we are ready to build our semantic layer view in the Live Data Gateway Web UI.
Creating a Semantic Layer View
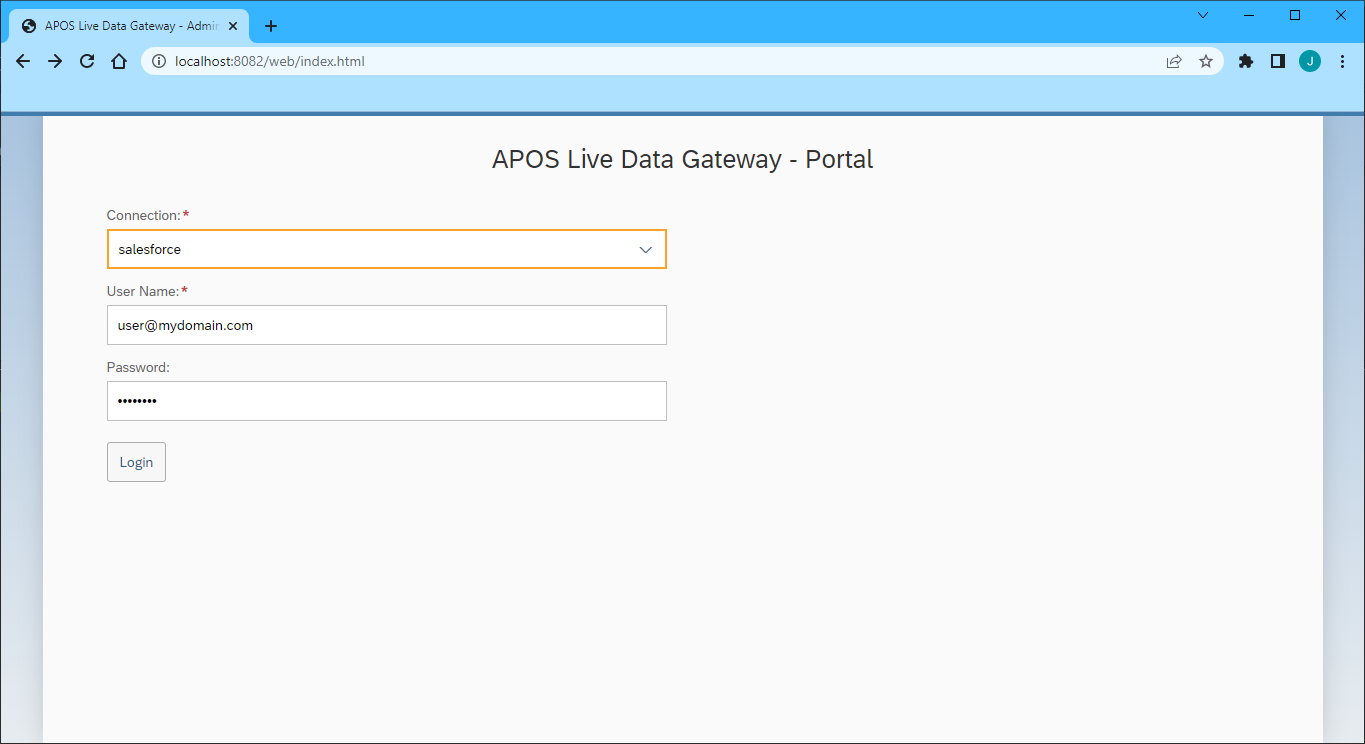
- In your browser, navigate to the APOS Live Data Gateway Portal
- Select a Connection (e.g. "api")
- Set User Name and Password to the User and Password properties for UKG Pro WFM.
- Click "Login"
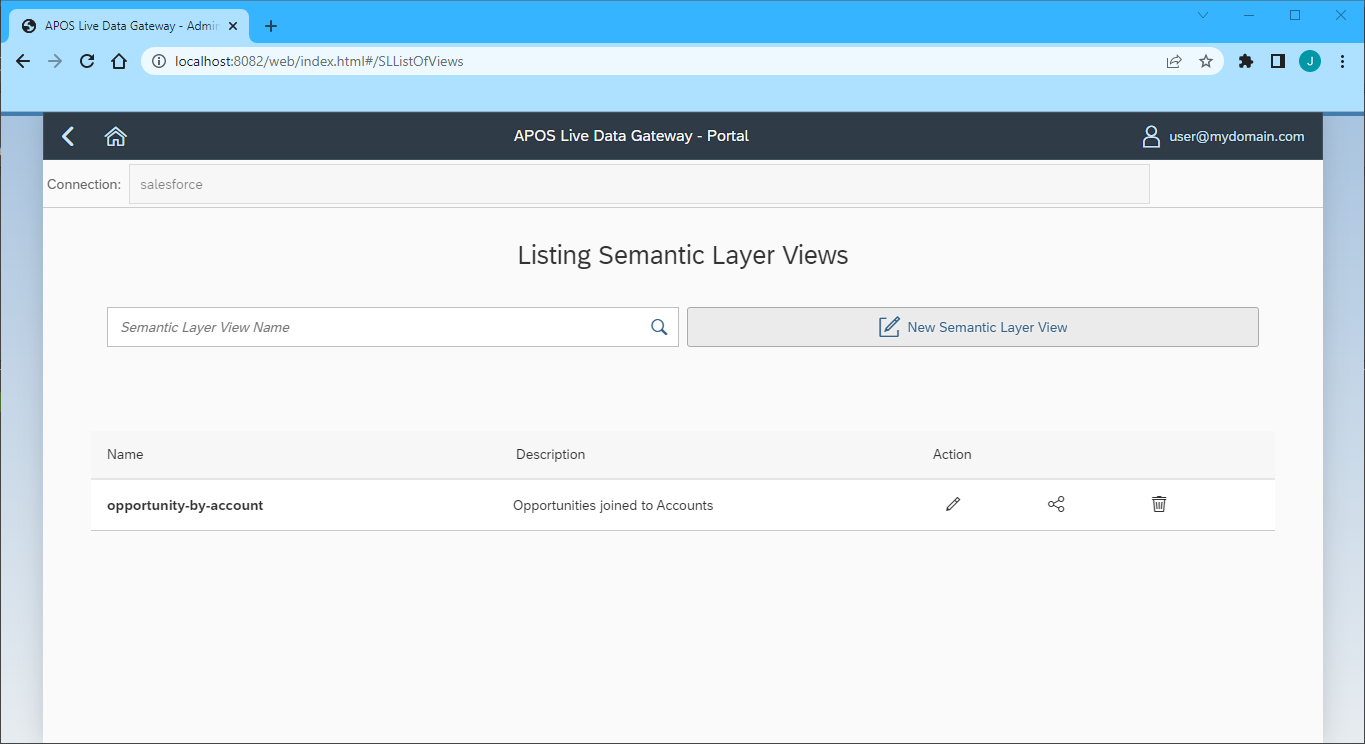
- Once connected, click "Semantic Layer" to create a new semantic layer view
- Click "New Semantic Layer View"
- Set the Semantic Layer View Prefix and Semantic Layer View Name
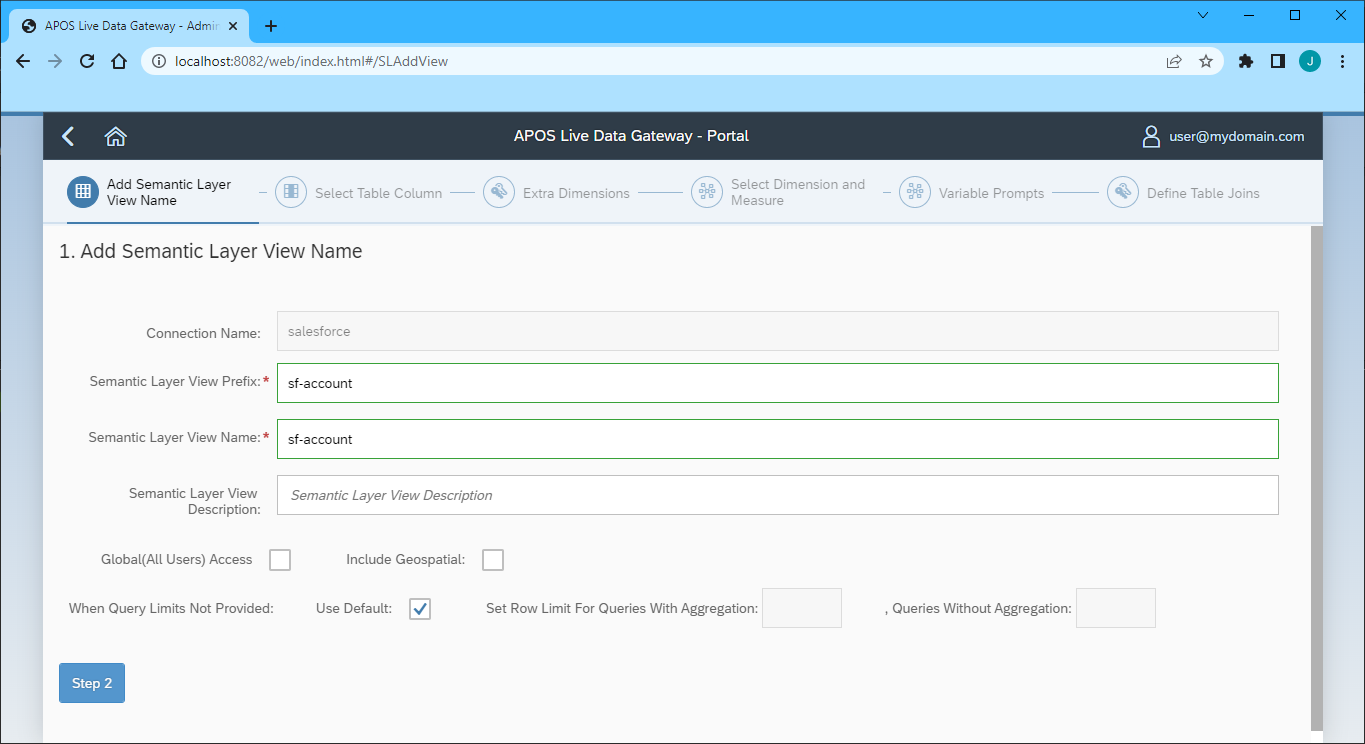
- Click "Step 2"
- Select the table(s) and column(s) you wish to include in your view
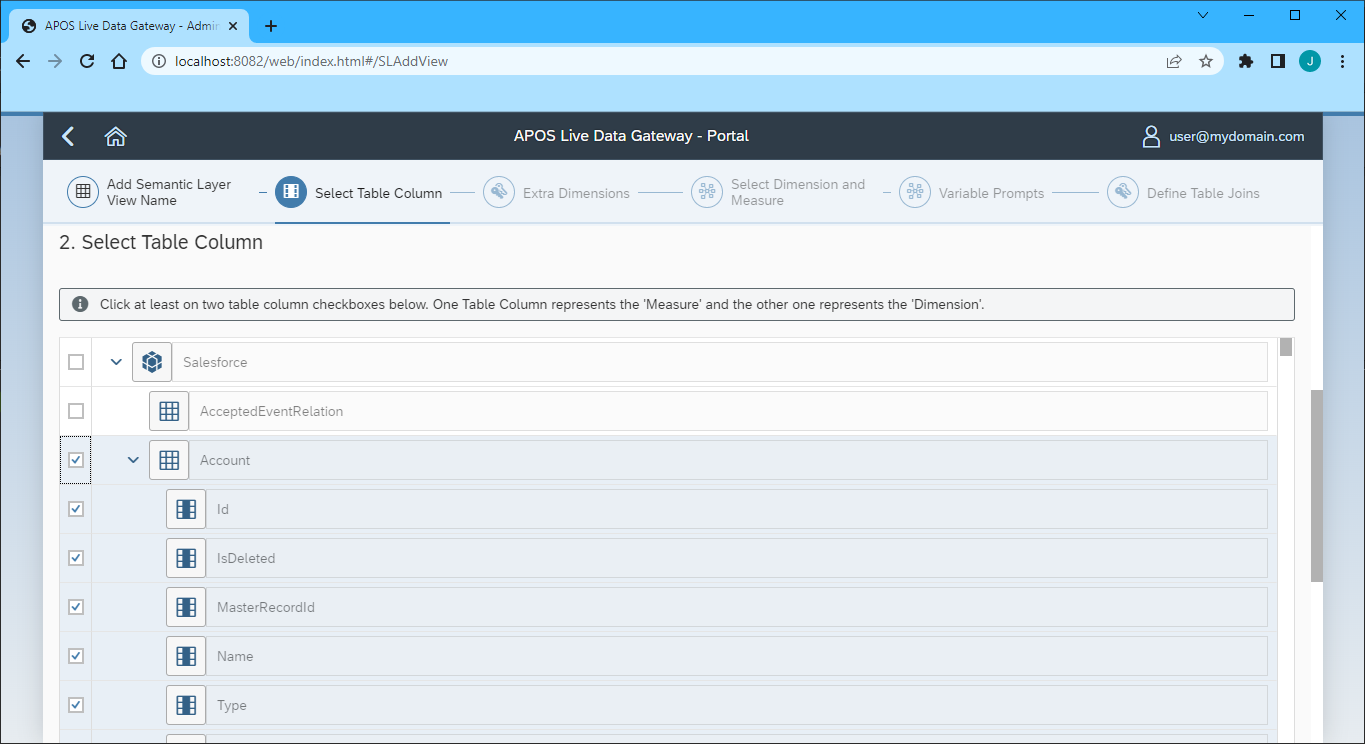
- Click "Step 3"
- Select the Measures from the available table columns
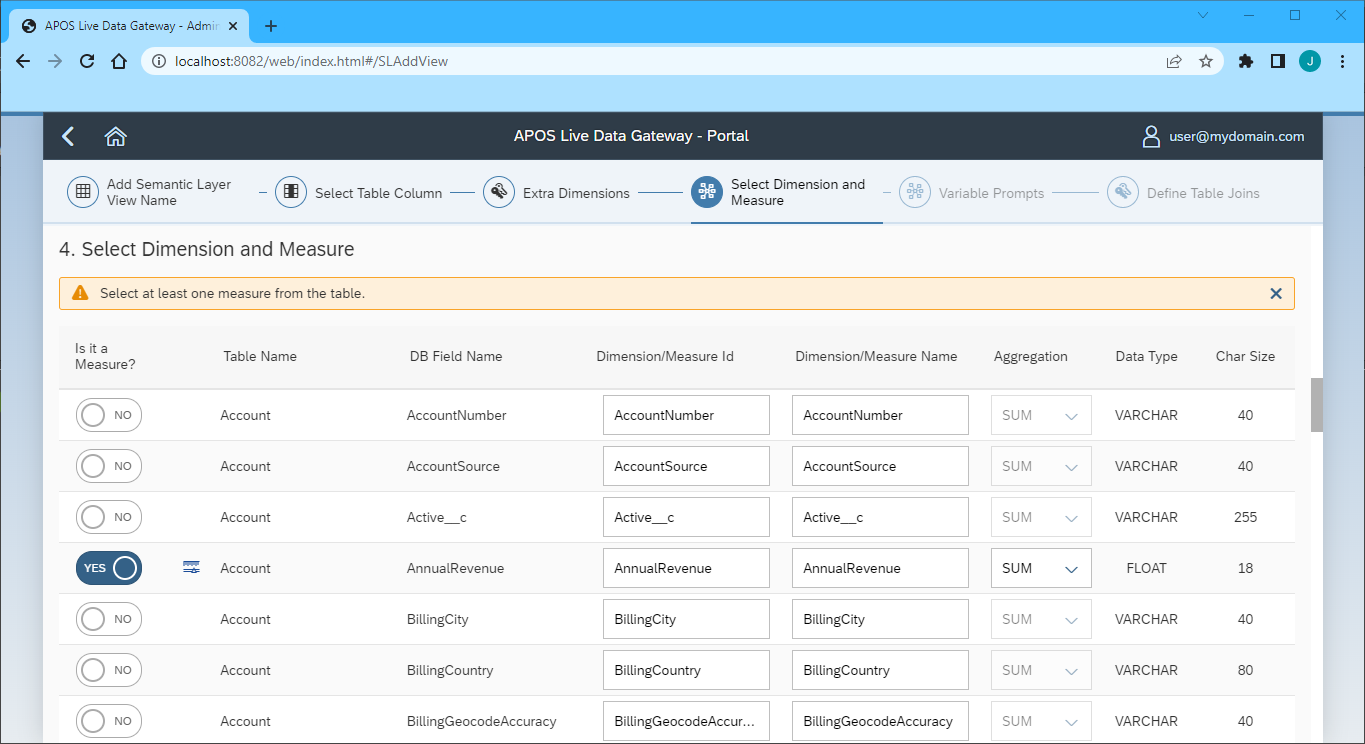
- Click "Step 5" (we skipped the "Extra Dimensions" step)
- Add any Variable Prompts
- Click "Step 6"
- Define any Table Joins
- Click "Review"
- Review you semantic layer view and click "Save"
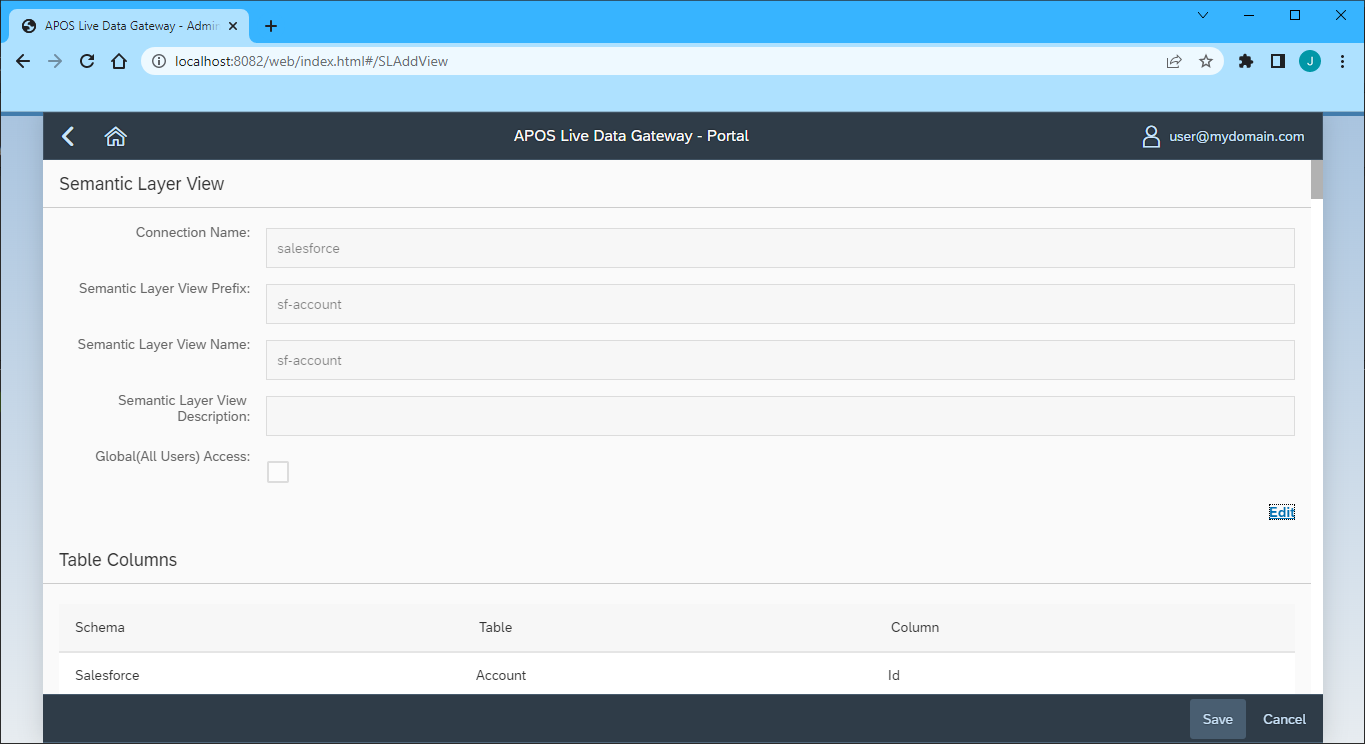
With the Semantic Layer View created, you are ready to access your UKG Pro WFM data through the APOS Live Data Gateway, enabling real-time data connectivity to UKG Pro WFM data from SAP Analytics Cloud and other SAP solutions.
More Information & Free Evaluation
Please visit APOS Systems - APOS Solutions - Request Evaluation Software to request evaluation software or email [email protected] for more information on working with your live UKG Pro WFM data in APOS Live Data Gateway.