








Create Apps from Bannerbear Data in Qlik Sense Cloud

Qlik Sense Cloud allows you to create and share data visualizations and interact with information in new ways. CData Connect AI creates a live connection to Bannerbear. By pairing Qlik Sense Cloud with CData Connect AI, you get true cloud-to-cloud connectivity to all of your SaaS and cloud-based Big Data and NoSQL sources — no need to migrate your data or write your integrations. Simply connect to Connect AI from Qlik Sense Cloud and get instant, live access to your Bannerbear data.
In this article, we walk through two connections:
- Connecting to Bannerbear in Connect AI
- Connecting to Connect AI from Qlik Sense Cloud to create a model and build a simple dashboard
Configure Bannerbear Connectivity for Qlik Sense Cloud
Connectivity to Bannerbear from Qlik Cloud is made possible through CData Connect AI. To work with Bannerbear data from Qlik Cloud, we start by creating and configuring a Bannerbear connection.
- Log into Connect AI, click Sources, and then click Add Connection
- Select "Bannerbear" from the Add Connection panel
-
Enter the necessary authentication properties to connect to Bannerbear.
Start by setting the Profile connection property to the location of the Bannerbear Profile on disk (e.g. C:\profiles\Bannerbear.apip). Next, set the ProfileSettings connection property to the connection string for Bannerbear (see below).
Bannerbear API Profile Settings
Retrieve your API keys from the Bannerbear dashboard. Specify the key type (Project or Master) via the KeyType property.

- Click Save & Test
-
Navigate to the Permissions tab in the Add Bannerbear Connection page and update the User-based permissions.



Add a Personal Access Token
When connecting to Connect AI through the REST API, the OData API, or the Virtual SQL Server, a Personal Access Token (PAT) is used to authenticate the connection to Connect AI. It is best practice to create a separate PAT for each service to maintain granularity of access.
- Click on the Gear icon () at the top right of the Connect AI app to open the settings page.
- On the Settings page, go to the Access Tokens section and click Create PAT.
-
Give the PAT a name and click Create.

- The personal access token is only visible at creation, so be sure to copy it and store it securely for future use.
With the connection configured and a PAT generated, you are ready to connect to Bannerbear data from Qlik Sense Cloud.
Create a Qlik Sense App from Bannerbear Data
This section explains how to add Bannerbear data to a Qlik Sense app for visualizations, analytics, reporting, and more.
Create a New App and Upload Data
- Log into your Qlik Sense instance and click the button to create a new app
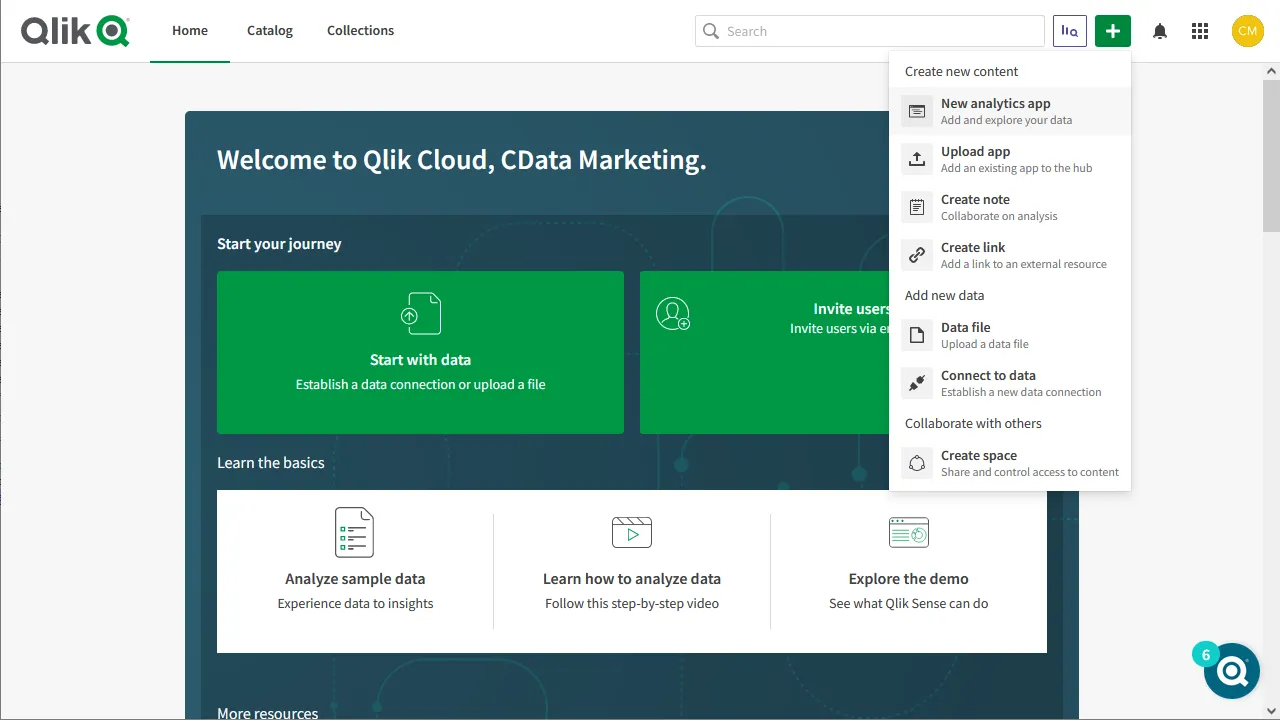
- Name and configure the new app and click "Create"
- In the workspace, click to open the new app
- Click to add data from files and other sources
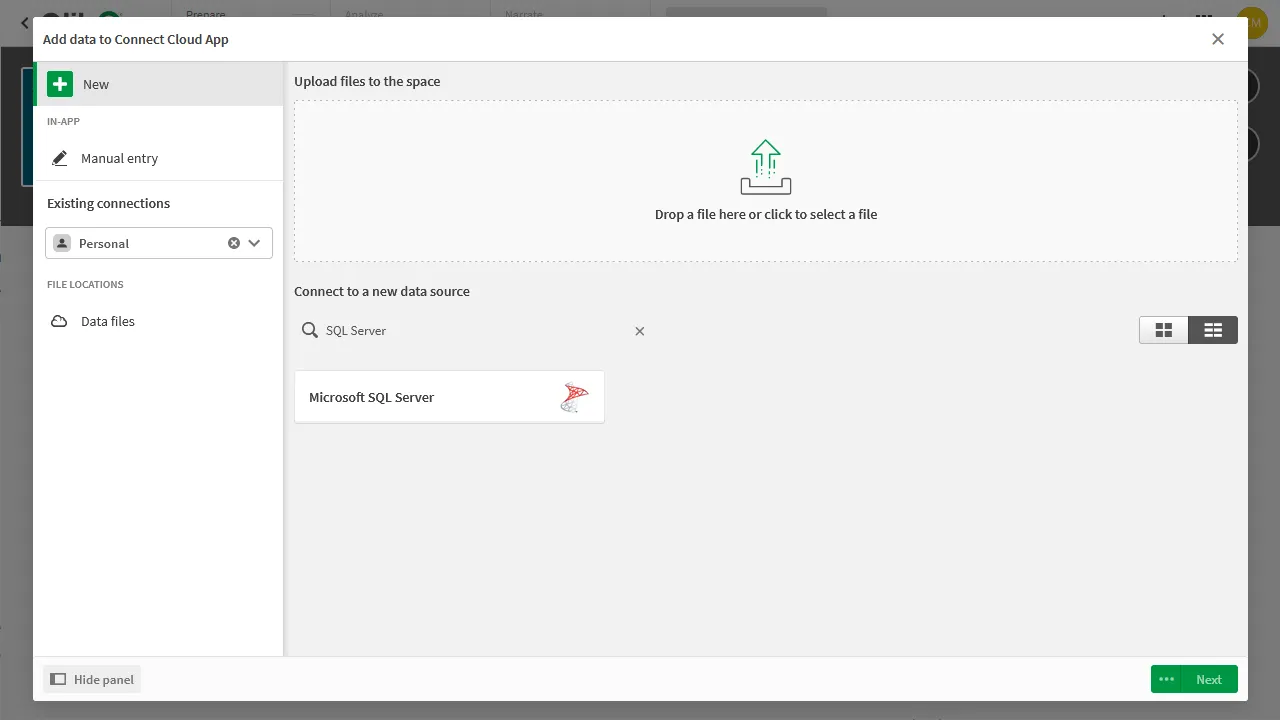
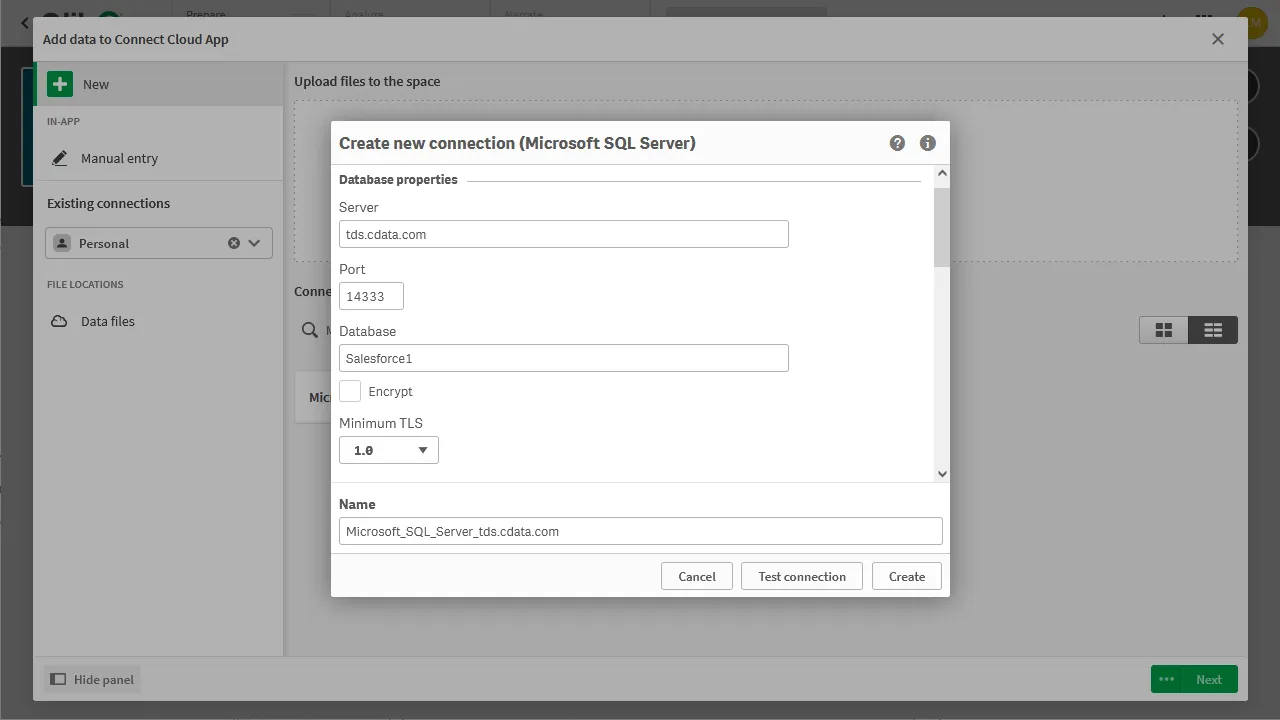
- Select the Microsoft SQL Server connector and set the configuration properties.
- Set Server to tds.cdata.com
- Set Port to 14333
- Set Database to the connection you created (e.g. API1)
- Set User name to the Connect AI user (e.g. [email protected])
- Set Password to the PAT for the above user
- Select an owner for the connection
- Select a Bannerbear entity (Table) to view
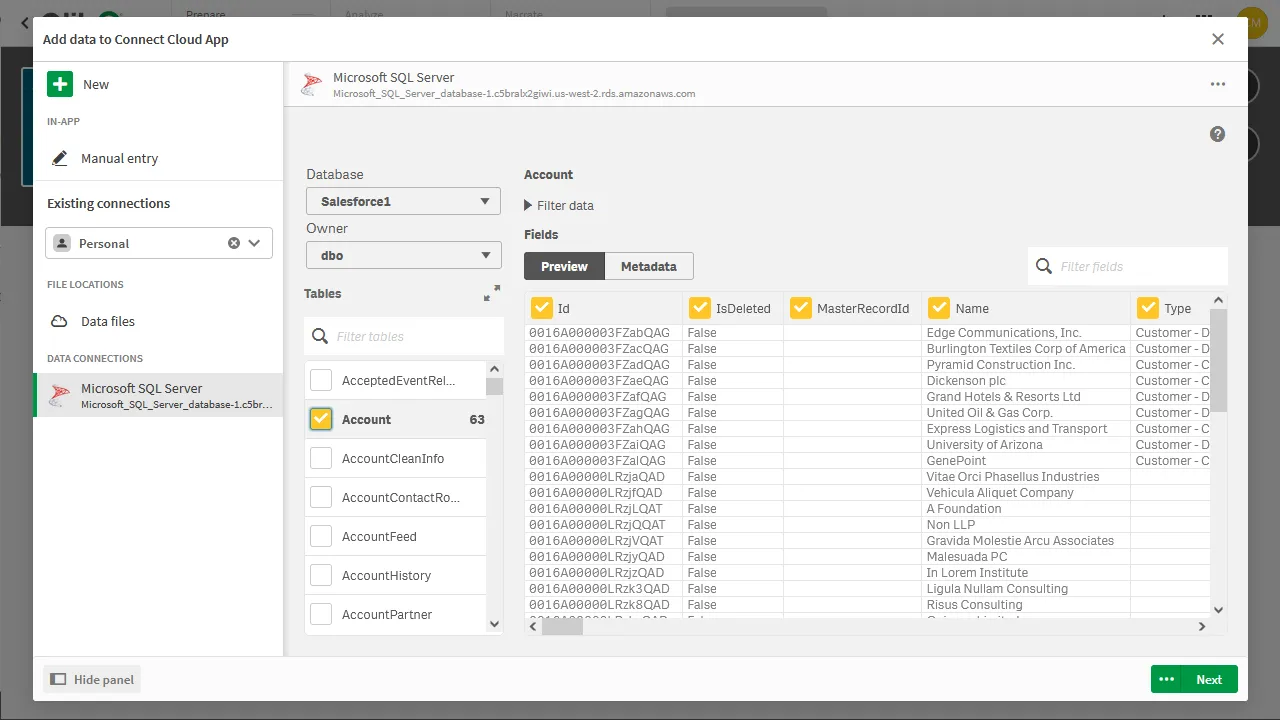
- Click Next, configure the model, and load the data into Qlik Sense.
Generate Insights or Customize Your App
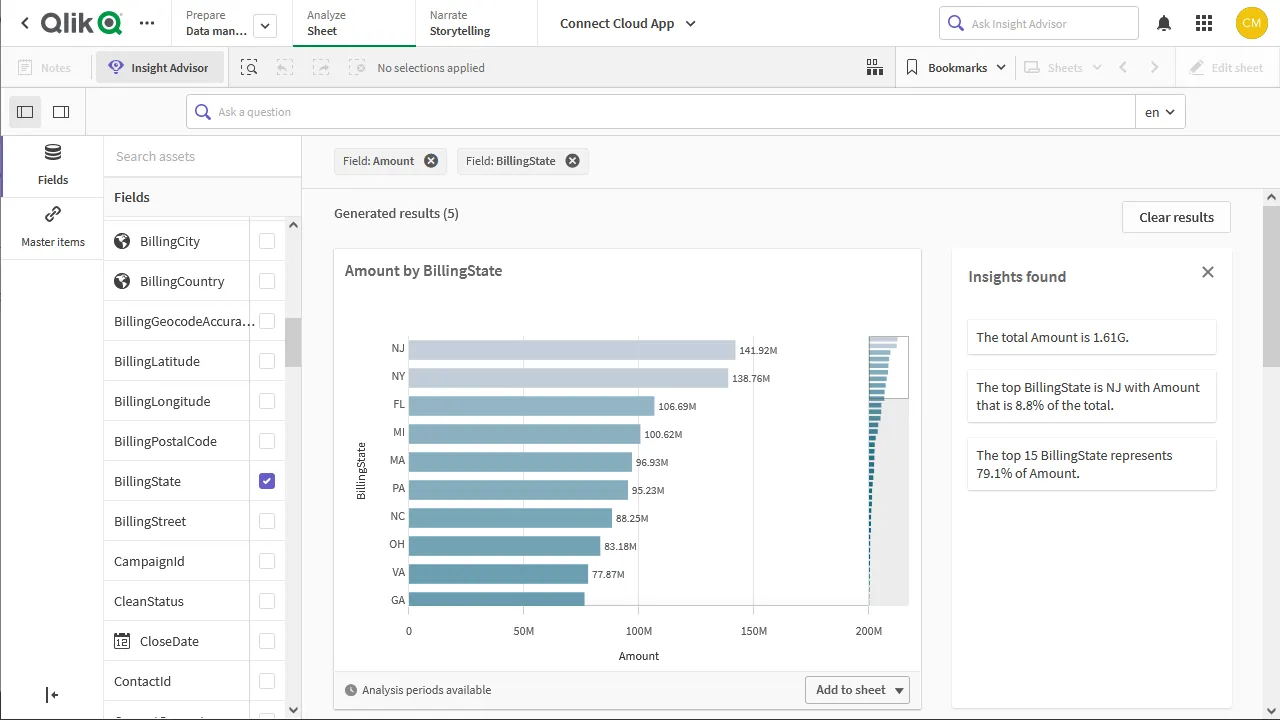
With the data loaded into Qlik Sense, you are ready to begin discovering insights. You can build custom visualizations, reports, and dashboards engineered to gain actionable insights into your Bannerbear data.
More Information & Free Trial
Now, you have created a simple but powerful dashboard from live Bannerbear data. For more information on creating OData feeds from Bannerbear (and more than 100 other data sources), visit the Connect AI page. Sign up for a free trial and start working with live Bannerbear data in Qlik Sense Cloud.