




DataBind Controls to CleverPush Data in C++Builder

The CData ODBC driver for CleverPush makes it easy to integrate connectivity to live CleverPush data with standard data access components in C++Builder. This article shows how to create a simple visual component library (VCL) application in C++Builder that connects to CleverPush data, executes queries, and displays the results in a grid. An additional section shows how to use FireDAC components to execute commands from code.
Create a Connection to CleverPush Data
If you have not already, first specify connection properties in an ODBC DSN (data source name). This is the last step of the driver installation. You can use the Microsoft ODBC Data Source Administrator to create and configure ODBC DSNs.
Start by setting the Profile connection property to the location of the Cleverpush Profile on disk (e.g. C:\profiles\Cleverpush.apip). Next, set the ProfileSettings connection property to the connection string for Cleverpush (see below).
Cleverpush API Profile Settings
CleverPush uses private API keys to authenticate requests. Your API key is passed as the Authorization request header value on every API call.
You can find your private API key in the CleverPush dashboard under Settings > API. Use the private key (not the public key) for server-side access.
After setting the following connection properties, you are ready to connect:
- AuthScheme: Set this to APIKey.
- APIKey: Set this to your CleverPush private API key.
Optional Connection Properties
- ChannelId: Set this to your default CleverPush channel identifier. Most tables require a channel filter. Setting this property allows queries without specifying ChannelId in every WHERE clause.
You can then follow the steps below to use the Data Explorer to create a FireDAC connection to CleverPush.
- In a new VCL Forms application, expand the FireDAC node in the Data Explorer.
- Right-click the ODBC Data Source node in the Data Explorer.
- Click Add New Connection.
- Enter a name for the connection.
- In the FireDAC Connection Editor that appears, set the DataSource property to the name of the ODBC DSN for CleverPush.
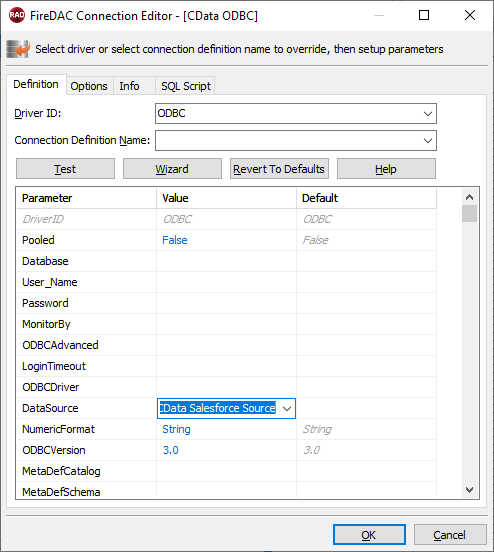
Create VCL Applications with Connectivity to CleverPush Data
Follow the procedure below to start querying CleverPush data from a simple VCL application that displays the results of a query in a grid.
-
Drop a TFDConnection component onto the form and set the following properties:
- ConnectionDefName: Select the FireDAC connection to CleverPush.
- Connected: Select True from the menu and, in the dialog that appears, enter your credentials.
-
Drop a TFDQuery component onto the form and set the properties below:
- Connection: Set this property to the TFDConnection component, if this component is not already specified.
SQL: Click the button in the SQL property and enter a query. For example:
SELECT Id, Name FROM Segments WHERE ChannelId = 'your_channel_id'- Active: Set this property to true.
Drop a TDataSource component onto the form and set the following property:
- DataSet: In the menu for this property, select the name of the TFDQuery component.
-
Drop a TDBGrid control onto the form and set the following property:
- DataSource: Select the name of the TDataSource.
- Drop a TFDGUIxWaitCursor onto the form — this is required to avoid a run-time error.
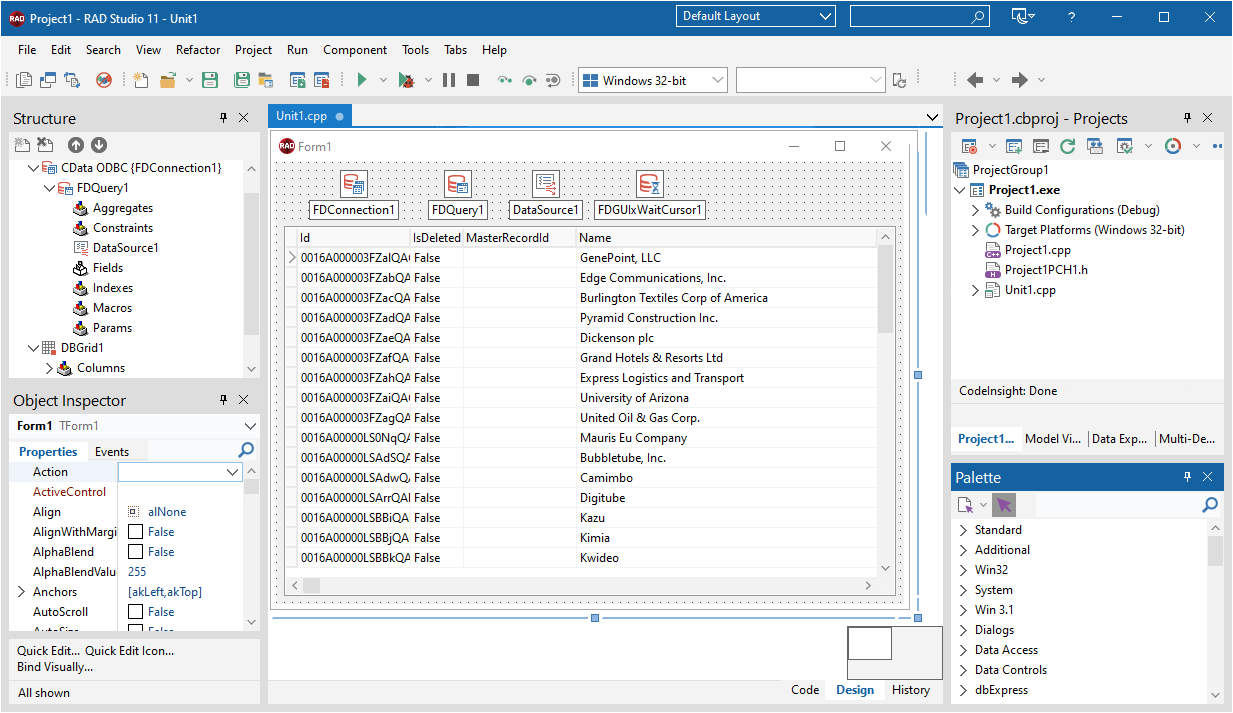
Execute Commands to CleverPush with FireDAC Components
You can use the TFDConnection and TFQuery components to execute queries to CleverPush data. This section provides CleverPush-specific examples of executing queries with the TFQuery component.
Connect to CleverPush Data
To connect to the data source, set the Connected property of the TFDConnection component to true. You can set the same properties from code:
FDConnection1->ConnectionDefName = "CData CleverPush ODBC Source";
FDConnection1->Connected = true;
To connect the TFDQuery component to CleverPush data, set the Connection property of the component. When a TFDQuery component is added at design time, its Connection property is automatically set to point to a TFDConnection on the form, as in the application above.
Create Parameterized Queries
To create a parameterized query, use the following syntax below:
FDQuery1->SQL->Text = "select * from Segments where channelid = :ChannelId";
FDQuery1->ParamByName("channelid")->AsString = "your_channel_id";
FDQuery1->Open();
The example above binds a string-type input parameter by name and then opens the dataset that results.
Prepare the Statement
Preparing statements is costly in system resources and time. The connection must be active and open while a statement is prepared. By default, FireDAC prepares the query to avoid recompiling the same query over and over. To disable statement preparation, set ResourceOptions.DirectExecute to True; for example, when you need to execute a query only once.
Execute a Query
To execute a query that returns a result set, such as a select query, use the Open method. The Open method executes the query, returns the result set, and opens it. The Open method will return an error if the query does not produce a result set.
FDQuery1->SQL->Text = "select * from Segments where channelid = :ChannelId";
FDQuery1->ParamByName("channelid")->AsString = "your_channel_id";
FDQuery1->Open();
Related Articles
Below you can find other articles for using the CData ODBC Driver with RAD Studio, Delphi, and C++ Builder.