








Build Apps with Live HubDB data in Adalo using CData Connect AI

Adalo is a no-code platform used to build custom mobile and web applications without needing programming skills. It allows users to design interfaces, manage databases, and integrate functionality through simple drag-and-drop tools, making app development accessible and efficient. When combined with CData Connect AI, it provides access to HubDB data to build custom applications and more.
This article explains how to use CData Connect AI to create a live connection to HubDB and how to connect and access live HubDB data from the Adalo platform.
Configure HubDB connectivity for Adalo in CData Connect AI
To work with HubDB data in Adalo, we need to connect to HubDB from Connect AI, provide user access to the connection, and create OData endpoints for the HubDB data.
Connect to HubDB from Connect AI
CData Connect AI uses a straightforward, point-and-click interface to connect to data sources.
- Log into Connect AI, click Sources, and then click Add Connection
- Select "HubDB" from the Add Connection panel
-
Enter the necessary authentication properties to connect to HubDB.
There are two authentication methods available for connecting to HubDB data source: OAuth Authentication with a public HubSpot application and authentication with a Private application token.
Using a Custom OAuth App
AuthScheme must be set to "OAuth" in all OAuth flows. Be sure to review the Help documentation for the required connection properties for you specific authentication needs (desktop applications, web applications, and headless machines).
Follow the steps below to register an application and obtain the OAuth client credentials:
- Log into your HubSpot app developer account.
- Note that it must be an app developer account. Standard HubSpot accounts cannot create public apps.
- On the developer account home page, click the Apps tab.
- Click Create app.
- On the App info tab, enter and optionally modify values that are displayed to users when they connect. These values include the public application name, application logo, and a description of the application.
- On the Auth tab, supply a callback URL in the "Redirect URLs" box.
- If you're creating a desktop application, set this to a locally accessible URL like http://localhost:33333.
- If you are creating a Web application, set this to a trusted URL where you want users to be redirected to when they authorize your application.
- Click Create App. HubSpot then generates the application, along with its associated credentials.
- On the Auth tab, note the Client ID and Client secret. You will use these later to configure the driver.
Under Scopes, select any scopes you need for your application's intended functionality.
A minimum of the following scopes is required to access tables:
- hubdb
- oauth
- crm.objects.owners.read
- Click Save changes.
- Install the application into a production portal with access to the features that are required by the integration.
- Under "Install URL (OAuth)", click Copy full URL to copy the installation URL for your application.
- Navigate to the copied link in your browser. Select a standard account in which to install the application.
- Click Connect app. You can close the resulting tab.
Using a Private App
To connect using a HubSpot private application token, set the AuthScheme property to "PrivateApp."
You can generate a private application token by following the steps below:
- In your HubDB account, click the settings icon (the gear) in the main navigation bar.
- In the left sidebar menu, navigate to Integrations > Private Apps.
- Click Create private app.
- On the Basic Info tab, configure the details of your application (name, logo, and description).
- On the Scopes tab, select Read or Write for each scope you want your private application to be able to access.
- A minimum of hubdb and crm.objects.owners.read is required to access tables.
- After you are done configuring your application, click Create app in the top right.
- Review the info about your application's access token, click Continue creating, and then Show token.
- Click Copy to copy the private application token.
To connect, set PrivateAppToken to the private application token you retrieved.

- Log into your HubSpot app developer account.
- Click Save & Test
-
Navigate to the Permissions tab in the Add HubDB Connection page and update the User-based permissions.



Add a Personal Access Token
When connecting to Connect AI through the REST API, Workspaces, or the Virtual SQL Server, a Personal Access Token (PAT) is used to authenticate the connection to Connect AI. It is best practice to create a separate PAT for each service to maintain granularity of access.
- Click on the Gear icon () at the top right of the Connect AI app to open the settings page.
- On the Settings page, go to the Access Tokens section and click Create PAT.
-
Give the PAT a name and click Create.

- The personal access token is only visible at creation, so be sure to copy it and store it securely for future use.
Configure HubDB Endpoints for Adalo
After connecting to HubDB, create a workspace for your desired table(s).
-
Navigate to the Workspaces page and click Add to create a new Workspace (or select an existing workspace).
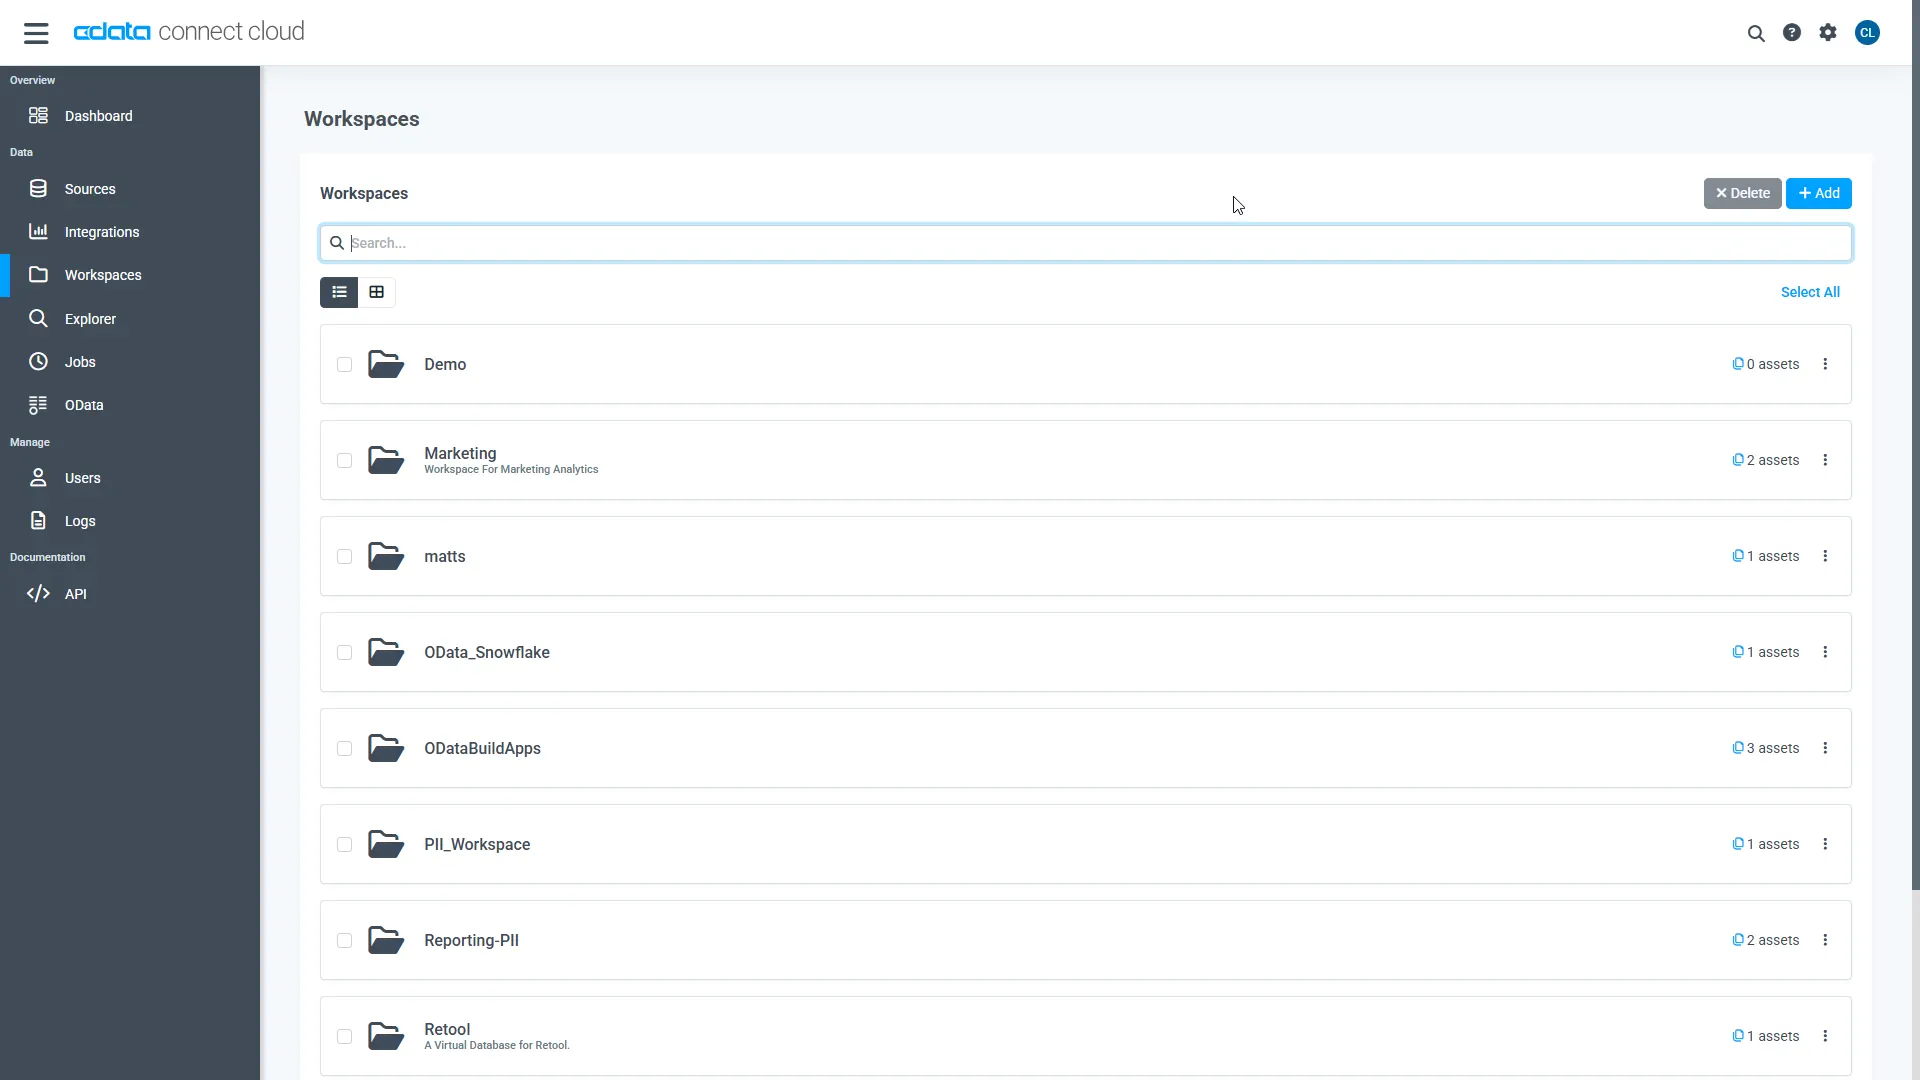
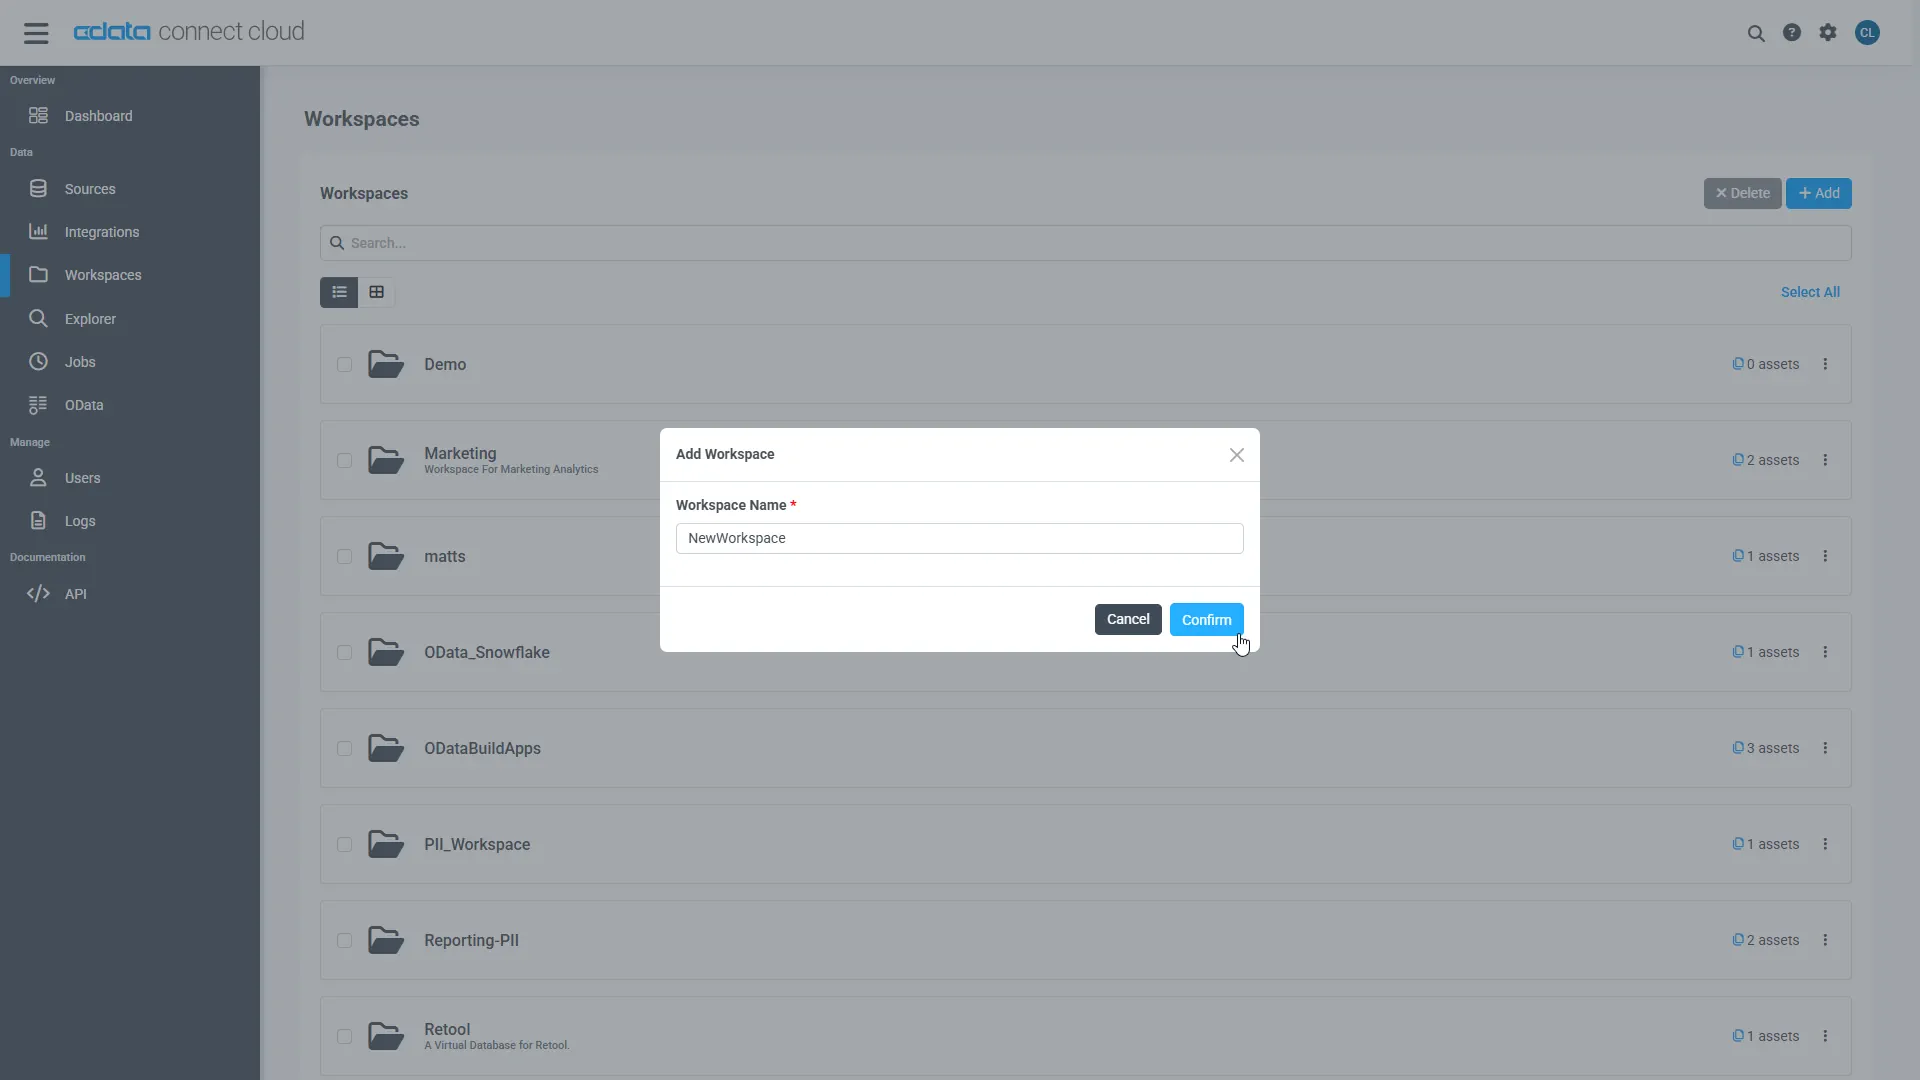
- Click Add to add new assets to the Workspace.
-
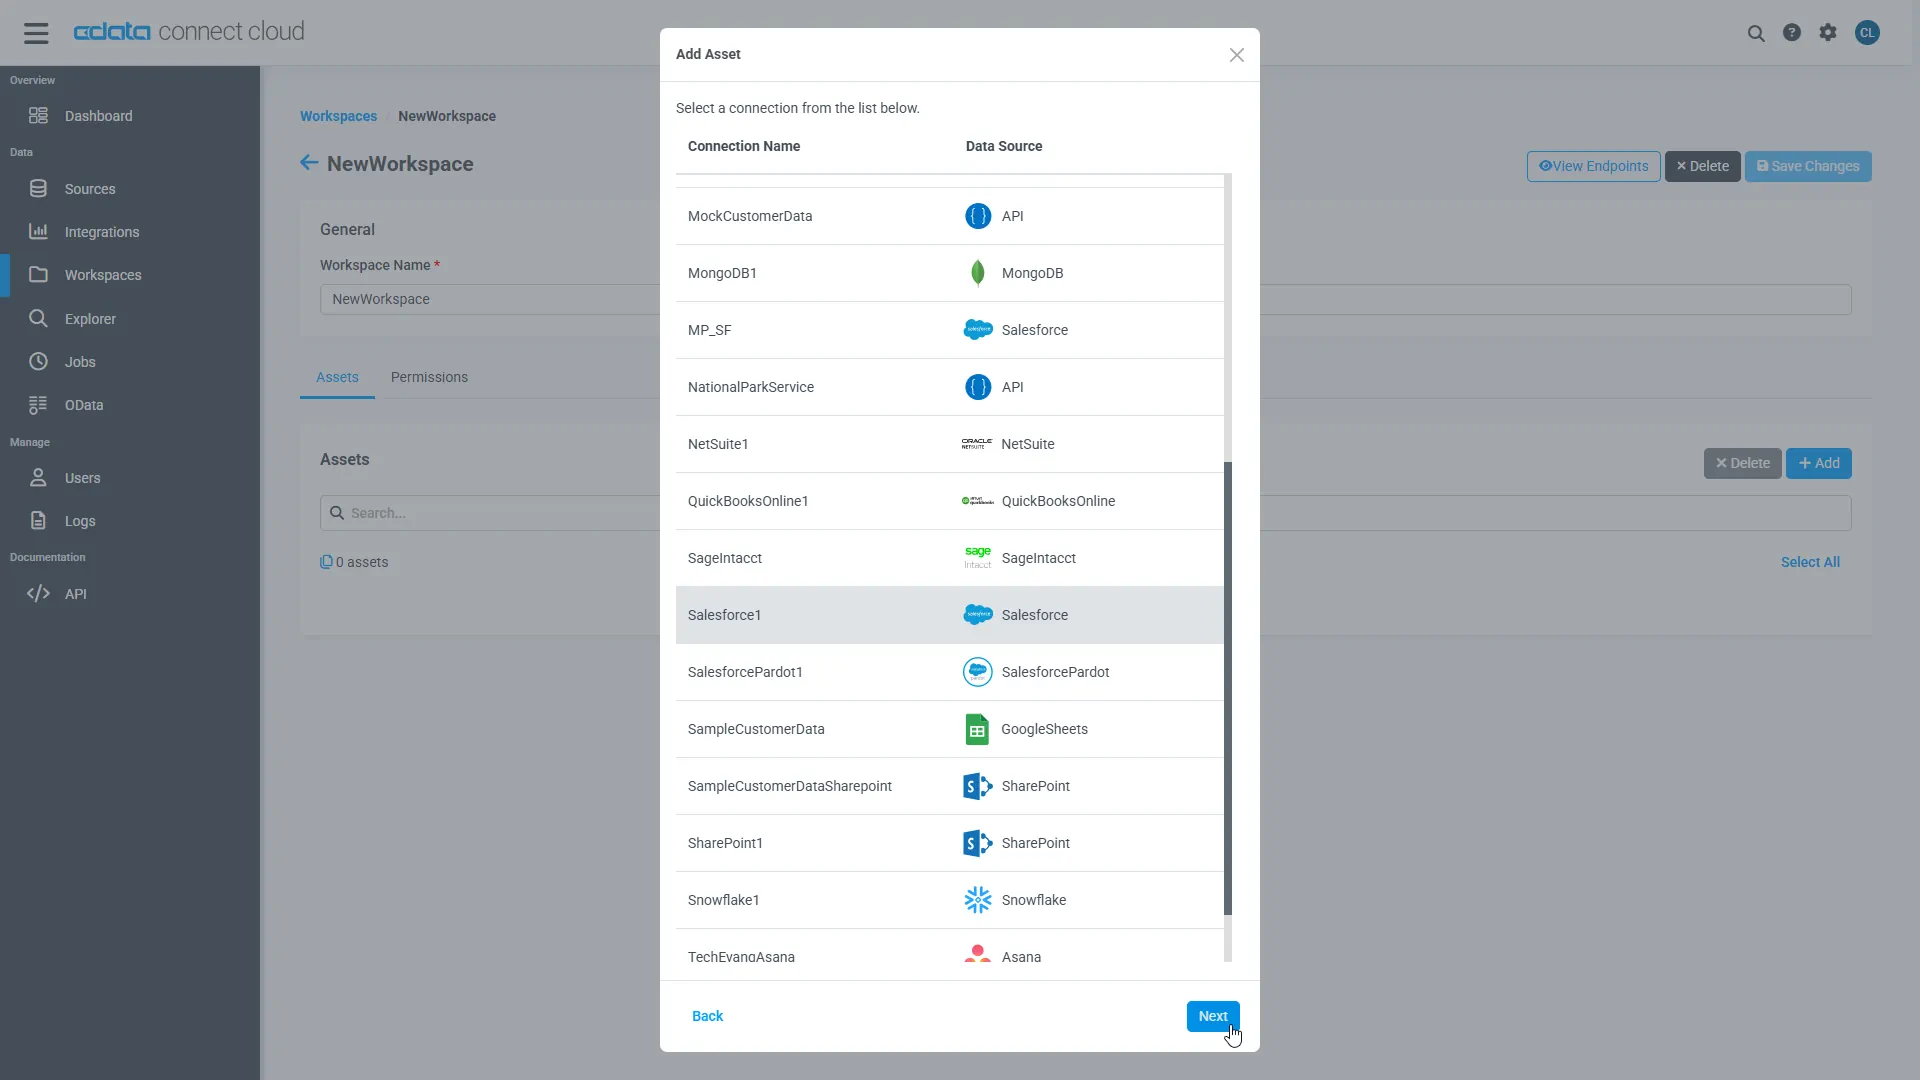
Select the HubDB connection (e.g. HubDB1) and click Next.
-
Select the table(s) you wish to work with and click Confirm.
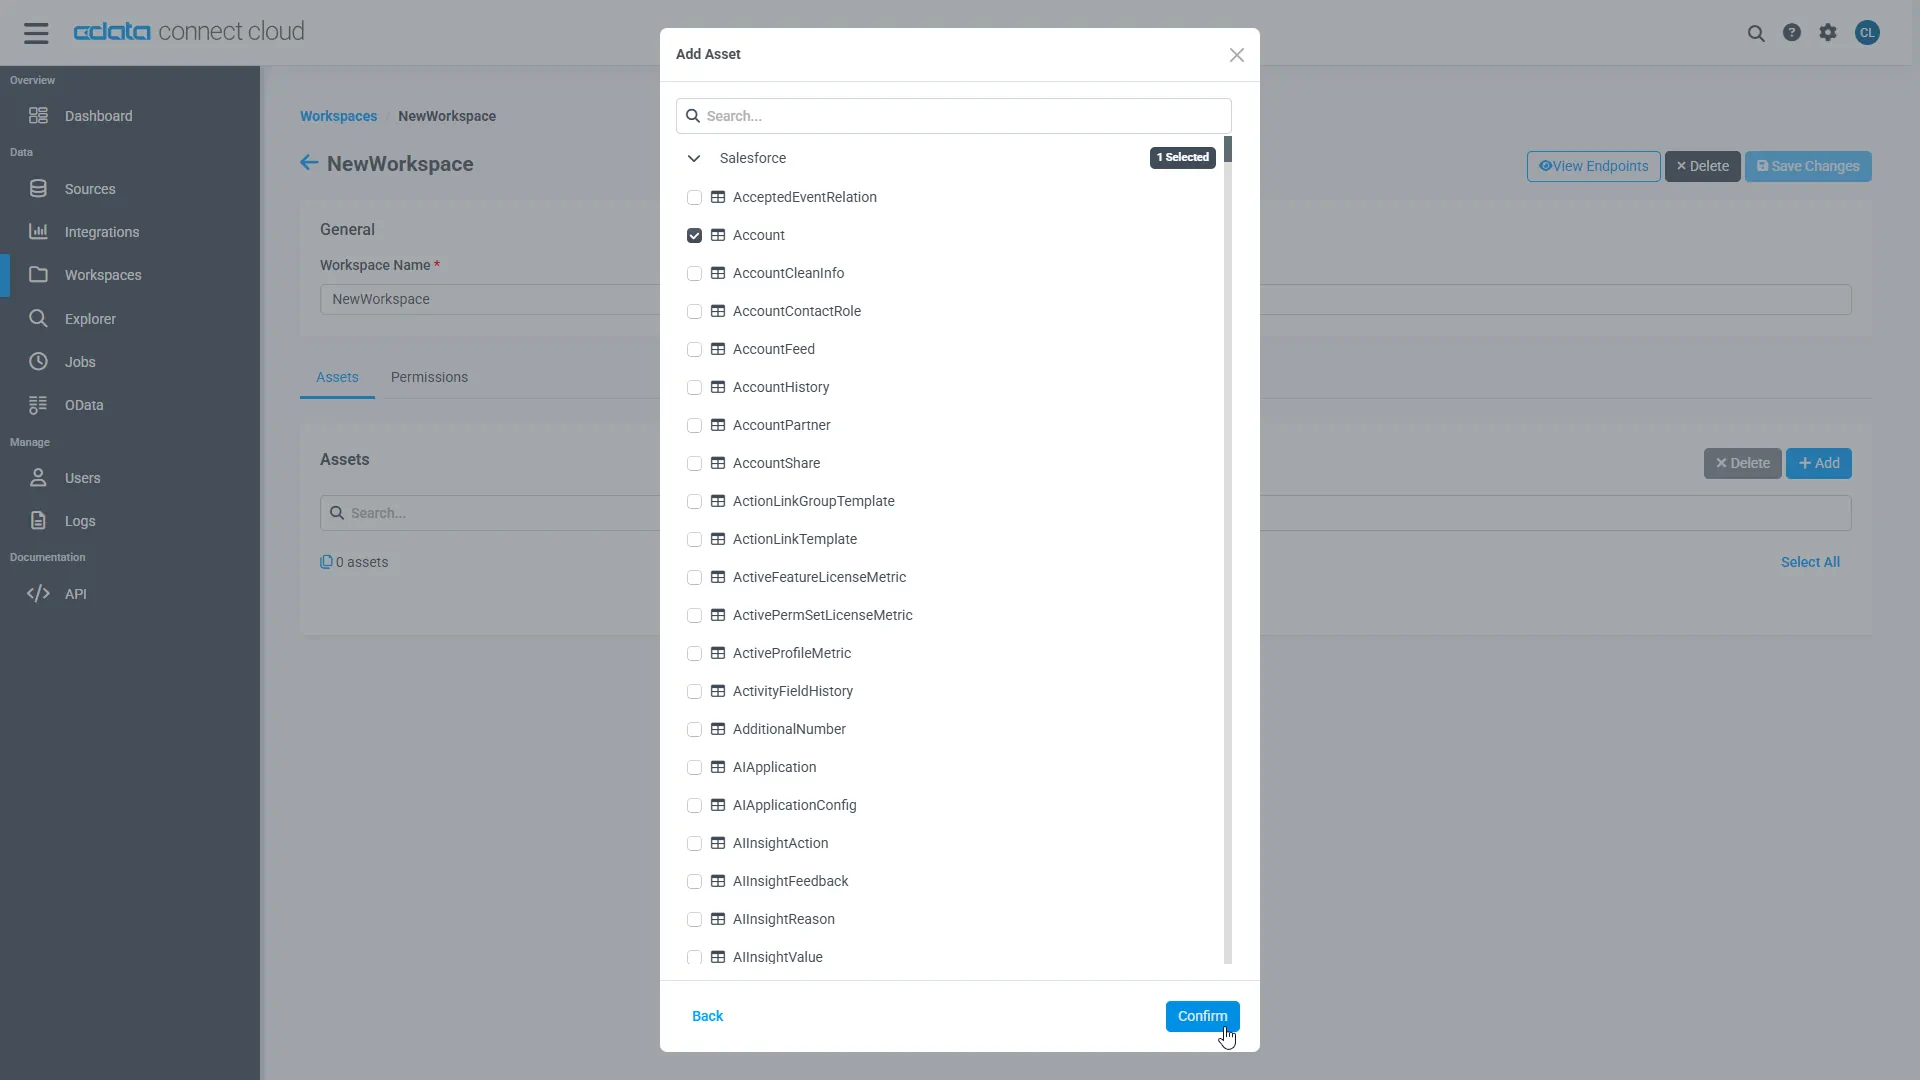
- Make note of the OData Service URL for your workspace, e.g. https://cloud.cdata.com/api/odata/{workspace_name}
With the connection, PAT, and Workspace configured, you are ready to connect to HubDB data from Adalo.
Build a custom app with Adalo
After configuring CData Connect AI, you can begin developing the Adalo app using HubDB data.
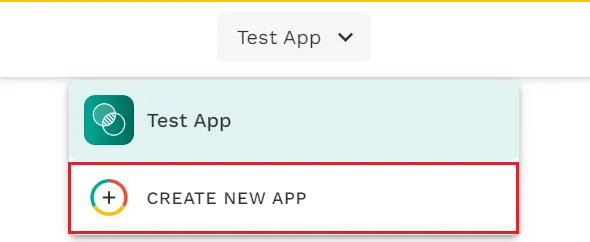
- Click on CREATE NEW APP.
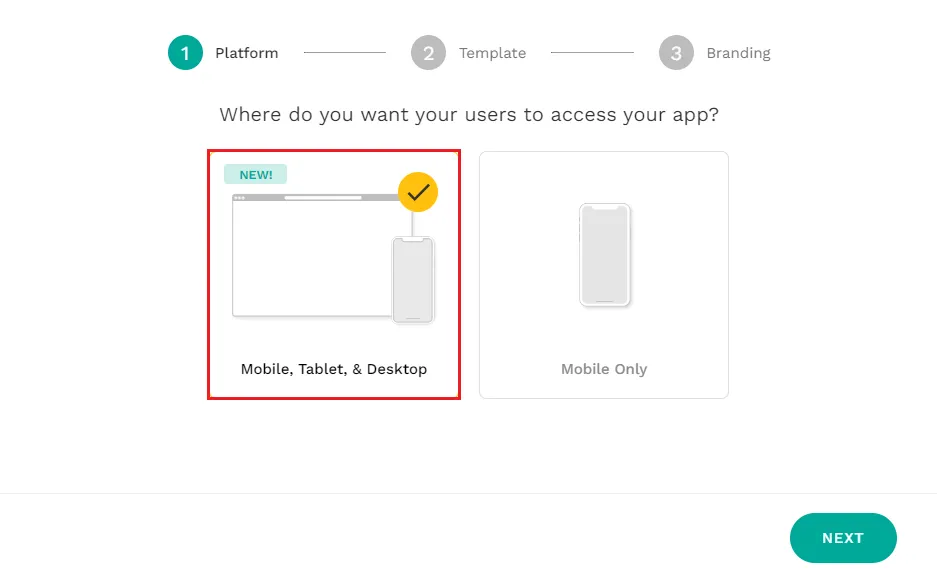
- Select Desktop Web App and click on Next.
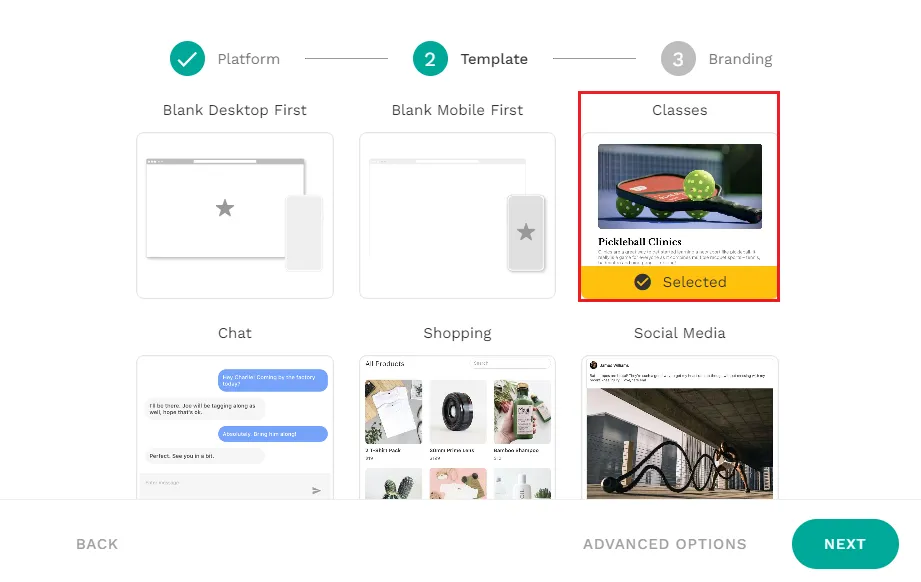
- You can choose any template, but for testing purposes, we've chosen a Blank template.
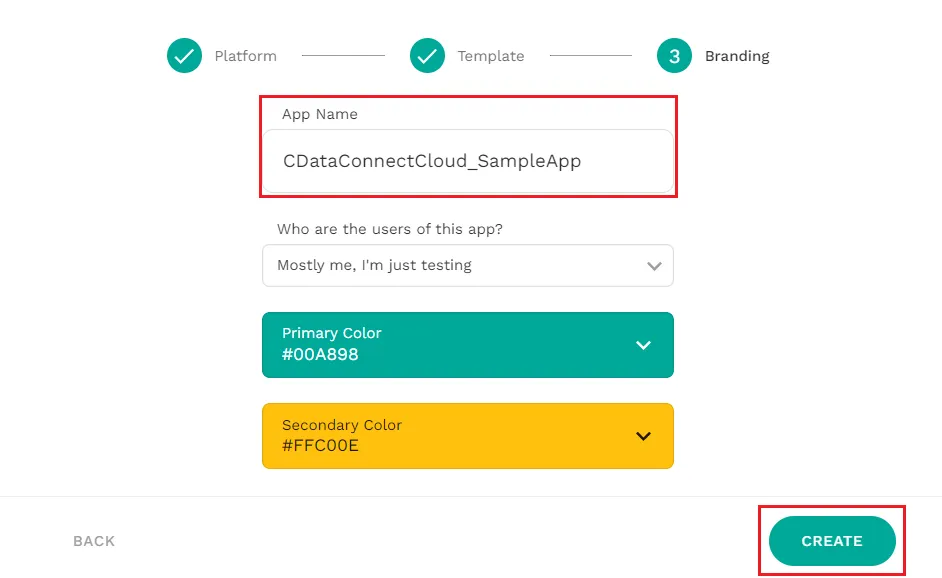
- Finally, add an app name and choose a color scheme, and your app is ready to go!
Registering external collections
Adalo uses a data structure called Collection to manage app data and offers a feature called External Collections with APIs, which lets you seamlessly integrate Collection with external APIs. Use this feature to connect to Connect AI.
- After creating an app, you first need to register a Collection, which is a definition for handling data within the Adalo app. There are two types of Collections: Database Collections, which are like Adalo's own internal database, and External Collections, which allow access to external APIs. In this case, we will access an external API, registering it as an External Collection.
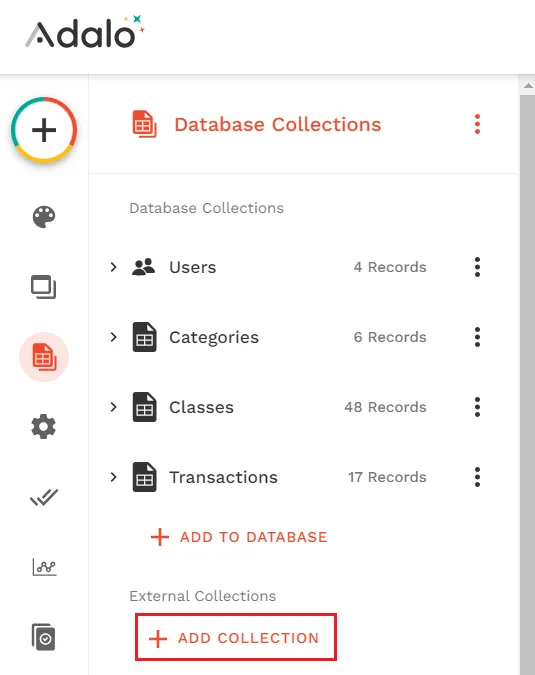
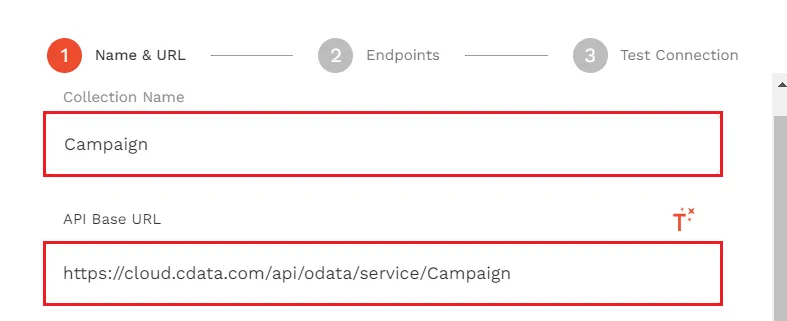
- On the External Collections registration screen, click on ADD COLLECTION to enter the collection name (any name of your choice), and provide the API base URL endpoint (OData endpoint registered on Connect AI). Make sure to add "/(table)" to the OData URL to access the specific endpoint. (Refer to the image given for reference)
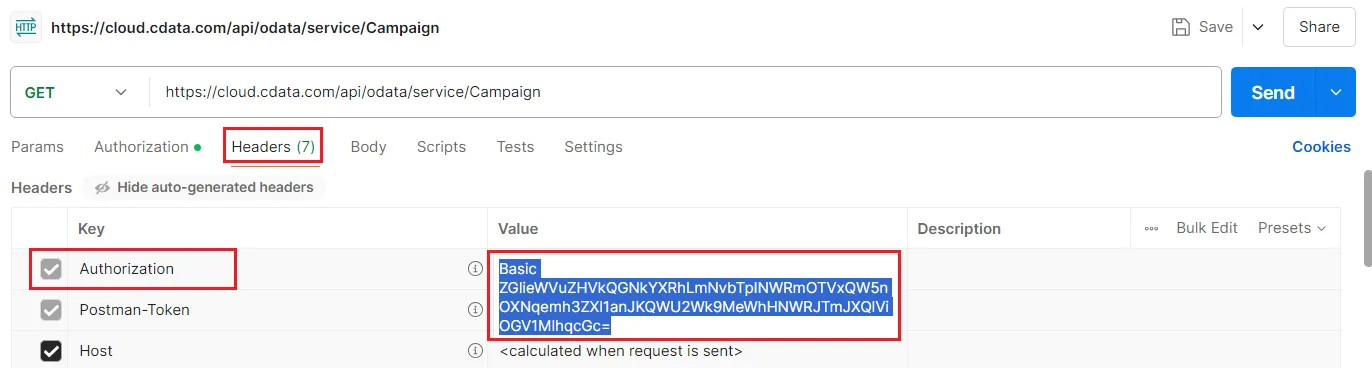
- In order to authenticate, you need a base64 authorization header comprising your username and PAT, joined by a colon. For example, [email protected]:MY_PAT. You can use a scripting tool, web tool, or other application to create this header.
Using Postman to generate the Authorization header
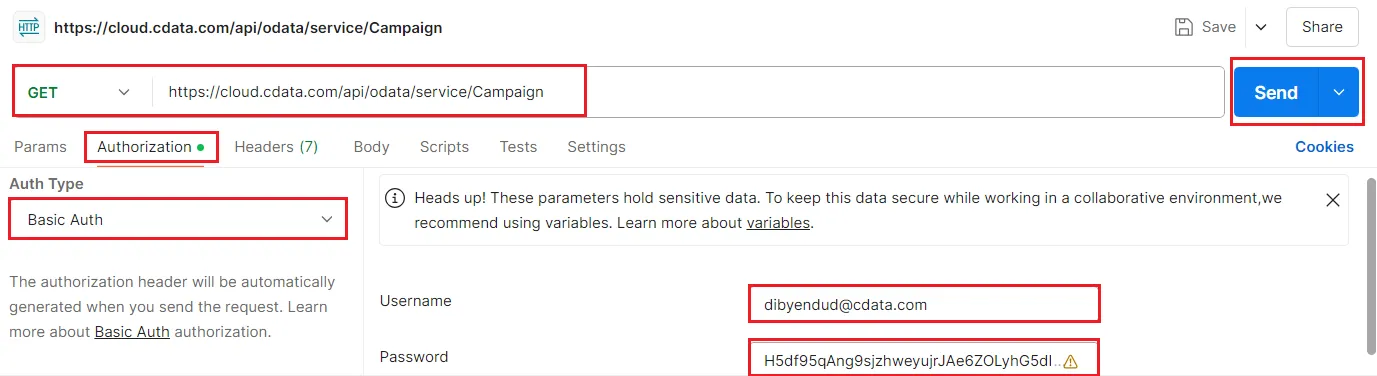
- Open the Postman application. Enter the OData URL mentioned in the previous step for a GET request on Postman. Click on the Authorization tab and select Auth Type as "Basic Auth". Enter the Username and Password as follows and click on Send:
- Username: Connect AI Username
- Password: PAT generated on Connect AI
- Go to the Headers tab and copy/save the value of the Authorization key.
- Open the Postman application. Enter the OData URL mentioned in the previous step for a GET request on Postman. Click on the Authorization tab and select Auth Type as "Basic Auth". Enter the Username and Password as follows and click on Send:
- Back in Adalo, click on ADD ITEM and select Header.
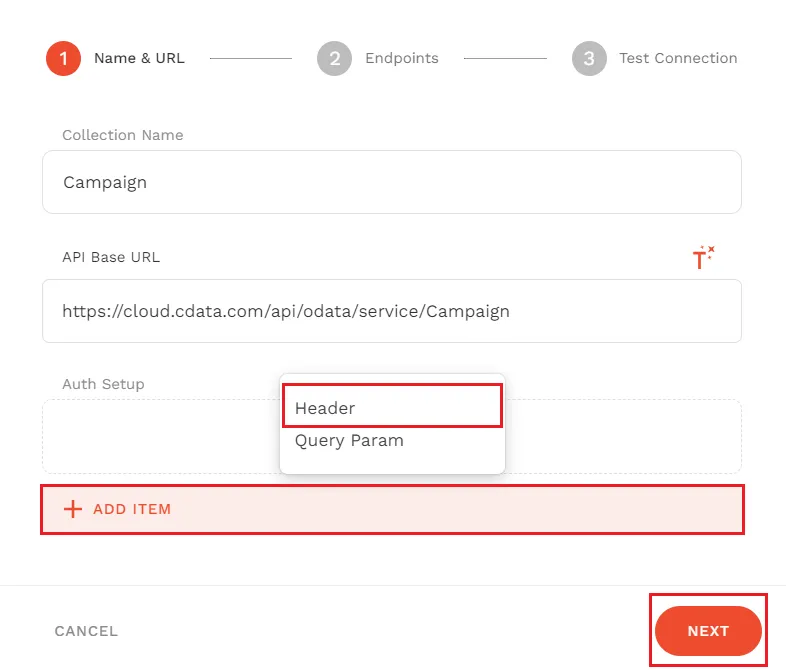
- Enter the details in the Header section as follows:
- Name: "Authorization"
- Value: Authorization key value copied in the previous step
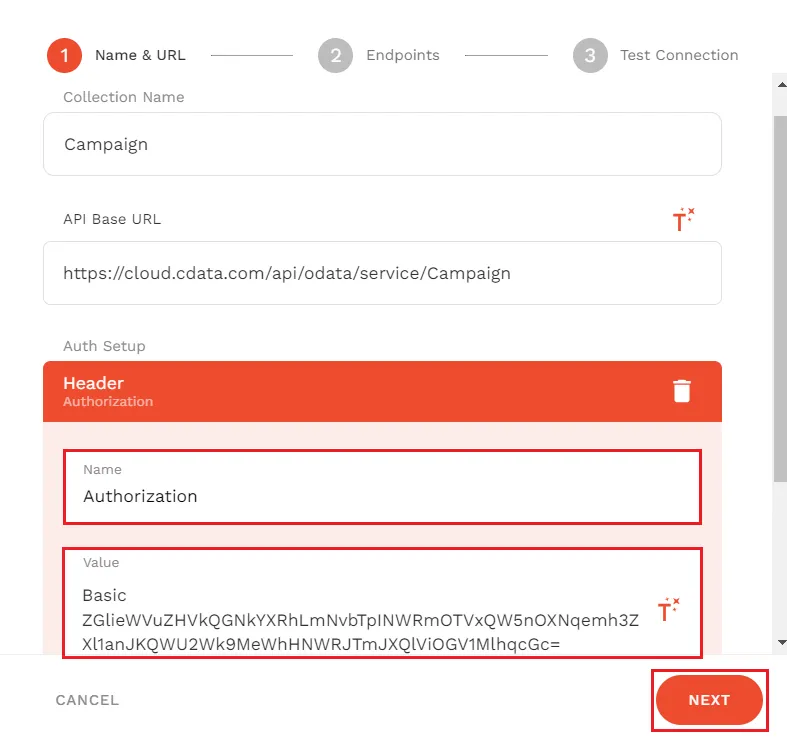
- Select Done and click on Next.
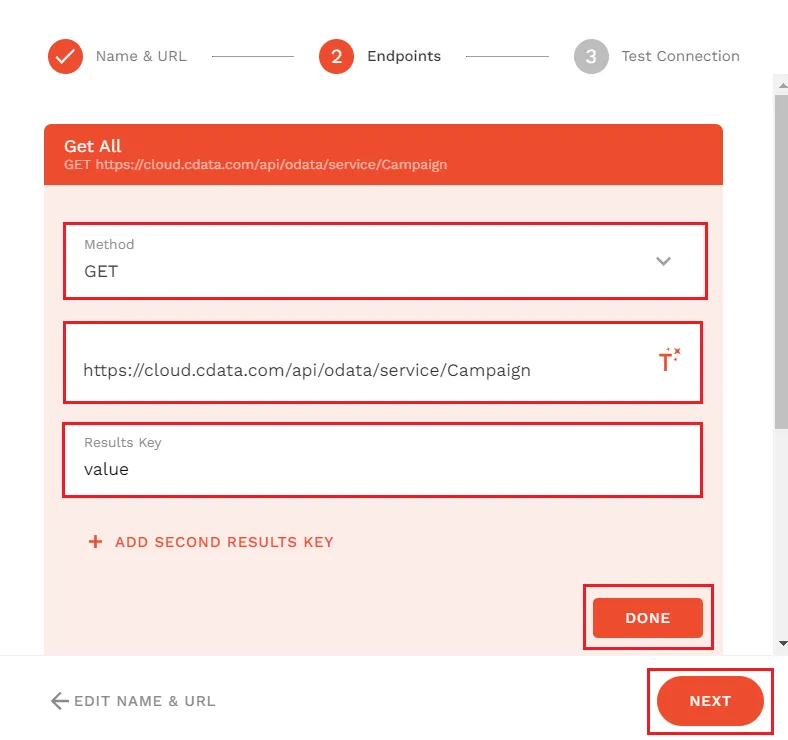
- Select Get All and enter "value" in the Results Key section. Click on Done and Next.
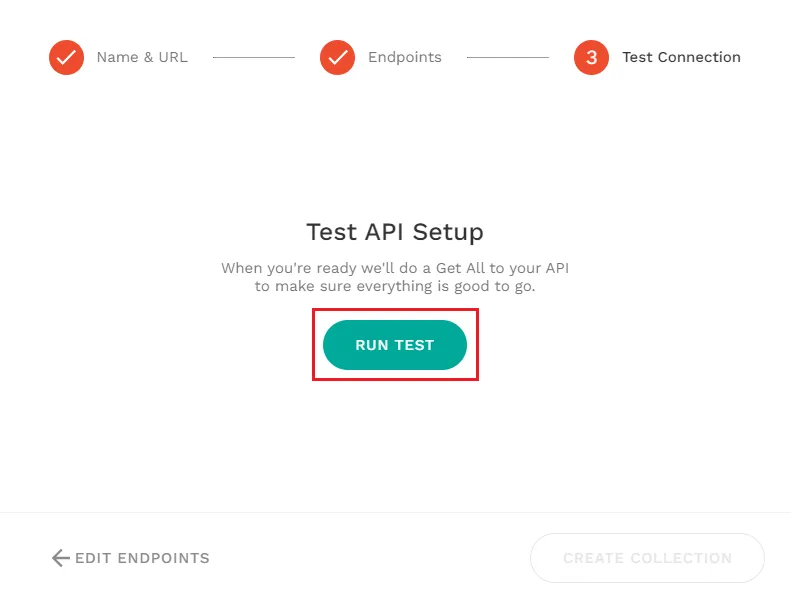
- Now, to test the API setup, click on RUN TEST. If you finally see the message and response shown below, the creation of External Collections is complete.
Creating a list screen
After configuring CData Connect AI, you can now begin developing the app on Adalo using HubDB data.
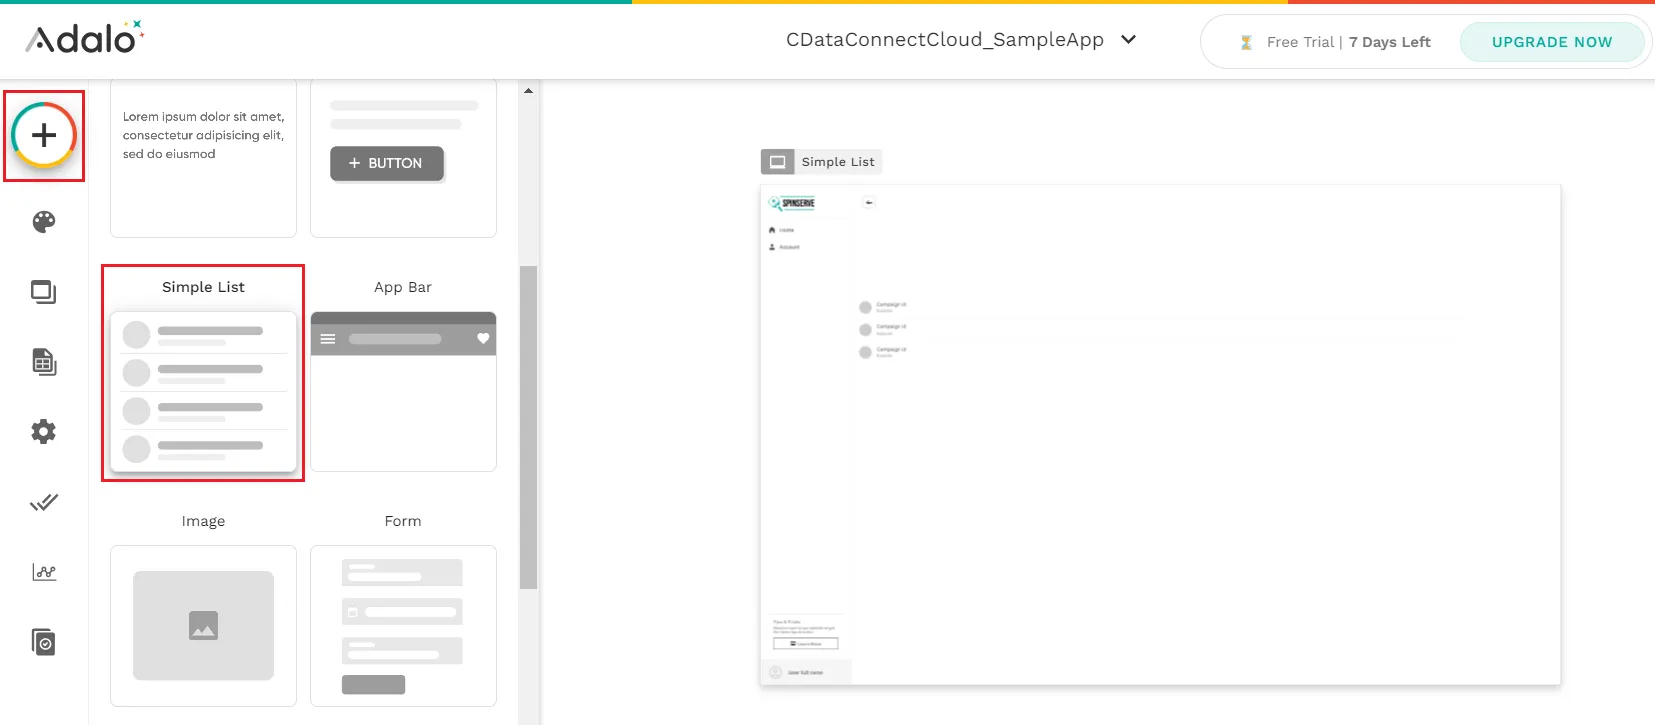
- First, click the + button in the upper right corner of the Adalo screen to display the list screen, then drag and drop "Simple List" onto the screen.
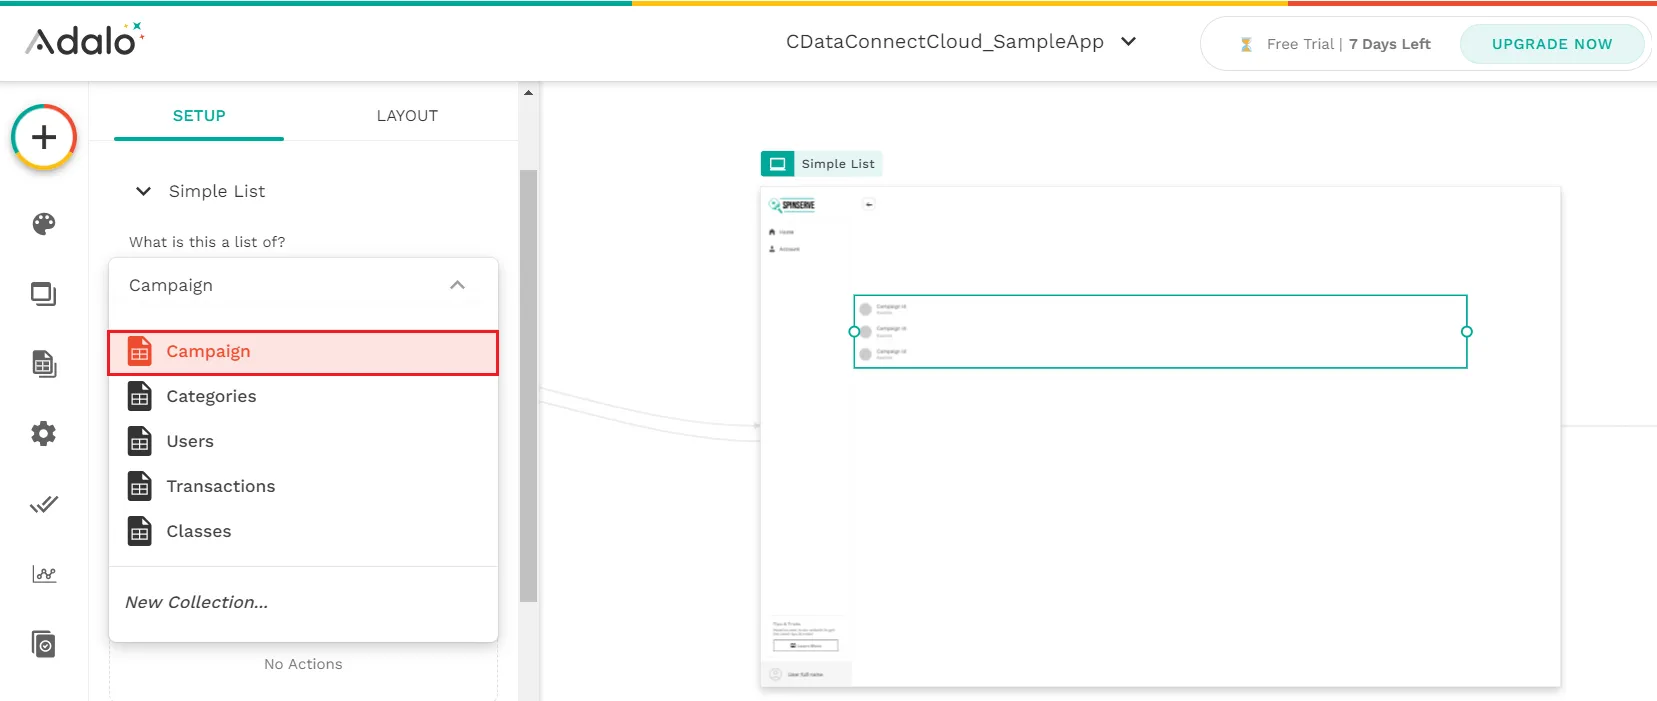
- Once the layout is complete as shown below, link the External Collections definition you created earlier to What is this a list of?
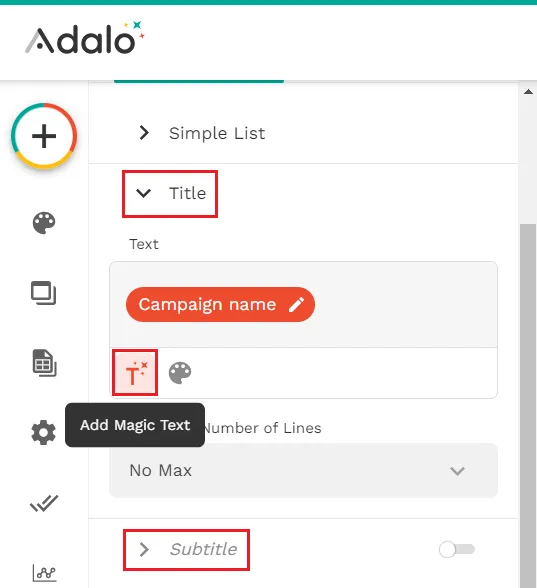
- Click on "Add Magic Text" button (as shown) to add the "Title" and "Subtitle" to the data items you want to obtain.
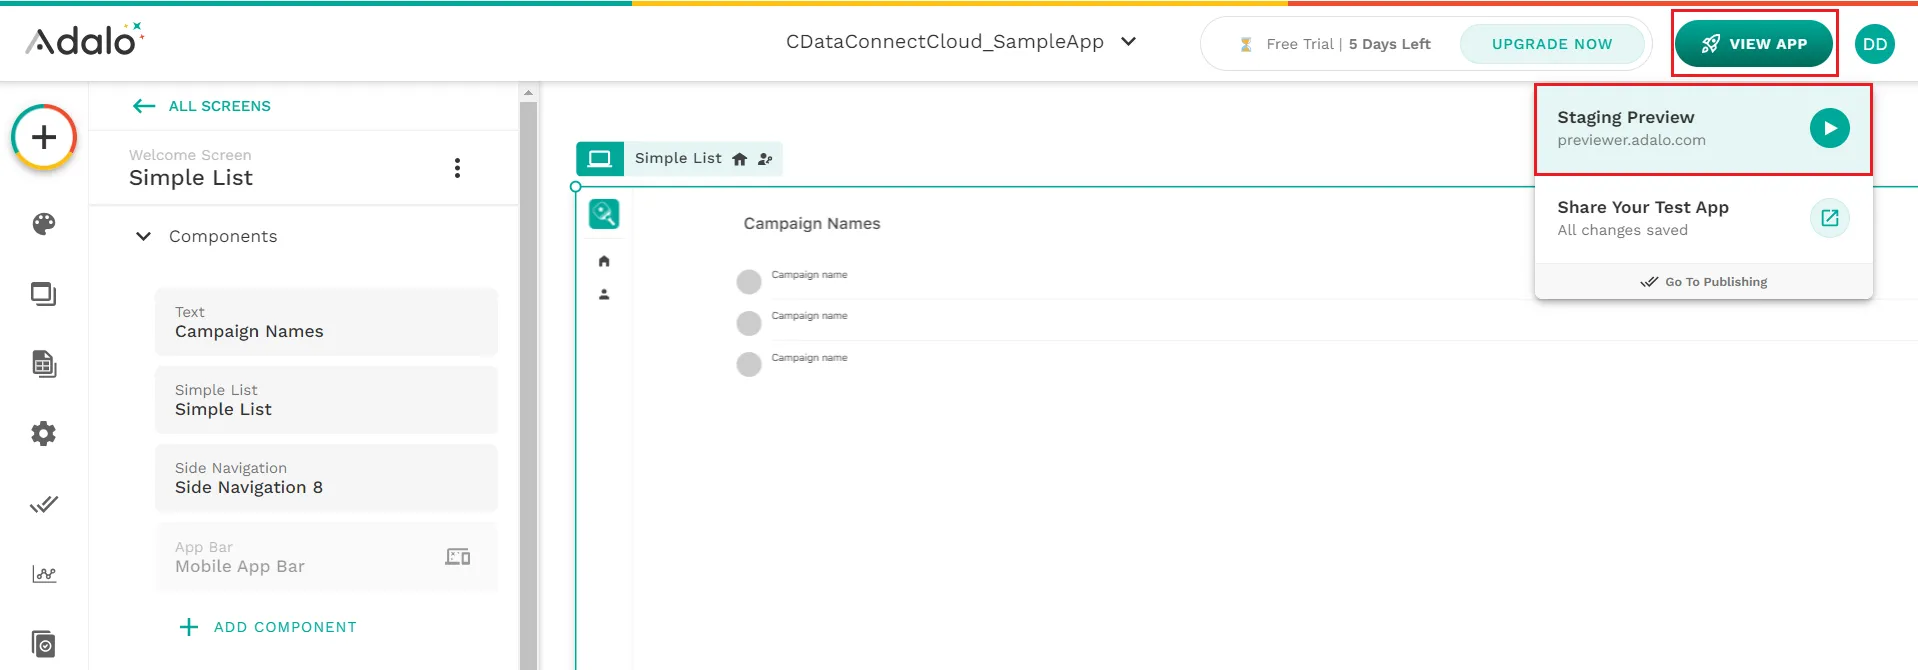
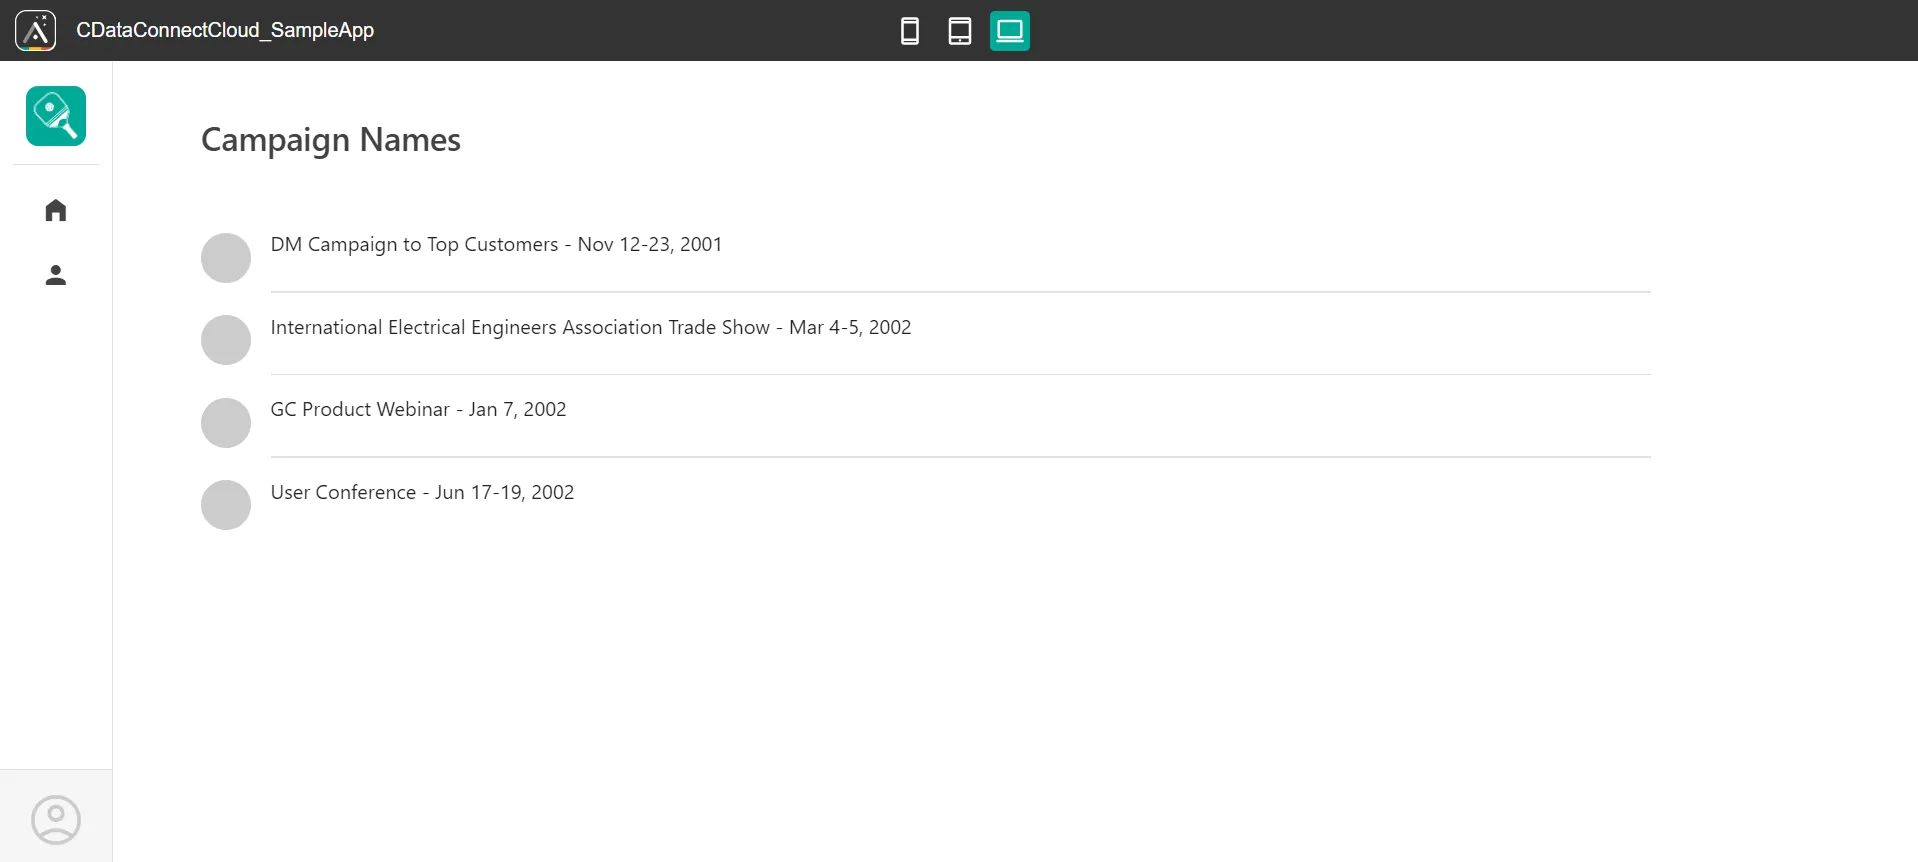
- Now, click on View App in the top right corner of the screen and select Staging Preview.
-
You can now view the HubDB data in the app created on Adalo.
Live connections to HubDB data from cloud applications
Adalo now allows you to connect to live HubDB data directly, allowing you to create more connections and apps without duplicating HubDB data.
To get real-time data access to over 100 SaaS, big data, and NoSQL sources directly from your cloud applications, visit CData Connect AI.