








How to Connect to Live HubDB Data from Sourcegraph Amp (via CData Connect AI)

Sourcegraph Amp is a modern AI agent environment designed for building intelligent, production-ready assistants capable of stateful reasoning, automatic context management, and native MCP (Model Context Protocol) integration. When combined with CData Connect AI, you can leverage Amp to create agents that interact with your HubDB data in real time using natural language or SQL-based queries.
CData Connect AI provides a secure, cloud-to-cloud interface for accessing HubDB data. Through the Connect AI Remote MCP Server, Amp connects directly to HubDB, enabling live data queries and operations without replication. With optimized pushdown capabilities, CData Connect AI executes SQL operations including filters, aggregations, and joins directly in HubDB for fast, real-time performance.
In this article, we demonstrate how to configure the Amp agent to conversationally explore your HubDB data using natural language or SQL. With Connect AI, you can easily build agents that have secure, live access to HubDB along with hundreds of other enterprise data sources.
Prerequisites
- An active CData Connect AI
- The Sourcegraph Amp VS Code extension or Amp CLI installed
- Node.js v20 or higher installed
- Access to HubDB
Step 1: Configure HubDB Connectivity for Sourcegraph Amp
Connectivity to HubDB from Amp is made possible through CData Connect AI Remote MCP. To interact with HubDB data from Amp, we start by creating and configuring a HubDB connection in CData Connect AI.
- Log into Connect AI, click Sources, and then click Add Connection
- Select "HubDB" from the Add Connection panel
-
Enter the necessary authentication properties to connect to HubDB.
There are two authentication methods available for connecting to HubDB data source: OAuth Authentication with a public HubSpot application and authentication with a Private application token.
Using a Custom OAuth App
AuthScheme must be set to "OAuth" in all OAuth flows. Be sure to review the Help documentation for the required connection properties for you specific authentication needs (desktop applications, web applications, and headless machines).
Follow the steps below to register an application and obtain the OAuth client credentials:
- Log into your HubSpot app developer account.
- Note that it must be an app developer account. Standard HubSpot accounts cannot create public apps.
- On the developer account home page, click the Apps tab.
- Click Create app.
- On the App info tab, enter and optionally modify values that are displayed to users when they connect. These values include the public application name, application logo, and a description of the application.
- On the Auth tab, supply a callback URL in the "Redirect URLs" box.
- If you're creating a desktop application, set this to a locally accessible URL like http://localhost:33333.
- If you are creating a Web application, set this to a trusted URL where you want users to be redirected to when they authorize your application.
- Click Create App. HubSpot then generates the application, along with its associated credentials.
- On the Auth tab, note the Client ID and Client secret. You will use these later to configure the driver.
Under Scopes, select any scopes you need for your application's intended functionality.
A minimum of the following scopes is required to access tables:
- hubdb
- oauth
- crm.objects.owners.read
- Click Save changes.
- Install the application into a production portal with access to the features that are required by the integration.
- Under "Install URL (OAuth)", click Copy full URL to copy the installation URL for your application.
- Navigate to the copied link in your browser. Select a standard account in which to install the application.
- Click Connect app. You can close the resulting tab.
Using a Private App
To connect using a HubSpot private application token, set the AuthScheme property to "PrivateApp."
You can generate a private application token by following the steps below:
- In your HubDB account, click the settings icon (the gear) in the main navigation bar.
- In the left sidebar menu, navigate to Integrations > Private Apps.
- Click Create private app.
- On the Basic Info tab, configure the details of your application (name, logo, and description).
- On the Scopes tab, select Read or Write for each scope you want your private application to be able to access.
- A minimum of hubdb and crm.objects.owners.read is required to access tables.
- After you are done configuring your application, click Create app in the top right.
- Review the info about your application's access token, click Continue creating, and then Show token.
- Click Copy to copy the private application token.
To connect, set PrivateAppToken to the private application token you retrieved.

- Log into your HubSpot app developer account.
- Click Save & Test


Step 2: Set Up Amp for CData Connect AI
Copy the MCP Endpoint
Amp communicates with Connect AI through the hosted MCP endpoint:
https://mcp.cloud.cdata.com/mcpThis endpoint provides secure, cloud-to-cloud communication between Amp and your Connect AI workspace.
Generate Base64 Credentials
To authenticate Amp with Connect AI, generate your Base64-encoded credentials. For example, in PowerShell:
{Convert}::ToBase64String{(Text.Encoding)}::ASCII.GetBytes("[email protected]:yourPAT")
Replace [email protected] with your Connect AI email and yourPAT with your Personal Access Token.
Register the MCP Server in Amp
Once you have your Base64 string, register the CData Connect AI MCP server with Amp using the following command:
amp mcp add cdata-connect-ai -- npx -y mcp-remote@latest https://mcp.cloud.cdata.com/mcp --header "Authorization: Basic "
This adds your Connect AI configuration to Amp's settings file, enabling communication with CData Connect AI.
Verify Your Connection and Explore Data
- Create a New Thread
- Enter the Interactive Chat
- Verify MCP Servers
- Confirm Your Data Source
Start a new Amp session to begin interacting with your data:
amp thread new
Connect to the new thread using:
amp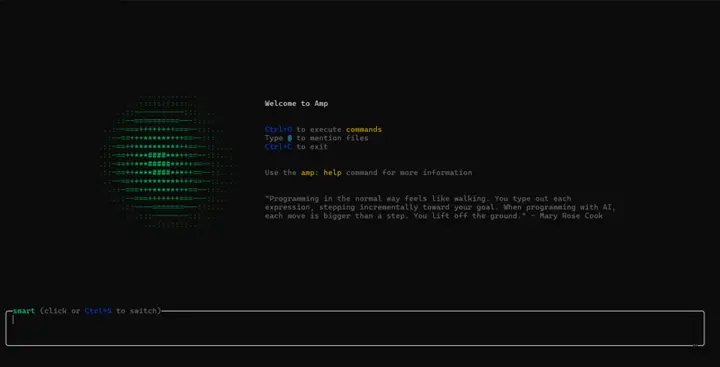
Inside the Amp shell, check your registered MCP servers:
list mcp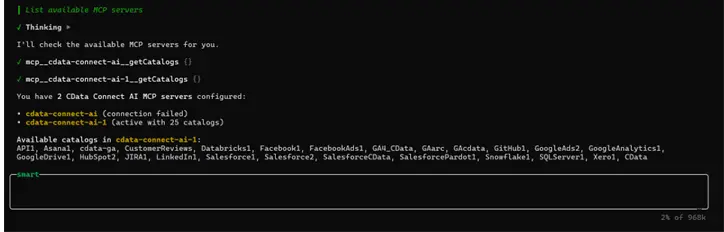
Confirm that your connected HubDB data appears as a catalog by running
getCatalogs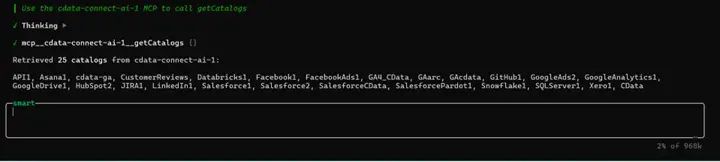
Step 3: Build Intelligent Agents with Live HubDB Data Access
With your Amp application configured and connected to CData Connect AI, you can now build sophisticated agents that interact with your HubDB data using natural language. The MCP integration provides your agents with powerful data access capabilities.
Available MCP Tools for your Agent
Your Amp application has access to the following CData Connect AI MCP tools:
- getCatalogs: Lists all data source catalogs (e.g., HubDB1)
- getSchemas: Returns database schemas within the connected catalog
- getTables: Lists all tables and views available under a given schema
- getColumns: Returns column definitions for a specific table or view
- queryData: Executes SQL queries (SELECT, INSERT, UPDATE, DELETE)
- getProcedures: Lists stored procedures or API endpoints
- getProcedureParameters: Returns metadata for stored procedure parameters
- executeProcedure: Invokes stored procedures (e.g., HubDB actions)
Key Features of Amp
Amp provides several production-ready capabilities that make it ideal for building intelligent, data-aware AI agents:
- Automatic Context Management: Amp maintains and recalls conversational context automatically, enabling seamless multi-turn interactions without manual state tracking.
- Stateful Conversations: Preserve context and memory across multiple queries to create natural, human-like conversations.
- Native MCP Integration: Amp natively supports the Model Context Protocol (MCP), allowing secure, real-time access to live data from CData Connect AI and other MCP-compatible servers.
- Tool-Oriented Architecture: Tools are treated as first-class components with managed invocation, input validation, and error handling.
- Efficient Context Handling: Amp optimizes prompts dynamically, ensuring relevant information is preserved even when approaching model token limits.
- Cross-Source Querying: Combine and query multiple connected data sources within a single conversational workflow.
- Fine-Grained Permission Controls: Define and enforce tool access levels to maintain data governance and secure integrations.
- Developer-Friendly CLI and SDK: Manage MCP connections, configure agents, and test workflows easily from the Amp CLI or VS Code extension.
Example Use Cases
Here are some examples of what your Amp agents can do with live data access through CData Connect AI:
- Data Analysis Agent: Identify trends and anomalies in HubDB data.
- Report Generation Agent: Generate reports from natural language prompts.
- Interactive Chatbot: Explain insights conversationally using live data.
- Data Quality Agent: Monitor and flag real-time data inconsistencies.
- Automated Workflow Agent: Trigger alerts based on defined data conditions.
Testing Your Agent
Once your agent is running, you can interact with it through natural language queries. For example:
- "Show me all new leads from the past 30 days."
- "What are the top-performing campaigns this quarter?"
- "Analyze revenue growth and highlight anomalies."
- "Generate a summary report of current opportunities."
- "Find all records where status is pending approval."
Get CData Connect AI
To get live data access to hundreds of SaaS, Big Data, and NoSQL sources directly from your Amp agent environment, try CData Connect AI today!