








Use Grok to Talk to Your HubDB Data via CData Connect AI

Grok AI is a large language model developed by xAI for real-time reasoning, tool invocation, and agentic workflows. It enables developers to build AI agents that can reason over live data, discover tools dynamically, and take intelligent actions.
CData Connect AI provides a secure cloud-to-cloud interface for integrating hundreds of enterprise data sources with Grok AI. Using Connect AI, live HubDB data is exposed through a remote MCP endpoint without replication, allowing Grok AI agents to securely query and analyze governed enterprise data in real time.
Step 1: Configure HubDB in CData Connect AI
To enable Grok to query live HubDB data, first create a HubDB connection in CData Connect AI. This connection is exposed through the CData Remote MCP Server.
-
Log into Connect AI, click Sources, and then click Add Connection.

-
Select "HubDB" from the Add Connection panel.

-
Enter the required authentication properties.
There are two authentication methods available for connecting to HubDB data source: OAuth Authentication with a public HubSpot application and authentication with a Private application token.
Using a Custom OAuth App
AuthScheme must be set to "OAuth" in all OAuth flows. Be sure to review the Help documentation for the required connection properties for you specific authentication needs (desktop applications, web applications, and headless machines).
Follow the steps below to register an application and obtain the OAuth client credentials:
- Log into your HubSpot app developer account.
- Note that it must be an app developer account. Standard HubSpot accounts cannot create public apps.
- On the developer account home page, click the Apps tab.
- Click Create app.
- On the App info tab, enter and optionally modify values that are displayed to users when they connect. These values include the public application name, application logo, and a description of the application.
- On the Auth tab, supply a callback URL in the "Redirect URLs" box.
- If you're creating a desktop application, set this to a locally accessible URL like http://localhost:33333.
- If you are creating a Web application, set this to a trusted URL where you want users to be redirected to when they authorize your application.
- Click Create App. HubSpot then generates the application, along with its associated credentials.
- On the Auth tab, note the Client ID and Client secret. You will use these later to configure the driver.
Under Scopes, select any scopes you need for your application's intended functionality.
A minimum of the following scopes is required to access tables:
- hubdb
- oauth
- crm.objects.owners.read
- Click Save changes.
- Install the application into a production portal with access to the features that are required by the integration.
- Under "Install URL (OAuth)", click Copy full URL to copy the installation URL for your application.
- Navigate to the copied link in your browser. Select a standard account in which to install the application.
- Click Connect app. You can close the resulting tab.
Using a Private App
To connect using a HubSpot private application token, set the AuthScheme property to "PrivateApp."
You can generate a private application token by following the steps below:
- In your HubDB account, click the settings icon (the gear) in the main navigation bar.
- In the left sidebar menu, navigate to Integrations > Private Apps.
- Click Create private app.
- On the Basic Info tab, configure the details of your application (name, logo, and description).
- On the Scopes tab, select Read or Write for each scope you want your private application to be able to access.
- A minimum of hubdb and crm.objects.owners.read is required to access tables.
- After you are done configuring your application, click Create app in the top right.
- Review the info about your application's access token, click Continue creating, and then Show token.
- Click Copy to copy the private application token.
To connect, set PrivateAppToken to the private application token you retrieved.
 Click Create & Test.
- Log into your HubSpot app developer account.
-
Open the Permissions tab and configure user access.

Add a Personal Access Token
A Personal Access Token (PAT) authenticates MCP requests from Agno to CData Connect AI.
- Open Settings and navigate to Access Tokens.
- Click Create PAT.
-
Save the generated token securely.

Step 2: Install required dependencies
Remote MCP Tools allow Grok to connect to external MCP (Model Context Protocol) servers, extending its capabilities with custom tools from third parties or your own implementations. Simply specify a server URL and optional configuration xAI manages the MCP server connection and interaction on your behalf.
Open the terminal and install the required dependencies for the MCP integration using pip.
pip install xai-sdk==1.4.0
The xai-sdk (v1.4.0) enables Remote MCP tools, and python-dotenv is used to securely load environment variables.
pip install python-dotenv
Step 3: Generate an xAI API key
- Create or login to xAI account
- Open xAI API console
- Navigate to API Keys
- Click on create API key
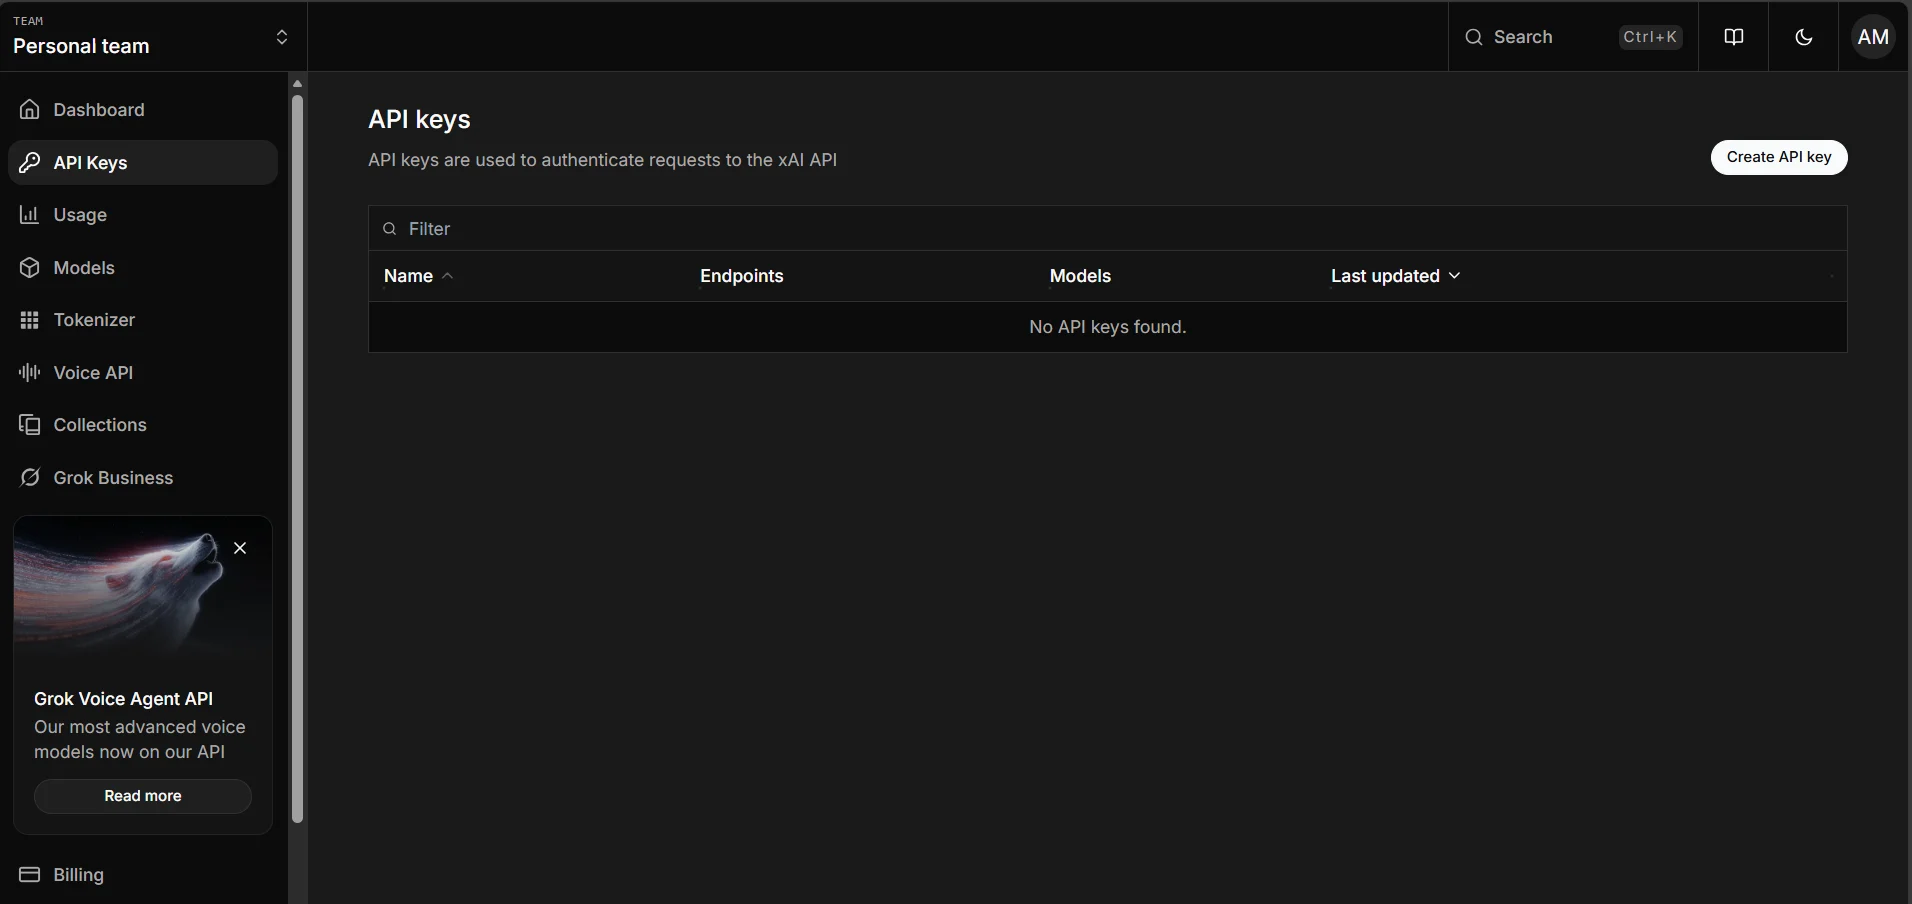
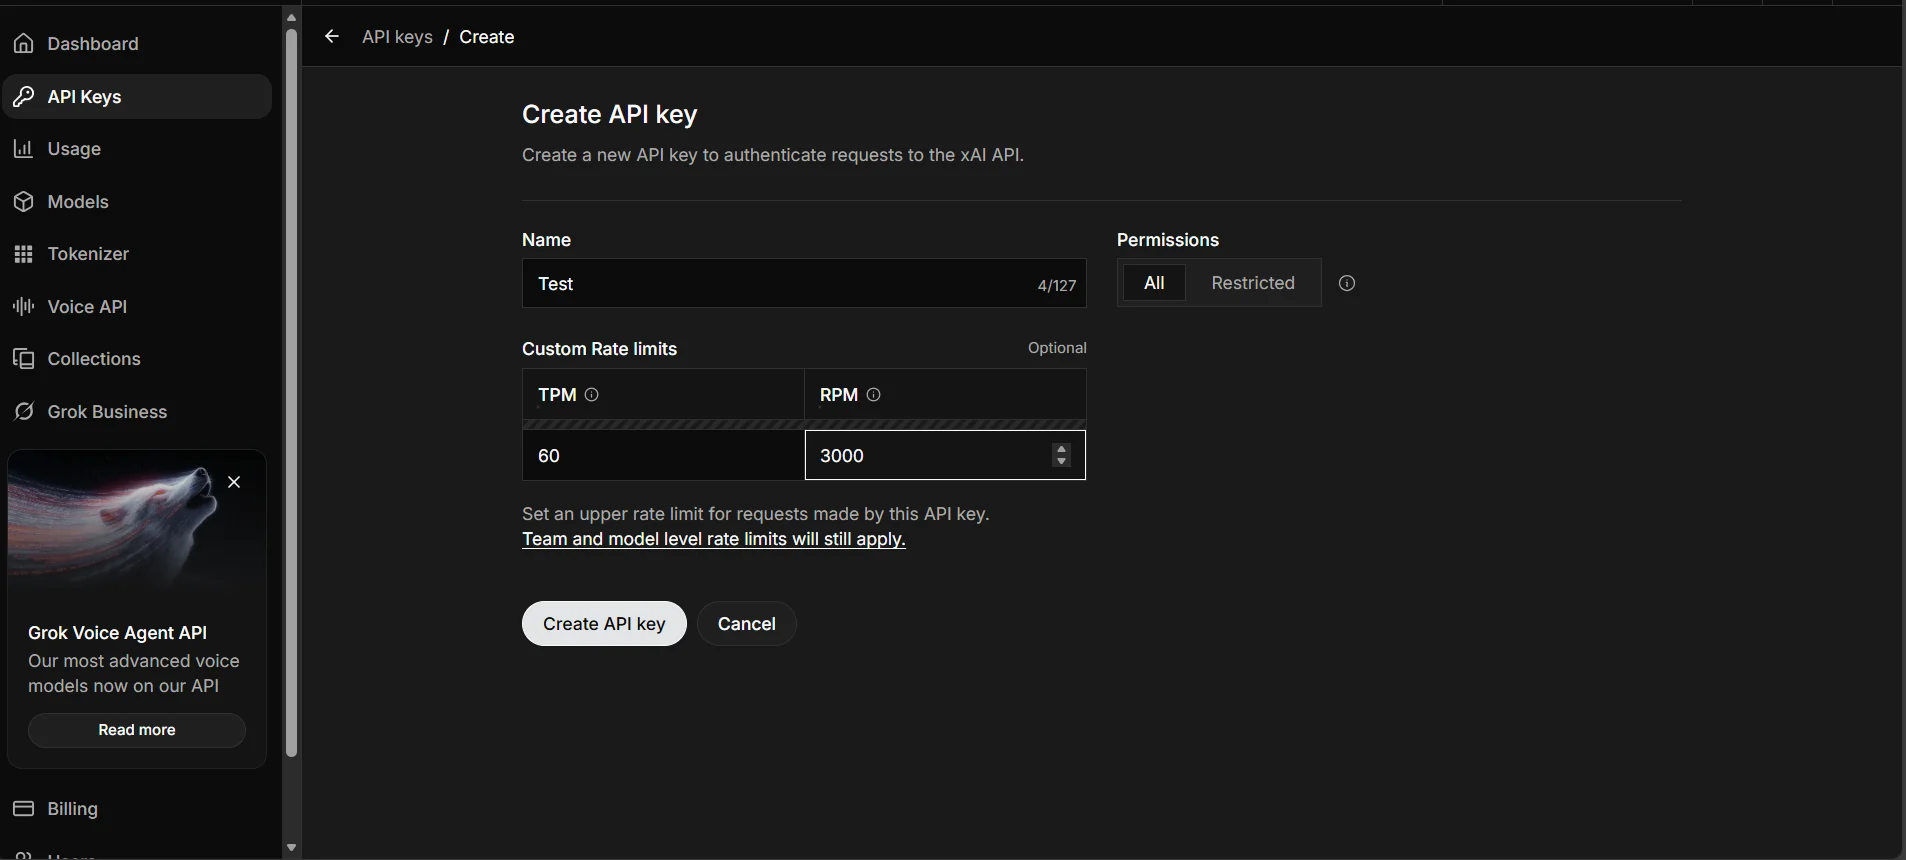
After generating an API key, user need to save it somewhere safe. Recommended option is to export it as an environment variable in your terminal or save it to a .env file.
Step 4: Connect to CData Connect AI
Initialize the Grok client and configure the MCP connection to CData Connect AI. The code below establishes a secure connection and sends a natural language query to your data source.
import os

from xai_sdk import Client
from xai_sdk.chat import user
from xai_sdk.tools import mcp

client = Client(api_key="Your_xAI-API_KEY")
chat = client.chat.create(
	model="grok-4-1-fast-non-reasoning",
	tools=[
		mcp(
			server_url="https://mcp.cloud.cdata.com/mcp",
			extra_headers={"Authorization": "Basic Username:PAT"} #Base64 Encoded Username:PAT
		)
		],
	include=["verbose_streaming"],
)

chat.append(user("List the top two catalogs for me please"))

is_thinking = True
for response, chunk in chat.stream():
	# View the server-side tool calls as they are being made in real-time
	for tool_call in chunk.tool_calls:
		print(f"
Calling tool: {tool_call.function.name} with arguments: {tool_call.function.arguments}")
	if response.usage.reasoning_tokens and is_thinking:
		print(f"
Thinking... ({response.usage.reasoning_tokens} tokens)", end="", flush=True)
	if chunk.content and is_thinking:
		print("

Final Response:")
		is_thinking = False
	if chunk.content and not is_thinking:
		print(chunk.content, end="", flush=True)

print("

Usage:")
print(response.usage)
print(response.server_side_tool_usage)
print("

Server Side Tool Calls:")
print(response.tool_calls)
This code initializes the Grok AI client, connects to CData Connect AI via MCP using Basic Authentication, and streams the response in real-time. The agent automatically discovers available tools, invokes them to query your live data, and displays both the tool calls and final results.
Run the script to see Grok query your connected data source.
Query Results
The output shows Grok invoking MCP tools through CData Connect AI and returning live data from your connected source.
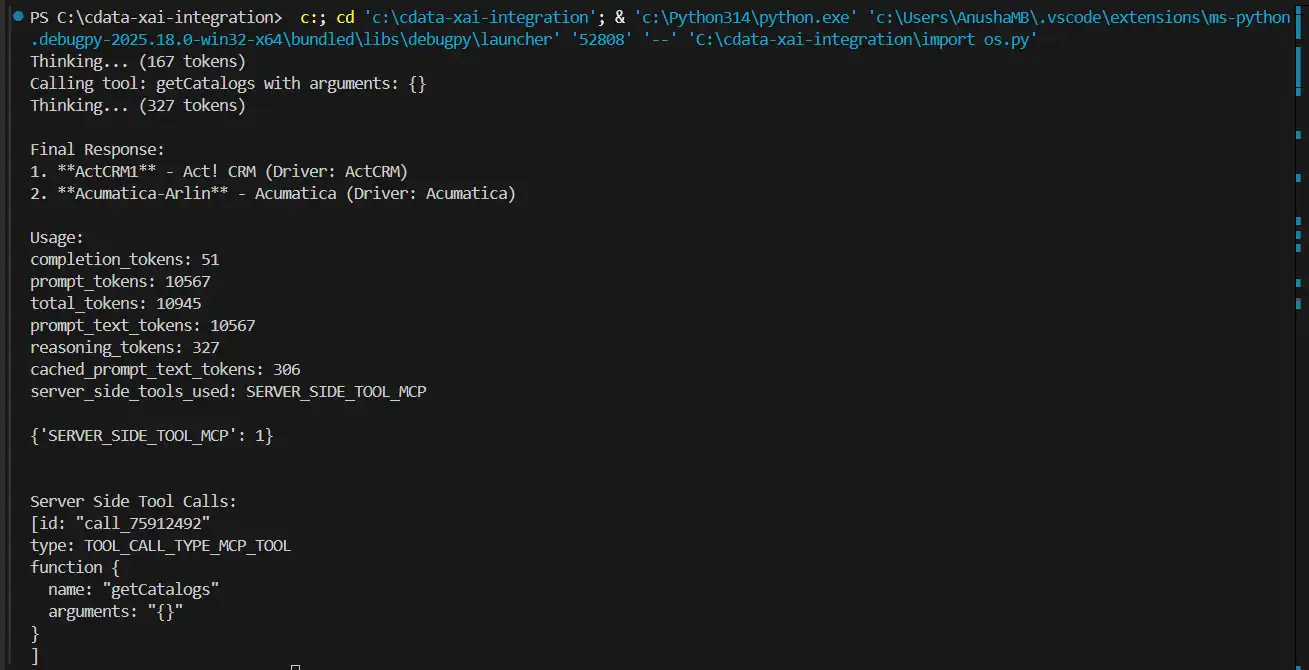
User can now query live data using natural language through Grok AI.
Build agentic workflows with Grok and CData Connect AI
Combining Grok AI with CData Connect AI delivers AI-powered data access without pipelines or custom integrations. Start your free trial today to see how CData can empower Grok with live, secure access to hundreds of external systems.