








Connect to Live HubDB Data in MicroStrategy through CData Connect AI

MicroStrategy is an analytics and mobility platform that enables data-driven innovation. When you pair MicroStrategy with CData Connect AI, you gain database-like access to live HubDB data from MicroStrategy, expanding your reporting and analytics capabilities. In this article, we walk through connecting to HubDB in Connect AI and connecting to Connect AI in MicroStrategy to create a simple visualization of HubDB data.
As a cloud-based integration platform, Connect AI is ideal for working with cloud-based BI and analytics tools. With no servers to configure or data proxies to set up, you can simply use the web-based UI to create a live connection to HubDB and connect from MicroStrategy to start performing analytics based on live HubDB data.
Configure HubDB Connectivity for Microstrategy
Connectivity to HubDB from Microstrategy is made possible through CData Connect AI. To work with HubDB data from Microstrategy, we start by creating and configuring a HubDB connection.
- Log into Connect AI, click Sources, and then click Add Connection
- Select "HubDB" from the Add Connection panel
-
Enter the necessary authentication properties to connect to HubDB.
There are two authentication methods available for connecting to HubDB data source: OAuth Authentication with a public HubSpot application and authentication with a Private application token.
Using a Custom OAuth App
AuthScheme must be set to "OAuth" in all OAuth flows. Be sure to review the Help documentation for the required connection properties for you specific authentication needs (desktop applications, web applications, and headless machines).
Follow the steps below to register an application and obtain the OAuth client credentials:
- Log into your HubSpot app developer account.
- Note that it must be an app developer account. Standard HubSpot accounts cannot create public apps.
- On the developer account home page, click the Apps tab.
- Click Create app.
- On the App info tab, enter and optionally modify values that are displayed to users when they connect. These values include the public application name, application logo, and a description of the application.
- On the Auth tab, supply a callback URL in the "Redirect URLs" box.
- If you're creating a desktop application, set this to a locally accessible URL like http://localhost:33333.
- If you are creating a Web application, set this to a trusted URL where you want users to be redirected to when they authorize your application.
- Click Create App. HubSpot then generates the application, along with its associated credentials.
- On the Auth tab, note the Client ID and Client secret. You will use these later to configure the driver.
Under Scopes, select any scopes you need for your application's intended functionality.
A minimum of the following scopes is required to access tables:
- hubdb
- oauth
- crm.objects.owners.read
- Click Save changes.
- Install the application into a production portal with access to the features that are required by the integration.
- Under "Install URL (OAuth)", click Copy full URL to copy the installation URL for your application.
- Navigate to the copied link in your browser. Select a standard account in which to install the application.
- Click Connect app. You can close the resulting tab.
Using a Private App
To connect using a HubSpot private application token, set the AuthScheme property to "PrivateApp."
You can generate a private application token by following the steps below:
- In your HubDB account, click the settings icon (the gear) in the main navigation bar.
- In the left sidebar menu, navigate to Integrations > Private Apps.
- Click Create private app.
- On the Basic Info tab, configure the details of your application (name, logo, and description).
- On the Scopes tab, select Read or Write for each scope you want your private application to be able to access.
- A minimum of hubdb and crm.objects.owners.read is required to access tables.
- After you are done configuring your application, click Create app in the top right.
- Review the info about your application's access token, click Continue creating, and then Show token.
- Click Copy to copy the private application token.
To connect, set PrivateAppToken to the private application token you retrieved.

- Log into your HubSpot app developer account.
- Click Save & Test
-
Navigate to the Permissions tab in the Add HubDB Connection page and update the User-based permissions.



Add a Personal Access Token
When connecting to Connect AI through the REST API, the OData API, or the Virtual SQL Server, a Personal Access Token (PAT) is used to authenticate the connection to Connect AI. It is best practice to create a separate PAT for each service to maintain granularity of access.
- Click on the Gear icon () at the top right of the Connect AI app to open the settings page.
- On the Settings page, go to the Access Tokens section and click Create PAT.
-
Give the PAT a name and click Create.

- The personal access token is only visible at creation, so be sure to copy it and store it securely for future use.
With the connection configured and a PAT generated, you are ready to connect to HubDB data from MicroStrategy.
Connect to and Visualize HubDB Data Using MicroStrategy
You can connect to HubDB in MicroStrategy by adding a data source based on the native SQL Server functionality. Once you have created a data source, you can build dynamic visualizations of HubDB data in MicroStrategy.
- Open MicroStrategy and select your account.
- Click Add External Data, select Databases, and use Select Tables as the Import Option.
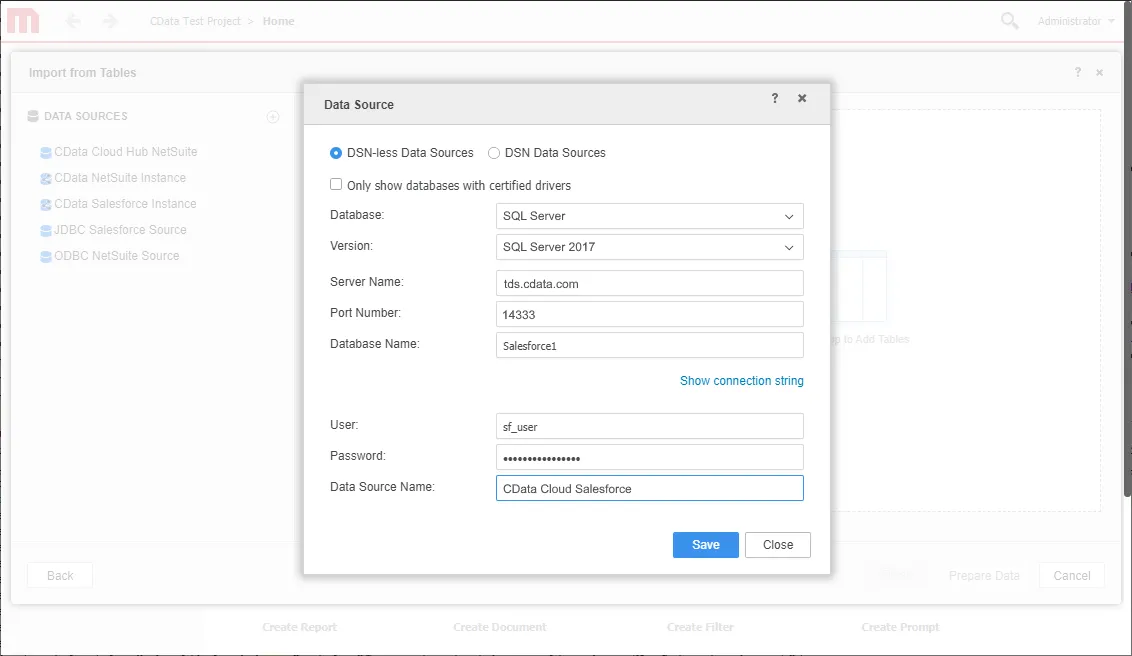
- In the Import from Tables wizard, click to add a new Data Source.
- Select "SQL Server" in the Database menu and select "SQL Server 2017" in the Version menu.
- Sat the connection properties as follows:
- Server Name: tds.cdata.com
- Port Number: 14333
- Database Name: the name of your HubDB connection (e.g. HubDB1)
- User: a Connect AI user
- Password: the PAT for your Connect AI user
- Data Source Name: a name for the new external data source, like "CData Cloud HubDB"
- Expand the menu for the new data source and choose "Edit Catalog Options"
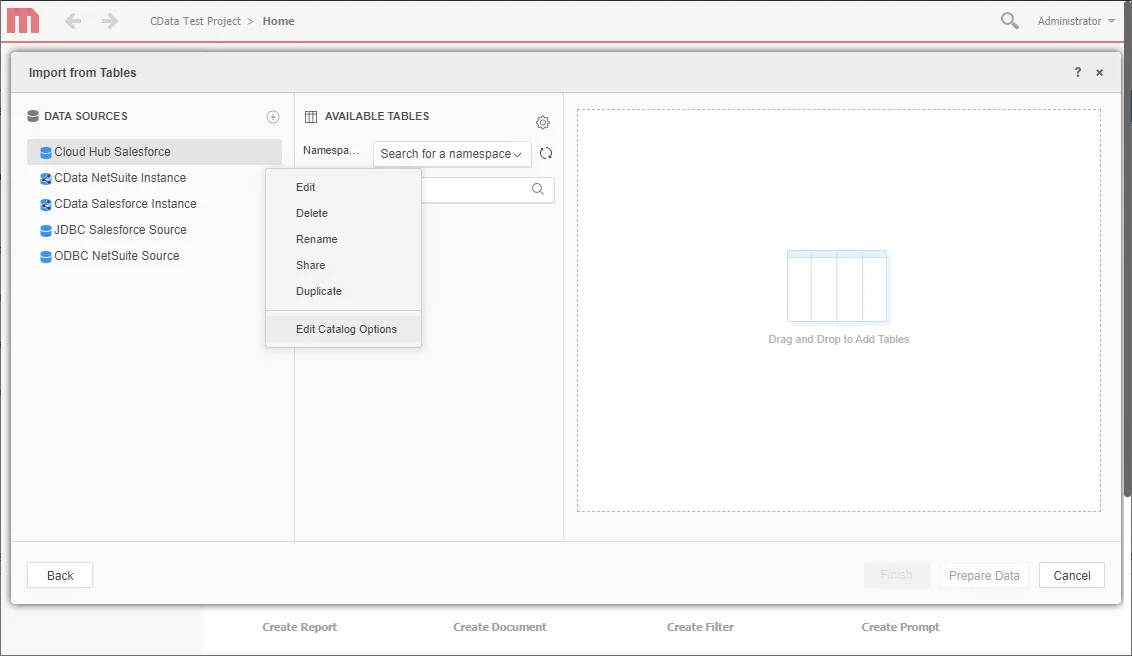
- Edit the "SQL statement retrieve columns ..." query to include TABLE_SCHEMA = '#?Schema_Name?#' in the WHERE clause, and click Apply and then OK (the complete query is below).
SELECT DISTINCT TABLE_SCHEMA NAME_SPACE, TABLE_NAME TAB_NAME, COLUMN_NAME COL_NAME, (CASE WHEN (DATA_TYPE LIKE '%char' AND (CHARACTER_SET_NAME='utf8' OR CHARACTER_SET_NAME='usc2')) THEN CONCAT('a',DATA_TYPE) ELSE DATA_TYPE END) DATA_TYPE, CHARACTER_MAXIMUM_LENGTH DATA_LEN, NUMERIC_PRECISION DATA_PREC, NUMERIC_SCALE DATA_SCALE FROM INFORMATION_SCHEMA.COLUMNS WHERE TABLE_NAME IN (#TABLE_LIST#) AND TABLE_SCHEMA='#?Schema_Name?#' ORDER BY 1,2,3 - Select the new data source and select the Namespace that corresponds to your virtual HubDB database (like HubDB1).
- Drag tables into the pane to insert then.
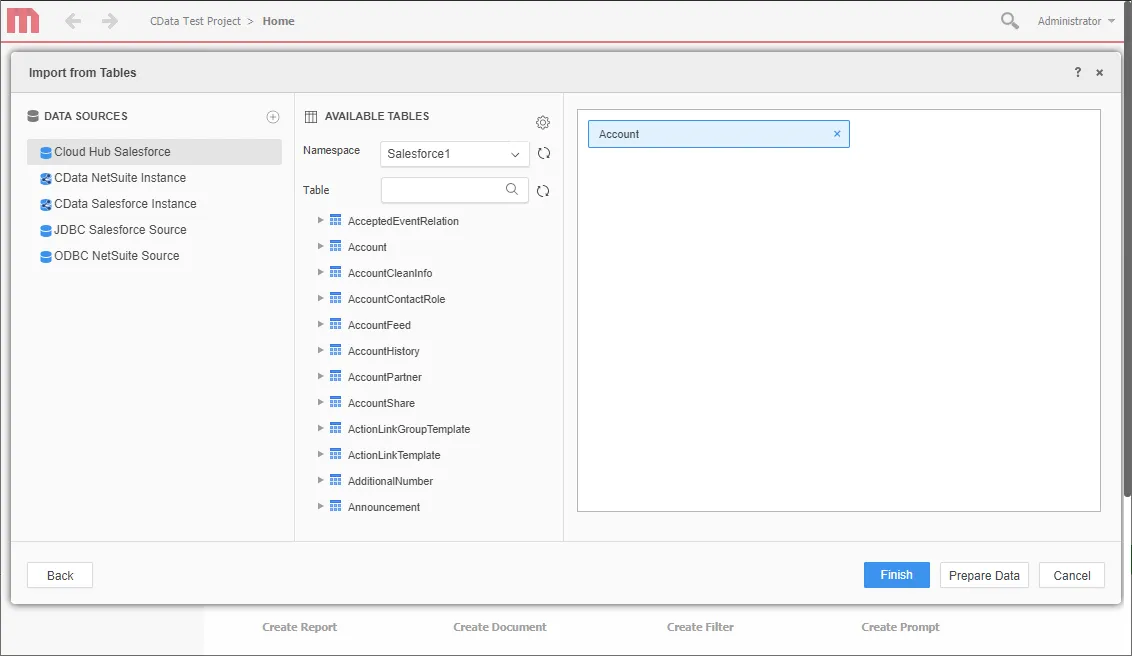 Note: Since we create a live connection, we can insert whole tables and utilize the filtering and aggregation features native to the MicroStrategy products to customize our datasets.
 - Click Finish, choose the option to connect live, save the query, and choose the option to create a new dossier. Live connections are possible and effective, thanks to high-performance data processing native to CData Connect AI.
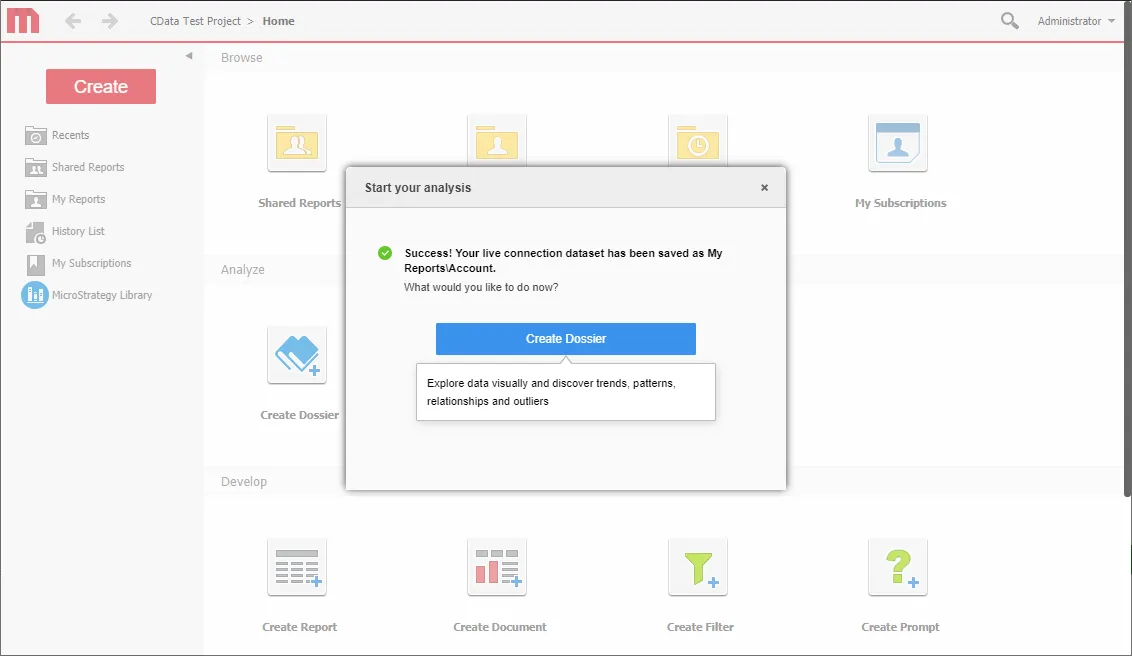
- Choose a visualization, choose fields to display, and apply any filters to create a new visualization of HubDB data. Data types are discovered automatically through dynamic metadata discovery. Where possible, the complex queries generated by the filters and aggregations will be pushed down to HubDB, while any unsupported operations (which can include SQL functions and JOIN operations) will be managed by the CData SQL engine embedded in Connect AI.
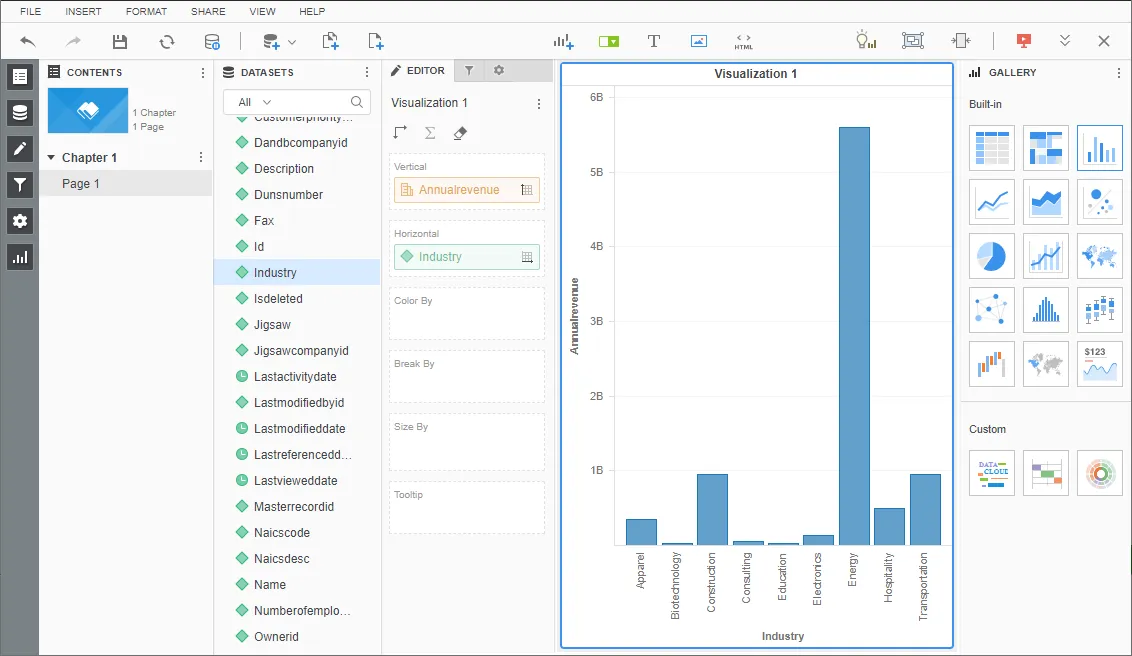
- Once you have finished configuring the dossier, click File -> Save.
Using CData Connect AI with MicroStrategy, you can easily create robust visualizations and reports on HubDB data. For more information on connecting to HubDB (and more than 100 other data sources), visit the Connect AI page. Sign up for a free trial and start working with live HubDB data in MicroStrategy.