








Connecting Pipedream with HubDB Data via CData Connect AI MCP Server

Pipedream is a cloud-based workflow automation platform that allows developers to connect APIs, automate tasks, and build event-driven workflows using serverless functions. When combined with CData Connect AI Remote MCP, Pipedream can interact with HubDB data in real time using natural language, without the need for data replication to a natively supported database.
CData Connect AI offers a dedicated cloud-to-cloud interface for connecting to HubDB data. The CData Connect AI Remote MCP Server enables secure communication between Pipedream and HubDB, making it possible to ask questions and retrieve data from HubDB using Pipedream workflows, all powered by an LLM that intelligently discovers data sources and generates SQL queries on the fly.
This article covers how to build a simple natural language data query workflow in Pipedream to conversationally explore HubDB data. The connectivity principles apply to any Pipedream workflow. With Connect AI, workflows and agents can be built with access to live HubDB data, plus hundreds of other sources.
Prerequisites
- A CData Connect AI account with at least one active connection (e.g., HubDB)
- A Pipedream account
- An OpenAI account with API Key
-
CData Connect AI credentials:
- Email (used as username for Basic Auth)
- Personal Access Token (PAT) generated from the CData Connect AI Settings page
Step 1: Configure HubDB connectivity for Pipedream
Connectivity to HubDB from Pipedream is made possible through CData Connect AI Remote MCP. To interact with HubDB from Pipedream, we start by creating and configuring a HubDB connection in CData Connect AI.
- Log into Connect AI, click Sources, and then click Add Connection
- Select "HubDB" from the Add Connection panel
-
Enter the necessary authentication properties to connect to HubDB.
There are two authentication methods available for connecting to HubDB data source: OAuth Authentication with a public HubSpot application and authentication with a Private application token.
Using a Custom OAuth App
AuthScheme must be set to "OAuth" in all OAuth flows. Be sure to review the Help documentation for the required connection properties for you specific authentication needs (desktop applications, web applications, and headless machines).
Follow the steps below to register an application and obtain the OAuth client credentials:
- Log into your HubSpot app developer account.
- Note that it must be an app developer account. Standard HubSpot accounts cannot create public apps.
- On the developer account home page, click the Apps tab.
- Click Create app.
- On the App info tab, enter and optionally modify values that are displayed to users when they connect. These values include the public application name, application logo, and a description of the application.
- On the Auth tab, supply a callback URL in the "Redirect URLs" box.
- If you're creating a desktop application, set this to a locally accessible URL like http://localhost:33333.
- If you are creating a Web application, set this to a trusted URL where you want users to be redirected to when they authorize your application.
- Click Create App. HubSpot then generates the application, along with its associated credentials.
- On the Auth tab, note the Client ID and Client secret. You will use these later to configure the driver.
Under Scopes, select any scopes you need for your application's intended functionality.
A minimum of the following scopes is required to access tables:
- hubdb
- oauth
- crm.objects.owners.read
- Click Save changes.
- Install the application into a production portal with access to the features that are required by the integration.
- Under "Install URL (OAuth)", click Copy full URL to copy the installation URL for your application.
- Navigate to the copied link in your browser. Select a standard account in which to install the application.
- Click Connect app. You can close the resulting tab.
Using a Private App
To connect using a HubSpot private application token, set the AuthScheme property to "PrivateApp."
You can generate a private application token by following the steps below:
- In your HubDB account, click the settings icon (the gear) in the main navigation bar.
- In the left sidebar menu, navigate to Integrations > Private Apps.
- Click Create private app.
- On the Basic Info tab, configure the details of your application (name, logo, and description).
- On the Scopes tab, select Read or Write for each scope you want your private application to be able to access.
- A minimum of hubdb and crm.objects.owners.read is required to access tables.
- After you are done configuring your application, click Create app in the top right.
- Review the info about your application's access token, click Continue creating, and then Show token.
- Click Copy to copy the private application token.
To connect, set PrivateAppToken to the private application token you retrieved.

- Log into your HubSpot app developer account.
- Click Save & Test
-
Navigate to the Permissions tab in the Add HubDB Connection page and update the User-based permissions.



Add a Personal Access Token
A Personal Access Token (PAT) is used to authenticate the connection to Connect AI from Pipedream. It is best practice to create a separate PAT for each service to maintain granularity of access.
- Click on the Gear icon () at the top right of the Connect AI app to open the settings page.
- On the Settings page, go to the Access Tokens section and click Create PAT.
- Give the PAT a name and click Create.

- The personal access token is only visible at creation, so be sure to copy it and store it securely for future use.
With the connection configured and a PAT generated, we are ready to connect to HubDB from Pipedream.
Step 2: Set up environment variables in Pipedream
Store credentials securely as environment variables in Pipedream.
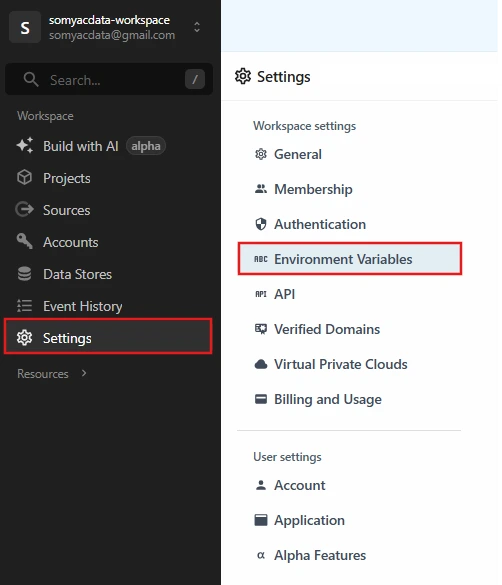
- In Pipedream, go to Settings, then Environment Variables
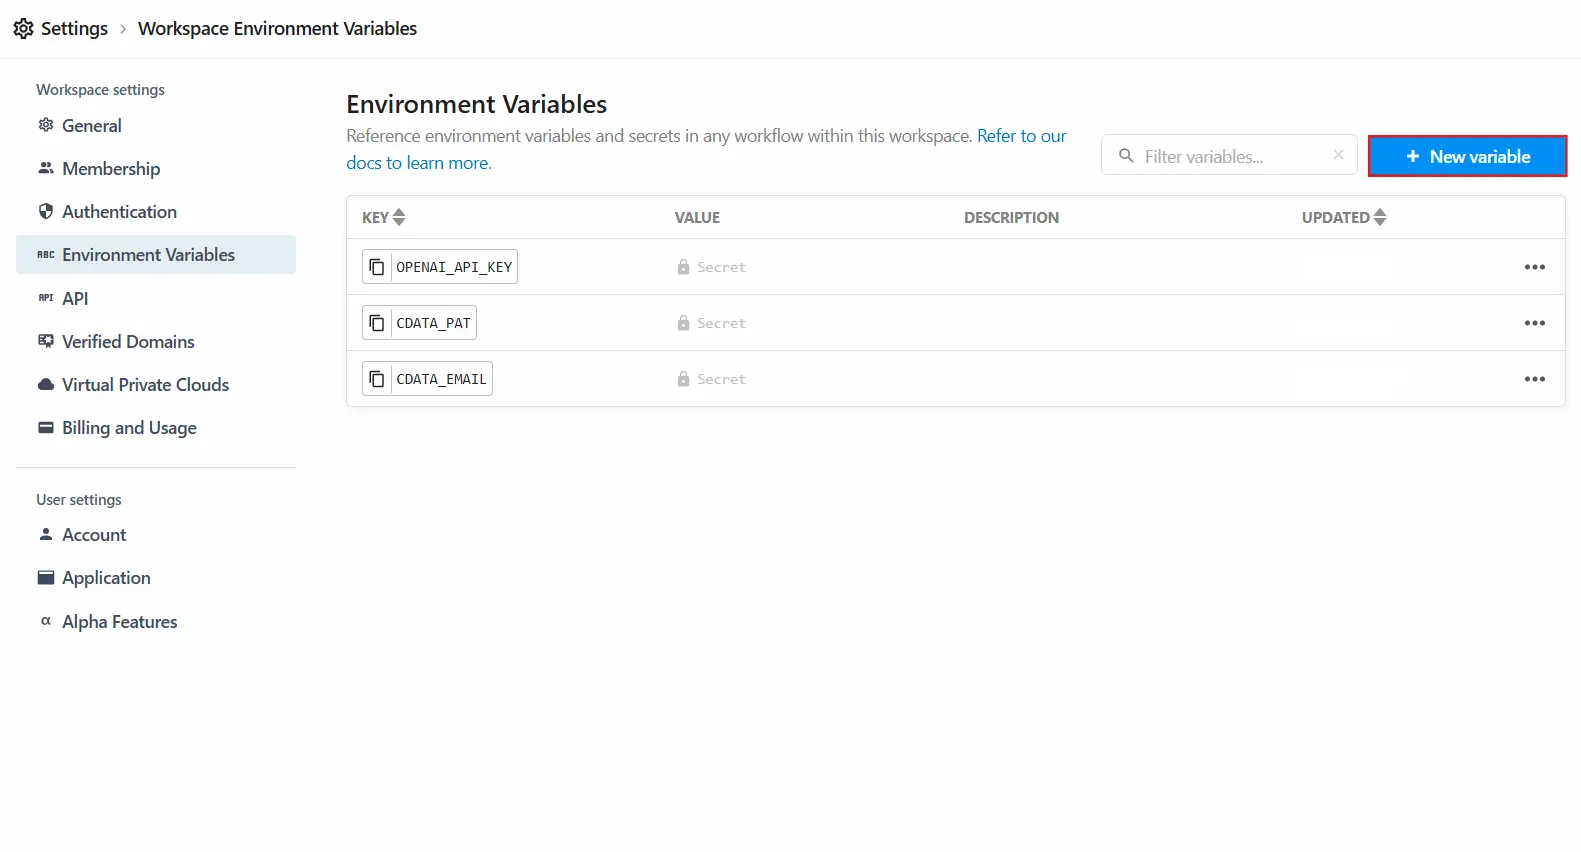
- Click on New Variable and add the following variables:
| Variable name | Value |
|---|---|
| CDATA_EMAIL | CData Connect AI login email |
| CDATA_PAT | CData Personal Access Token |
| OPENAI_API_KEY | OpenAI API Key |
Step 3: Create the Pipedream workflow
3.1 Configure the HTTP trigger
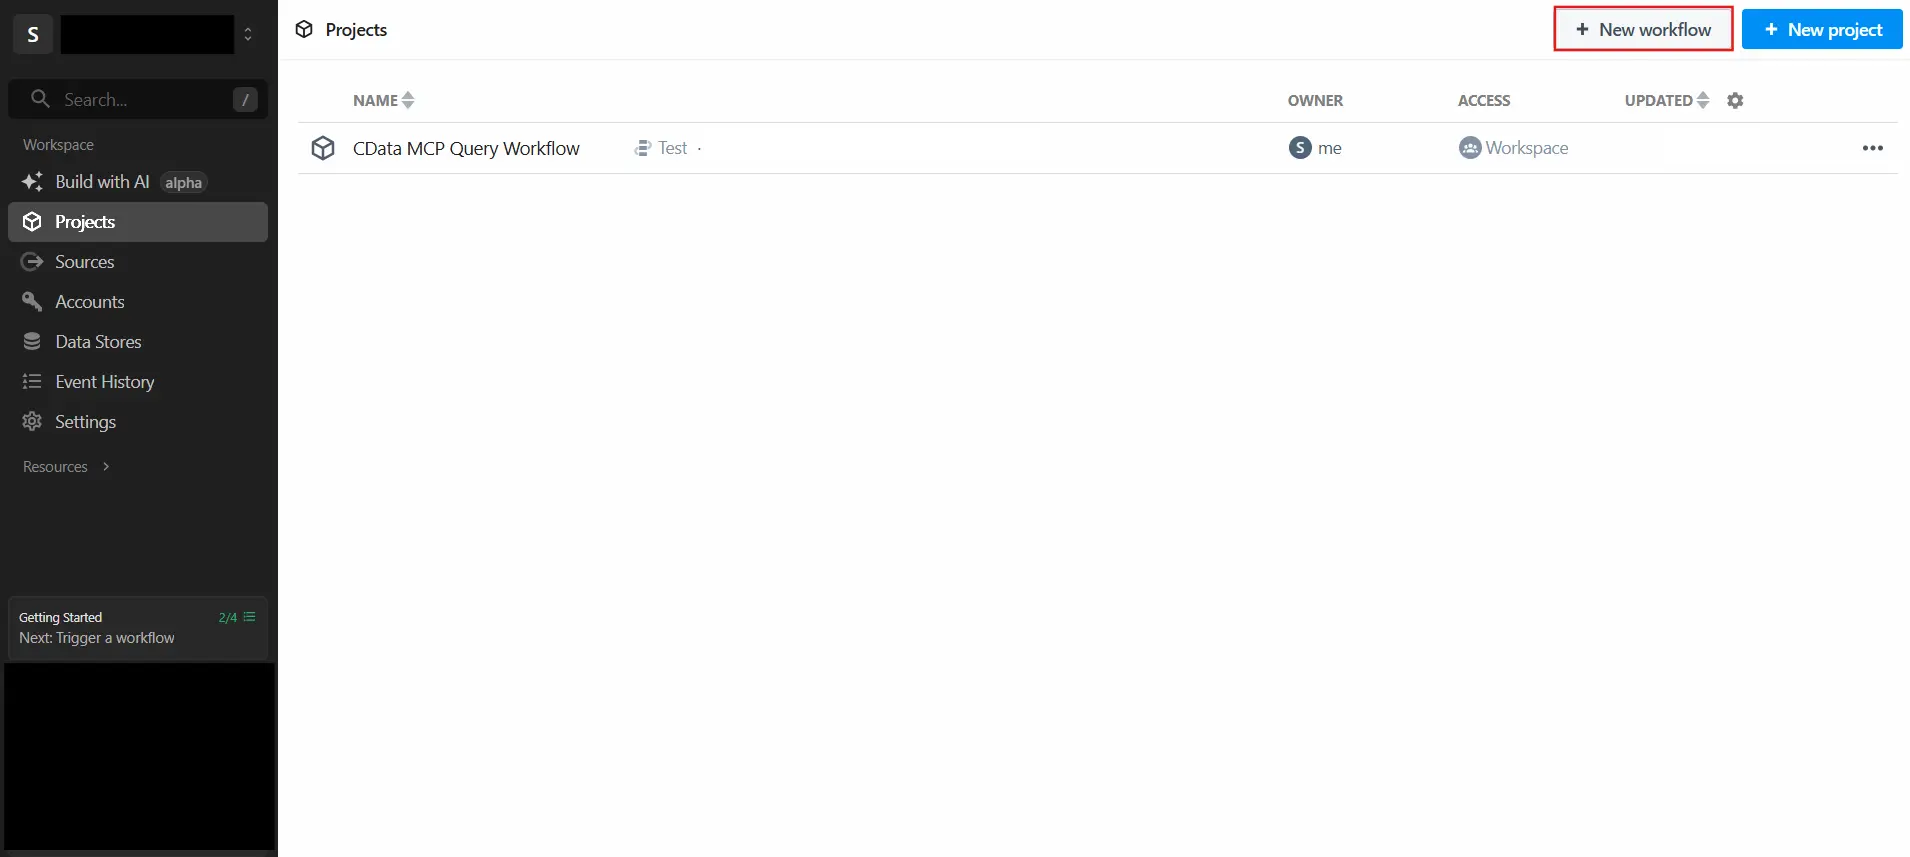
- Create a new workflow in Pipedream
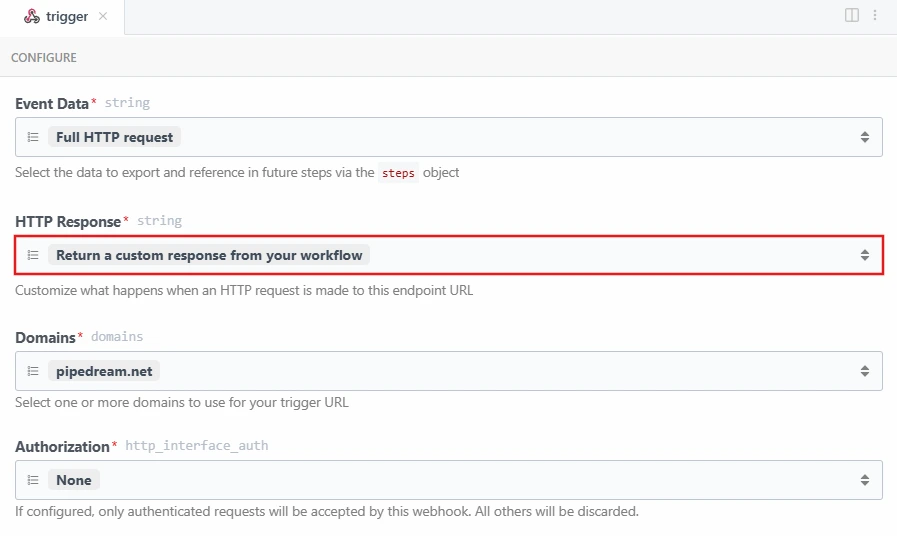
- Select HTTP / Webhook as the trigger
- Set HTTP Response to "Return a custom response from your workflow"
3.2 Add the LLM step
Add a Node.js code step named LLM. This step extracts the natural language query from the incoming request.
Replace the default code in the step with the following:
import OpenAI from "openai";

export default defineComponent({
  async run({ steps }) {
    if (steps.trigger.event.method === "OPTIONS") {
      return { userQuery: null, isOptions: true };
    }

    const body = steps.trigger.event.body;
    const parsed = typeof body === "string" ? JSON.parse(body) : body;
    const userQuery = parsed?.query;

    console.log("USER QUERY:", userQuery);
    if (!userQuery) throw new Error("No query found in request body");

    return { userQuery };
  }
});
3.3 Add the MCP step
Add a Node.js code step named MCP. This step implements the full agentic MCP flow, it automatically discovers all available connections, selects the most relevant one based on the question, discovers the schema and tables dynamically, generates a SQL query using the LLM, and executes it against HubDB data.
The step uses the following CData Connect AI MCP tools in sequence:
| MCP Tool | Purpose |
|---|---|
| getCatalogs | Retrieves all available connections from CData Connect AI |
| getSchemas | Retrieves the database schemas for the selected connection |
| getTables | Retrieves all tables and views for the selected schema |
| queryData | Executes the generated SQL query and returns results |
Replace the default code in the step with the following:
import fetch from "node-fetch";
import OpenAI from "openai";

export default defineComponent({
  async run({ steps }) {
    const email = process.env.CDATA_EMAIL;
    const pat = process.env.CDATA_PAT;
    const credentials = email + ":" + pat;
    const auth = Buffer.from(credentials).toString("base64");
    const llmOutput = steps.LLM;
    const userQuery = llmOutput.return_value.userQuery; // In Pipedream replace with: steps.LLM.$return_value.userQuery
    const MCP_URL = "https://mcp.cloud.cdata.com/mcp";
    const NL = String.fromCharCode(10);
    const CRNL = String.fromCharCode(13) + String.fromCharCode(10);

    const headers = {
      "Content-Type": "application/json",
      "Accept": "application/json, text/event-stream",
      "Authorization": "Basic " + auth
    };

    function parseSSE(raw) {
      try {
        const lines = raw.split(NL);
        for (let i = 0; i < lines.length; i++) {
          const line = lines.at(i);
          const trimmed = line.trim();
          if (trimmed.indexOf("data:") === 0) {
            const jsonStr = trimmed.slice(5).trim();
            if (jsonStr) {
              const json = JSON.parse(jsonStr);
              const result = json && json.result;
              const content = result && result.content;
              if (Array.isArray(content)) {
                return {
                  parsed: content.map(function(c) { return c.text || ""; }).join(NL),
                  isError: (result && result.isError) || false,
                  full: json
                };
              }
            }
          }
        }
      } catch (e) {
        console.log("SSE parse error:", e.message);
      }
      return { parsed: raw, isError: false, full: null };
    }

    function parseCSV(text) {
      let clean = text || "";
      if (clean.charAt(0) === '"' && clean.charAt(clean.length - 1) === '"') {
        clean = clean.slice(1, -1);
      }
      const ESC_CRNL = String.fromCharCode(92) + "r" + String.fromCharCode(92) + "n";
      const ESC_QUOTE = String.fromCharCode(92) + '"';
      const ESC_SLASH = String.fromCharCode(92) + String.fromCharCode(92);
      const SINGLE_SLASH = String.fromCharCode(92);
      clean = clean.split(ESC_CRNL).join(CRNL).split(ESC_QUOTE).join('"').split(ESC_SLASH).join(SINGLE_SLASH);
      const lines = clean.split(CRNL).filter(function(l) { return l.trim(); });
      return lines.slice(1).map(function(l) { return l.split(",").at(0).trim(); }).filter(Boolean);
    }

    async function initSession() {
      const res = await fetch(MCP_URL, {
        method: "POST",
        headers: headers,
        body: JSON.stringify({
          jsonrpc: "2.0",
          id: 1,
          method: "initialize",
          params: {
            protocolVersion: "2024-11-05",
            capabilities: {},
            clientInfo: { name: "pipedream", version: "1.0" }
          }
        })
      });
      return res.headers.get("mcp-session-id");
    }

    async function callMCP(id, method, args, sessionId) {
      const reqHeaders = Object.assign({}, headers);
      if (sessionId) {
        Object.assign(reqHeaders, { "mcp-session-id": sessionId });
      }
      const res = await fetch(MCP_URL, {
        method: "POST",
        headers: reqHeaders,
        body: JSON.stringify({
          jsonrpc: "2.0",
          id: id,
          method: "tools/call",
          params: { name: method, arguments: args }
        })
      });
      const raw = await res.text();
      const result = parseSSE(raw);
      result.raw = raw;
      return result;
    }

    const client = new OpenAI({ apiKey: process.env.OPENAI_API_KEY });
    const completions = client.chat.completions;

    const session1 = await initSession();
    const catalogsResult = await callMCP(2, "getCatalogs", {}, session1);
    const catalogs = parseCSV(catalogsResult.parsed);

    const systemMsg1 = "You are a data routing expert. Pick the MOST relevant connection name from the list. Return ONLY the connection name. Available connections: " + catalogs.join(", ");
    const connectionResponse = await completions.create({
      model: "gpt-4o-mini",
      messages: new Array(
        { role: "system", content: systemMsg1 },
        { role: "user", content: userQuery }
      )
    });
    const connectionName = connectionResponse.choices.at(0).message.content.trim();

    const session2 = await initSession();
    const schemasResult = await callMCP(2, "getSchemas", {
      connectionName: connectionName,
      catalogName: connectionName
    }, session2);
    const schemas = parseCSV(schemasResult.parsed);
    const schemaName = schemas.at(0) || "REST";

    const session3 = await initSession();
    const tablesResult = await callMCP(2, "getTables", {
      connectionName: connectionName,
      catalogName: connectionName,
      schemaName: schemaName
    }, session3);
    const tableNames = parseCSV(tablesResult.parsed);

    const queryLower = userQuery.toLowerCase();
    const isListTablesQuery =
      queryLower.indexOf("list") !== -1 ||
      queryLower.indexOf("what tables") !== -1 ||
      queryLower.indexOf("show tables") !== -1;

    if (isListTablesQuery) {
      return {
        success: true,
        connection: connectionName,
        message: "Available tables in " + connectionName + "." + schemaName,
        tables: tableNames
      };
    }

    const tableList = tableNames.map(function(t) {
      return connectionName + "." + schemaName + "." + t;
    }).join(", ");

    const systemMsg2 = "You are a SQL expert. Generate SQL for CData. Use format: connectionName.schemaName.TableName. Available tables: " + tableList + ". Return ONLY SQL. No markdown. No brackets.";
    const sqlResponse = await completions.create({
      model: "gpt-4o-mini",
      messages: new Array(
        { role: "system", content: systemMsg2 },
        { role: "user", content: userQuery }
      )
    });
    const sql = sqlResponse.choices.at(0).message.content.trim();

    if (!sql) { return { error: "LLM returned empty SQL" }; }

    const session4 = await initSession();
    const queryResult = await callMCP(2, "queryData", {
      query: sql,
      connectionName: connectionName
    }, session4);

    if (queryResult.full) {
      const content = queryResult.full.result && queryResult.full.result.content;
      if (Array.isArray(content)) {
        try {
          const parsed = JSON.parse(content.at(0).text);
          const results = parsed.results && parsed.results.at(0);
          return {
            sql: sql,
            connection: connectionName,
            data: (results && results.rows) || new Array(),
            schema: (results && results.schema) || new Array(),
            success: true
          };
        } catch (e) {
          return { sql: sql, connection: connectionName, raw: content.at(0).text, success: true };
        }
      }
    }
    return { sql: sql, connection: connectionName, raw: queryResult.raw };
  }
});
Note: When pasting into Pipedream, replace llmOutput.return_value.userQuery with steps.LLM.$return_value.userQuery as indicated in the comment on that line.
3.4 Configure the response step
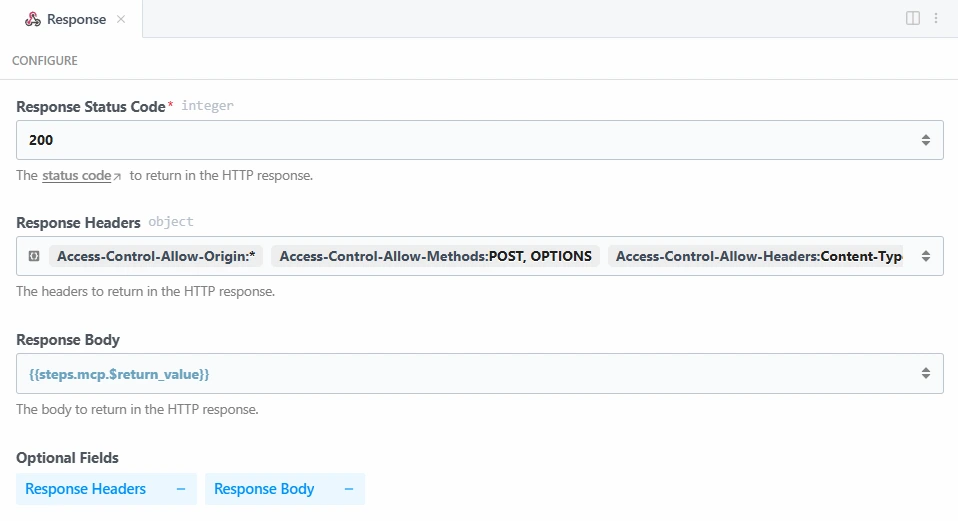
- Add a Return HTTP Response step and name it Response
- Set Response Status Code to 200
- Set Response Body to {{steps.mcp.$return_value}}
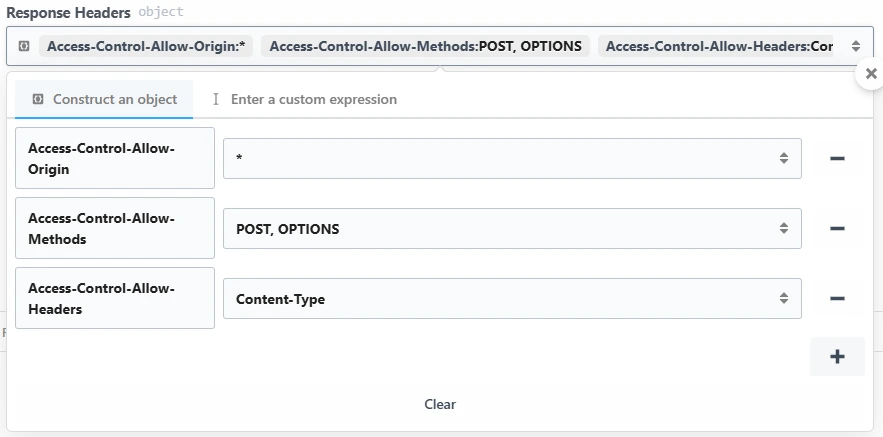
- Add the following Response Headers by clicking Response Headers then :
| Key | Value |
|---|---|
| Access-Control-Allow-Origin | * |
| Access-Control-Allow-Methods | POST, OPTIONS |
| Access-Control-Allow-Headers | Content-Type |
Step 4: Test the flow and interact with HubDB data
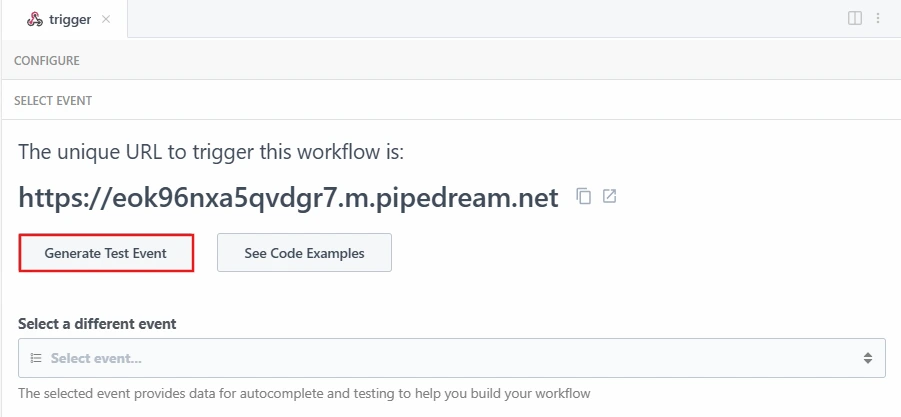
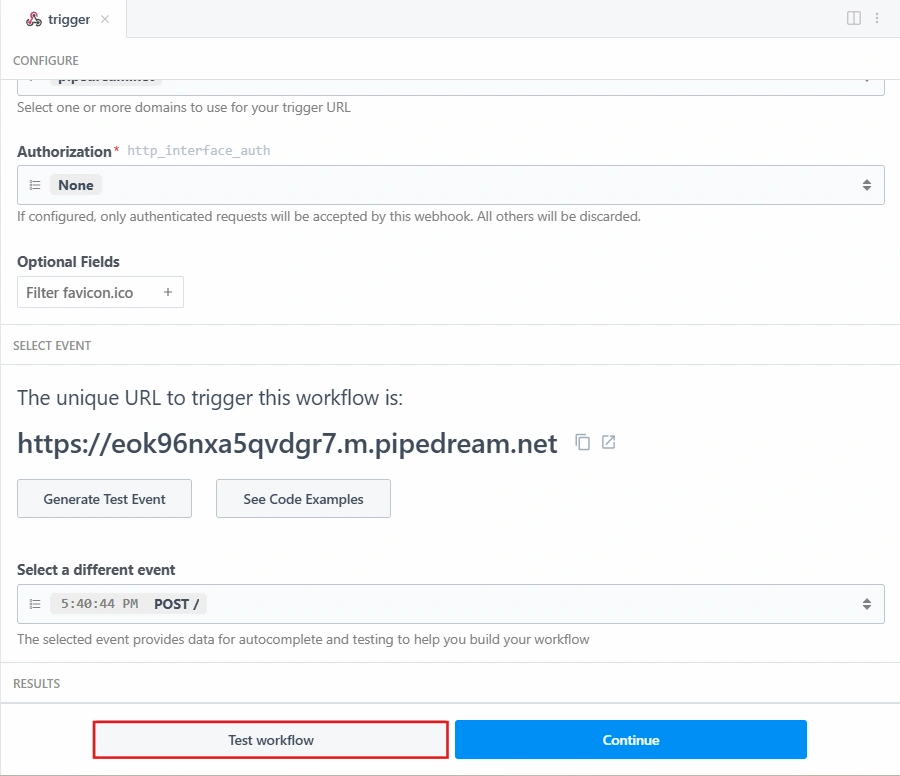
Set a test event on the trigger:
- Click the trigger step in the workflow
- Click Generate Test Event
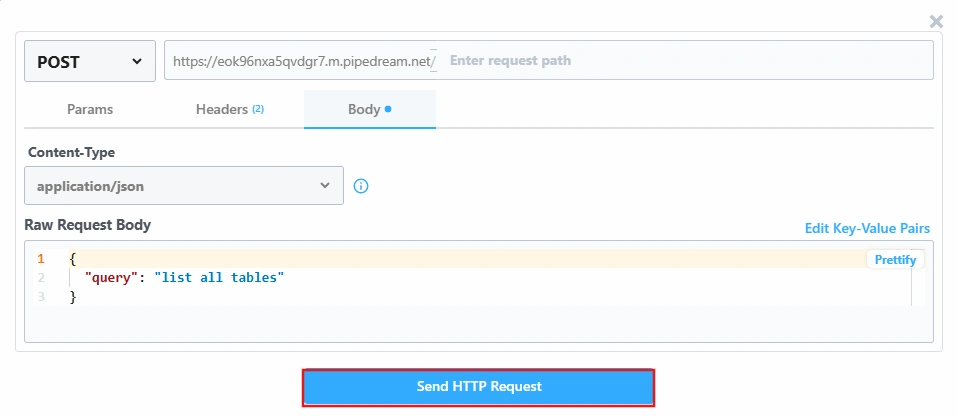
- Edit the event body and set it to:
{
  "query": "list all tables"
}
Run the full workflow
- Click Test workflow at the bottom of the trigger step
- Pipedream will run all steps in sequence using the test event
- Watch each step turn green as it completes successfully
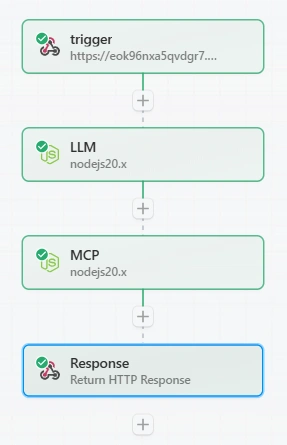
View results in each step
After the test run completes, click each step tab and check the Exports tab to inspect outputs:
| Step | What to look for in exports |
|---|---|
| trigger | body.query - confirms the query was received |
| LLM | userQuery - confirms the query was extracted |
| MCP | connection, sql, data, schema - confirms data was fetched |
| Response | $response.body - the final JSON response |
The Logs tab inside any step shows detailed outputs including the generated SQL, selected connection, and raw MCP responses.
Note: The Response step's Exports tab only shows a summary like { "success": true } with "status 200"; this confirms the workflow ran successfully but does not show the full data.
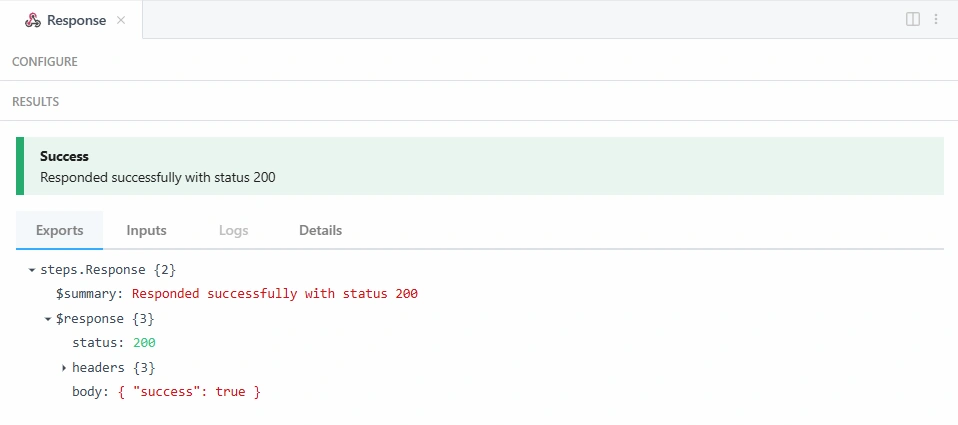
To see the complete output including data rows, SQL, and schema, click the MCP step tab and check the Exports tab. Expand $return_value to see the full response:
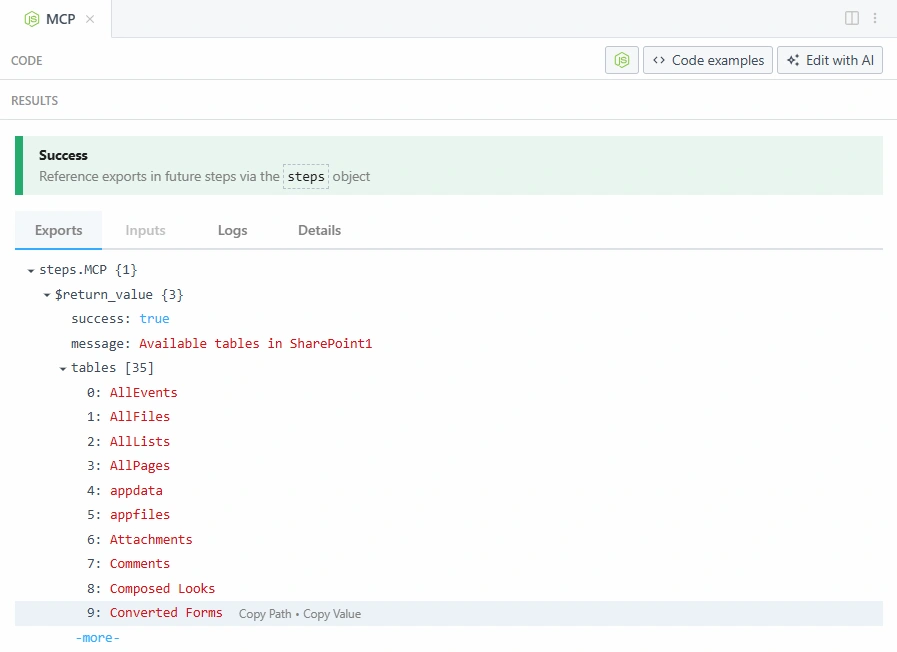
The workflow automatically:
- Discovers all CData connections
- Selects the most relevant connection for the question
- Discovers the schema and tables dynamically
- Generates and executes the appropriate SQL query
- Returns the results
How it works
The integration uses the following CData Connect AI MCP tools in sequence:
| MCP tool | Purpose |
|---|---|
| getCatalogs | Retrieves all available connections from CData Connect AI |
| getSchemas | Retrieves the database schemas for a specific connection |
| getTables | Retrieves all tables and views for a specific schema |
| queryData | Executes SQL queries and returns results |
The OpenAI LLM acts as the intelligent layer between the natural language question and the CData MCP tools, selecting the right connection, discovering the data structure, and generating accurate SQL queries automatically.
Build real-time, data-aware workflows with Pipedream and CData
Pipedream and CData Connect AI together enable intelligent, AI-driven workflows where natural language queries are automatically translated into live data operations across enterprise systems, without ETL pipelines, data sync jobs, or custom integration logic. This streamlined approach delivers stronger governance, lower operational overhead, and faster, more grounded responses from AI-powered workflows.
Start a free trial today to see how CData Connect AI can empower Pipedream with live, secure access to hundreds of external systems.