








Build Pipelines with Live Kafka Data in Google Cloud Data Fusion (via CData Connect AI)

Google Cloud Data Fusion simplifies building and managing data pipelines by offering a visual interface to connect, transform, and move data across various sources and destinations, streamlining data integration processes. When combined with CData Connect AI, it provides access to Kafka data for building and managing ELT/ETL data pipelines. This article explains how to use CData Connect AI to create a live connection to Kafka and how to connect and access live Kafka data from the Cloud Data Fusion platform.
Configure Kafka Connectivity for Cloud Data Fusion
Connectivity to Kafka from Cloud Data Fusion is made possible through CData Connect AI. To work with Kafka data from Cloud Data Fusion, we start by creating and configuring a Kafka connection.
- Log into Connect AI, click Sources, and then click Add Connection
- Select "Kafka" from the Add Connection panel
-
Enter the necessary authentication properties to connect to Kafka.
Set BootstrapServers and the Topic properties to specify the address of your Apache Kafka server, as well as the topic you would like to interact with.
Authorization Mechanisms
- SASL Plain: The User and Password properties should be specified. AuthScheme should be set to 'Plain'.
- SASL SSL: The User and Password properties should be specified. AuthScheme should be set to 'Scram'. UseSSL should be set to true.
- SSL: The SSLCert and SSLCertPassword properties should be specified. UseSSL should be set to true.
- Kerberos: The User and Password properties should be specified. AuthScheme should be set to 'Kerberos'.
You may be required to trust the server certificate. In such cases, specify the TrustStorePath and the TrustStorePassword if necessary.

- Click Save & Test
-
Navigate to the Permissions tab in the Add Kafka Connection page and update the User-based permissions.



Add a Personal Access Token
When connecting to Connect AI through the REST API, the OData API, or the Virtual SQL Server, a Personal Access Token (PAT) is used to authenticate the connection to Connect AI. It is best practice to create a separate PAT for each service to maintain granularity of access.
- Click on the Gear icon () at the top right of the Connect AI app to open the settings page.
- On the Settings page, go to the Access Tokens section and click Create PAT.
-
Give the PAT a name and click Create.

- The personal access token is only visible at creation, so be sure to copy it and store it securely for future use.
With the connection configured and a PAT generated, you are ready to connect to Kafka data from Cloud Data Fusion.
Connecting to Kafka from Cloud Data Fusion
Follow these steps to establish a connection from Cloud Data Fusion to Kafka through the CData Connect AI JDBC driver:
- Download and install the CData Connect AI JDBC driver:
- Open the Integrations page of CData Connect AI.
- Search for and select JDBC.
- Download and run the setup file.
- When the installation is complete, copy the JAR file(cdata.jdbc.connect.jar) from the installation directory (e.g., C:\Program Files\CData\JDBC Driver for CData Connect\lib).
- Log into Cloud Data Fusion.
- Click the green "+" button at the top right to add an entity.
- Under Driver, click Upload.
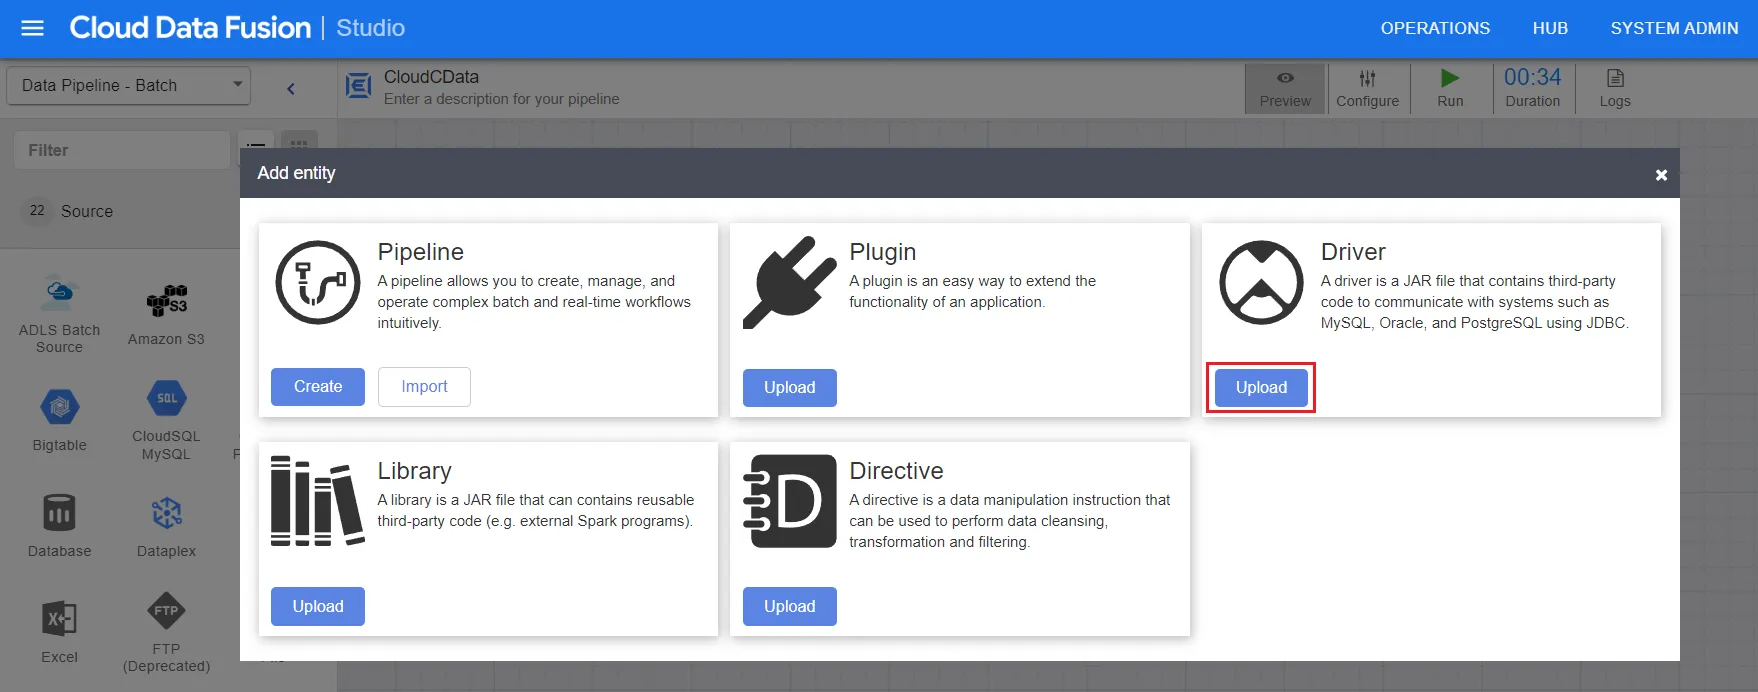
- Now, upload the CData Connect AI JDBC driver (JAR file).
- Enter the driver settings:
- Name: Enter the name of the driver
- Class name: Enter "cdata.jdbc.connect.ConnectDriver"
- Version: Enter the driver version
- Description (optional): Enter a description for the driver
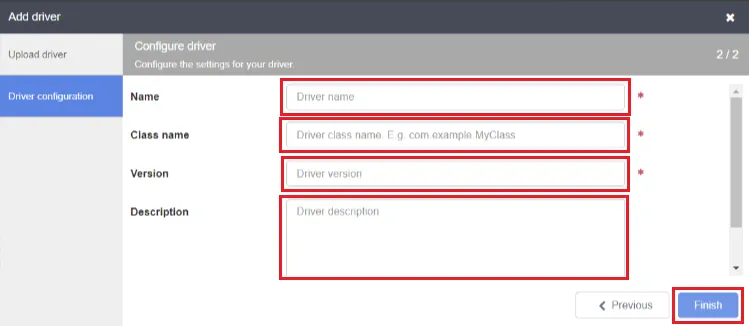
- Click on Finish.
- Enter source configuration settings:
- Label: Helps to identify the connection
- JDBC driver name: Enter the JDBC driver name to identify the driver configured in Step 6.
- Connection string: Enter the JDBC connection string, for example:
jdbc:connect:AuthScheme=Basic;user=username;password=PAT; - User: Enter your CData Connect AI username, displayed in the top-right corner of the CData Connect AI interface. For example, "[email protected]"
- Password: Enter the PAT you generated on the Settings page.
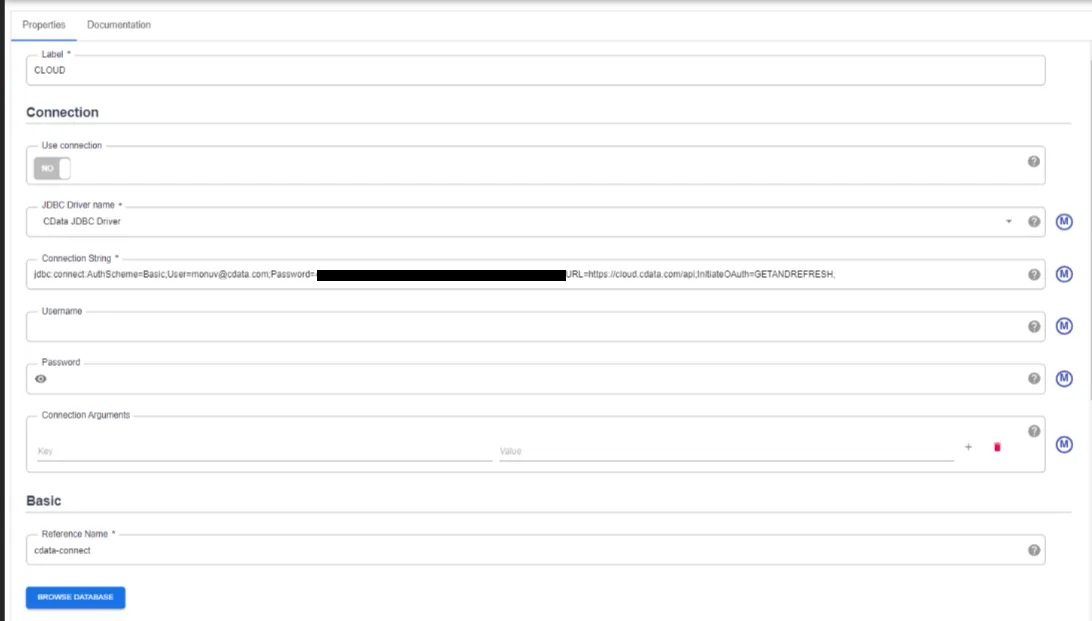
- Click Validate in the top right corner.
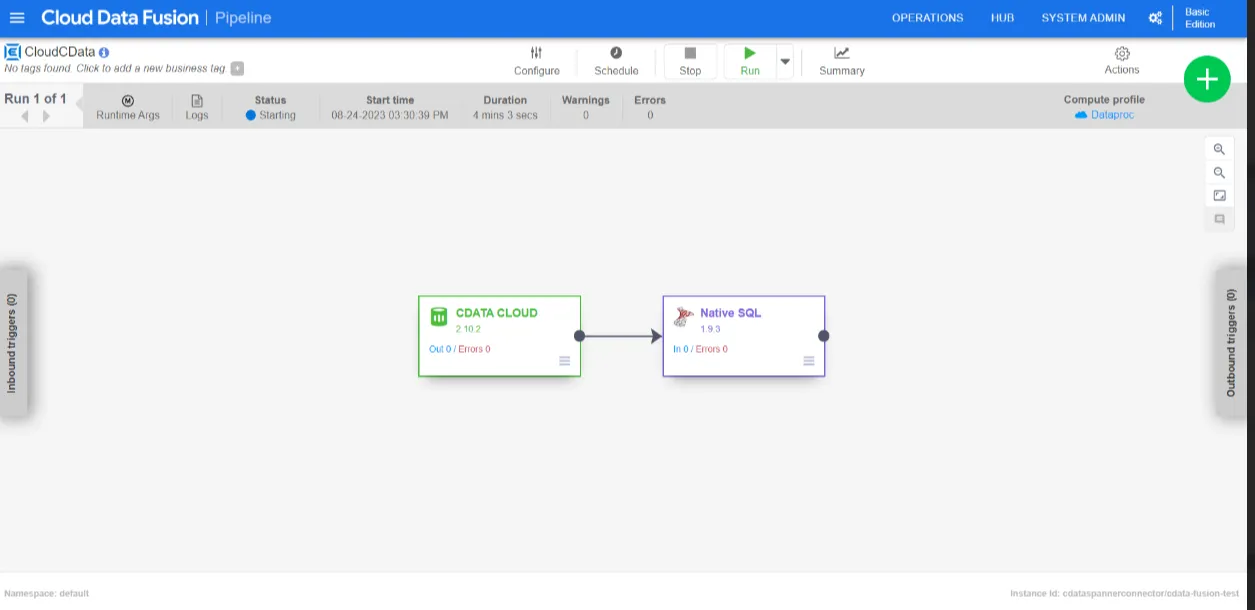
- If the connection is successful, you can manage the pipeline by editing it through the UI.
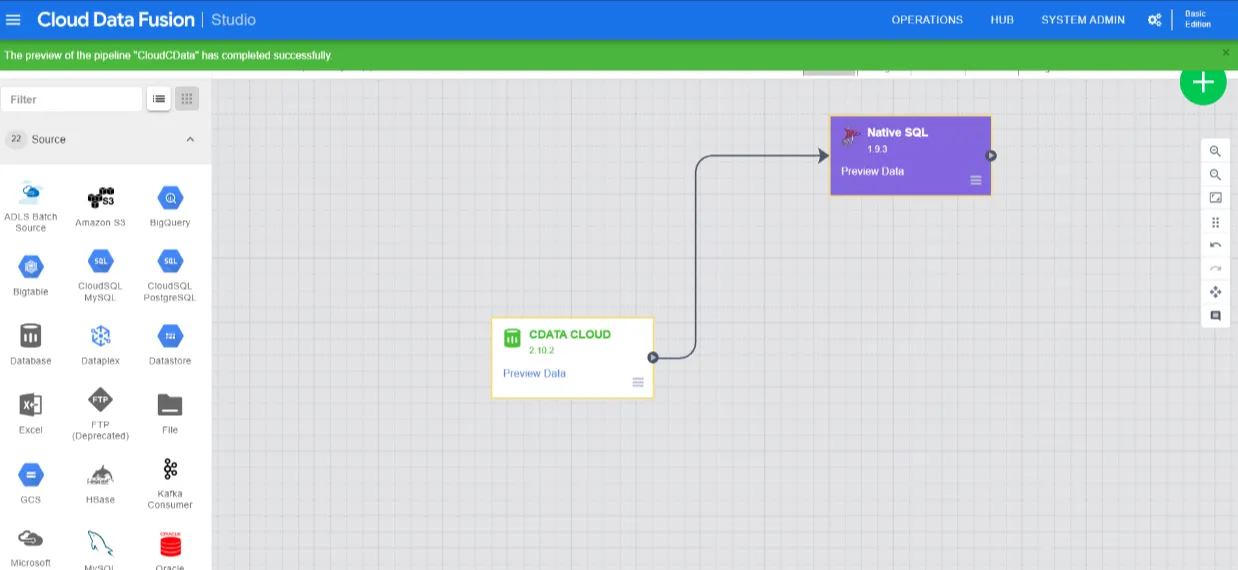
- Run the pipepline created.
Troubleshooting
Please be aware that there is a known issue in Cloud Data Fusion where "int" types from source data are automatically cast as "long".
Live Access to Kafka Data from Cloud Applications
Now you have a direct connection to live Kafka data from from Google Cloud Data Fusion. You can create more connections to ensure a smooth movement of data across various sources and destinations, thereby streamlining data integration processes - all without replicating Kafka data.
To get real-time data access to hundreds of SaaS, Big Data, and NoSQL sources (including Kafka) directly from your cloud applications, explore the CData Connect AI.