








Create PingOne-Connected Business Apps in AppSheet

Google AppSheet is a no-code development platform for application software, enabling users to design mobile, tablet, and web applications. When combined with CData Connect AI, you gain immediate cloud-to-cloud access to PingOne data for business applications. This article outlines the process of connecting to PingOne using Connect AI and constructing a basic app from PingOne data within AppSheet.
CData Connect AI offers a dedicated cloud-to-cloud interface for PingOne, enabling the creation of reports directly from live PingOne data within AppSheet, all without the need for data replication to a native database. When you design applications that interact with data, AppSheet formulates SQL queries to retrieve the required information. With its inherent optimized data processing capabilities, CData Connect AI efficiently channels all supported SQL operations, including filters and JOINs, directly to PingOne. This leverages server-side processing to swiftly deliver the requested PingOne data.
Configure PingOne Connectivity for AppSheet
Connectivity to PingOne from AppSheet is made possible through CData Connect AI. To work with PingOne data from AppSheet, we start by creating and configuring a PingOne connection.
- Log into Connect AI, click Sources, and then click Add Connection
- Select "PingOne" from the Add Connection panel
-
Enter the necessary authentication properties to connect to PingOne.
To connect to PingOne, configure these properties:
- Region: The region where the data for your PingOne organization is being hosted.
- AuthScheme: The type of authentication to use when connecting to PingOne.
- Either WorkerAppEnvironmentId (required when using the default PingOne domain) or AuthorizationServerURL, configured as described below.
Configuring WorkerAppEnvironmentId
WorkerAppEnvironmentId is the ID of the PingOne environment in which your Worker application resides. This parameter is used only when the environment is using the default PingOne domain (auth.pingone). It is configured after you have created the custom OAuth application you will use to authenticate to PingOne, as described in Creating a Custom OAuth Application in the Help documentation.
First, find the value for this property:
- From the home page of your PingOne organization, move to the navigation sidebar and click Environments.
- Find the environment in which you have created your custom OAuth/Worker application (usually Administrators), and click Manage Environment. The environment's home page displays.
- In the environment's home page navigation sidebar, click Applications.
- Find your OAuth or Worker application details in the list.
-
Copy the value in the Environment ID field.
It should look similar to:
WorkerAppEnvironmentId='11e96fc7-aa4d-4a60-8196-9acf91424eca'
Now set WorkerAppEnvironmentId to the value of the Environment ID field.
Configuring AuthorizationServerURL
AuthorizationServerURL is the base URL of the PingOne authorization server for the environment where your application is located. This property is only used when you have set up a custom domain for the environment, as described in the PingOne platform API documentation. See Custom Domains.
Authenticating to PingOne with OAuth
PingOne supports both OAuth and OAuthClient authentication. In addition to performing the configuration steps described above, there are two more steps to complete to support OAuth or OAuthCliet authentication:
- Create and configure a custom OAuth application, as described in Creating a Custom OAuth Application in the Help documentation.
- To ensure that the driver can access the entities in Data Model, confirm that you have configured the correct roles for the admin user/worker application you will be using, as described in Administrator Roles in the Help documentation.
- Set the appropriate properties for the authscheme and authflow of your choice, as described in the following subsections.
OAuth (Authorization Code grant)
Set AuthScheme to OAuth.
Desktop Applications
Get and Refresh the OAuth Access Token
After setting the following, you are ready to connect:
- InitiateOAuth: GETANDREFRESH. To avoid the need to repeat the OAuth exchange and manually setting the OAuthAccessToken each time you connect, use InitiateOAuth.
- OAuthClientId: The Client ID you obtained when you created your custom OAuth application.
- OAuthClientSecret: The Client Secret you obtained when you created your custom OAuth application.
- CallbackURL: The redirect URI you defined when you registered your custom OAuth application. For example: https://localhost:3333
When you connect, the driver opens PingOne's OAuth endpoint in your default browser. Log in and grant permissions to the application. The driver then completes the OAuth process:
- The driver obtains an access token from PingOne and uses it to request data.
- The OAuth values are saved in the location specified in OAuthSettingsLocation, to be persisted across connections.
The driver refreshes the access token automatically when it expires.
For other OAuth methods, including Web Applications, Headless Machines, or Client Credentials Grant, refer to the Help documentation.

- Click Save & Test
-
Navigate to the Permissions tab in the Add PingOne Connection page and update the User-based permissions.



Add a Personal Access Token
When connecting to Connect AI through the REST API, the OData API, or the Virtual SQL Server, a Personal Access Token (PAT) is used to authenticate the connection to Connect AI. It is best practice to create a separate PAT for each service to maintain granularity of access.
- Click on the Gear icon () at the top right of the Connect AI app to open the settings page.
- On the Settings page, go to the Access Tokens section and click Create PAT.
-
Give the PAT a name and click Create.

- The personal access token is only visible at creation, so be sure to copy it and store it securely for future use.
With the connection configured and a PAT generated, you are ready to connect to PingOne data from AppSheet.
Connect to PingOne from AppSheet
The steps below outline connecting to CData Connect AI from AppSheet to create a new PingOne data source.
- Log into AppSheet
- Click "My account" in the menu
- Click the Sources tab and add a new data source
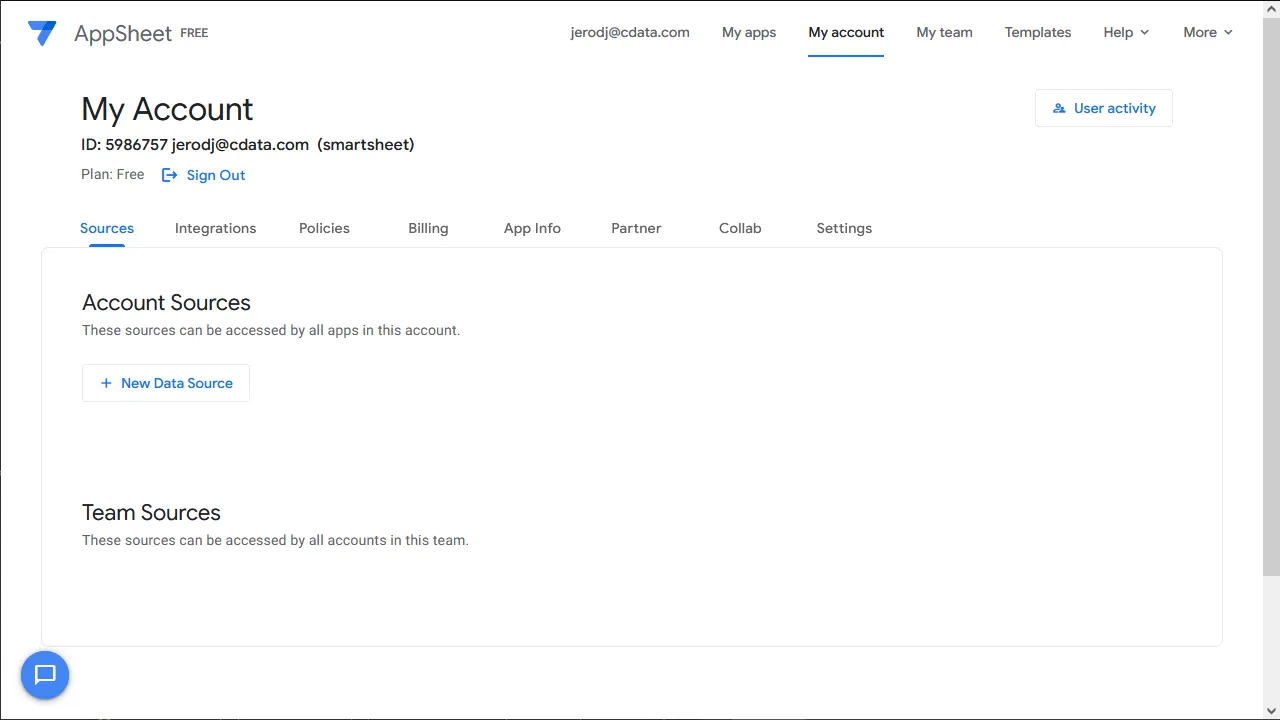
- Select Cloud Database and set the connection information
- Type: Sql Server
- Server: tds.cdata.com,14333
- Database: the PingOne connection, for example, PingOne1
- Username: a Connect AI user, for example, [email protected]
- Password: the PAT for the above Connect AI user
- SSL: Require SSL
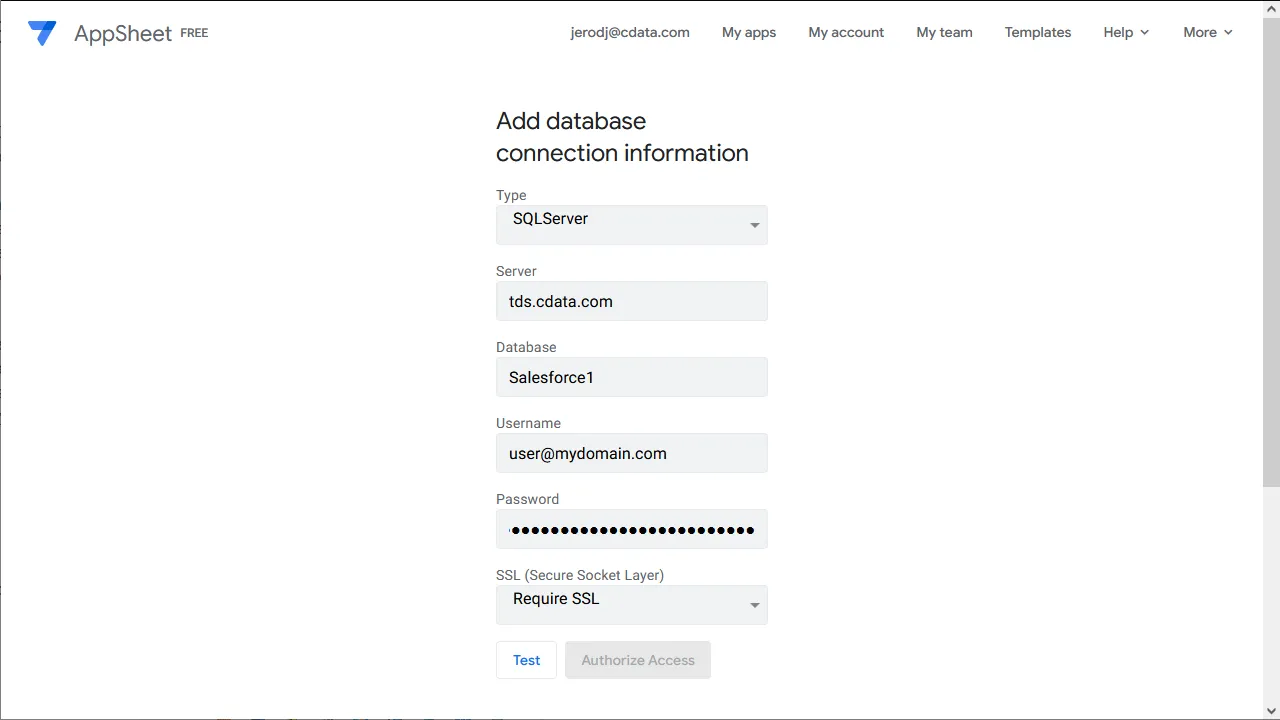
- Click "Test Connection"
- Click "Authorize Access"
Create an App
Once you create the data source for PingOne, you can start building apps on PingOne data. Start by clicking "My apps" in the menu.
- Click to create a new app and select "Start with your own data"
- Name the app and select an appropriate category, based on your data
- Select the newly created data source
- Select the table or view with the data you want
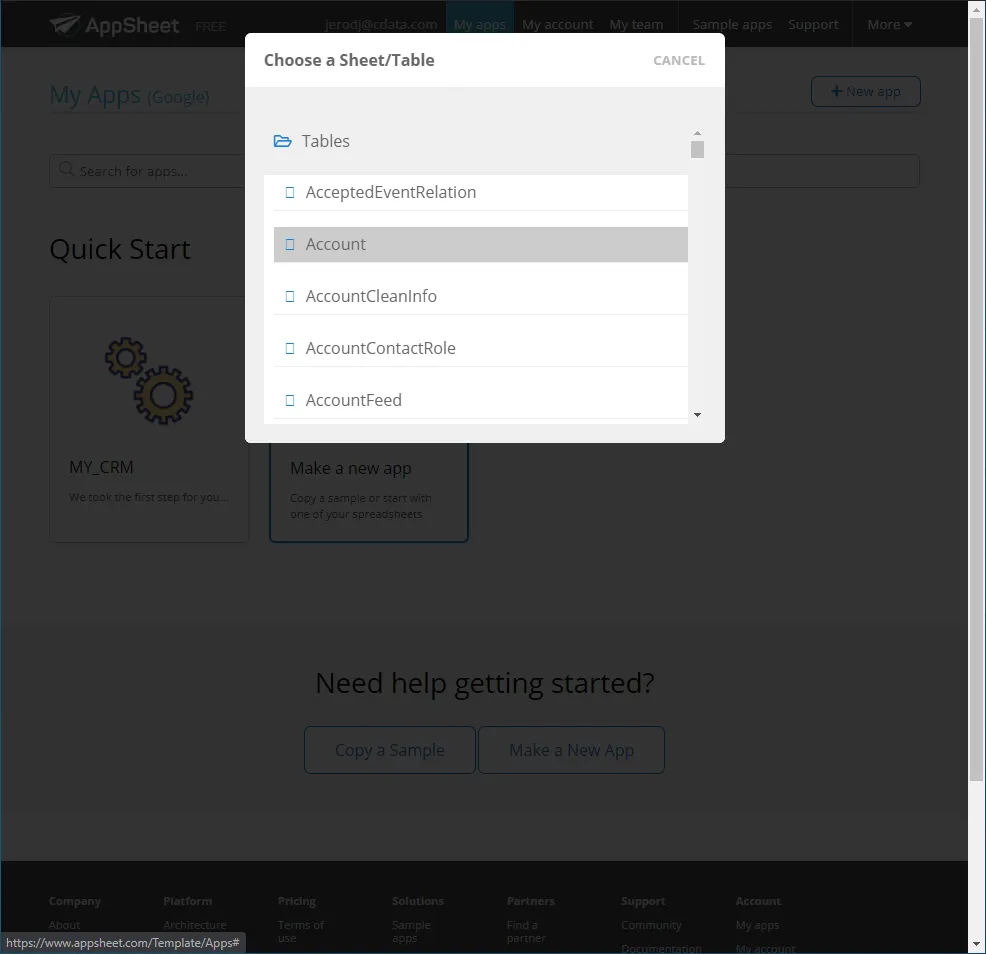
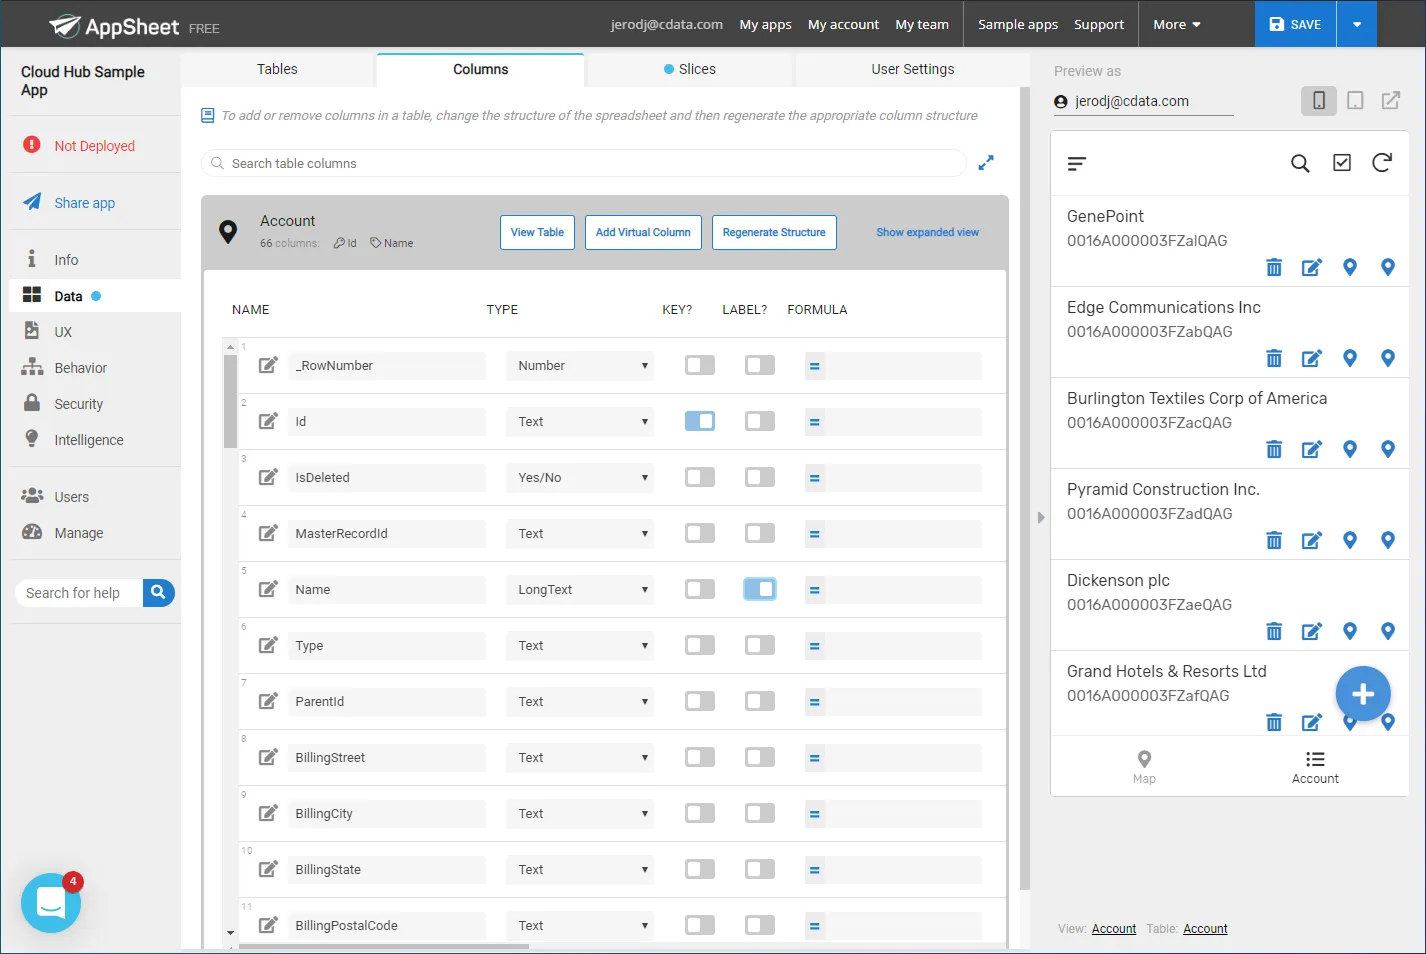
At this point, you can configure the design of your app, selecting which columns from the selected table to display, use as labels, and more. Preview the app in the preview panel and then publish or share it when ready.
To get live data access to hundreds of SaaS, Big Data, and NoSQL sources directly from your cloud applications, try CData Connect AI today!