




Connect to Talkdesk Data in DBeaver

NOTE: The Legacy ODBC driver was removed in DBeaver Community Edition 23.1. As an alternative, you can use a CData JDBC Driver (learn how here: How to Connect DBeaver to Talkdesk via JDBC). If you need to use ODBC Drivers, refer to the DBeaver Documentation.
The CData ODBC Driver for Talkdesk enables access to live data from Talkdesk under the ODBC standard, allowing you work with Talkdesk data in a wide variety of BI, reporting, and ETL tools and directly, using familiar SQL queries. This article shows how to manage Talkdesk data with visual tools in DBeaver like the query browser.
The CData ODBC drivers offer unmatched performance for interacting with live Talkdesk data in DBeaver due to optimized data processing built into the driver. When you issue complex SQL queries from DBeaver to Talkdesk, the driver pushes supported SQL operations, like filters and aggregations, directly to Talkdesk and utilizes the embedded SQL engine to process unsupported operations (often SQL functions and JOIN operations) client-side. With built-in dynamic metadata querying, you can manage and analyze Talkdesk data.
Connect to Talkdesk
If you have not already done so, provide values for the required connection properties in the data source name (DSN). You can configure the DSN using the Microsoft ODBC Data Source Administrator. This is also the last step of the driver installation. See the "Getting Started" chapter in the Help documentation for a guide to using the Microsoft ODBC Data Source Administrator to create and configure a DSN.
Talkdesk uses the OAuth 2.0 Client Credentials grant. There is no browser-based authorization step and no callback URL.
Set the following connection properties:
- AccountName: The name of your Talkdesk account.
- Region: The region where your Talkdesk instance is deployed. Supported values are US (default), EU, CA, AU, UK, and FedRamp.
- OAuthClientId: The Client Id assigned when you registered your custom OAuth application.
- OAuthClientSecret: The Client Secret assigned to your custom OAuth application.
Creating a Custom OAuth Application
- Log in to your Talkdesk account and select OAuth Clients from the navigation menu.
- Click Create OAuth Client and give the client a descriptive name.
- Set Grant Type to Client Credentials.
- Click Add scopes and select the scopes for the data you want to access.
- Click Create and copy the Client Id and Client Secret.
When you connect, the driver automatically requests an access token from Talkdesk, caches it, and refreshes it when it expires. Make sure the scopes selected for the application match the views you plan to query, or the token request can fail.
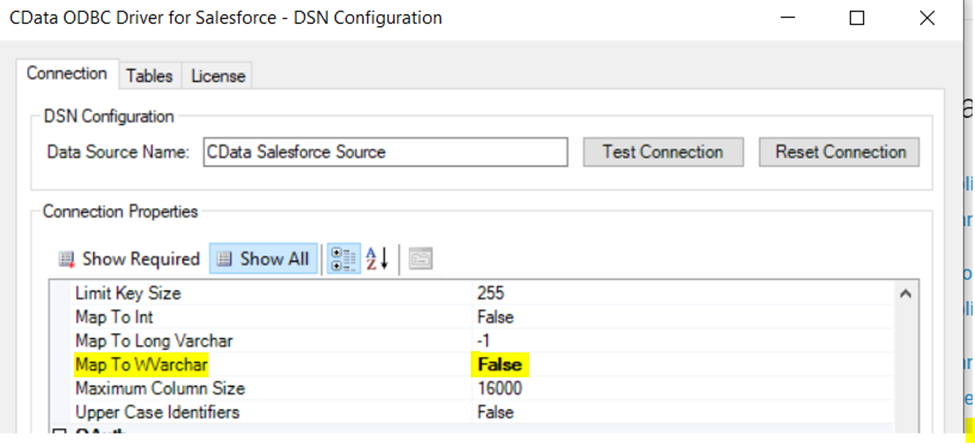
Finally, set the "Map To WVarchar connection property to False in the DSN Configuration window for the driver. This configuration will allow string types to be mapped to SQL_VARCHAR and prevent SQL_WVARCHAR types from being displayed as NULL.
Connecting to the Talkdesk ODBC Data Source in DBeaver
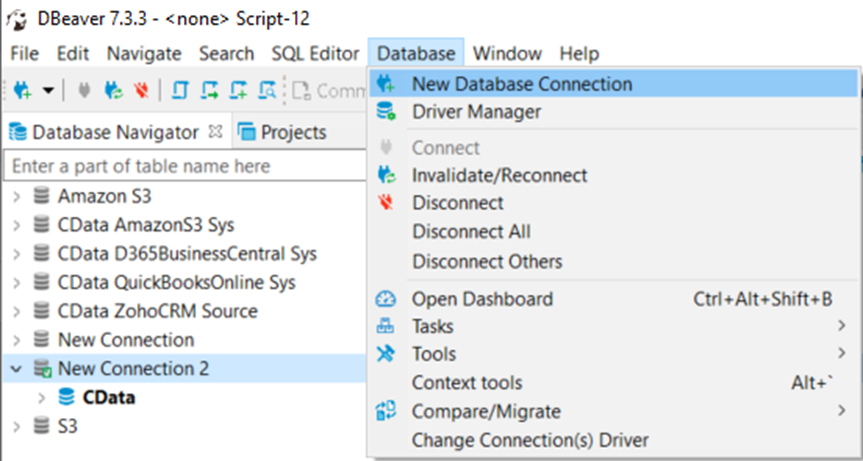
- Open the DBeaver application and in the Database menu, select the New Database Connection option.
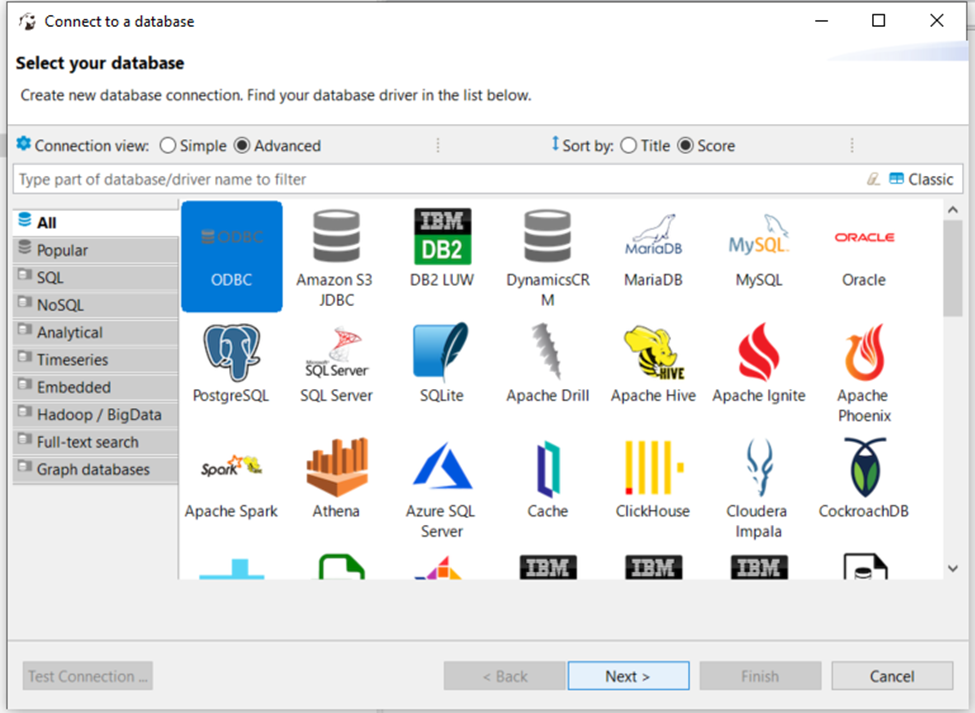
- In the 'Connect to a database' window, select ODBC and click Next.
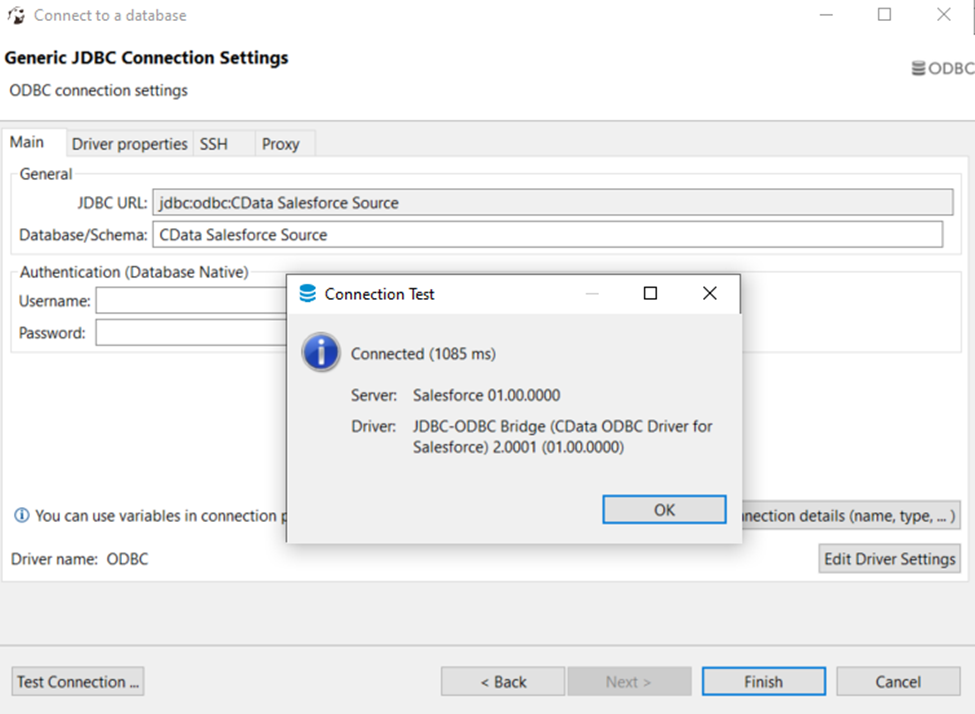
- In the Database/Schema field, enter the DSN name (CData Talkdesk Source by default). It will be automatically added to the JDBC URL as well.
- Click the Test Connection button. You should receive a 'Connected' message after DBeaver has detected the DSN, along with details about the driver if the connection is successful.
Query Talkdesk Data
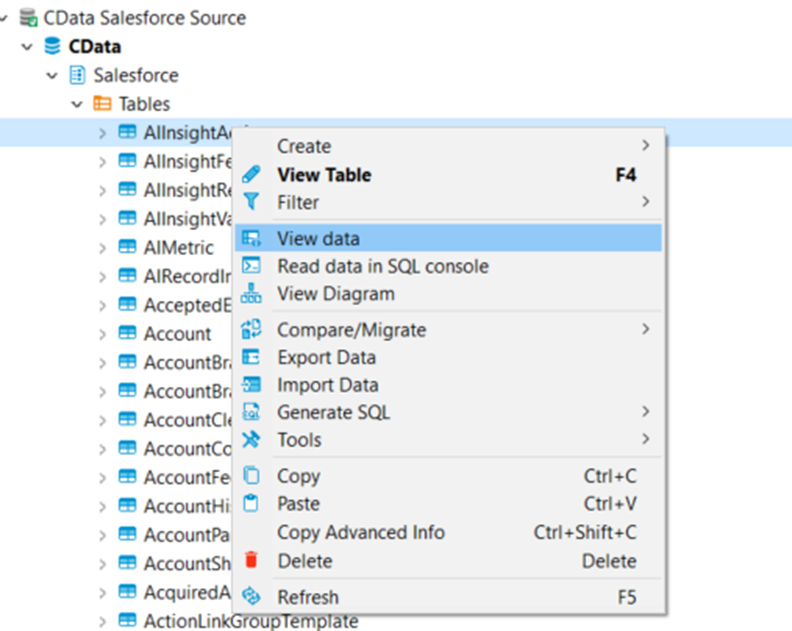
You can now query information from the tables exposed by the data source connection. You can expand the database structure in order to view all the tables. You can retrieve the table's data by right-clicking on a table name and selecting View data. The data will then be available in the Data tab.
Free Trial & More Information
At this point, you have connected to live Talkdesk data from DBeaver. For more information, visit the CData ODBC Driver page. Download a free, 30-day trial and start working live Talkdesk data DBeaver today.
Ready to get started?
Download a free trial of the Talkdesk ODBC Driver to get started:
Download NowLearn more:
 Talkdesk ODBC Driver
The Talkdesk ODBC Driver is a powerful tool that allows you to connect with live data from Talkdesk, directly from any applications that support ODBC connectivity.
Access Talkdesk data like you would a database - read Talkdesk Accounts, Attributes, BillingAccounts, Callbacks, Campaigns, Cases, Contacts, GuardianUsers, Invoices, Products, Subscriptions, Teams, Users, Wallets, etc. through a standard ODBC Driver interface.