








How to Connect to Live Typeform Data in Mistral AI Workflows and Agents (via CData Connect AI)

Mistral AI is a frontier AI company that builds enterprise-grade open-source and commercial large language models (LLMs). With Mistral, you can train, fine-tune, and deploy agents anywhere – on premises, in the cloud, or at the edge – while retaining full control of your data. Its agent-ready platform enables multilingual and multimodal AI that can search, create, code, automate, and collaborate securely, with support for memory and extended context handling.
CData Connect AI provides a secure cloud-to-cloud interface for easily integrating hundreds of enterprise data sources with Mistral AI. Through CData Connect AI, Mistral AI agents can query, analyze, and act on live Typeform data in real time, without replication. Connect AI manages authentication, security, and query optimization so you can focus on building intelligent workflows, while Mistral handles reasoning and natural language interaction.
In this guide, we will use Mistral AI's Le Chat, Mistral's customizable conversational chatbot, along with CData Connect AI to connect to live Typeform data. You will be able to interact with your live Typeform data directly in Mistral AI workflows – running queries and automating tasks securely.
The setup takes just a few minutes, and once connected, you will have your own chatbot agent intelligently conversing with your live Typeform data.
Let's begin.
Prerequisites
- A Mistral AI account – Sign up or log in here.
- A CData Connect AI account – Sign up or log in here.
- An active Typeform account with valid credentials.
Overview
Here is a quick overview of the steps we will follow:
- Connect: Add a connection to Typeform in CData Connect AI using your credentials.
- Configure: Create a custom MCP connection in Mistral AI Le Chat that points to your Typeform connection in CData Connect AI.
- Query: Interact with live Typeform data in Mistral AI workflows – running queries and taking actions using natural language.
Step 1: Configure Typeform Connectivity for Mistral
Connectivity to Typeform from Mistral AI is made possible through CData Connect AI Remote MCP. To interact with Typeform data from Mistral, we start by creating and configuring a Typeform connection in CData Connect AI.
- Log into Connect AI, click Sources, and then click Add Connection.
- Select "Typeform" from the Add Connection panel.
-
Enter the necessary authentication properties to connect to Typeform.
Start by setting the Profile connection property to the location of the TypeForm Profile on disk (e.g. C:\profiles\TypeForm.apip). Next, set the ProfileSettings connection property to the connection string for TypeForm (see below).
TypeForm API Profile Settings
Authentication to TypeForm uses the OAuth standard.
To authenticate to TypeForm, you must first register and configure an OAuth application with TypeForm here: https://admin.typeform.com/account#/section/tokens. Your app will be assigned a client ID and a client secret which can be set in the connection string. More information on setting up an OAuth application can be found at https://developer.typeform.com/get-started/.
Note that there are several different use scenarios which all require different redirect URIs:
- CData Desktop Applications: CData desktop applications (Sync, API Server, ArcESB) accept OAuth tokens at /src/oauthCallback.rst. The host and port is the same as the default port used by the application. For example, if you use http://localhost:8019/ to access CData Sync then the redirect URI will be http://localhost:8019/src/oauthCallback.rst.
- CData Cloud Applications: CData cloud applications are similar to their desktop counterparts. If you access Connect AI at https://1.2.3.4/ then you should use the redirect https://1.2.3.4/src/oauthCallback.rst.
- Desktop Application: When using a desktop application, the URI https://localhost:33333 is recommended.
- Web Application: When developing a web application using the driver, use your own URI here such as https://my-website.com/oauth.
After setting the following connection properties, you are ready to connect:
- AuthScheme: Set this to OAuth.
- InitiateOAuth: Set this to GETANDREFRESH. You can use InitiateOAuth to manage the process to obtain the OAuthAccessToken.
- OAuthClientId: Set this to the Client Id that is specified in your app settings.
- OAuthClientSecret: Set this to Client Secret that is specified in your app settings.
- CallbackURL: Set this to the Redirect URI you specified in your app settings.

- Click Save & Test.
-
Navigate to the Permissions tab in the Add Typeform Connection page
and update the user-based permissions.



Add a Personal Access Token
A Personal Access Token (PAT) is used to authenticate the connection to Connect AI from Mistral AI. It is a best practice to create a separate PAT for each service to maintain fine-grained access control.
- Click on the gear icon () at the top right of the Connect AI app to open the Settings page.
- On the Settings page, go to the Access Tokens section and click Create PAT.
-
Give the PAT a descriptive name and click Create.

- Note: The PAT is only visible at creation, so be sure to copy and store it securely for future use.
With the connection configured and a PAT generated, you are ready to connect to Typeform data from Mistral AI workflows.
Step 2: Configure the MCP Connector in Mistral Le Chat
With your Typeform connection and PAT created in CData Connect AI, the next step is to configure a custom MCP connector inside Mistral Le Chat.
-
Log into Le Chat.

-
From the left-hand menu, click on Intelligence, then select Connectors. Click Add Connector.
-
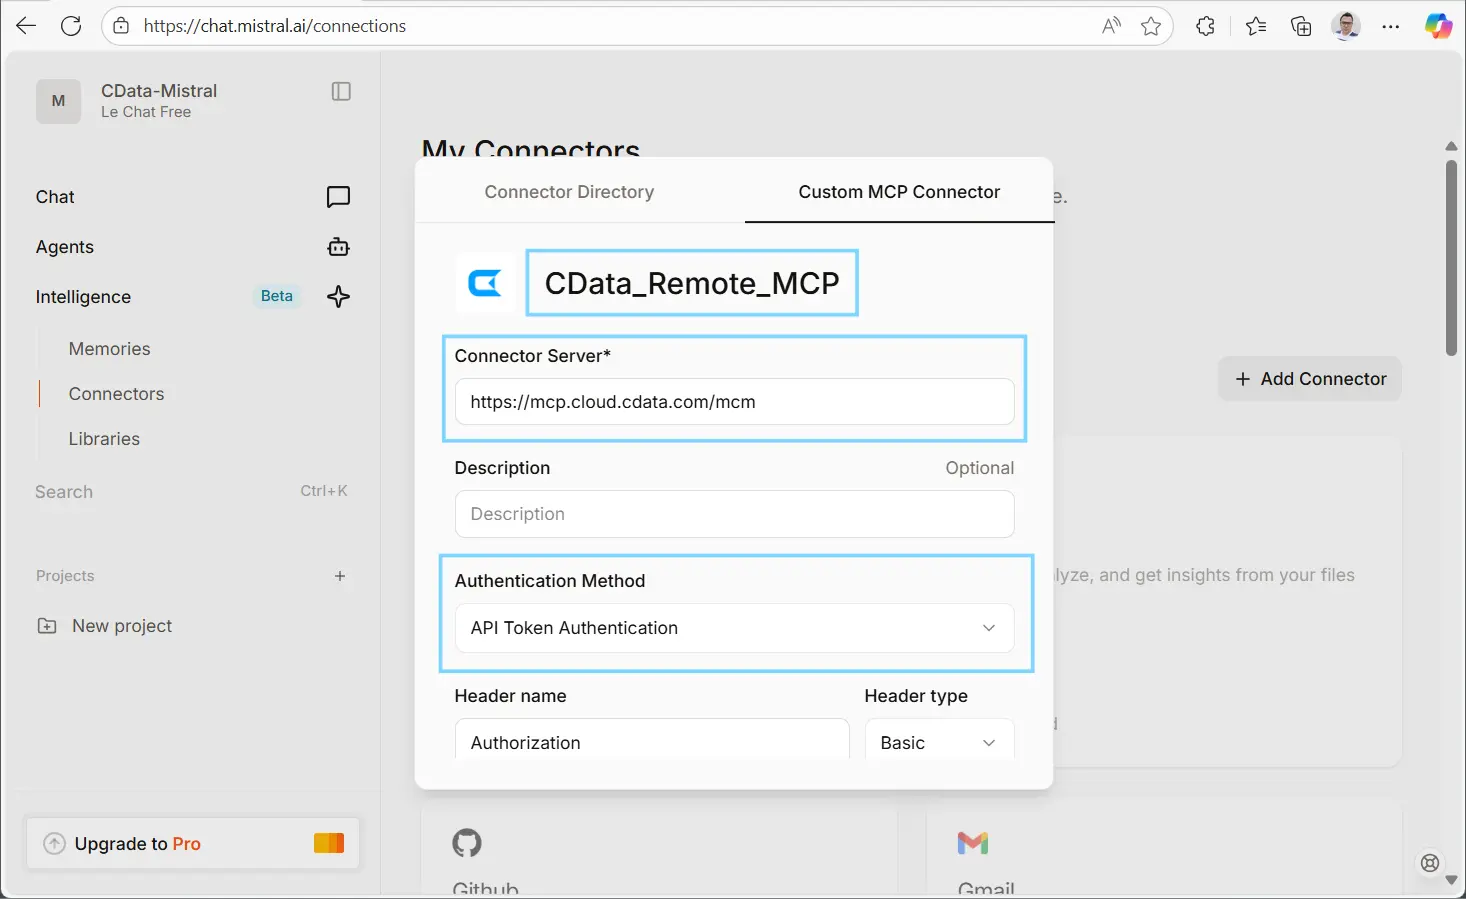
In the dialog, select Custom MCP Connector and enter the following details:
- Connector Name: For example, CData_Remote_MCP.
- Connector Server: https://mcp.cloud.cdata.com/mcp (found in the "Connect Data to AI" ribbon in Connect AI).
- Authentication Method: API Token Authentication.
- Header Name: Authorization.
- Header Value: Basic [email protected]:YourPAT (replace "[email protected]" with your CData Connect AI email and "YourPAT" with the PAT created earlier in above format).
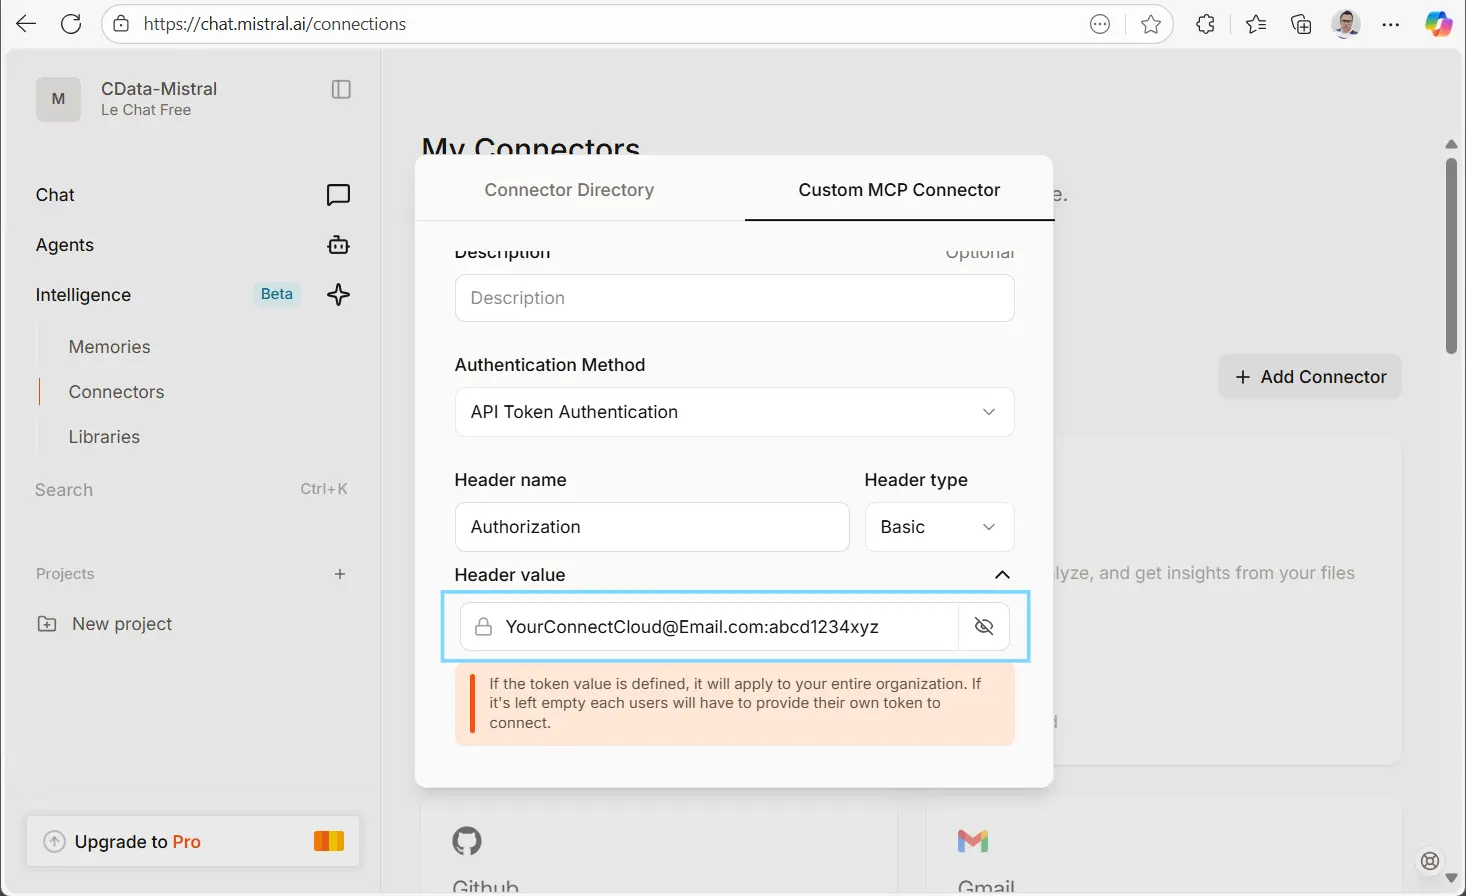
- Click Connect to establish the connection.
-
Scroll down to the bottom of the Connections section to confirm that your
MCP connection is successfully established.
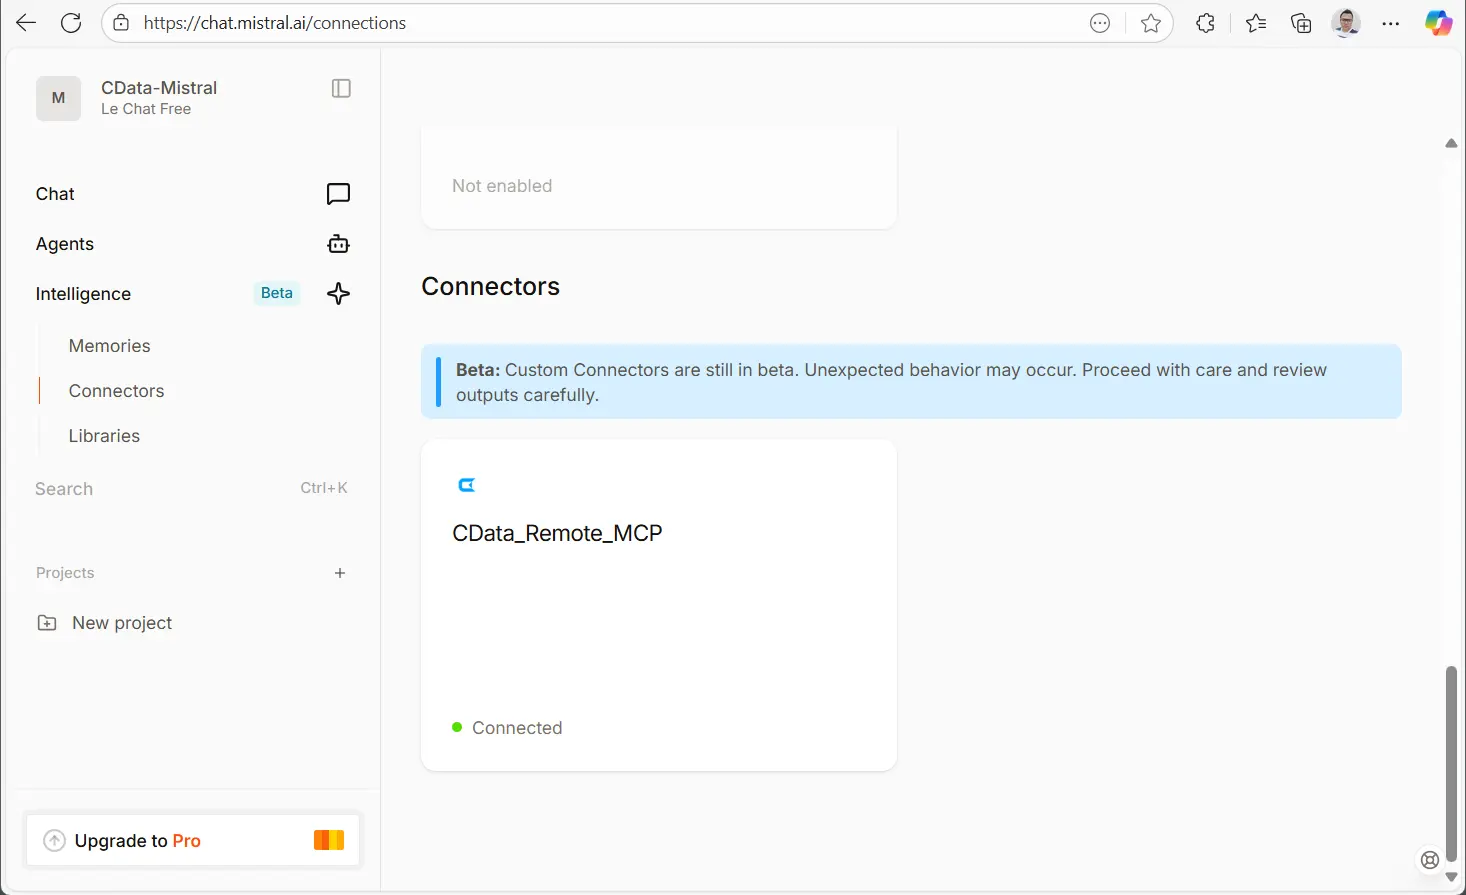
This step ensures that Mistral Le Chat can securely route queries through the CData Remote MCP Server to your live Typeform data.
Step 3: Query Live Typeform Data from Mistral AI
Now that your MCP connector is configured in Le Chat, you can begin querying live Typeform data directly in your conversations.
- In Le Chat, click on Chats in the left menu to start a new chat.
-
Enable your MCP connector by clicking the Enable Tools button.

-
Run a discovery query such as Get Catalogs or Get Tables to see
the available data sources and schemas connected through CData Connect AI.

-
Test the connection by running a simple query. For example:
"Compare the win rate of Opportunities across different industries."


And that's it! You can now interact with live Typeform data conversationally inside Mistral Le Chat.
Build Complex AI Agents with CData Connect AI
With the integration complete, you can go beyond simple queries and build complex, multi-step AI agents. These agents can combine reasoning from Mistral AI with secure, real-time access to your enterprise data through CData Connect AI, enabling workflows such as sales forecasting, support triage, customer trend analysis, and more.
Try CData Connect AI for free today and use the full power of Mistral AI agents with secure, live access to your enterprise data.