




Use the CData ODBC Driver for UKG Pro WFM in MicroStrategy Desktop

MicroStrategy is an analytics and mobility platform that enables data-driven innovation. When paired with the CData ODBC Driver for UKG Pro WFM, you gain database-like access to live UKG Pro WFM data from MicroStrategy, expanding your reporting and analytics capabilities. In this article, we walk through adding UKG Pro WFM as a data source in MicroStrategy Desktop and creating a simple visualization of UKG Pro WFM data.
The CData ODBC Driver offers unmatched performance for interacting with live UKG Pro WFM data in MicroStrategy due to optimized data processing built into the driver. When you issue complex SQL queries from MicroStrategy to UKG Pro WFM, the driver pushes supported SQL operations, like filters and aggregations, directly to UKG Pro WFM and utilizes the embedded SQL Engine to process unsupported operations (often SQL functions and JOIN operations) client-side. With built-in dynamic metadata querying, you can visualize and analyze UKG Pro WFM data using native MicroStrategy data types.
Connect to UKG Pro WFM as an ODBC Data Source
Information for connecting to UKG Pro WFM follows, along with different instructions for configuring a DSN in Windows and Linux environments.
Start by setting the Profile connection property to the location of the UKGProWFM Profile on disk (e.g. C:\profiles\UKGProWFM.apip). Next, set the ProfileSettings connection property to the connection string for UKGProWFM (see below).
UKGProWFM API Profile Settings
UKG Pro Workforce Management uses OAuth 2.0 with the Resource Owner Password Credentials grant (grant_type=password) to authorize access to the API. Unlike most OAuth-based profiles, this does not use a browser redirect/authorization-code step: the driver exchanges your UKG Pro WFM username, password, client ID, and client secret directly for an access token.
Set the following connection properties to authenticate:
- AuthScheme: Set this to OAuthPassword.
- Host: Set this to the hostname of your UKG Pro Workforce Management datacenter/tenant (for example, yourcompany.mykronos.com). Do not include the protocol (https://) or a trailing slash.
- OAuthClientId: Set this to the client ID issued for your UKG Pro Workforce Management OAuth application.
- OAuthClientSecret: Set this to the client secret issued for your UKG Pro Workforce Management OAuth application.
- User: Set this to your UKG Pro Workforce Management username.
- Password: Set this to your UKG Pro Workforce Management password.
Access tokens are obtained from https://{Host}/api/authentication/access_token. Refresh tokens issued by UKG Pro Workforce Management expire after 7 days; if a refresh attempt fails because the refresh token itself has expired, the driver must re-authenticate with your User/Password credentials to obtain a new access token.
When you configure the DSN, you may also want to set the Max Rows connection property. This will limit the number of rows returned, which is especially helpful for improving performance when designing reports and visualizations.
Windows
If you have not already, first specify connection properties in an ODBC DSN (data source name). This is the last step of the driver installation. You can use the Microsoft ODBC Data Source Administrator to create and configure ODBC DSNs.
Linux
If you are installing the CData ODBC Driver for UKG Pro WFM in a Linux environment, the driver installation predefines a system DSN. You can modify the DSN by editing the system data sources file (/etc/odbc.ini) and defining the required connection properties.
/etc/odbc.ini
[CData API Sys]
Driver = CData ODBC Driver for UKG Pro WFM
Description = My Description
Profile = C:\profiles\UKGProWFM.apip
AuthScheme = OAuthPassword
ProfileSettings = 'Host = yourcompany.mykronos.com
User = your_username
Password = your_password
'
OAuthClientId = your_client_id
OAuthClientSecret = your_client_secret
For specific information on using these configuration files, please refer to the help documentation (installed and found online).
Connect to and Visualize UKG Pro WFM Data using MicroStrategy Desktop
In addition to connecting UKG Pro WFM in MicroStrategy enterprise products, you can connect to UKG Pro WFM in MicroStrategy Desktop. Follow the steps below to add UKG Pro WFM data as a dataset and create visualizations and reports of UKG Pro WFM data.
- Open MicroStrategy Desktop and create a new dossier.
- In the datasets panel, click New Data, select Databases, and select Type a Query as the Import Option.
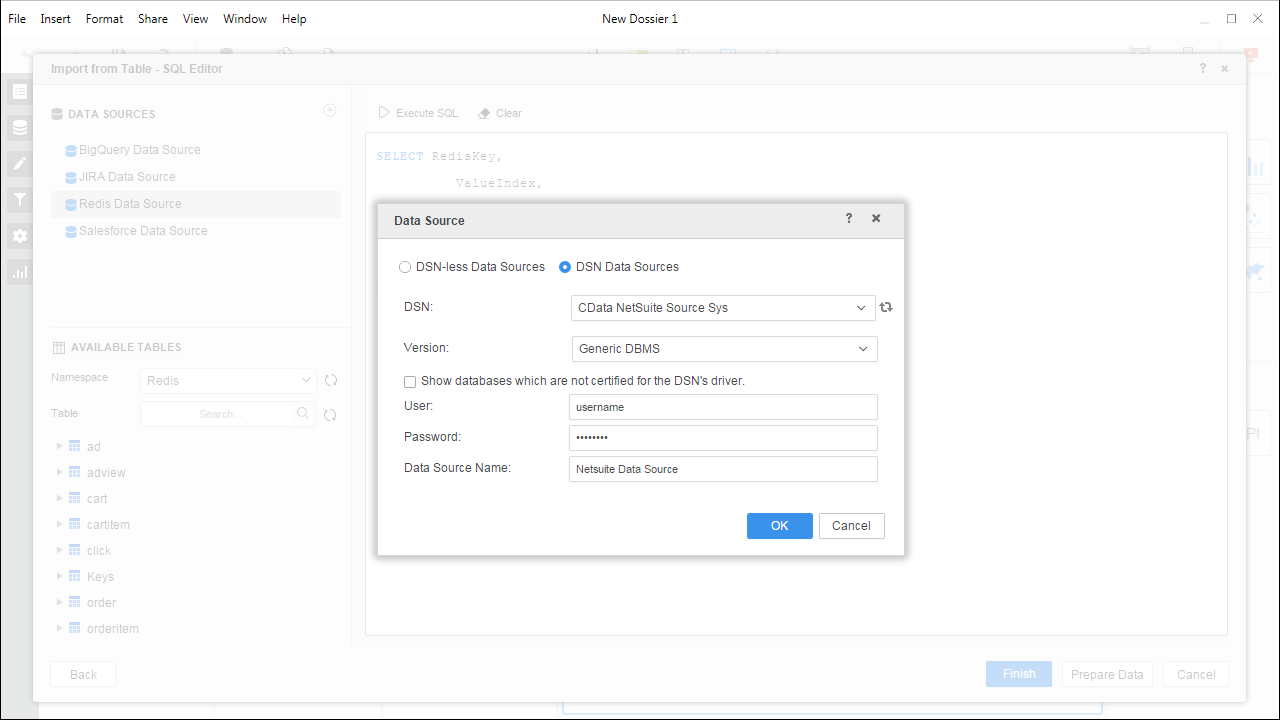
- Add a new data source and choose DSN data sources.
- Choose the DSN you previously configured (likely CData API Sys) and select Generic DBMS in the Version menu.
- Set the User and Password properties for the DSN (or use placeholder values) and name the data source.
- Select the new database instance to view the tables. You may need to manually click the search icon in the Available Tables section to see the tables.
- Create a SQL query for the UKG Pro WFM data (see below) and click Execute SQL to test the query.
SELECT * FROM Employees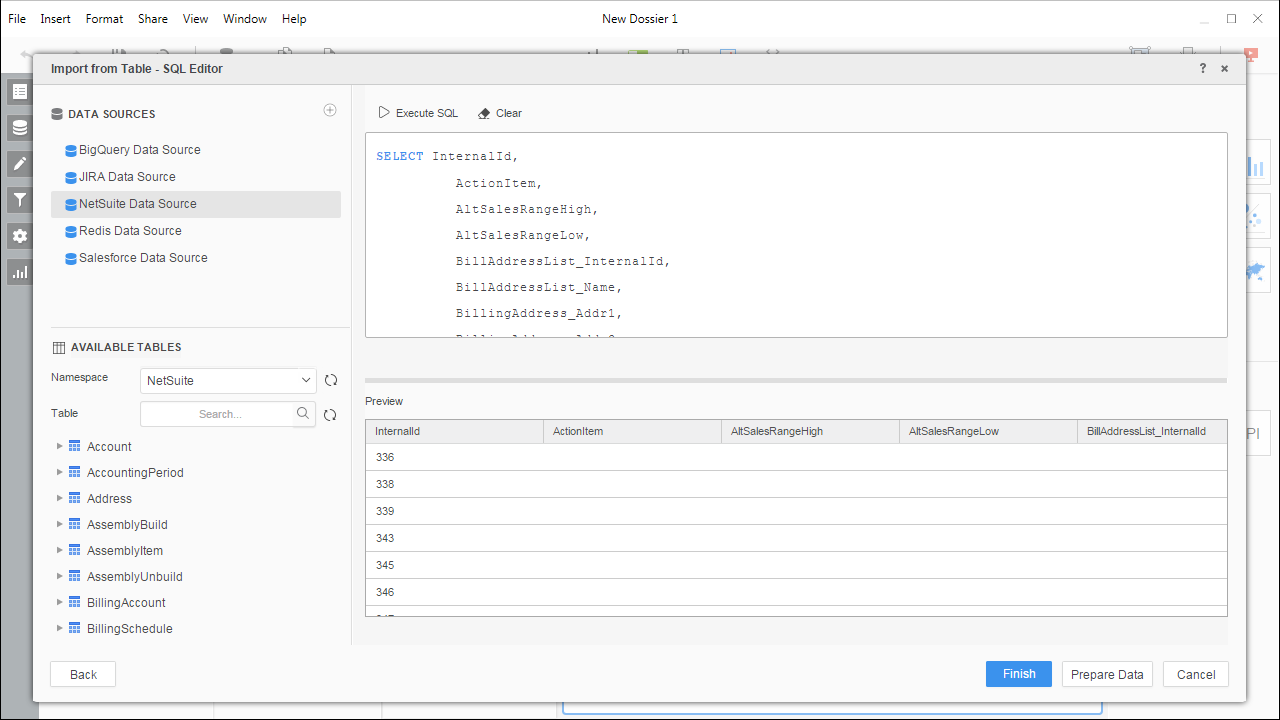 NOTE: Since we create a live connection, we can execute a SELECT * query and utilize the filtering and aggregation features native to the MicroStrategy products.
 - Click Finish and choose to connect live.
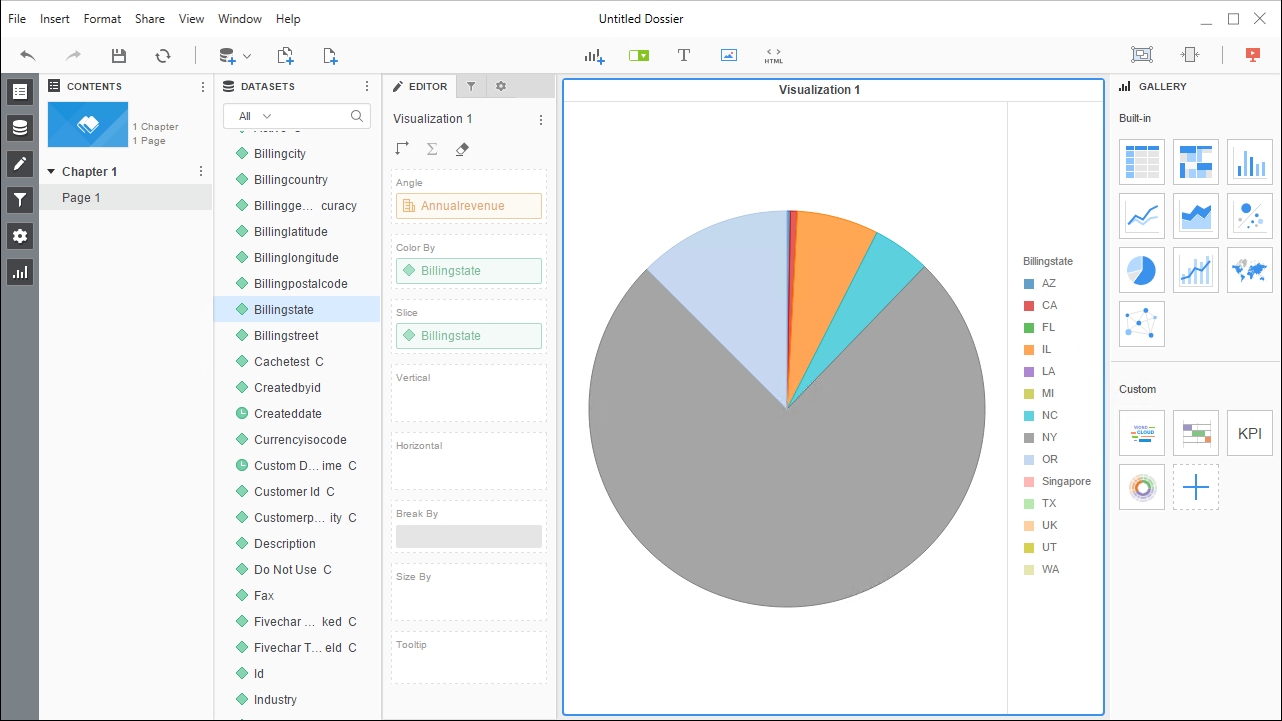
- Choose a visualization, choose fields to display (data types are discovered automatically through dynamic metadata discovery) and apply any filters to create a new visualization of UKG Pro WFM data. Where possible, the complex queries generated by the filters and aggregations will be pushed down to UKG Pro WFM, while any unsupported operations (which can include SQL functions and JOIN operations) will be managed client-side by the CData SQL Engine embedded in the driver.
- Once you are finished configuring the dossier, click File -> Save.
Using the CData ODBC Driver for UKG Pro WFM in MicroStrategy Desktop, you can easily create robust visualizations and reports on UKG Pro WFM data. Read our other articles on connecting to UKG Pro WFM in MicroStrategy and connecting to UKG Pro WFM in MicroStrategy Web for more examples.