








Integrate Live XML Data into Custom Business Apps Built in Power Apps

Power Apps is a service for building and using custom business apps that connect to your data and work across the web and mobile — without the time and expense of custom software development. When paired with CData Connect AI, you get instant, cloud-to-cloud access to XML data from the apps you build using Power Apps. This article shows how to connect to Connect AI from Power Apps and build an app based on live XML data.
CData Connect AI provides a pure SQL, cloud-to-cloud interface for XML, allowing you to easily integrate with live XML data in Power Apps — without replicating the data. CData Connect AI looks exactly like a SQL Server database to Power Apps and uses optimized data processing out of the box to push all supported SQL operations (filters, JOINs, etc) directly to XML, leveraging server-side processing to quickly return XML data.
Configure XML Connectivity for Power Apps
Connectivity to XML from Power Apps is made possible through CData Connect AI. To work with XML data from Power Apps, we start by creating and configuring a XML connection.
- Log into Connect AI, click Sources, and then click Add Connection
- Select "XML" from the Add Connection panel
-
Enter the necessary authentication properties to connect to XML.
Connecting to Local or Cloud-Stored (Box, Google Drive, Amazon S3, SharePoint) XML Files
CData Drivers let you work with XML files stored locally and stored in cloud storage services like Box, Amazon S3, Google Drive, or SharePoint, right where they are.
Setting connection properties for local files
Set the URI property to local folder path.
Setting connection properties for files stored in Amazon S3
To connect to XML file(s) within Amazon S3, set the URI property to the URI of the Bucket and Folder where the intended XML files exist. In addition, at least set these properties:
- AWSAccessKey: AWS Access Key (username)
- AWSSecretKey: AWS Secret Key
Setting connection properties for files stored in Box
To connect to XML file(s) within Box, set the URI property to the URI of the folder that includes the intended XML file(s). Use the OAuth authentication method to connect to Box.
Dropbox
To connect to XML file(s) within Dropbox, set the URI proprerty to the URI of the folder that includes the intended XML file(s). Use the OAuth authentication method to connect to Dropbox. Either User Account or Service Account can be used to authenticate.
SharePoint Online (SOAP)
To connect to XML file(s) within SharePoint with SOAP Schema, set the URI proprerty to the URI of the document library that includes the intended XML file. Set User, Password, and StorageBaseURL.
SharePoint Online REST
To connect to XML file(s) within SharePoint with REST Schema, set the URI proprerty to the URI of the document library that includes the intended XML file. StorageBaseURL is optional. If not set, the driver will use the root drive. OAuth is used to authenticate.
Google Drive
To connect to XML file(s) within Google Drive, set the URI property to the URI of the folder that includes the intended XML file(s). Use the OAuth authentication method to connect and set InitiateOAuth to GETANDREFRESH.
The DataModel property is the controlling property over how your data is represented into tables and toggles the following basic configurations.
- Document (default): Model a top-level, document view of your XML data. The data provider returns nested elements as aggregates of data.
- FlattenedDocuments: Implicitly join nested documents and their parents into a single table.
- Relational: Return individual, related tables from hierarchical data. The tables contain a primary key and a foreign key that links to the parent document.
See the Modeling XML Data chapter for more information on configuring the relational representation. You will also find the sample data used in the following examples. The data includes entries for people, the cars they own, and various maintenance services performed on those cars.

- Click Save & Test
-
Navigate to the Permissions tab in the Add XML Connection page and update the User-based permissions.



Add a Personal Access Token
When connecting to Connect AI through the REST API, the OData API, or the Virtual SQL Server, a Personal Access Token (PAT) is used to authenticate the connection to Connect AI. It is best practice to create a separate PAT for each service to maintain granularity of access.
- Click on the Gear icon () at the top right of the Connect AI app to open the settings page.
- On the Settings page, go to the Access Tokens section and click Create PAT.
-
Give the PAT a name and click Create.

- The personal access token is only visible at creation, so be sure to copy it and store it securely for future use.
With the connection configured and a PAT generated, you are ready to connect to XML data from Power Apps.
Connecting to CData Connect AI
To use Connect AI to integrate XML data into your Power Apps, you need a new SQL Server connection:
- Log in to Power Apps
- Click Dataverse -> Connections -> New connection
- Select SQL Server
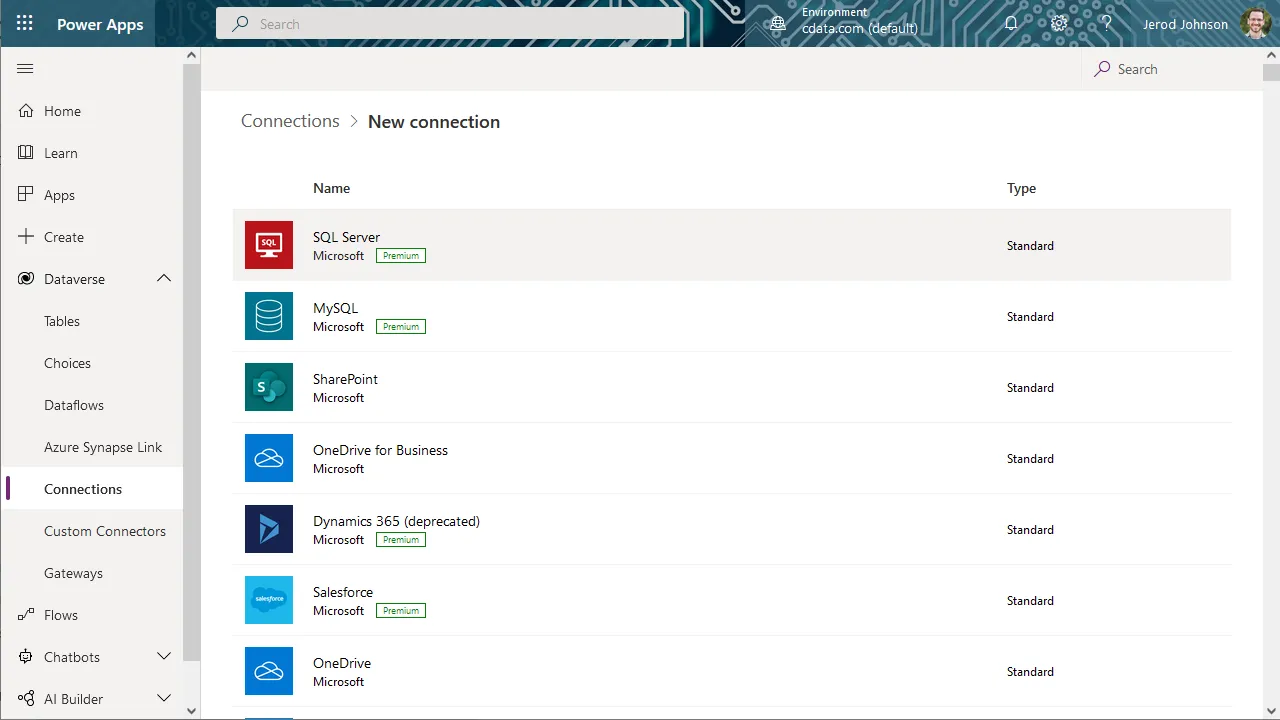
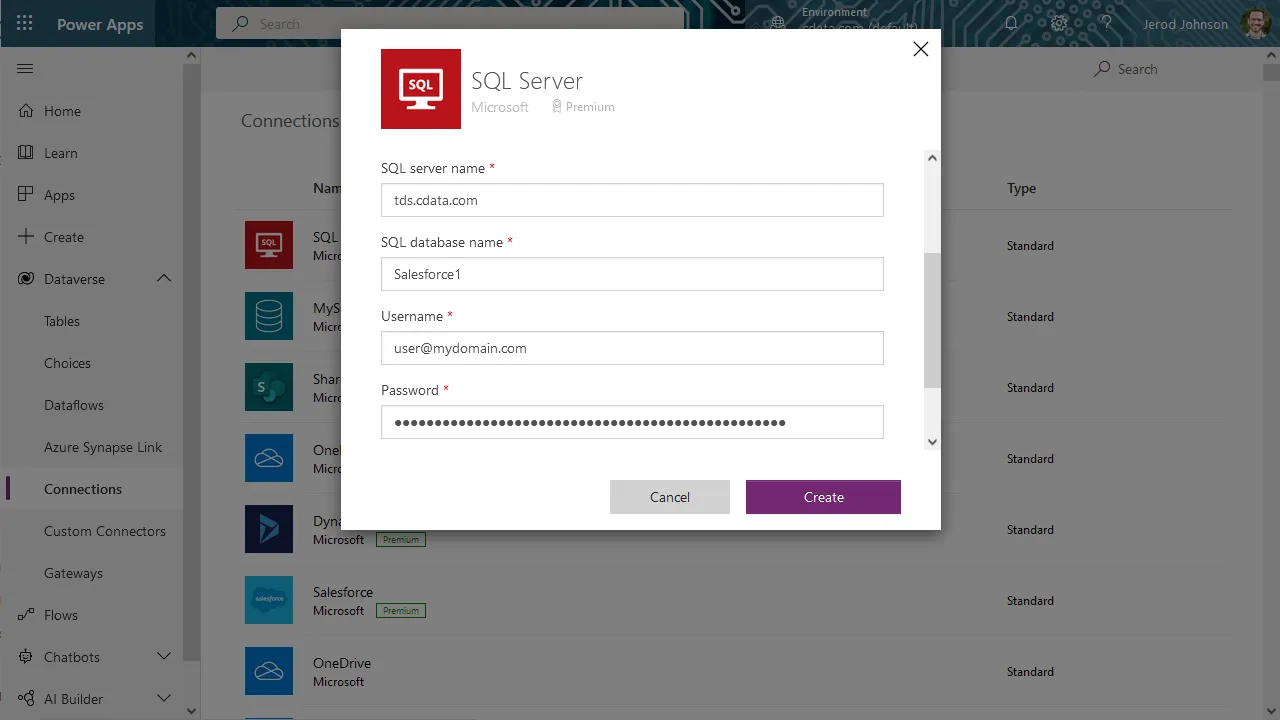
- In the connection wizard:
- Choose to connect directly
- Set SQL server name to tds.cdata.com,14333
- Set SQL database name to the name of the XML connection (e.g. XML1)
- Set Username to a Connect AI user (e.g. [email protected])
- Set Password to the PAT for the above user
- Click Create
Building a Data-Centric App for XML Data
With the connection to Connect AI configured, you are ready to integrate live XML data into the apps you build in Power Apps.
- Log in to Power Apps
- Click Create and select "SQL"
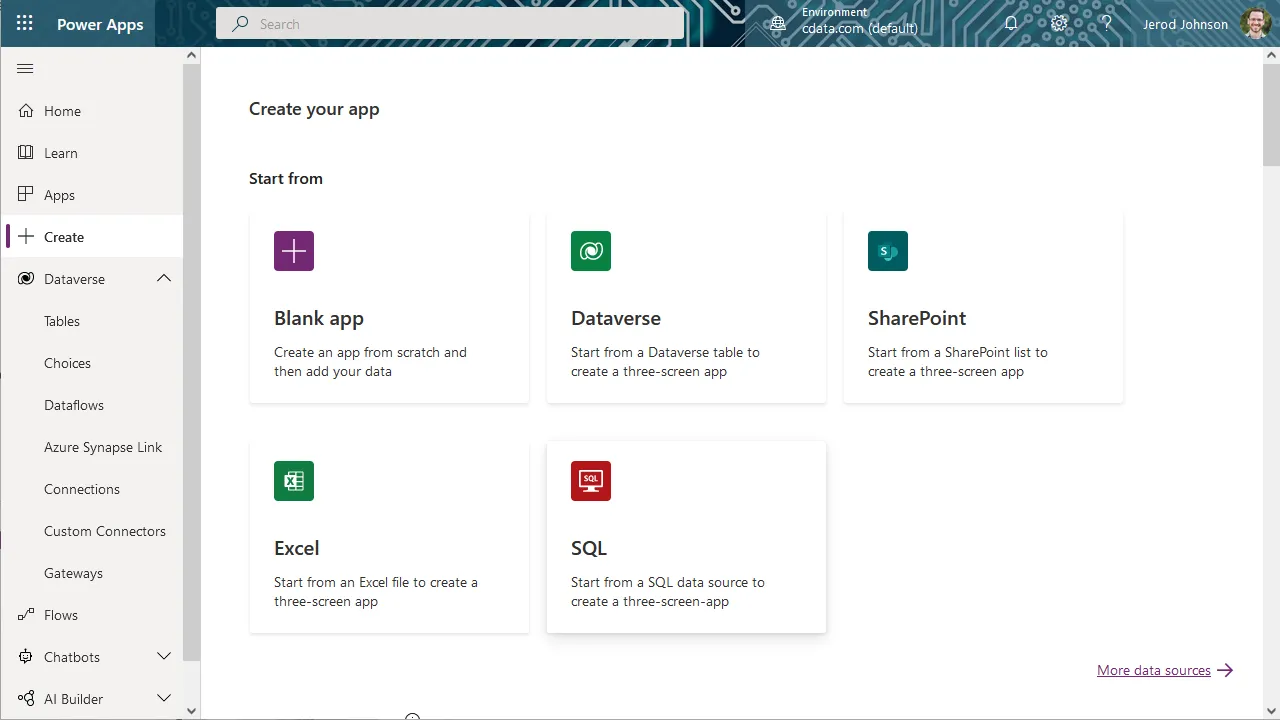
- Select the SQL Server connection you created
- Search for or choose a table to work with
- Click Connect
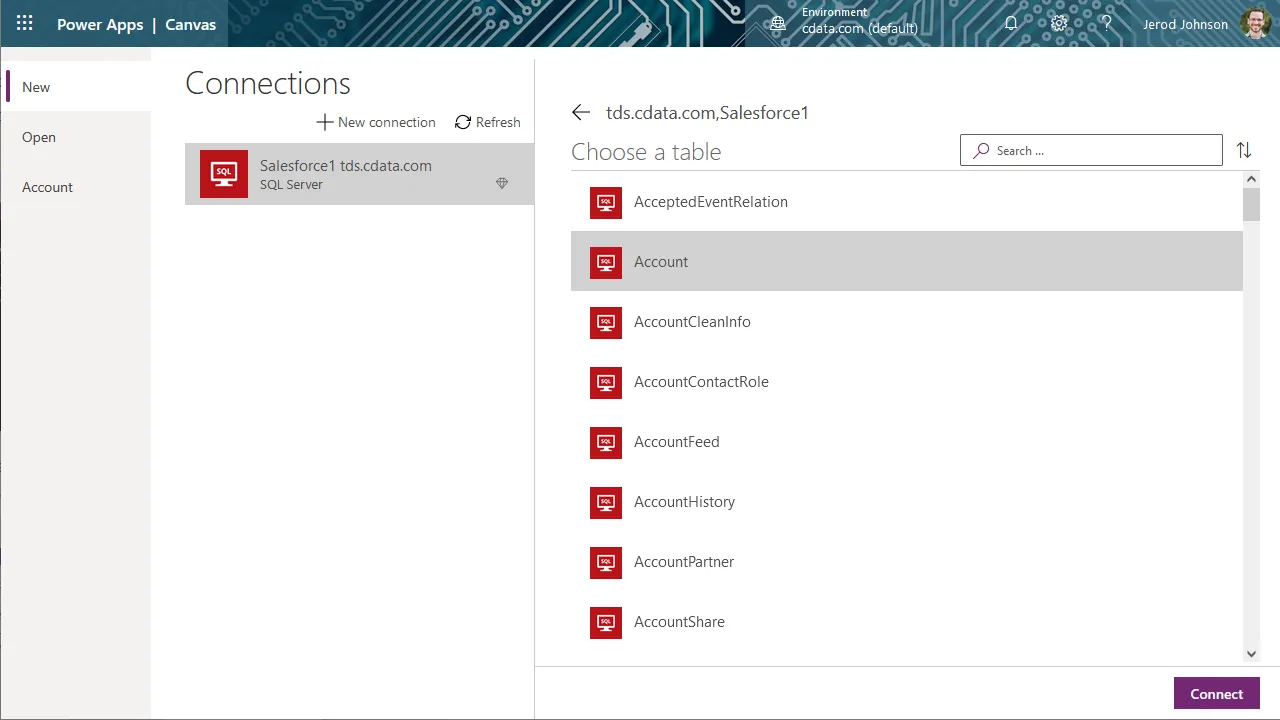
- Customize the newly created app just like you would any other, including changing the layout and setting the fields exposed in BrowseScreen, DetailScreen, and EditScreen
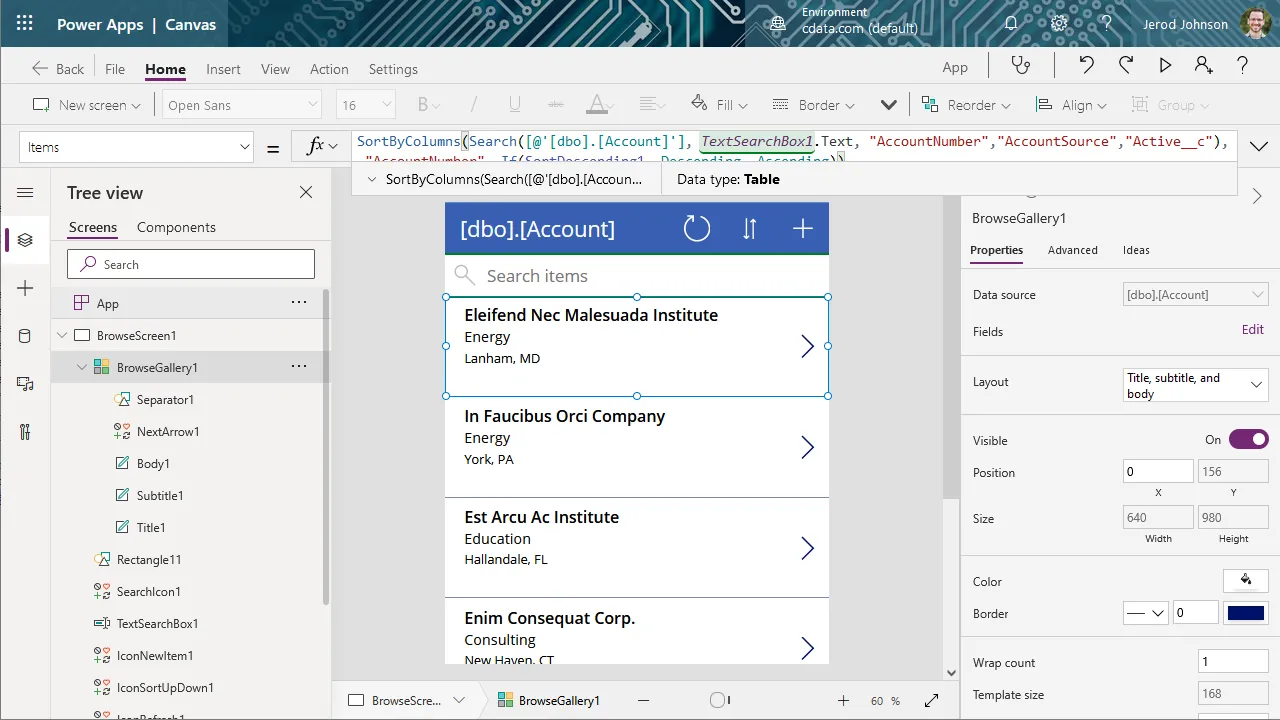
At this point, you have an app with read and write access to live XML data that you can save and publish for use within your organization.
SQL Access to XML Data from Cloud Applications
Now you have a direct connection to live XML data from Microsoft Power Apps. You can create more connections and apps to drive business — all without replicating XML data.
To get real-time data access to hundreds of SaaS, Big Data, and NoSQL sources directly from your cloud applications, sign up for a free trial of CData Connect AI.