








Access Live XML Data in Roo Code via CData Connect AI

Roo Code is an open-source AI coding agent that runs inside VS Code with real file system access, terminal control, and multi-step workflows. It works across entire project workspaces through specialized modes like Code, Architect, and Orchestrator. Available as a VS Code Extension for local development, or as Cloud Agents that integrate with Slack and GitHub. Roo Code natively supports MCP, connecting external tools and data sources via STDIO or Streamable HTTP.
By default, Roo Code has no access to live enterprise data. CData Connect AI bridges this gap by exposing hundreds of data sources. Once connected, Roo can introspect live schemas, validate queries, and generate code directly inside VS Code, retrieved by real enterprise data.
Step 1: Configure XML connectivity for Roo Code
Connectivity to XML from Roo Code is made possible through CData Connect AI's Remote MCP Server. To interact with XML data from Roo Code, start by creating and configuring a XML connection in CData Connect AI.
- Log into Connect AI, click Sources, and then click Add Connection
- Select XML from the Add Connection panel
-
Enter the necessary authentication properties to connect to XML.
Connecting to Local or Cloud-Stored (Box, Google Drive, Amazon S3, SharePoint) XML Files
CData Drivers let you work with XML files stored locally and stored in cloud storage services like Box, Amazon S3, Google Drive, or SharePoint, right where they are.
Setting connection properties for local files
Set the URI property to local folder path.
Setting connection properties for files stored in Amazon S3
To connect to XML file(s) within Amazon S3, set the URI property to the URI of the Bucket and Folder where the intended XML files exist. In addition, at least set these properties:
- AWSAccessKey: AWS Access Key (username)
- AWSSecretKey: AWS Secret Key
Setting connection properties for files stored in Box
To connect to XML file(s) within Box, set the URI property to the URI of the folder that includes the intended XML file(s). Use the OAuth authentication method to connect to Box.
Dropbox
To connect to XML file(s) within Dropbox, set the URI proprerty to the URI of the folder that includes the intended XML file(s). Use the OAuth authentication method to connect to Dropbox. Either User Account or Service Account can be used to authenticate.
SharePoint Online (SOAP)
To connect to XML file(s) within SharePoint with SOAP Schema, set the URI proprerty to the URI of the document library that includes the intended XML file. Set User, Password, and StorageBaseURL.
SharePoint Online REST
To connect to XML file(s) within SharePoint with REST Schema, set the URI proprerty to the URI of the document library that includes the intended XML file. StorageBaseURL is optional. If not set, the driver will use the root drive. OAuth is used to authenticate.
Google Drive
To connect to XML file(s) within Google Drive, set the URI property to the URI of the folder that includes the intended XML file(s). Use the OAuth authentication method to connect and set InitiateOAuth to GETANDREFRESH.
The DataModel property is the controlling property over how your data is represented into tables and toggles the following basic configurations.
- Document (default): Model a top-level, document view of your XML data. The data provider returns nested elements as aggregates of data.
- FlattenedDocuments: Implicitly join nested documents and their parents into a single table.
- Relational: Return individual, related tables from hierarchical data. The tables contain a primary key and a foreign key that links to the parent document.
See the Modeling XML Data chapter for more information on configuring the relational representation. You will also find the sample data used in the following examples. The data includes entries for people, the cars they own, and various maintenance services performed on those cars.

- Click Save & Test
- Navigate to the Permissions tab and update user-based permissions



Add a Personal Access Token
A Personal Access Token (PAT) is used to authenticate the connection to Connect AI from Roo Code. It is best practice to create a separate PAT for each integration to maintain granular access control.
- Click the gear icon at the top right of the Connect AI app to open Settings
- On the Settings page, go to the Access Tokens section and click Create PAT
- Give the PAT a descriptive name and click Create
- Copy the token when displayed and store it securely. It will not be shown again

With the XML connection configured and a PAT generated, Roo Code can now connect to XML data through Connect AI.
Step 2: Configure Connect AI in Roo Code
CData Connect AI can be integrated with Roo Code by registering the MCP Server directly in the Roo Code MCP configuration panel. Once registered, Roo Code agents can call live XML data through MCP tools without additional setup.
Method 1: Direct MCP configuration
Users can register the CData Connect AI MCP Server directly in the Roo Code MCP settings. Once registered, agents in any project can query live XML data through MCP tools without additional setup.
- Open VS Code with the Roo Code extension installed
- Click the Roo Code icon in the Activity Bar
-
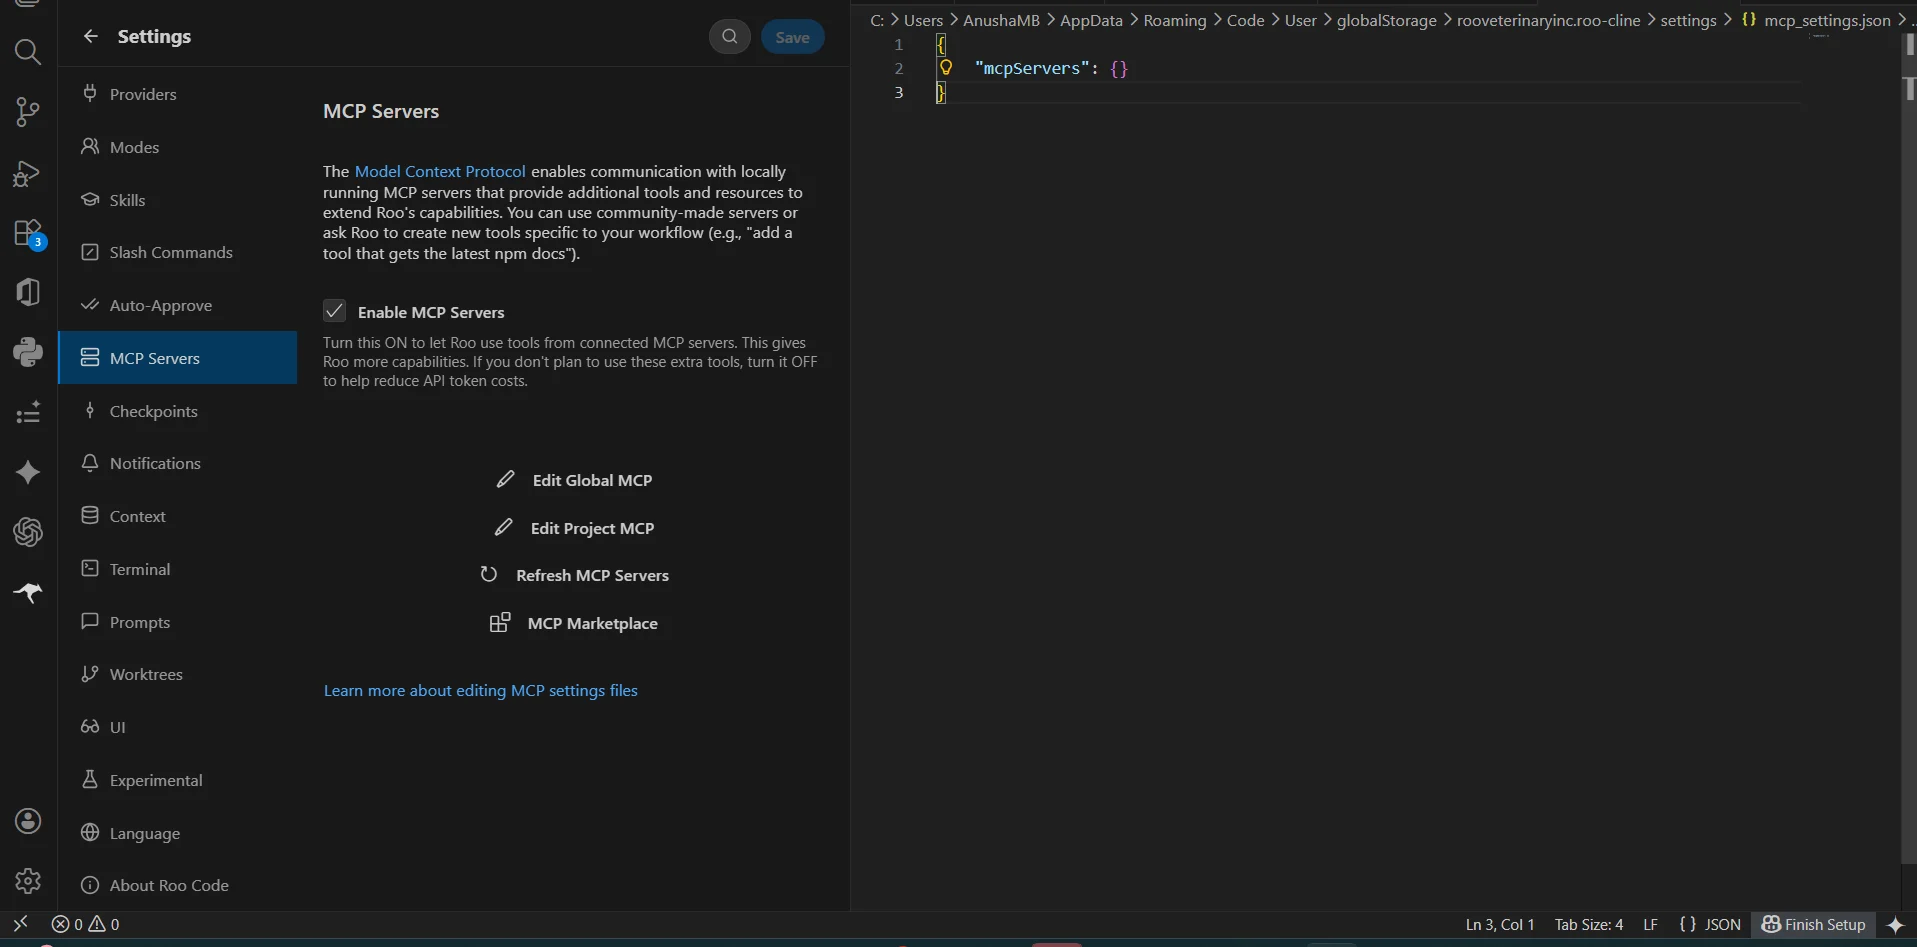
Navigate to Settings, then choose MCP Servers in the Roo Code pane and turn on Enable MCP Servers, now click Edit Global MCP to open the MCP configuration file
-
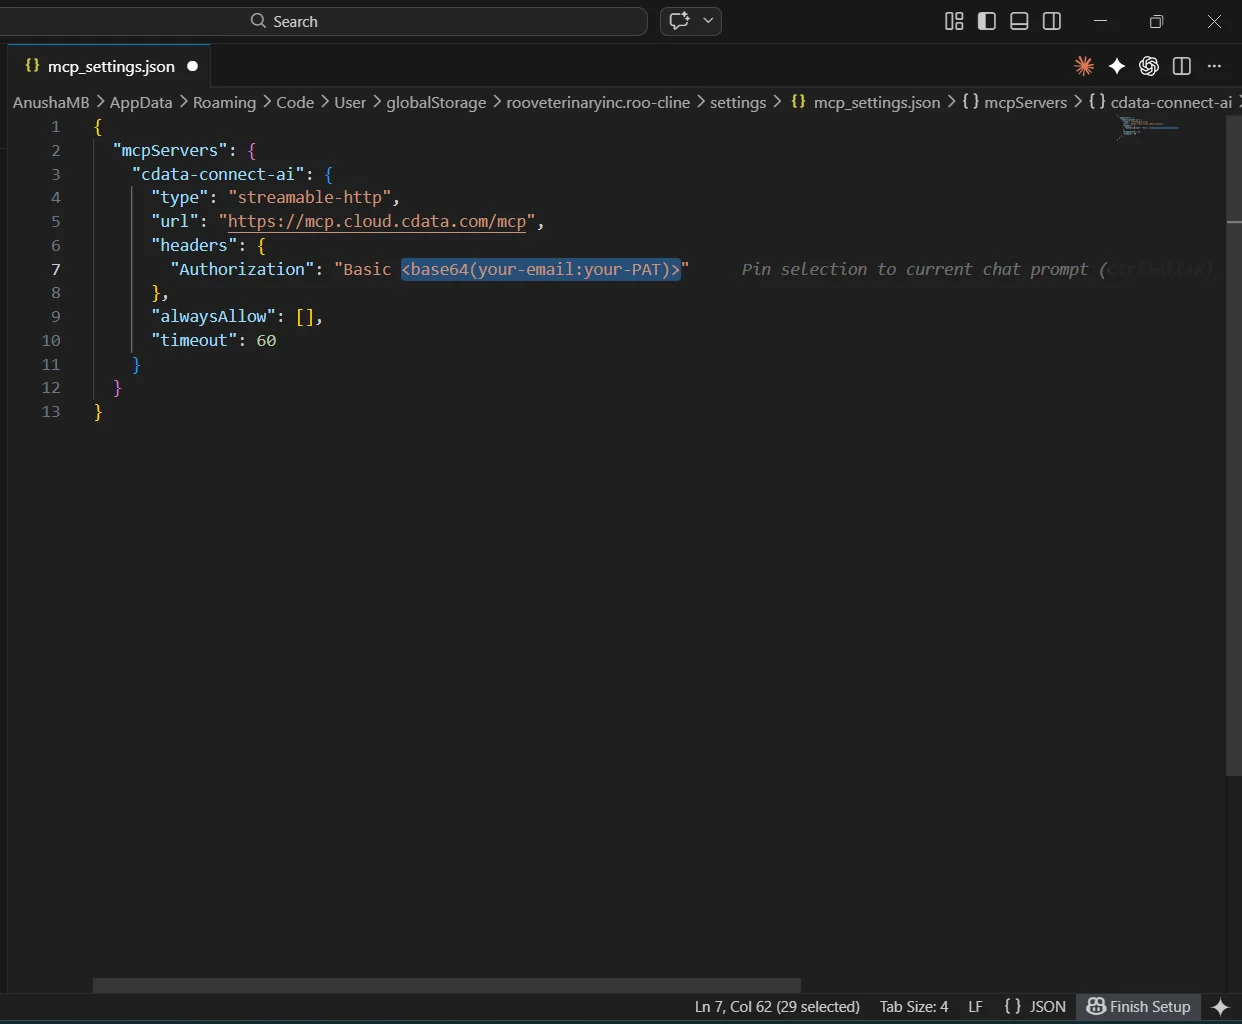
In the mcp_settings.json file, add the following inside the mcpServers object, replacing base64encode
{
    "mcpServers": {
        "cdata-mcp": {
            "type": "streamable-http",
            "url": "https://mcp.cloud.cdata.com/mcp",
            "headers": {
                "Authorization": "Basic base64encode(USERNAME:PAT)"
            }
        }
    }
}
- Save the file to register the MCP server
- Return to the MCP Servers panel and confirm that cdata-mcp is listed and its toggle is enabled. If it is not enabled, toggle it on
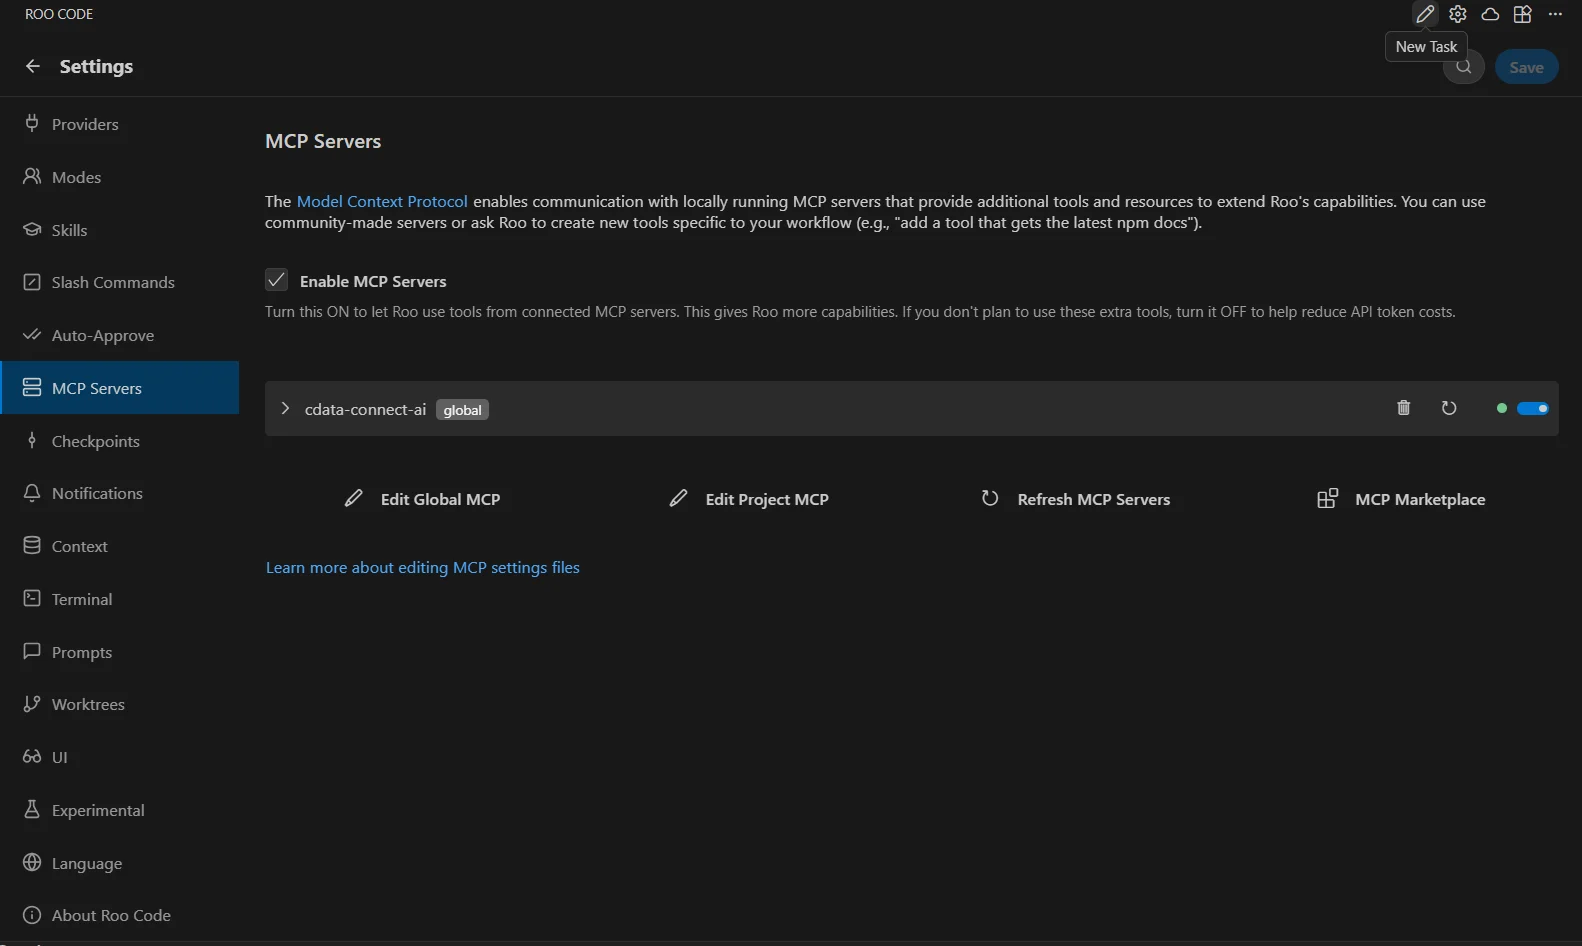
With the CData MCP Server registered and enabled, Roo Code agents can now query and act on live XML data through Connect AI in any project.
Query live XML data from Roo Code
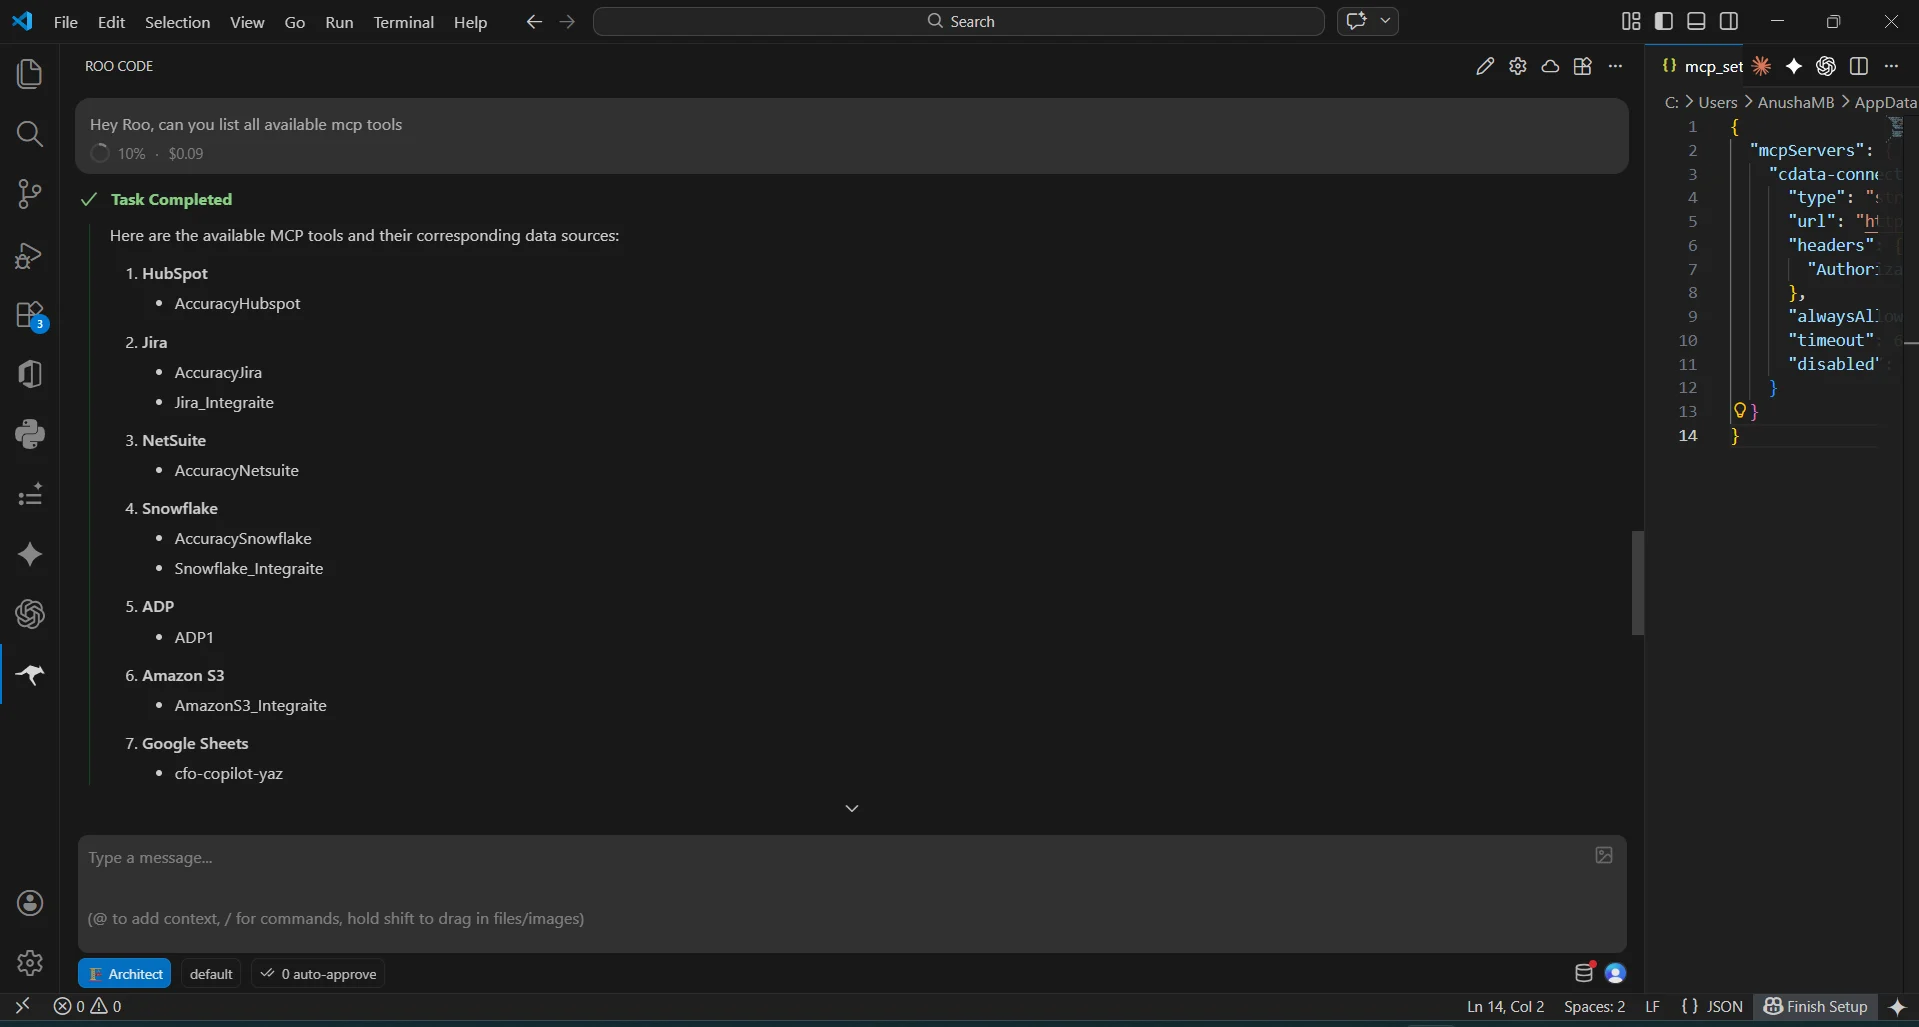
With the MCP server configured, start a conversation in the Roo Code chat panel to interact with live XML data.
-
Open the Roo Code chat and enter a prompt to explore your data, for example:
- List all available catalogs in my cdata-mcp connection.
- Show the schemas and tables available for XML.
- Query the top 5 records from XML data.
- The agent calls the CData Connect AI MCP Server and returns live results from XML data
Method 2: Build an application with natural language
Users can direct Roo Code to build a full application that connects to the CData Connect AI MCP Server through a natural language prompt. The agent gathers the required endpoint and credentials interactively, then generates a working application wired to live XML data — all from the Roo Code chat panel inside VS Code.
- Open the Roo Code panel in VS Code and select your preferred model from the dropdown
-
Enter a prompt that describes the application you want to build.
For example:
I would like to build a small application that connects to a remote MCP HTTPS server. I already have the MCP endpoint URL and the required credentials. The application should: - Establish a connection to the remote MCP server - Authenticate using the provided credentials - Retrieve and list all available catalogs from the MCP Please make sure the credentials are stored securely in a .env file and not hardcoded in the application. -
Roo Code will prompt you to provide the MCP endpoint URL and
authentication credentials. Supply the following values:
- MCP Endpoint URL: https://mcp.cloud.cdata.com/mcp
- Authorization: Basic base64(email:PAT)
-
Roo Code creates the project directory, initializes a
Node.js project, installs the necessary packages, and stores
credentials securely in a .env file
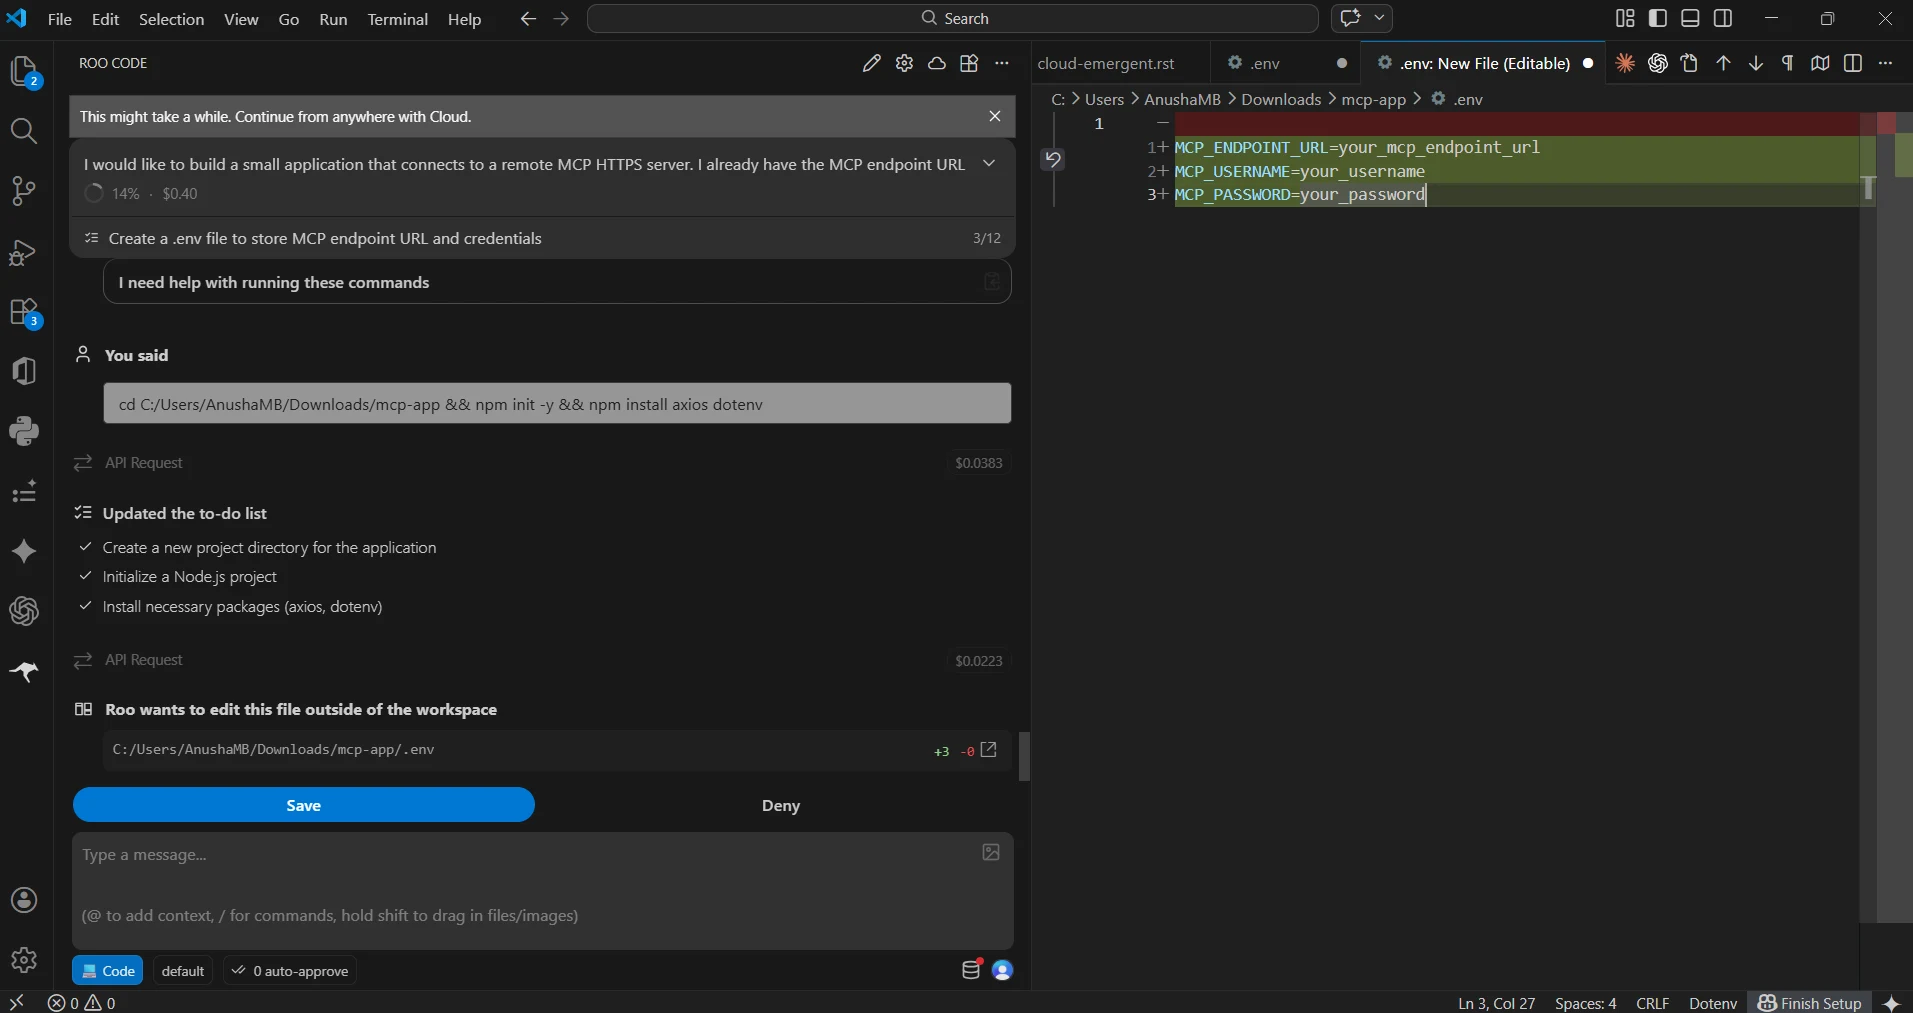
At this point, Roo Code has built an application that communicates with the CData Connect AI MCP Server and retrieves live XML data, all from a single natural language prompt inside VS Code.
Get CData Connect AI
To access hundreds of SaaS, Big Data, and NoSQL sources directly from Roo Code, try CData Connect AI today! Sign up for a free 14-day trial of CData Connect AI, and as always, our world-class Support Team is available to assist you with any questions you may have.