








Integrate Trae with Live Amazon Athena Data via CData Connect AI

Trae is an AI-powered integrated development environment (IDE) that pairs a familiar editor with agent modes such as Builder and SOLO. It supports the Model Context Protocol (MCP), so you can add external tools and data sources and give the agent access to live data.
By integrating Trae with CData Connect AI through the built-in MCP Server, Trae gains governed, real-time access to live Amazon Athena data. You can list catalogs, explore schemas, and query records from Amazon Athena data using natural language prompts, with all data access running securely against authorized sources.
This article explains how to configure Amazon Athena connectivity in Connect AI, generate the required personal access token, install Trae, add the Connect AI MCP Server, configure an LLM model, and verify the integration by querying live Amazon Athena data from the Trae agent.
About Amazon Athena Data Integration
CData provides the easiest way to access and integrate live data from Amazon Athena. Customers use CData connectivity to:
- Authenticate securely using a variety of methods, including IAM credentials, access keys, and Instance Profiles, catering to diverse security needs and simplifying the authentication process.
- Streamline their setup and quickly resolve issue with detailed error messaging.
- Enhance performance and minimize strain on client resources with server-side query execution.
Users frequently integrate Athena with analytics tools like Tableau, Power BI, and Excel for in-depth analytics from their preferred tools.
To learn more about unique Amazon Athena use cases with CData, check out our blog post: https://www.cdata.com/blog/amazon-athena-use-cases.
Getting Started
Step 1: Configure Amazon Athena connectivity for Trae
Connectivity to Amazon Athena from Trae is made possible through Connect AI's Remote MCP Server. To interact with Amazon Athena data from Trae, start by creating and configuring a Amazon Athena connection in Connect AI.
- Log into Connect AI, click Sources, and then click Add Connection
- Select Amazon Athena from the Add Connection panel
-
Enter the necessary authentication properties to connect to Amazon Athena.
Authenticating to Amazon Athena
To authorize Amazon Athena requests, provide the credentials for an administrator account or for an IAM user with custom permissions: Set AccessKey to the access key Id. Set SecretKey to the secret access key.
Note: Though you can connect as the AWS account administrator, it is recommended to use IAM user credentials to access AWS services.
Obtaining the Access Key
To obtain the credentials for an IAM user, follow the steps below:
- Sign into the IAM console.
- In the navigation pane, select Users.
- To create or manage the access keys for a user, select the user and then select the Security Credentials tab.
To obtain the credentials for your AWS root account, follow the steps below:
- Sign into the AWS Management console with the credentials for your root account.
- Select your account name or number and select My Security Credentials in the menu that is displayed.
- Click Continue to Security Credentials and expand the Access Keys section to manage or create root account access keys.
Authenticating from an EC2 Instance
If you are using the CData Data Provider for Amazon Athena 2018 from an EC2 Instance and have an IAM Role assigned to the instance, you can use the IAM Role to authenticate. To do so, set UseEC2Roles to true and leave AccessKey and SecretKey empty. The CData Data Provider for Amazon Athena 2018 will automatically obtain your IAM Role credentials and authenticate with them.
Authenticating as an AWS Role
In many situations it may be preferable to use an IAM role for authentication instead of the direct security credentials of an AWS root user. An AWS role may be used instead by specifying the RoleARN. This will cause the CData Data Provider for Amazon Athena 2018 to attempt to retrieve credentials for the specified role. If you are connecting to AWS (instead of already being connected such as on an EC2 instance), you must additionally specify the AccessKey and SecretKey of an IAM user to assume the role for. Roles may not be used when specifying the AccessKey and SecretKey of an AWS root user.
Authenticating with MFA
For users and roles that require Multi-factor Authentication, specify the MFASerialNumber and MFAToken connection properties. This will cause the CData Data Provider for Amazon Athena 2018 to submit the MFA credentials in a request to retrieve temporary authentication credentials. Note that the duration of the temporary credentials may be controlled via the TemporaryTokenDuration (default 3600 seconds).
Connecting to Amazon Athena
In addition to the AccessKey and SecretKey properties, specify Database, S3StagingDirectory and Region. Set Region to the region where your Amazon Athena data is hosted. Set S3StagingDirectory to a folder in S3 where you would like to store the results of queries.
If Database is not set in the connection, the data provider connects to the default database set in Amazon Athena.

- Click Save & Test
- Navigate to the Permissions tab and update user-based permissions



Add a Personal Access Token
A Personal Access Token (PAT) is used to authenticate the connection to Connect AI from Trae. It is best practice to create a separate PAT for each integration to maintain granular access control.
- Click the gear icon () at the top right of the Connect AI app to open Settings
- On the Settings page, go to the Access Tokens section and click Create PAT
- Give the PAT a descriptive name and click Create
- Copy the token when displayed and store it securely. It will not be shown again

With the Amazon Athena connection configured and a PAT generated, Trae can now connect to Amazon Athena data through Connect AI.
Step 2: Install Trae and configure the Connect AI MCP Server
Next, install Trae, add the Connect AI Remote MCP Server, and configure an LLM model so the agent can discover and call live data tools through Connect AI.
- Download and install the Trae IDE, then launch the application
-
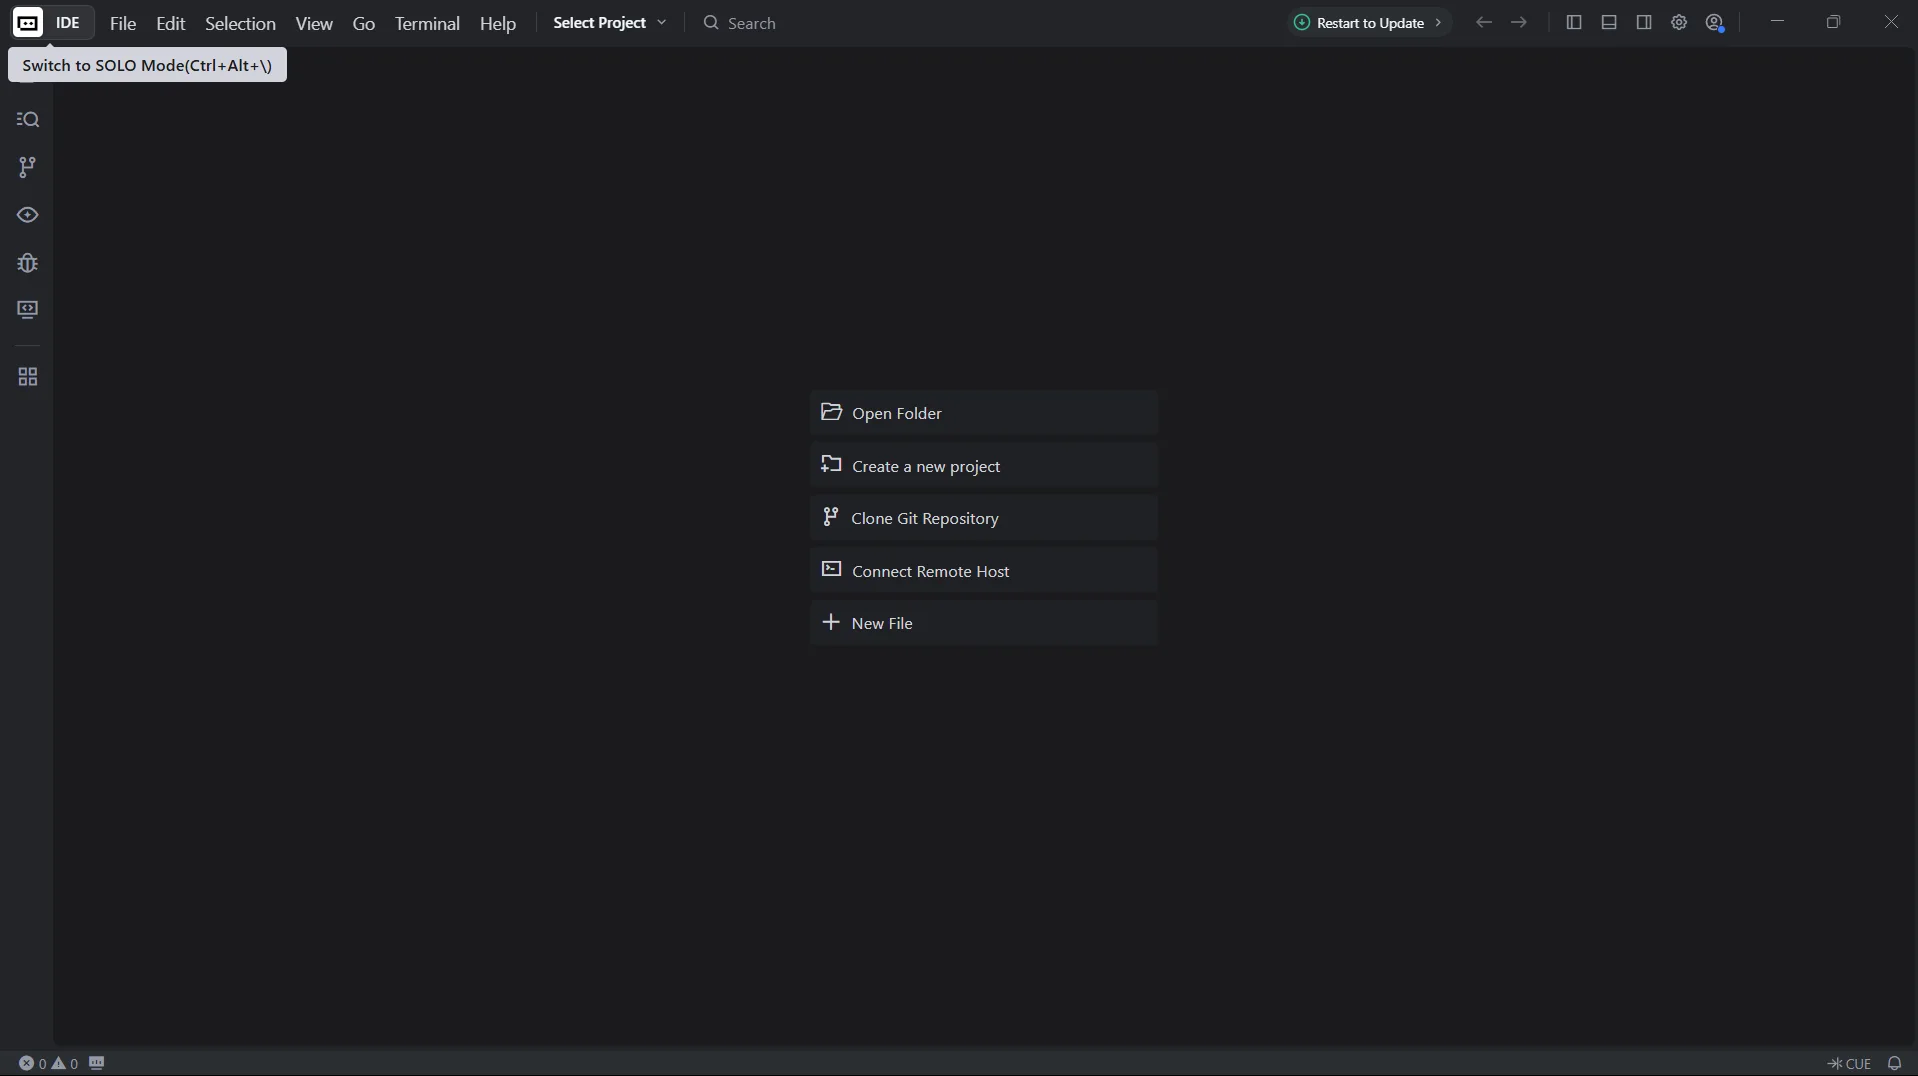
Switch to SOLO mode using the toggle at the top left, or press Ctrl + Alt + \
-
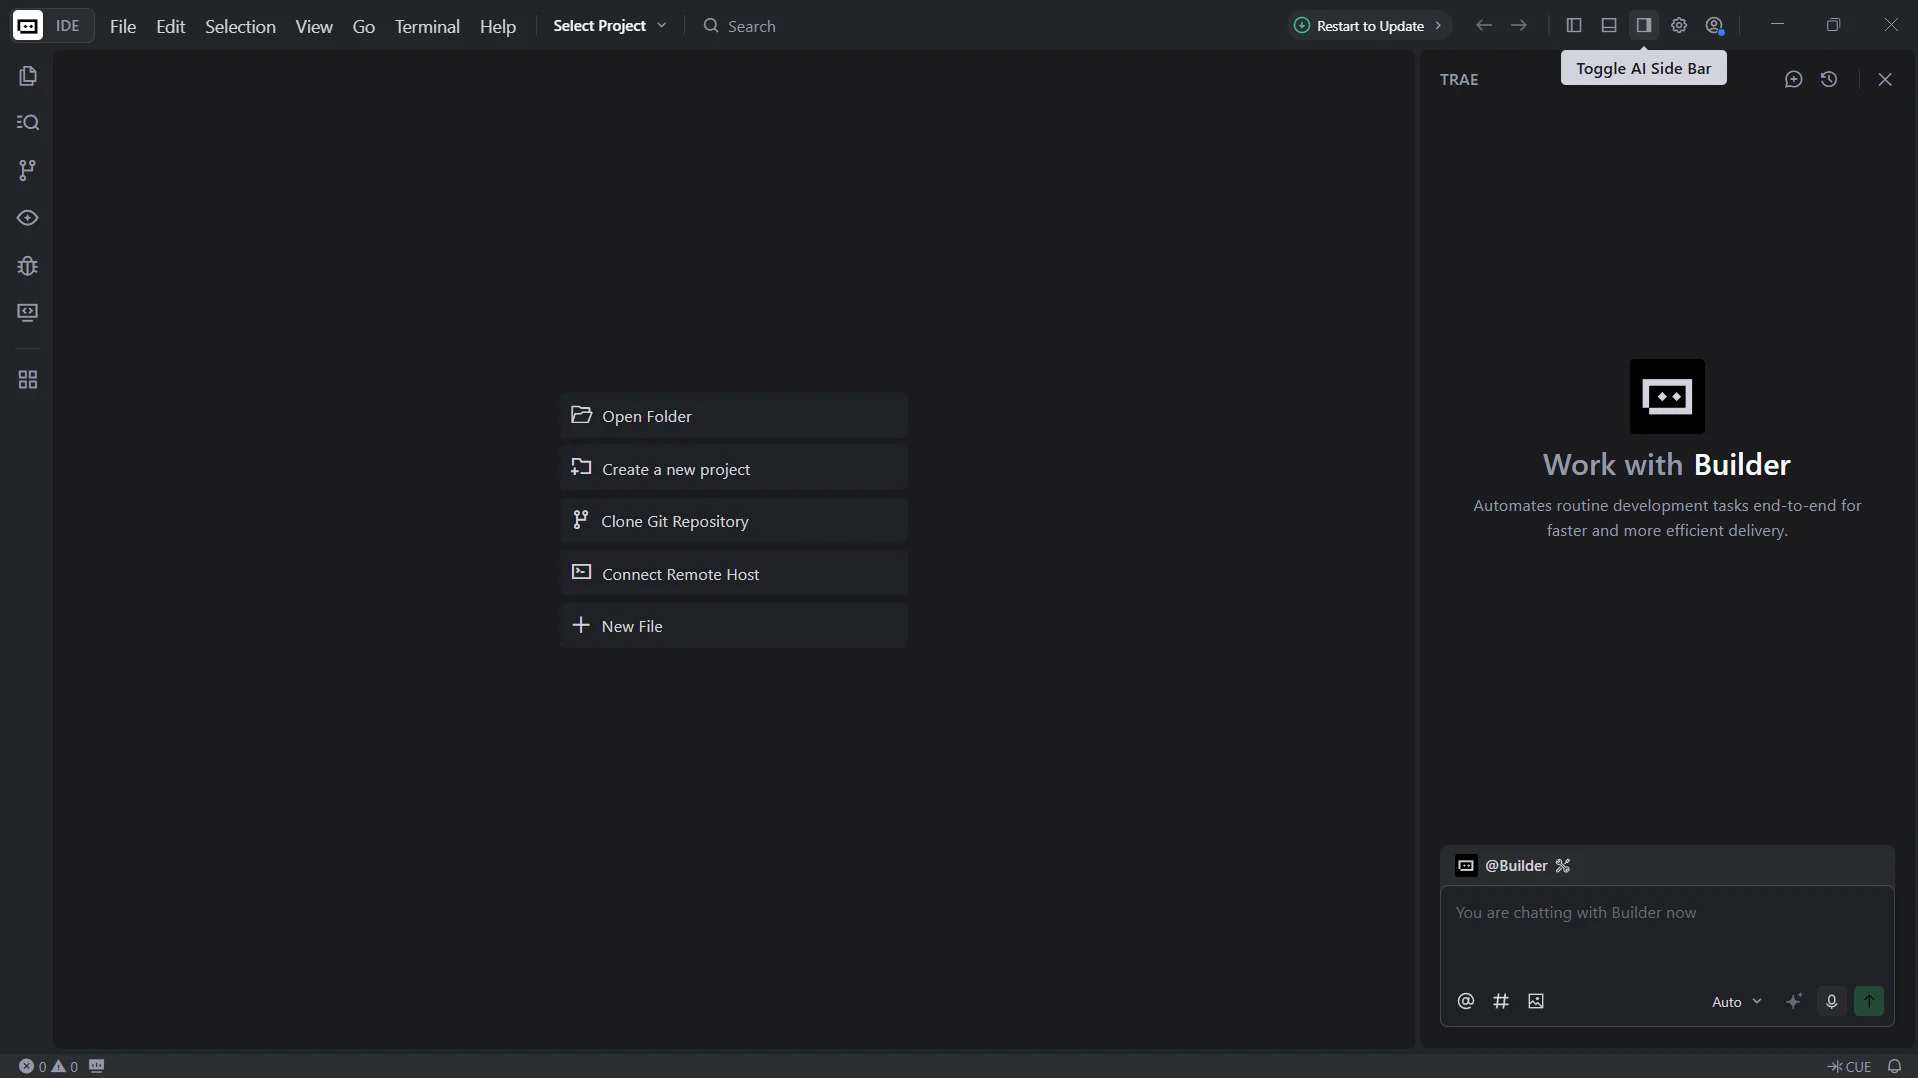
Click Toggle AI Sidebar to open the chat panel
-
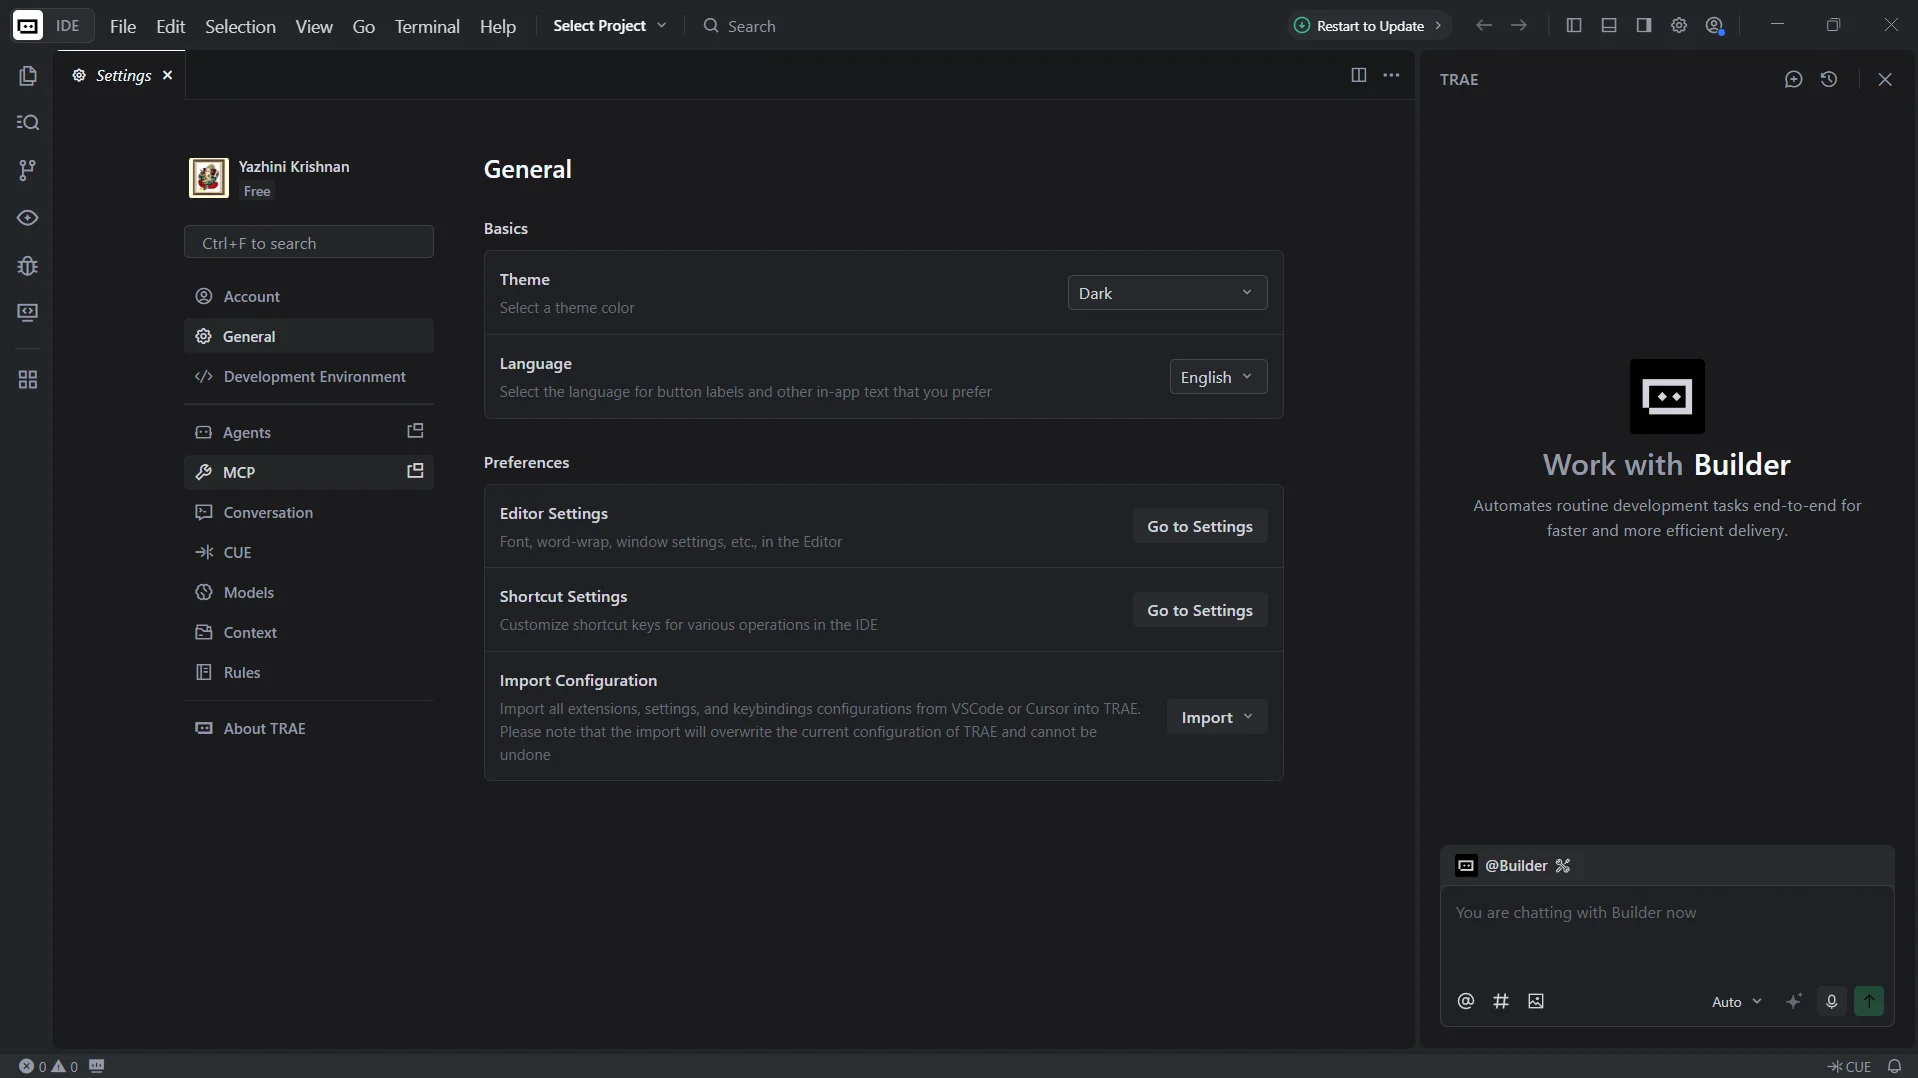
Open Settings, then select MCP from the left menu
-
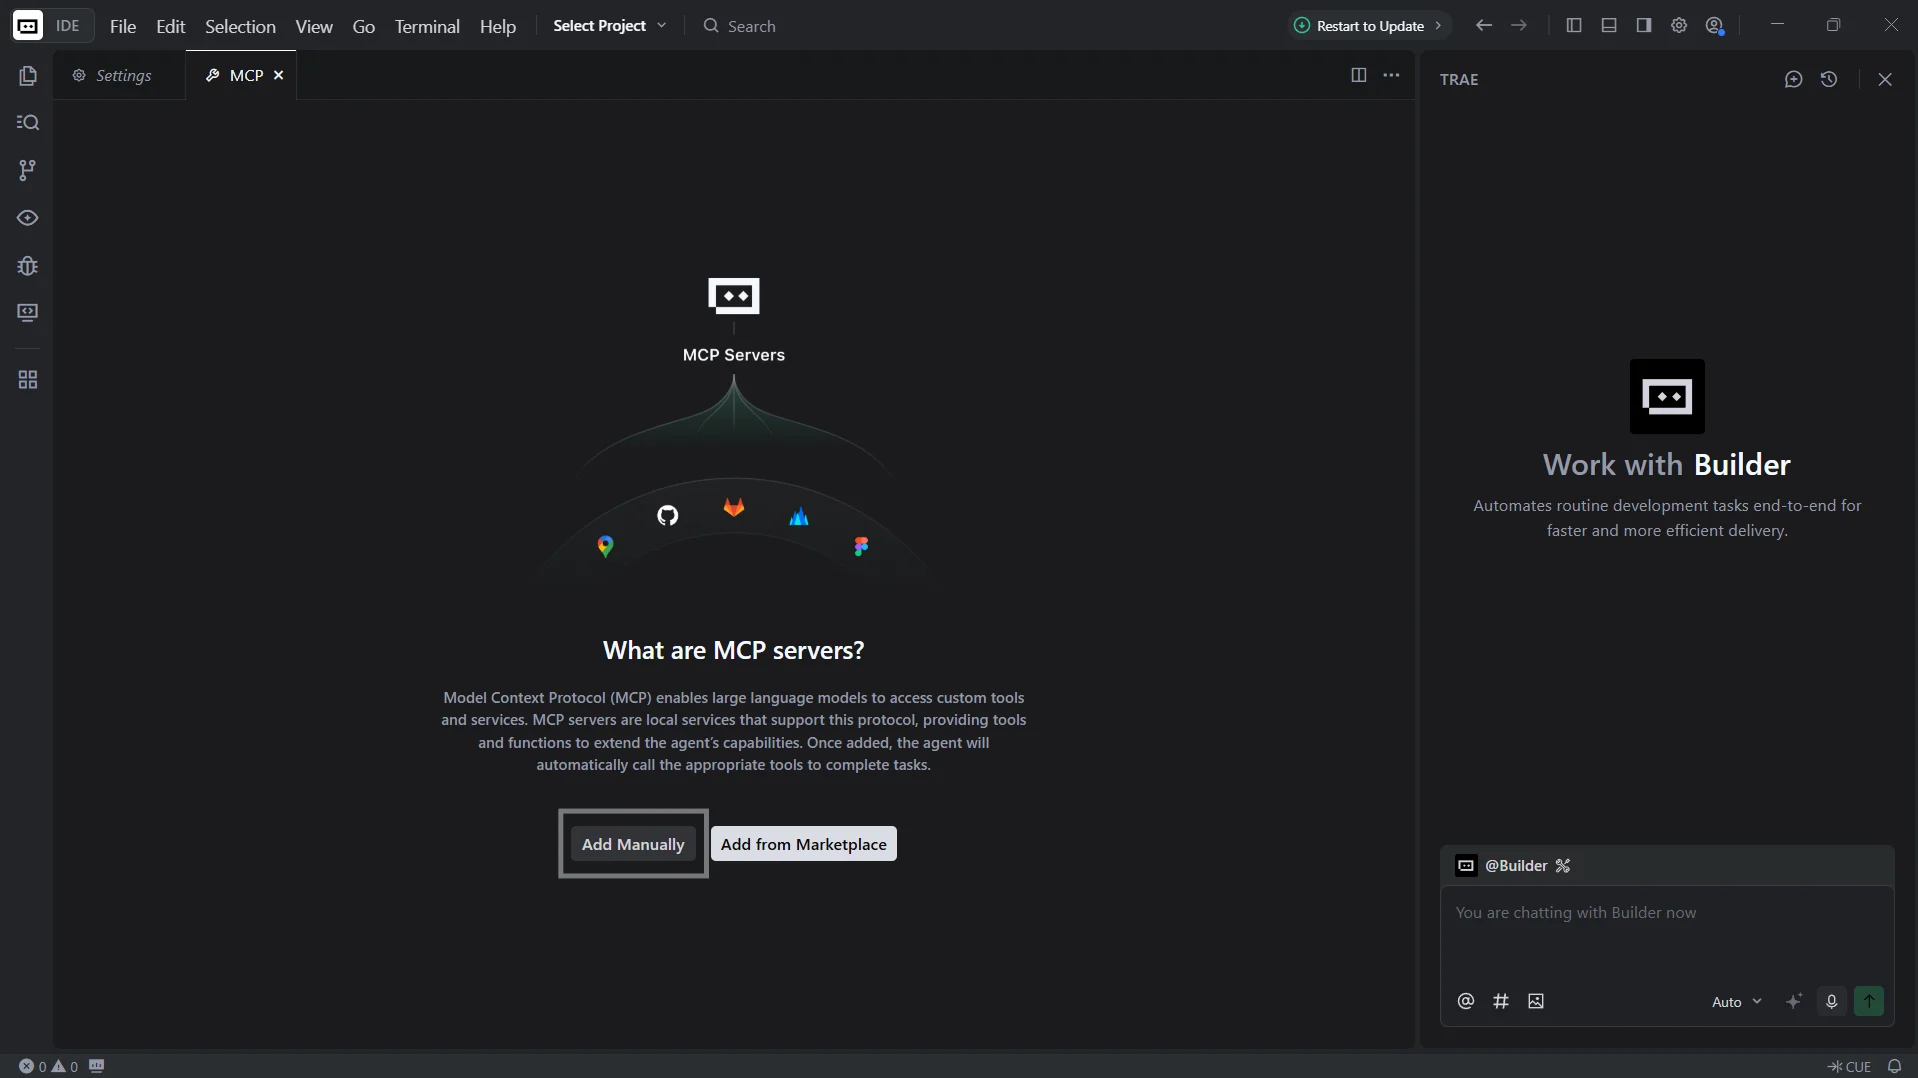
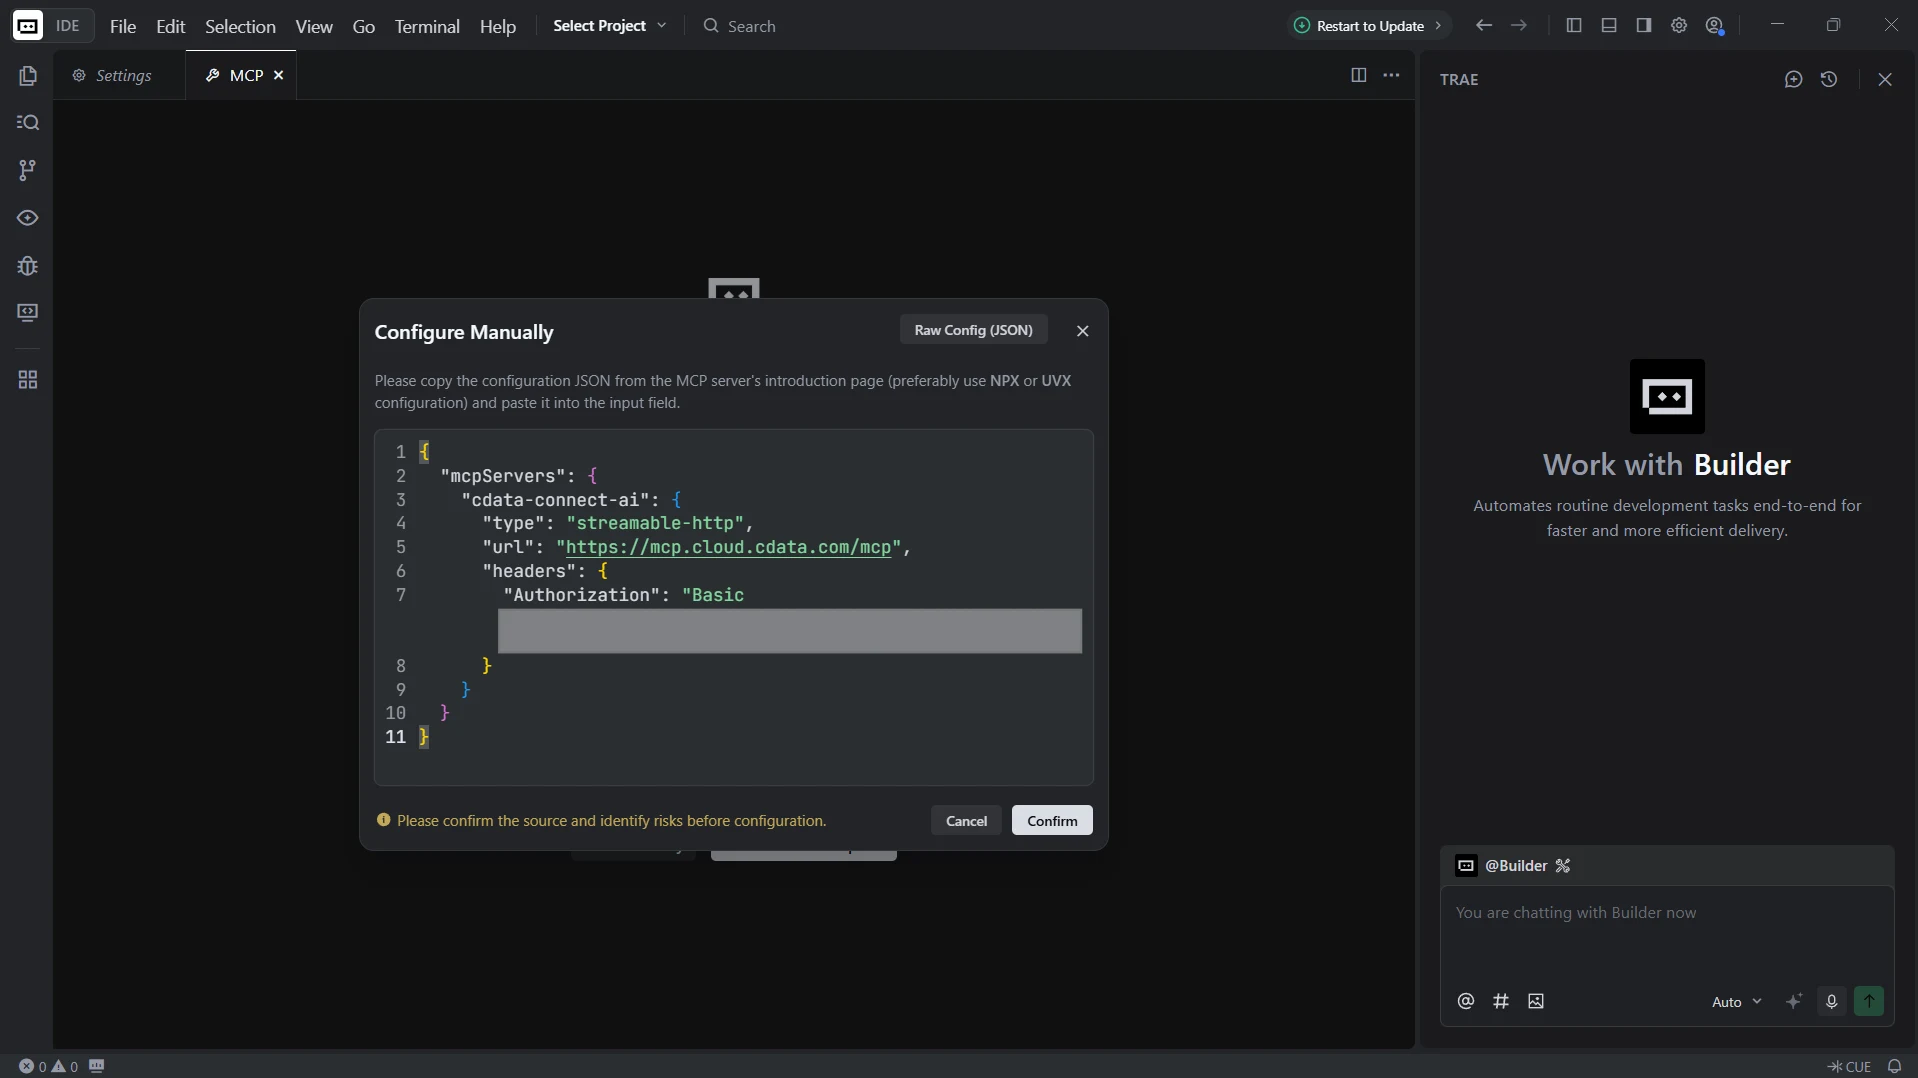
Click Add Manually
-
In the Configure Manually dialog, paste the following configuration and click Confirm:
{
  "mcpServers": {
    "cdata-connect-ai": {
      "type": "streamable-http",
      "url": "https://mcp.cloud.cdata.com/mcp",
      "headers": {
        "Authorization": "Basic your_base64_encoded_email_PAT"
      }
    }
  }
}
Note: Trae will use Basic authentication with Connect AI. Combine your Connect AI user email and the PAT you created earlier in the format email:PAT, base64 encode the combined string, and prefix it with Basic. For example, given [email protected]:ABC123...XYZ789, the Authorization header value becomes something like: Basic dXNlckBkb21haW4uY29tOkFCQzEyMy4uLlhZWjc4OQ==
Configure an LLM model
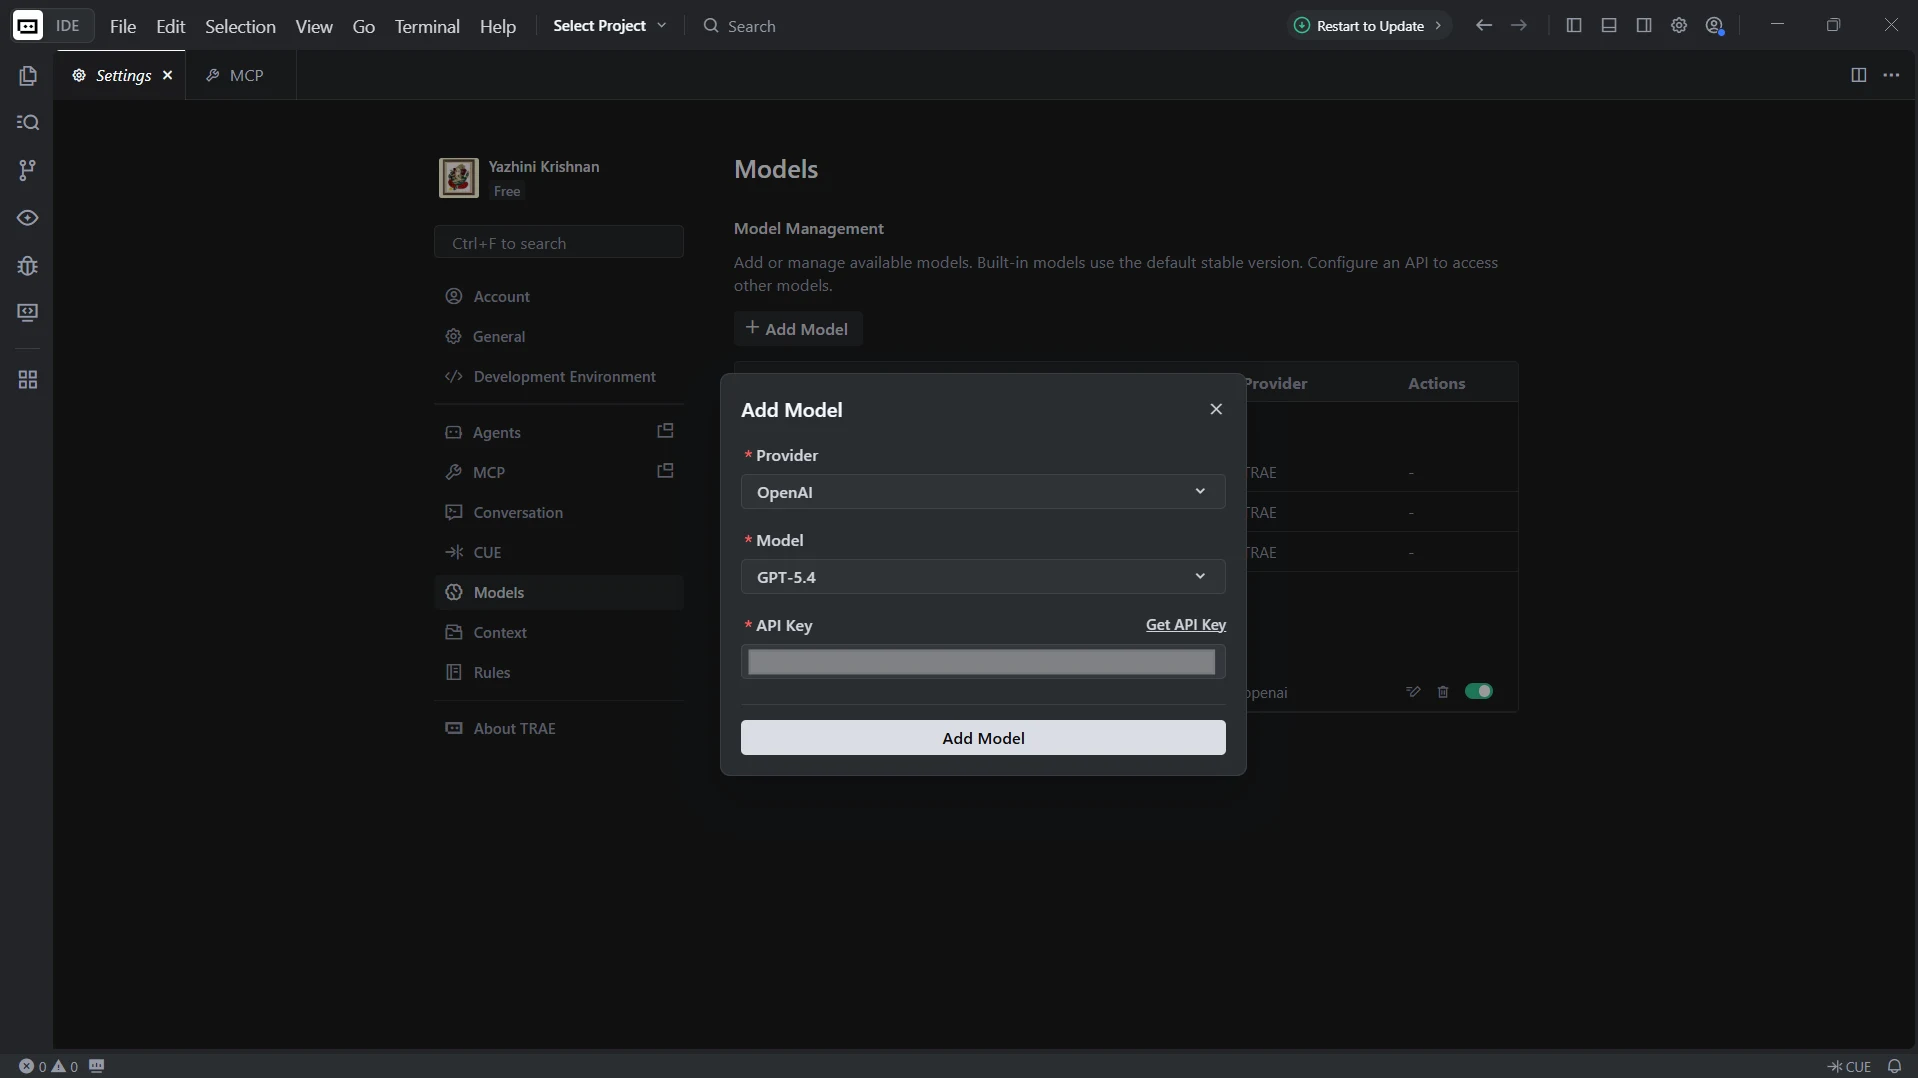
Trae requires at least one LLM model to power the agent's reasoning. Add a model so the agent can interpret prompts and call MCP tools through Connect AI.
- Return to Settings and select Models
-
Click Add Model, choose a provider such as OpenAI, Anthropic, or Google, select a model, enter your API key, and click Add Model
With the MCP server added and an LLM model configured, Trae is ready to query live Amazon Athena data through Connect AI.
Step 3: Query live Amazon Athena data from Trae
With the integration complete, use the Trae agent to interact with live Amazon Athena data through natural language prompts handled by the configured LLM.
-
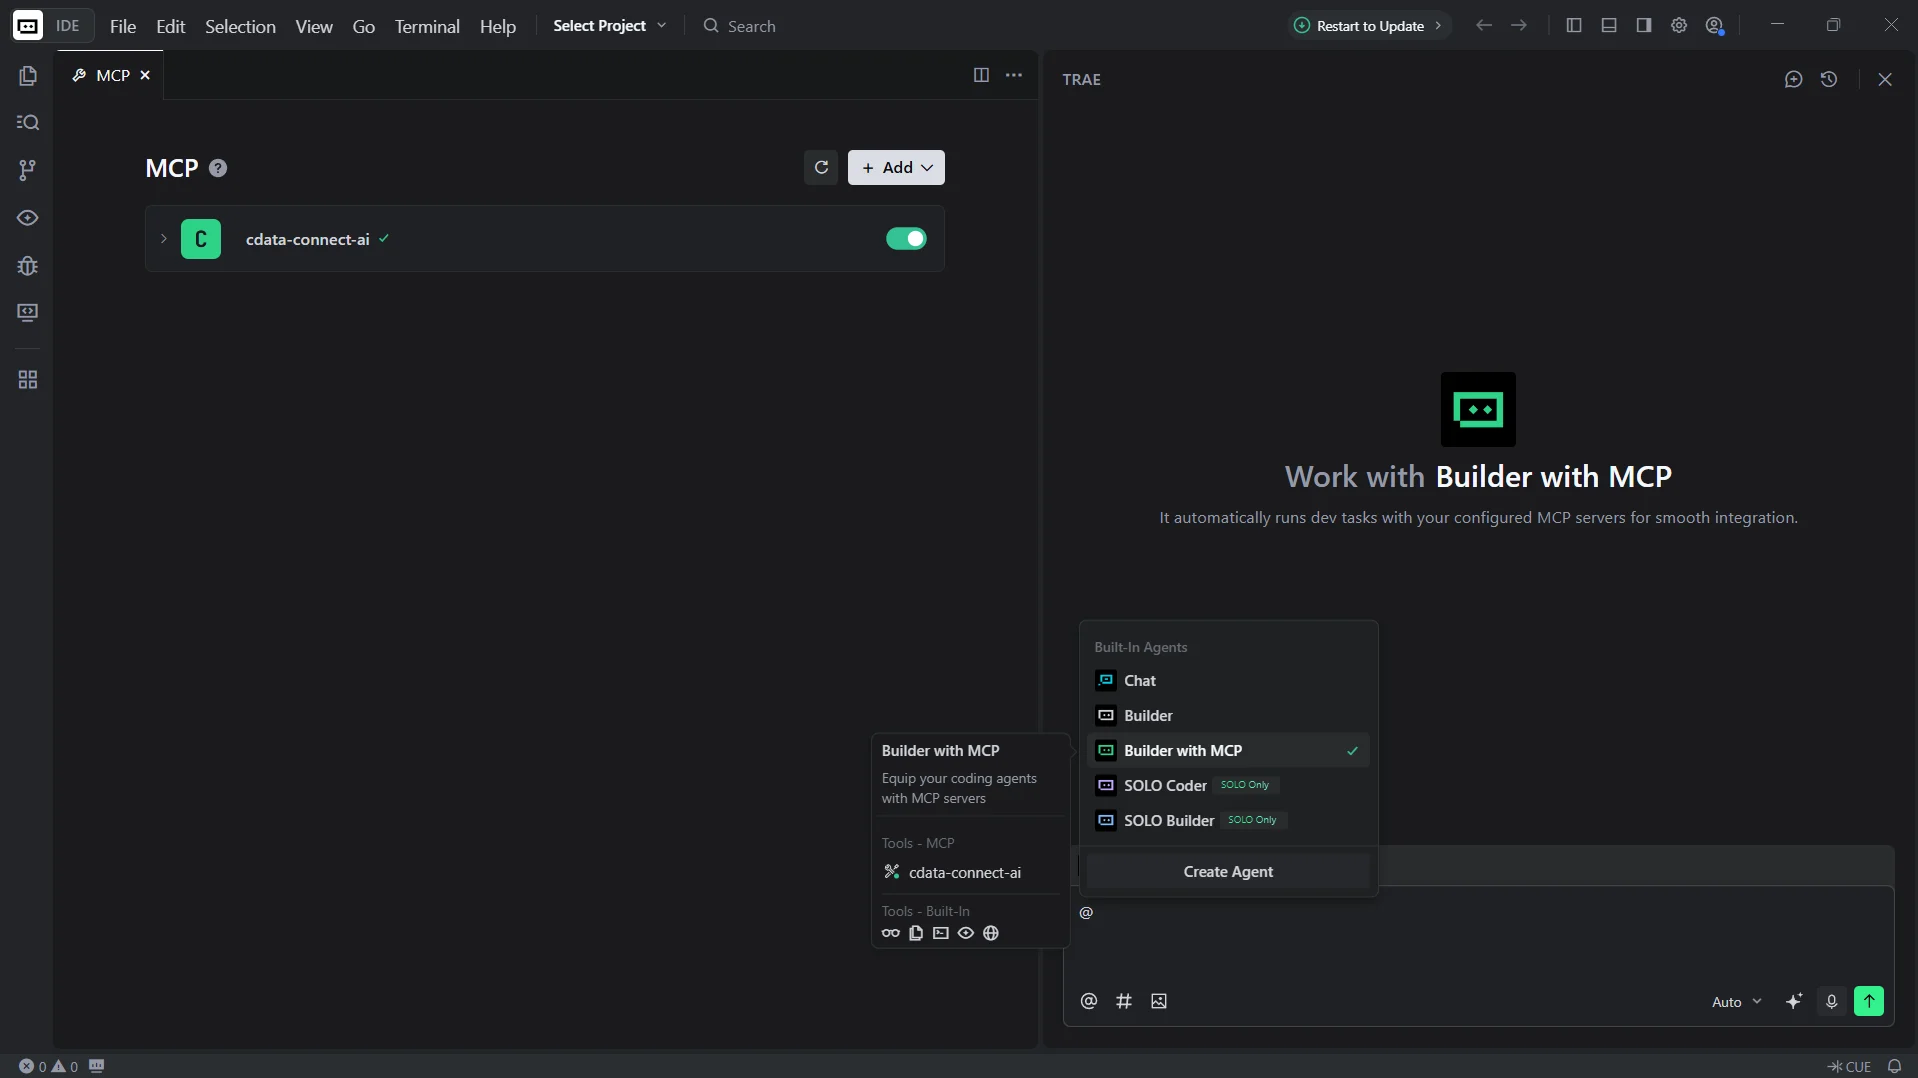
In the chat panel, type @ and select Builder with MCP. Confirm that cdata-connect-ai is listed under Tools - MCP
-
Enter a prompt to interact with your data, for example:
- List all catalogs in cdata-connect-ai
- Show the available schemas and tables for Amazon Athena
- Query the top 5 records from a table in Amazon Athena data
-
Trae calls the Connect AI MCP Server and returns live results from Amazon Athena data
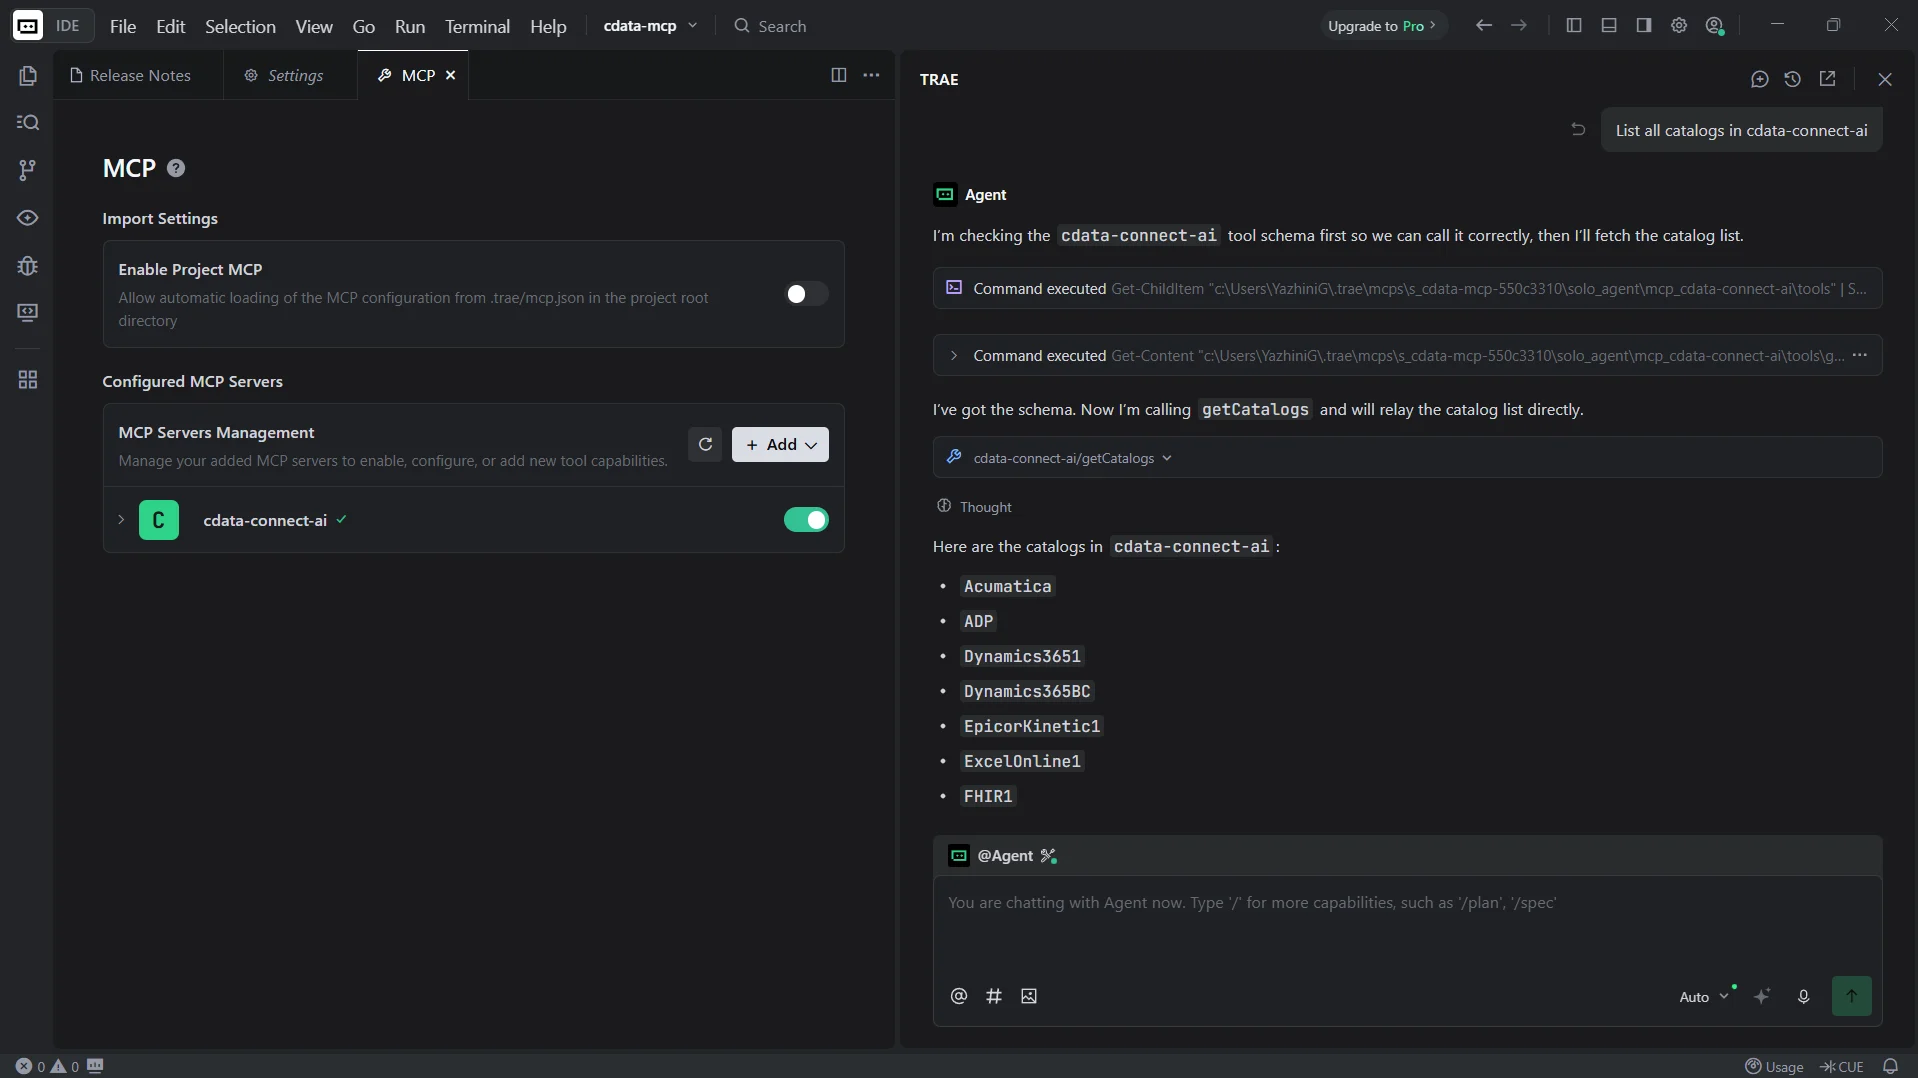
At this point, the Trae agent communicates with the Connect AI MCP Server and retrieves live Amazon Athena data through remote MCP tools directly from the IDE.
Get CData Connect AI
To access hundreds of SaaS, big data, and NoSQL sources directly from your cloud applications, try CData Connect AI today. Download a free 14-day trial of CData Connect AI, and our Support Team is available to help with any questions you have.