








Use Microsoft Copilot Studio to talk to your Bitbucket Data via CData Connect AI

Microsoft Copilot Studio is a no-code/low-code platform for creating AI Agents that can automate tasks, answer questions, and assist with various business processes. When combined with CData Connect AI Remote MCP, you can leverage Copilot Studio to interact with your Bitbucket data in real-time. This article outlines the process of connecting to Bitbucket using Connect AI Remote MCP and creating a connection in Copilot Studio to interact with your Bitbucket data.
CData Connect AI offers a dedicated cloud-to-cloud interface for connecting to Bitbucket data. The CData Connect AI Remote MCP Server enables secure communication between Microsoft Copilot Studio and Bitbucket. This allows you to ask questions and take actions on your Bitbucket data using Microsoft Copilot Studio, all without the need for data replication to a natively supported database. With its inherent optimized data processing capabilities, CData Connect AI efficiently channels all supported SQL operations, including filters and JOINs, directly to Bitbucket. This leverages server-side processing to swiftly deliver the requested Bitbucket data.
In this article, we show how to build a agent in Microsoft Copilot Studio to conversational explore (or Vibe Query) your data. The connectivity principals apply to any Copilot agent. With Connect AI you can build workflows and agents with access to live Bitbucket data, plus hundreds of other sources.
Step 1: Configure Bitbucket Connectivity for Microsoft Copilot Studio
Connectivity to Bitbucket from Microsoft Copilot Studio is made possible through CData Connect AI Remote MCP. To interact with Bitbucket data from Microsoft Copilot Studio, we start by creating and configuring a Bitbucket connection in CData Connect AI.
-
Log into Connect AI, click Connections and click Add Connection

-
Select "Bitbucket" from the Add Connection panel

-
Enter the necessary authentication properties to connect to Bitbucket.
For most queries, you must set the Workspace. The only exception to this is the Workspaces table, which does not require this property to be set, as querying it provides a list of workspace slugs that can be used to set Workspace. To query this table, you must set Schema to 'Information' and execute the query SELECT * FROM Workspaces>.
Setting Schema to 'Information' displays general information. To connect to Bitbucket, set these parameters:
- Schema: To show general information about a workspace, such as its users, repositories, and projects, set this to Information. Otherwise, set this to the schema of the repository or project you are querying. To get a full set of available schemas, query the sys_schemas table.
- Workspace: Required if you are not querying the Workspaces table. This property is not required for querying the Workspaces table, as that query only returns a list of workspace slugs that can be used to set Workspace.
Authenticating to Bitbucket
Bitbucket supports OAuth authentication only. To enable this authentication from all OAuth flows, you must create a custom OAuth application, and set AuthScheme to OAuth.
Be sure to review the Help documentation for the required connection properties for you specific authentication needs (desktop applications, web applications, and headless machines).
Creating a custom OAuth application
From your Bitbucket account:
- Go to Settings (the gear icon) and select Workspace Settings.
- In the Apps and Features section, select OAuth Consumers.
- Click Add Consumer.
- Enter a name and description for your custom application.
- Set the callback URL:
- For desktop applications and headless machines, use http://localhost:33333 or another port number of your choice. The URI you set here becomes the CallbackURL property.
- For web applications, set the callback URL to a trusted redirect URL. This URL is the web location the user returns to with the token that verifies that your application has been granted access.
- If you plan to use client credentials to authenticate, you must select This is a private consumer. In the driver, you must set AuthScheme to client.
- Select which permissions to give your OAuth application. These determine what data you can read and write with it.
- To save the new custom application, click Save.
- After the application has been saved, you can select it to view its settings. The application's Key and Secret are displayed. Record these for future use. You will use the Key to set the OAuthClientId and the Secret to set the OAuthClientSecret.
 Click Save & Test
-
Navigate to the Permissions tab in the Add Bitbucket Connection page and update the User-based permissions.

With the connection configured, we are ready to connect to Bitbucket data from Microsoft Copilot Studio.
Step 2: Connect Microsoft Copilot Studio to CData Connect AI
Follow these steps to add a CData Connect AI MCP connection in Microsoft Copilot Studio:
-
Under Tools, click Add tool, then click + New Tool.

-
In the Add Tool window, search for and click CData Connect AI.

-
In the Connect to CData Connect AI window, click Create to authenticate your connection CData Connect AI using OAuth authentication.

-
Click Add and configure to add the CData Connect AI Tool to your agent.

Optional: Give the AI Agent context
This step establishes the AI Agent's role and provides context for the conversation through the Instructions property in the Agent. By providing instructions that explicitly informs the agent about its role as an MCP Server expert and lists the available tools, you can enhance the agent's understanding and response accuracy. For example, you can set the System Message to:
You are an expert at using the MCP Client tool connected which is the CData Connect AI MCP Server. Always search thoroughly and use the most relevant MCP Client tool for each query. Below are the available tools and a description of each:
queryData: Execute SQL queries against connected data sources and retrieve results. When you use the queryData tool, ensure you use the following format for the table name: catalog.schema.tableName
getCatalogs: Retrieve a list of available connections from CData Connect AI. The connection names should be used as catalog names in other tools and in any queries to CData Connect AI. Use the `getSchemas` tool to get a list of available schemas for a specific catalog.
getSchemas: Retrieve a list of available database schemas from CData Connect AI for a specific catalog. Use the `getTables` tool to get a list of available tables for a specific catalog and schema.
getTables: Retrieve a list of available database tables from CData Connect AI for a specific catalog and schema. Use the `getColumns` tool to get a list of available columns for a specific table.
getColumns: Retrieve a list of available database columns from CData Connect AI for a specific catalog, schema, and table.
getProcedures: Retrieve a list of stored procedures from CData Connect AI for a specific catalog and schema
getProcedureParameters: Retrieve a list of stored procedure parameters from CData Connect AI for a specific catalog, schema, and procedure.
executeProcedure: Execute stored procedures with parameters against connected data sources
Step 3: Explore Live Bitbucket Data with Microsoft Copilot Studio
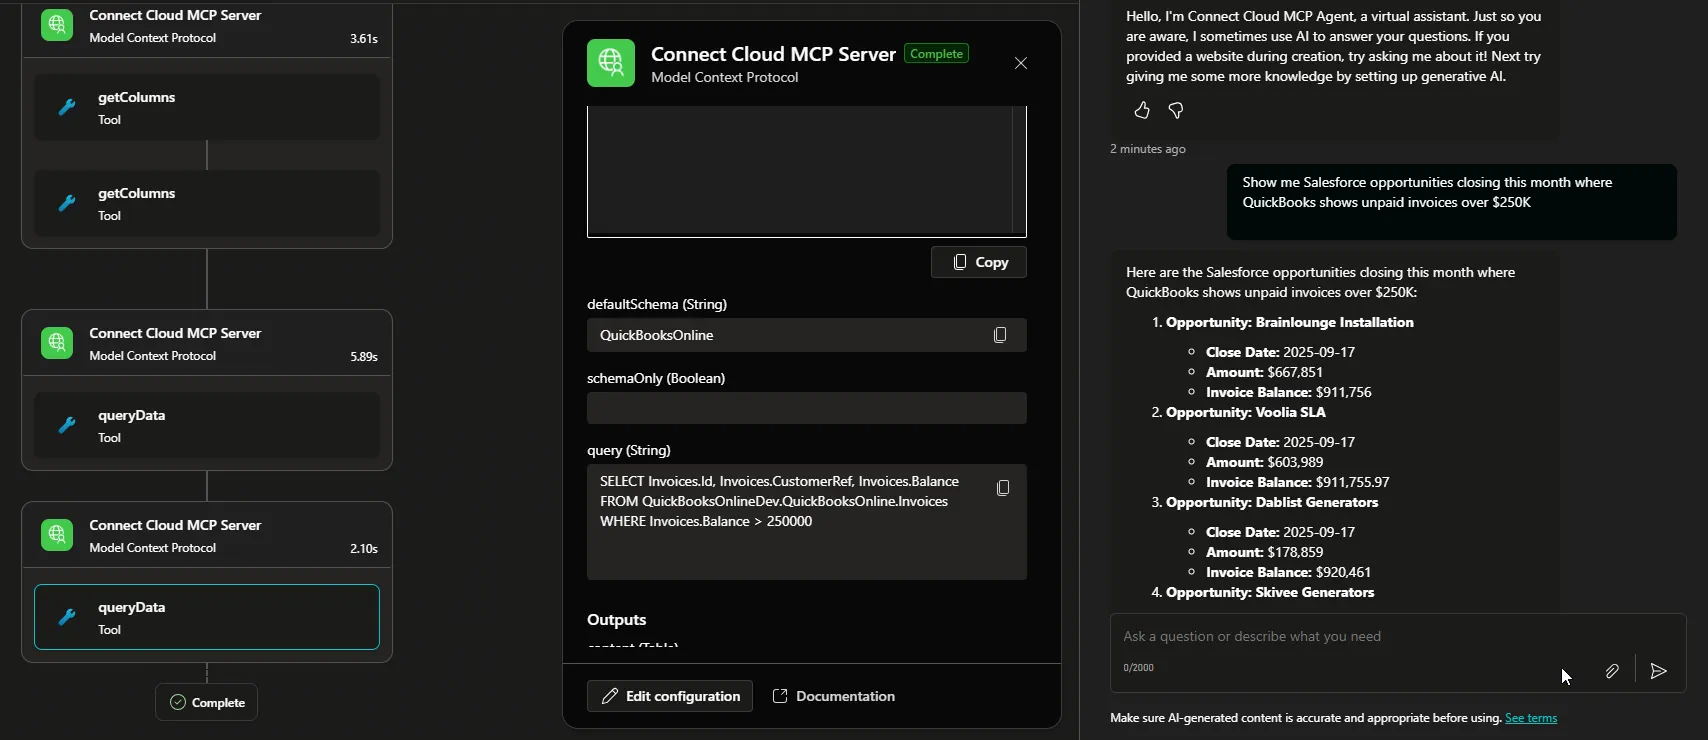
With the Agent created in Microsoft Copilot Studio and the MCP tool connected, you can now interact with your Bitbucket data using Microsoft Copilot Studio. The MCP tool allows you to send queries and receive responses from the Bitbucket data source in real-time.
Open the chat window in your Microsoft Copilot Studio Agent to begin interacting with your Bitbucket data. You can ask questions, retrieve data, and perform actions on your Bitbucket data using the MCP tool:
Get CData Connect AI
To get live data access to hundreds of SaaS, Big Data, and NoSQL sources directly from your cloud applications, try CData Connect AI today!