Discover how a bimodal integration strategy can address the major data management challenges facing your organization today.
Get the Report →Model Azure Synapse Data Using Azure Analysis Services
Leverage CData Connect Cloud to establish a connection between Azure Analysis Services and Azure Synapse, enabling the direct import of real-time Azure Synapse data.
Microsoft Azure Analysis Services (AAS) is a fully-managed platform-as-a-service (PaaS) offering that delivers enterprise-grade data models in the cloud. When combined with CData Connect Cloud, AAS facilitates immediate cloud-to-cloud access to Azure Synapse data for applications. This article outlines the process of connecting to Azure Synapse via Connect Cloud and importing Azure Synapse data into Visual Studio using an AAS extension.
CData Connect Cloud offers a seamless cloud-to-cloud interface tailored for Azure Synapse, enabling you to create live models of Azure Synapse data in Azure Analysis Services without the need to replicate data to a natively supported database. While constructing high-quality semantic data models for business reports and client applications, Azure Analysis Services formulates SQL queries to retrieve data. CData Connect Cloud is equipped with optimized data processing capabilities right from the start, directing all supported SQL operations, including filters and JOINs, directly to Azure Synapse. This leverages server-side processing for swift retrieval of the requested Azure Synapse data.
Prerequisites
Before you connect, you must first do the following:
- Connect a data source to your CData Connect Cloud account. Detailed steps are provided in the next section.
- Generate a Personal Access Token (PAT). Copy this down, as it acts as your password during authentication.
- Create a server in Azure Analysis Services to which you will deploy your data from CData Connect Cloud.
- Install and configure an On-Premise Gateway in your system. This will pull data from the source via CData Connect Cloud into the Azure Analysis Services project and deploy models to the server. Refer to the given link to find the detailed process.
Configure Azure Synapse Connectivity for AAS
Connectivity to Azure Synapse from Azure Analysis Services is made possible through CData Connect Cloud. To work with Azure Synapse data from Azure Analysis Services, we start by creating and configuring a Azure Synapse connection.
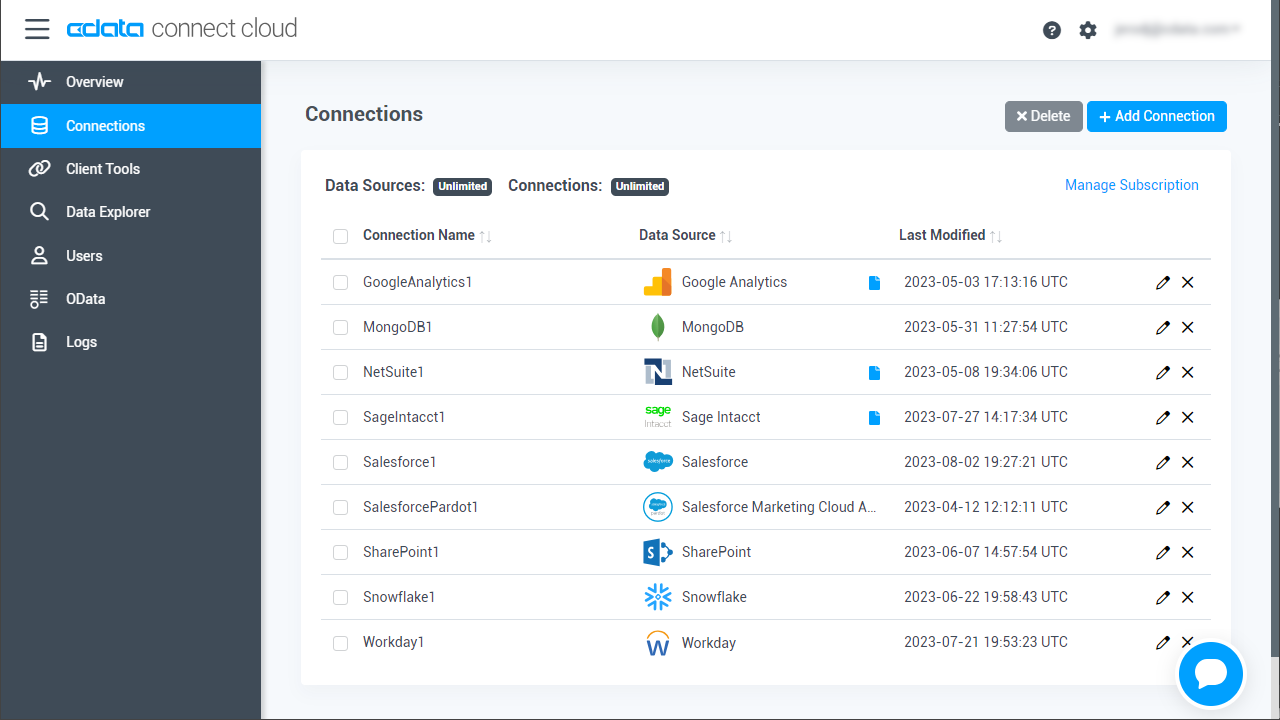
- Log into Connect Cloud, click Connections and click Add Connection
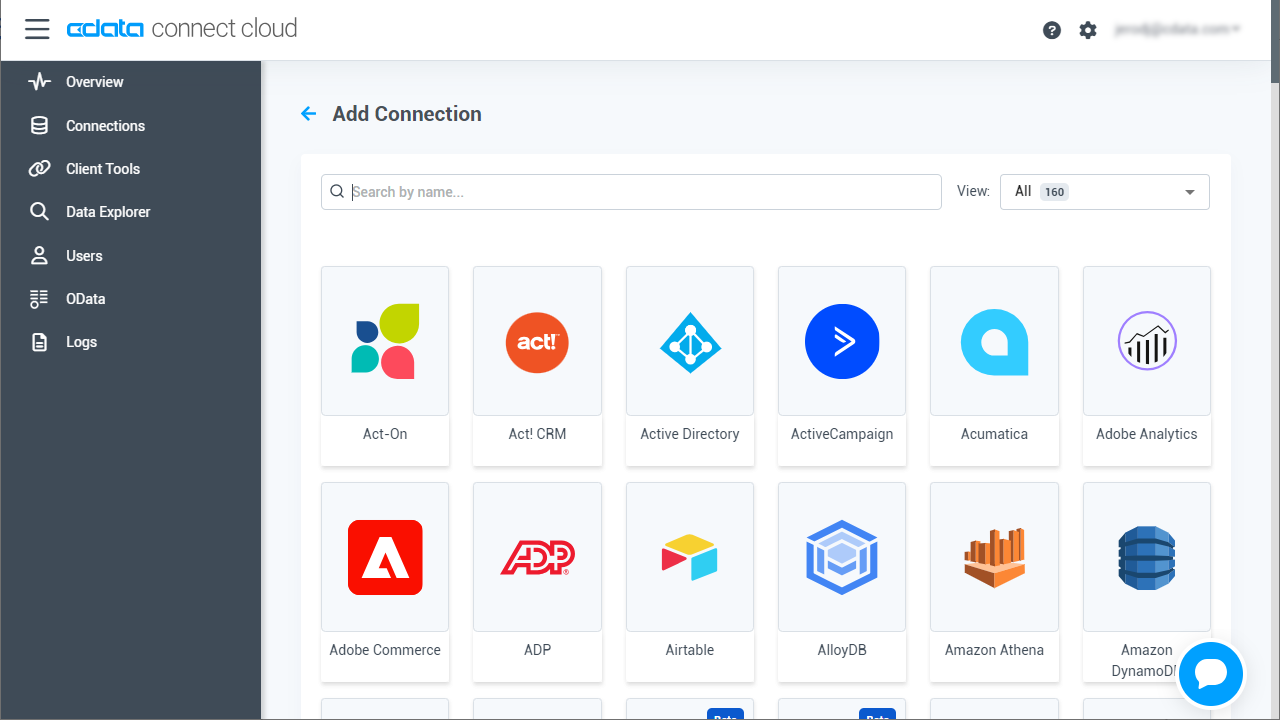
- Select "Azure Synapse" from the Add Connection panel
-
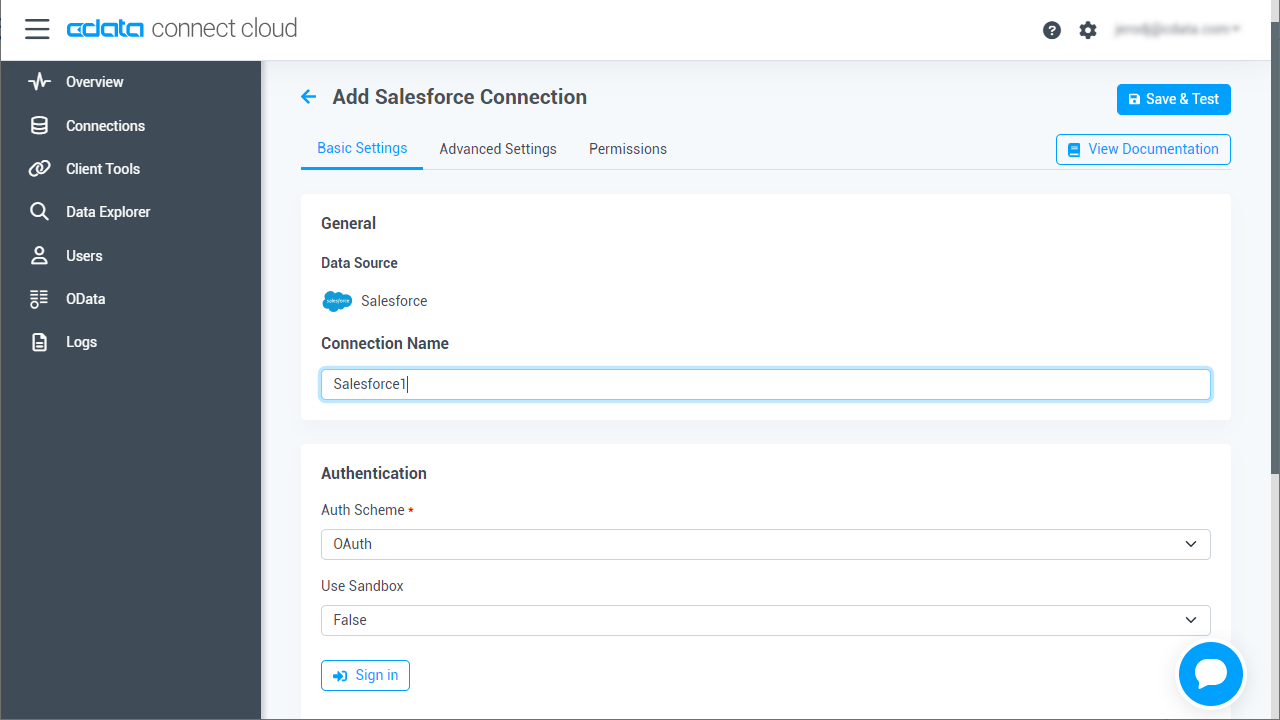
Enter the necessary authentication properties to connect to Azure Synapse.
Connecting to Azure Synapse
In addition to providing authentication (see below), set the following properties to connect to a Azure Synapse database:
- Server: The server running Azure. You can find this by logging into the Azure portal and navigating to Azure Synapse Analytics -> Select your database -> Overview -> Server name.
- Database: The name of the database, as seen in the Azure portal on the Azure Synapse Analytics page.
Authenticating to Azure Synapse
Connect to Azure Synapse using the following properties:
- User: The username provided for authentication with Azure.
- Password: The password associated with the authenticating user.
![Configuring a connection (Salesforce is shown)]()
- Click Create & Test
-
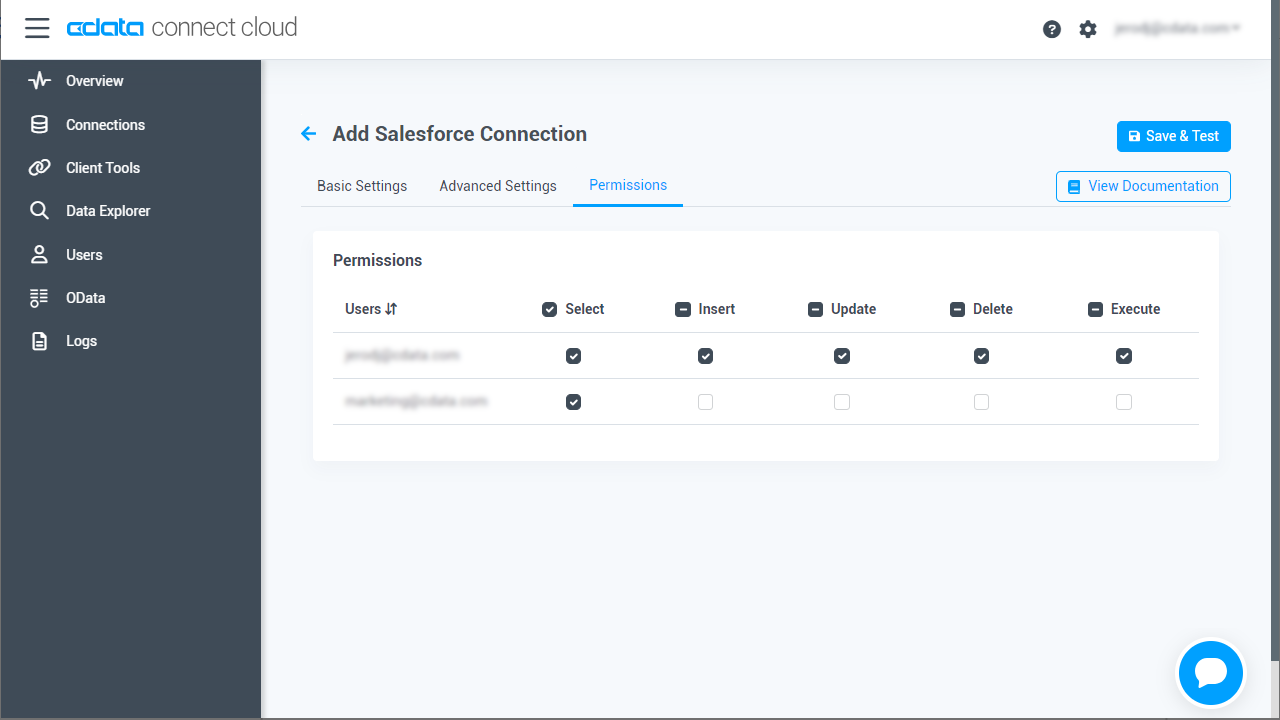
Navigate to the Permissions tab in the Add Azure Synapse Connection page and update the User-based permissions.
![Updating permissions]()
Add a Personal Access Token
If you are connecting from a service, application, platform, or framework that lacks support for OAuth authentication, you have the option to generate a Personal Access Token (PAT) for authentication purposes. It's advisable to follow best practices by creating a distinct PAT for each service to uphold access granularity.
- Click on your username at the top right of the Connect Cloud app and click User Profile.
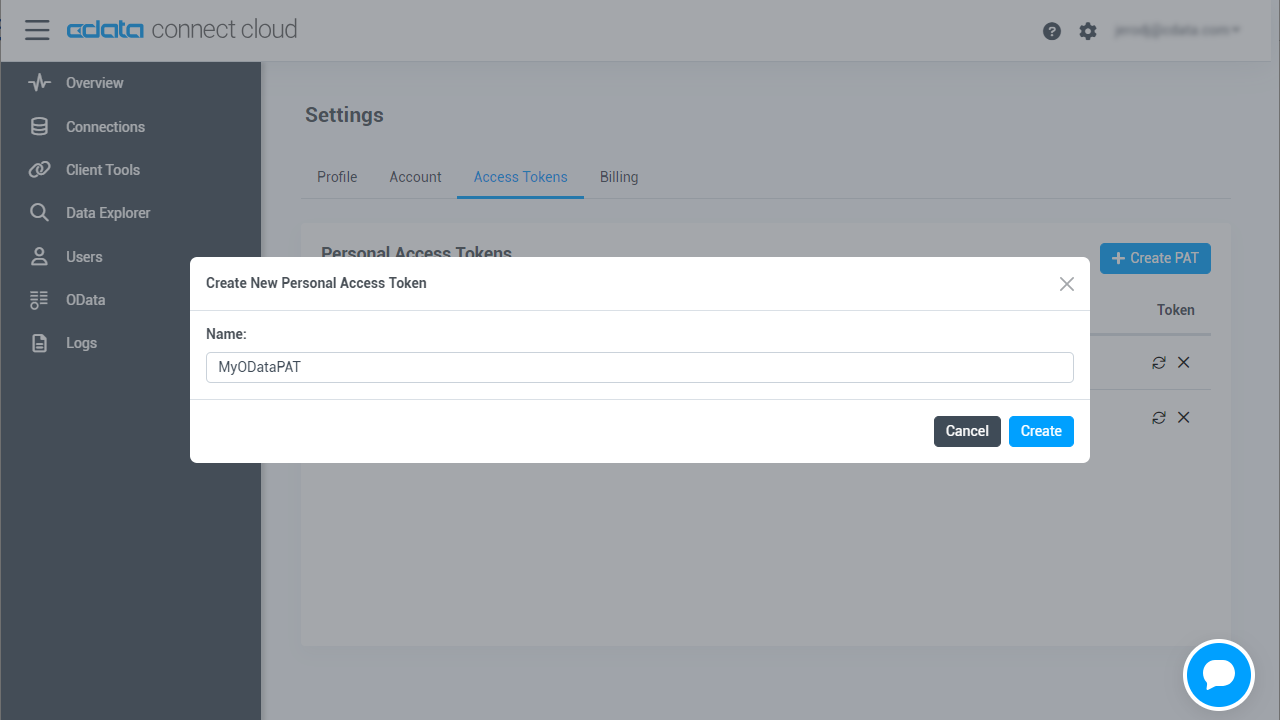
- On the User Profile page, scroll down to the Personal Access Tokens section and click Create PAT.
- Give your PAT a name and click Create.
- The personal access token is only visible at creation, so be sure to copy it and store it securely for future use.
With the connection configured, you are ready to connect to Azure Synapse data from Visual Studio using Azure Analysis Services.
Connect to Azure Synapse in Visual Studio Using AAS
The steps below outline connecting to CData Connect Cloud from Azure Analysis Services to create a new Azure Synapse data source. You will need the Microsoft Analysis Services Project extension installed in Microsoft Visual Studio to continue.
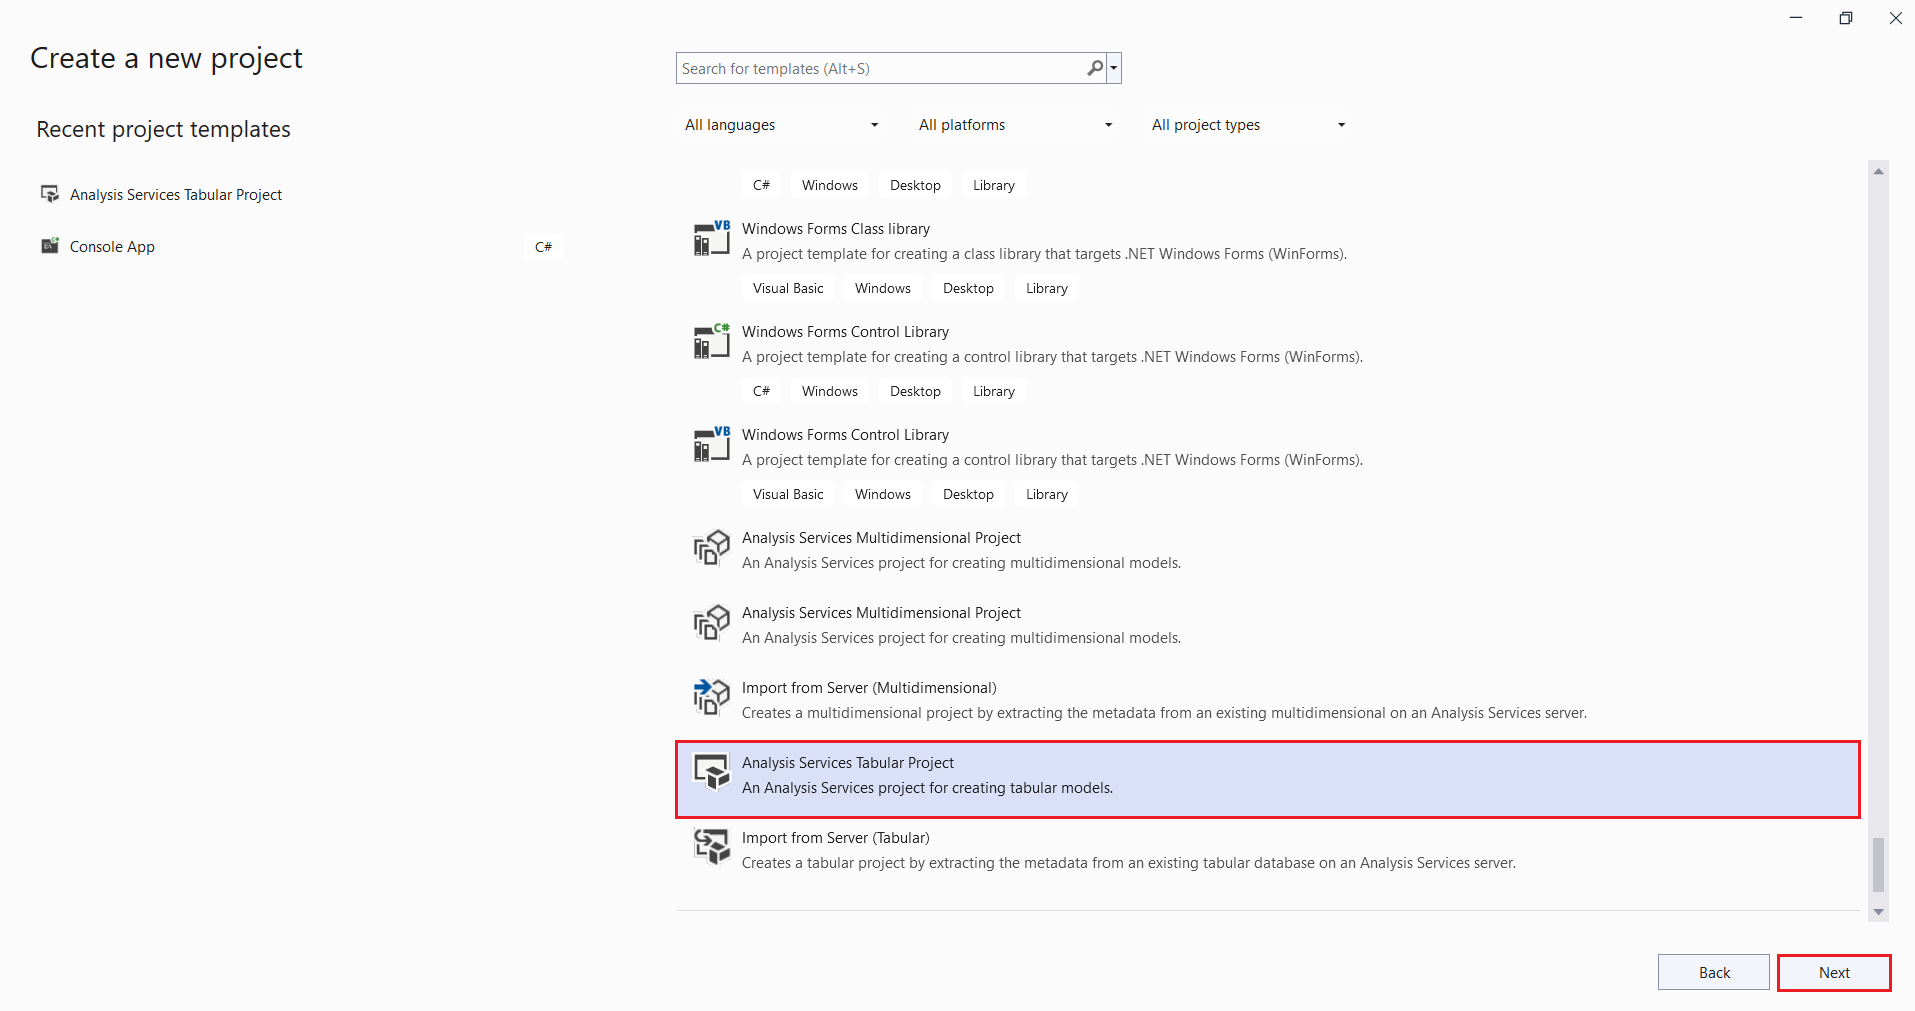
- In Visual Studio, create a new project. Select Analysis Services Tabular Project. Click on Next.
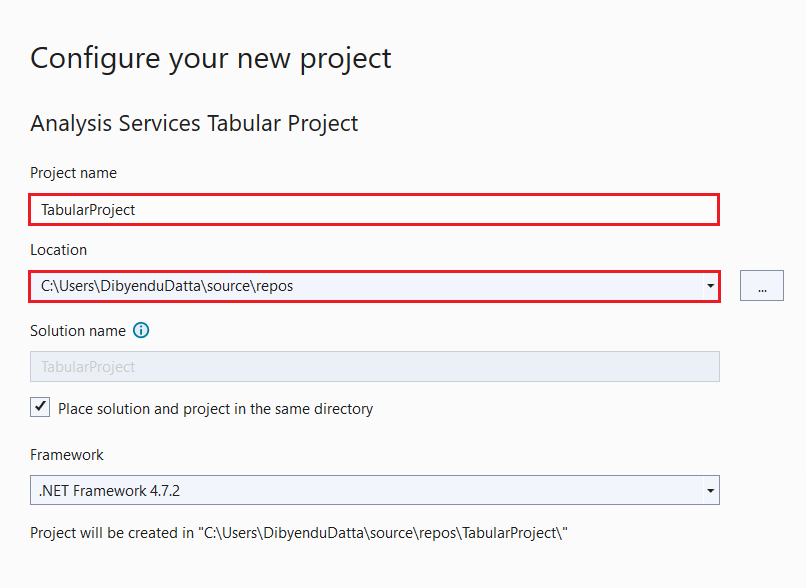
- In the Configure your new project dialog box, enter a name for your project in the Project name field. Fill in the rest of the fields.
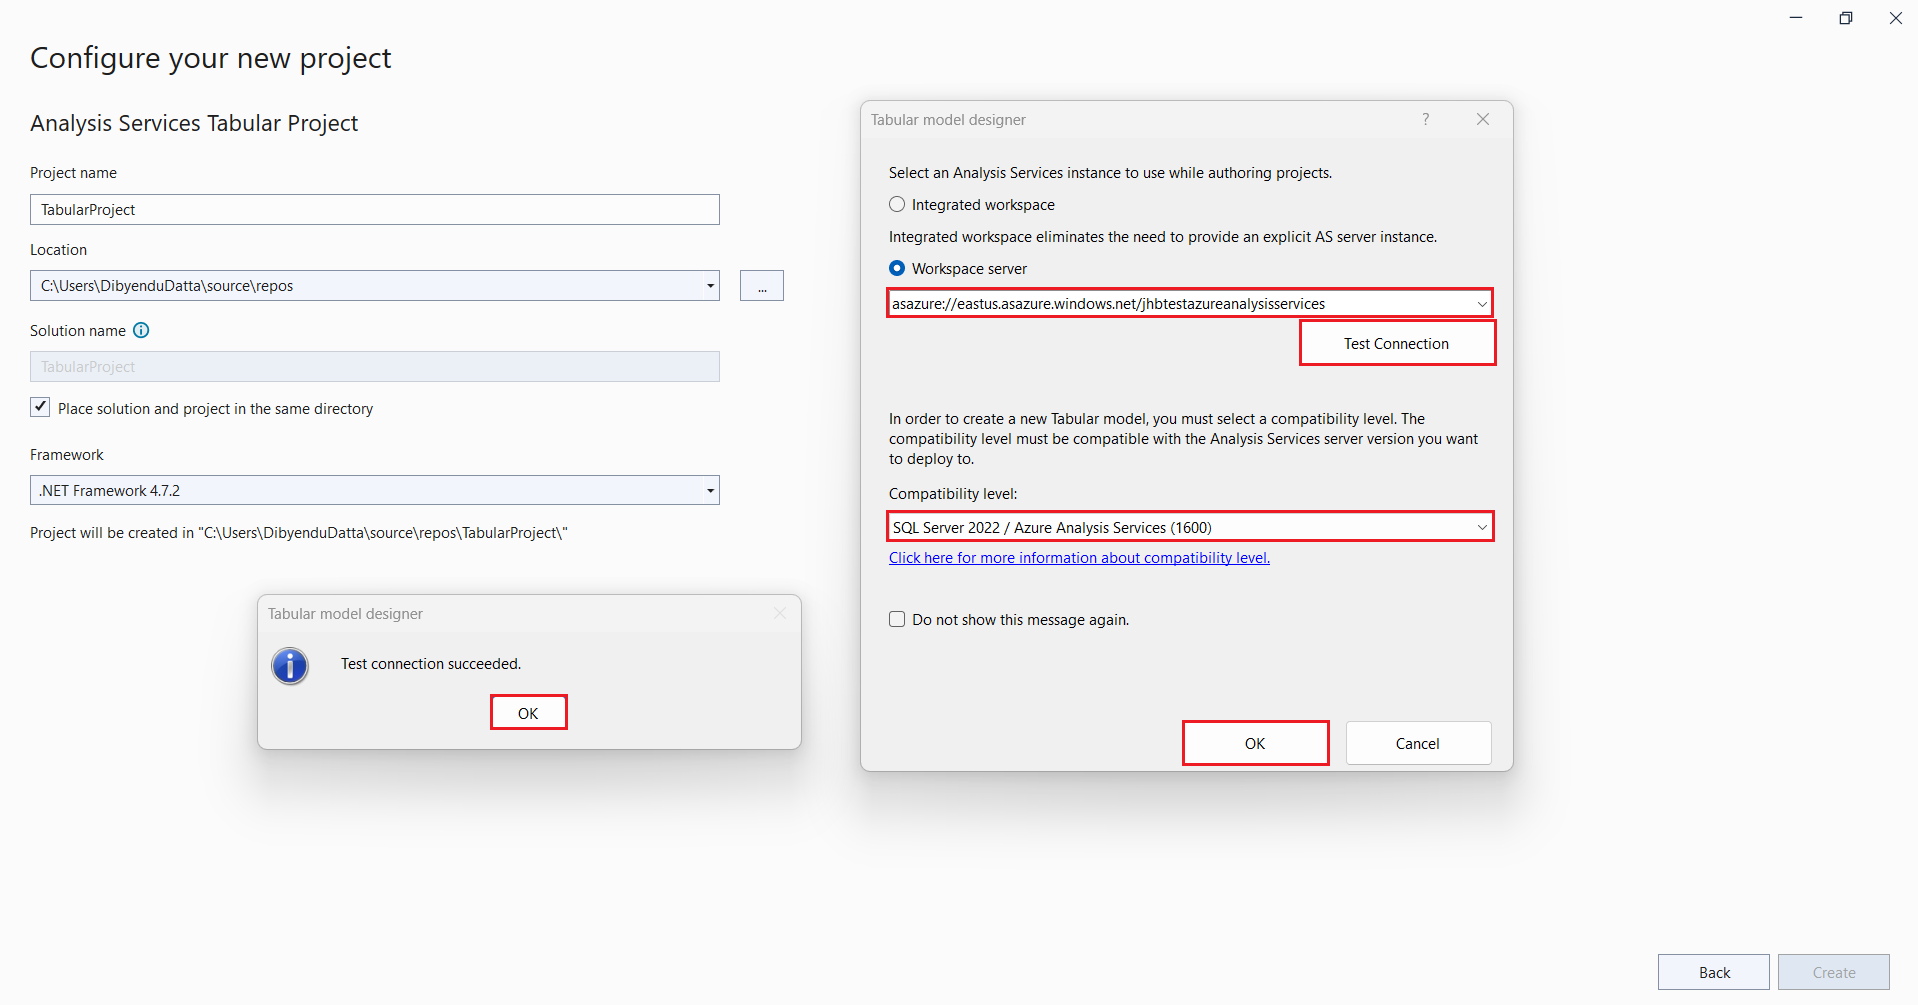
- Click on Create. The Tabular model designer dialog box opens. Select Workspace server and enter the address of your Azure Analysis Services server (for example, asazure://eastus.azure.windows.net/myAzureServer). Also, make sure to select the option SQL Server 2022 / Azure Analysis Services (1600) from the Compatibility level dropdown. Click on Test Connection to check if the connection details are correct. Click OK and sign in to your server.
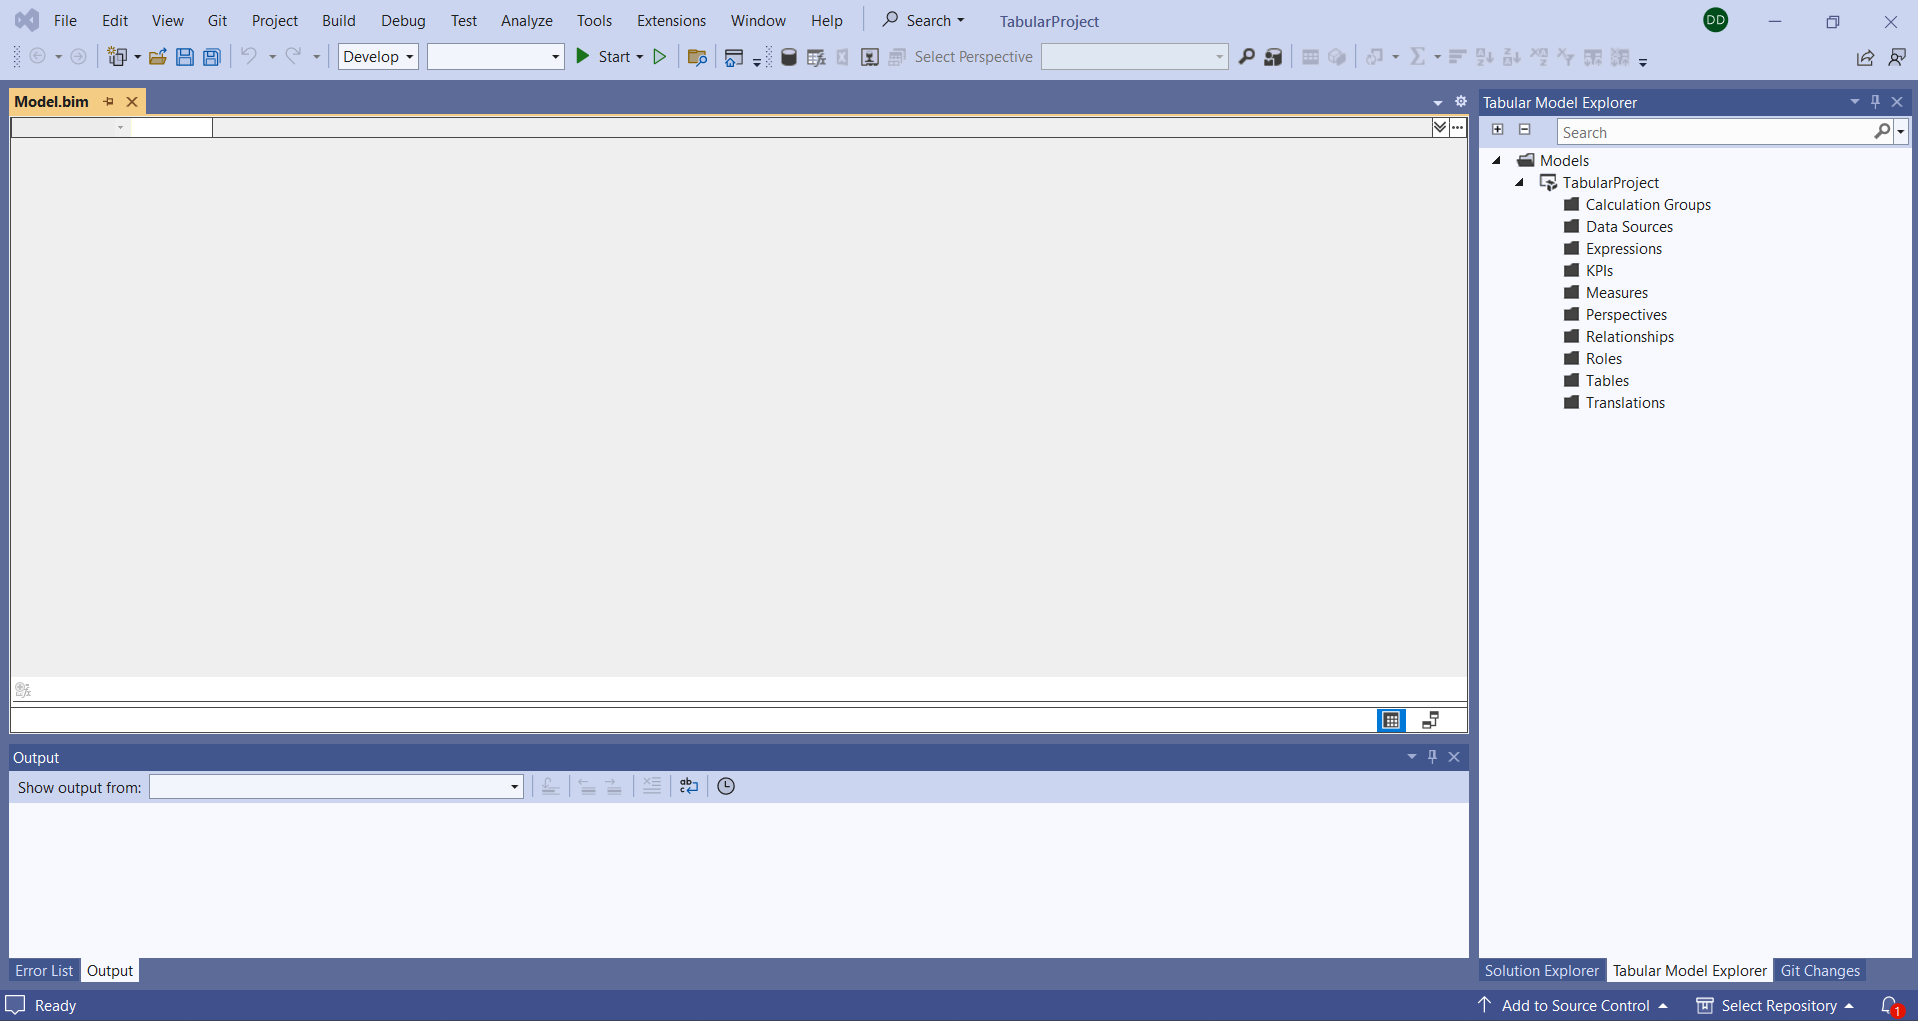
- Now, click on OK to create the project. Your Visual Studio window should resemble the following screenshot:
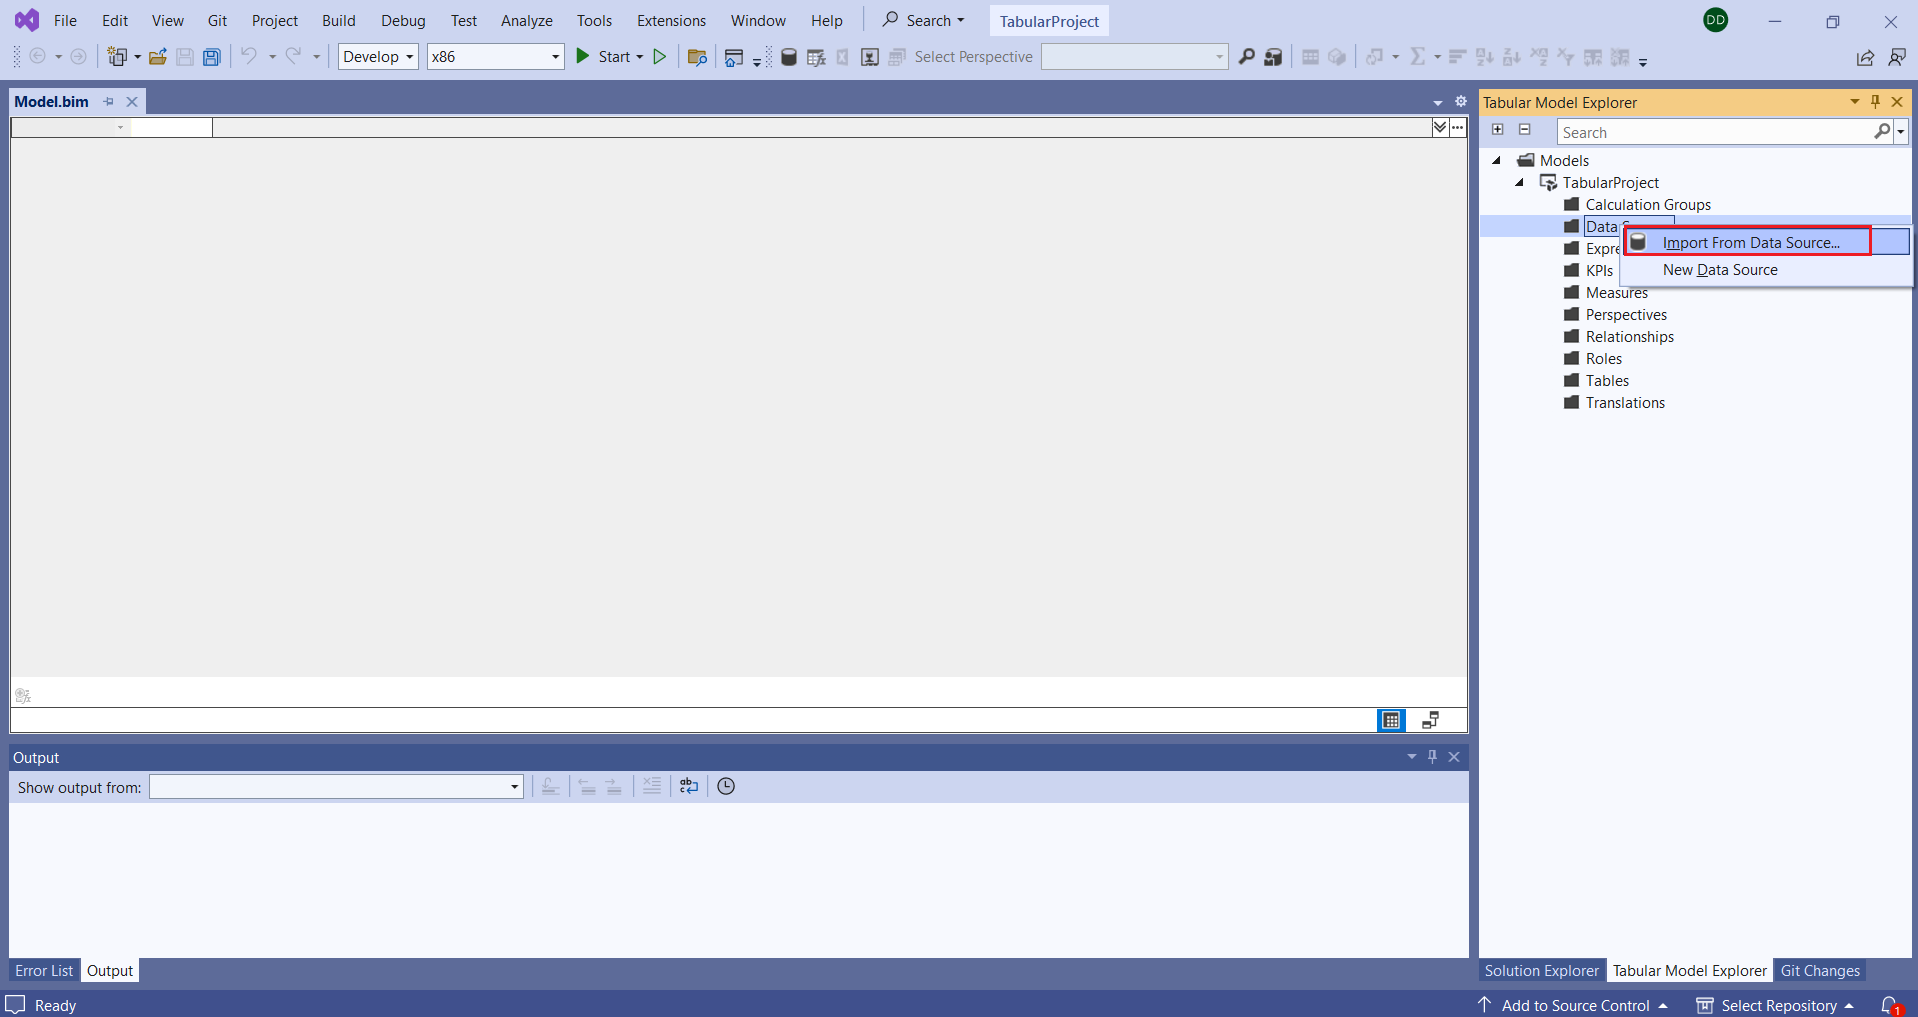
- In the Tabular Model Explorer window of Visual Studio, right-click Data Sources and select Import From Data Source.
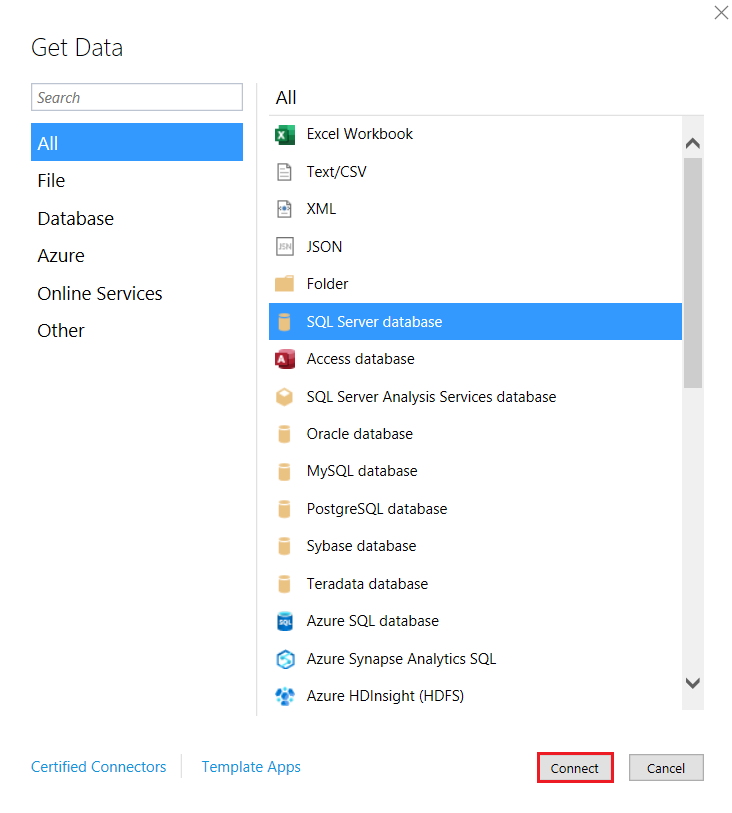
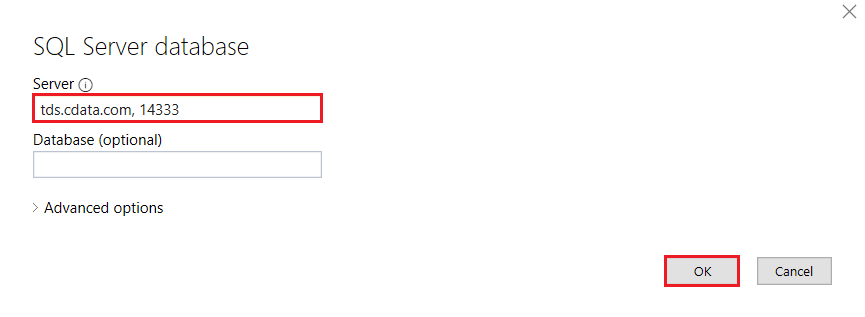
- In the Get Data window, select SQL Server database and click Connect. In the Server field, enter the Virtual SQL Server endpoint and the port separated by a comma: e.g., “tds.cdata.com, 14333”, and click on OK.
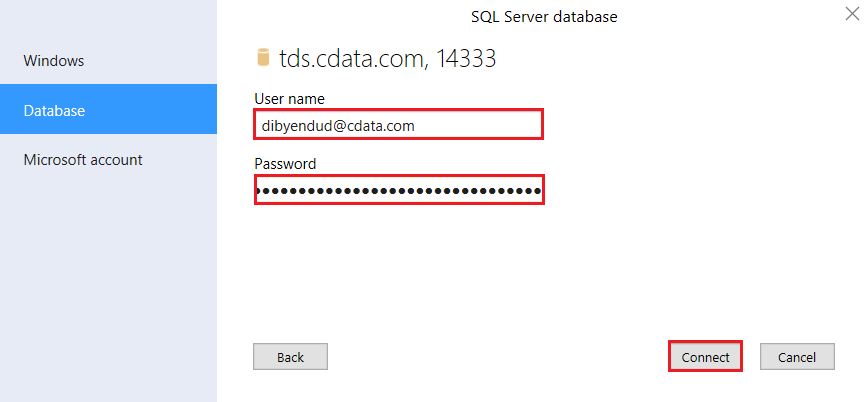
- Click on Database and enter the following information:
- User name: Enter your CData Connect Cloud username. This is displayed in the top-right corner of the CData Connect Cloud interface. For example, [email protected].
- Password: Enter the PAT you generated on the Settings page.
Click on Connect. If successful, the Navigator window will pop up.
![Entering the Username and Password (PAT)]()
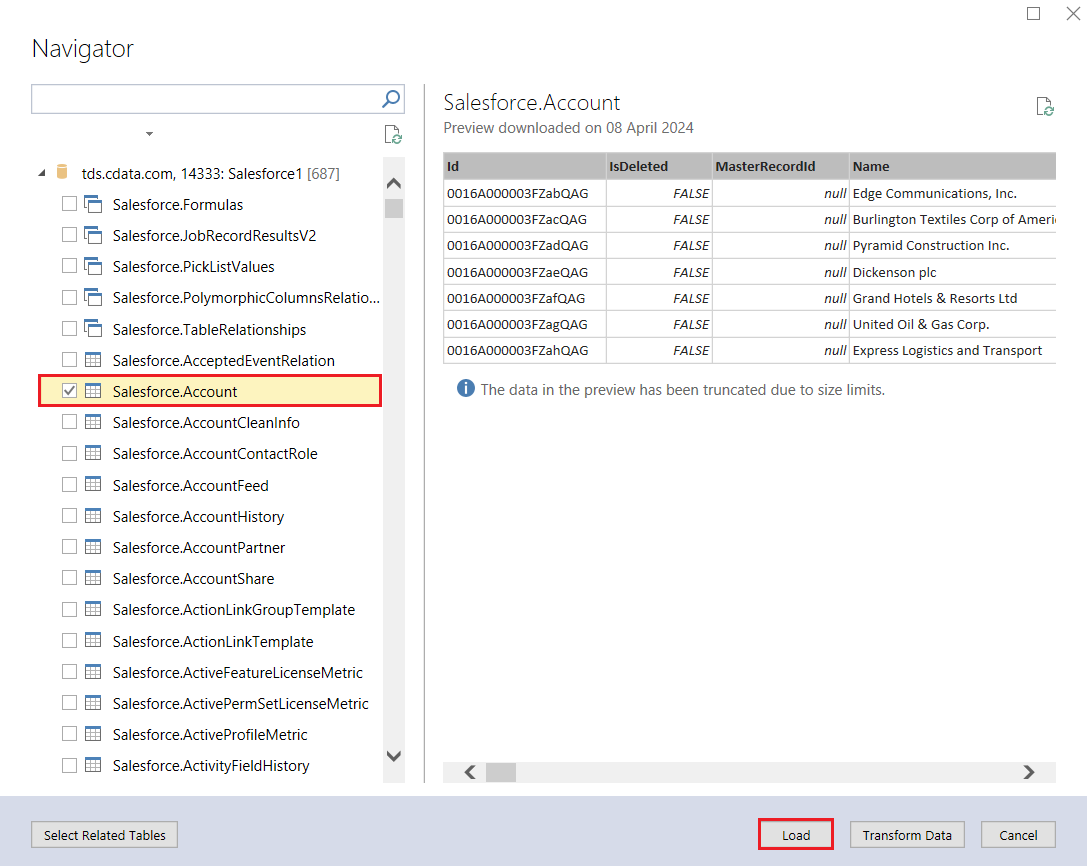
- In the Navigator window, search and select the tables of your choice
![Searching and selectisng the data source tables]()
- You should now see the Salesforce table populated with data in the preview section on the right panel.
- Click on Load to import the data.
![Select and load tables from the data source]()
Now that you have imported the Azure Synapse data into your data model, you are ready to deploy the project to Azure Analysis Services for use in business reports, client applications, and more.
Get CData Connect Cloud
To get live data access to 100+ SaaS, Big Data, and NoSQL sources directly from your cloud applications, try CData Connect Cloud today!


