







Use the CData SSIS Components to Insert New or Update Existing Azure Synapse Records from SQL Server

SQL Server databases are commonly used to store enterprise records. It is often necessary to move this data to other locations. The CData SSIS Components for Azure Synapse allow you to easily transfer data from SQL Server to Azure Synapse.
This article demonstrates how to use the CData SSIS Components for Azure Synapse inside of a SQL Server Integration Services workflow to export data from SQL Server to Azure Synapse, utilizing a lookup component to find and update any existing records or insert new records.
Add the Components
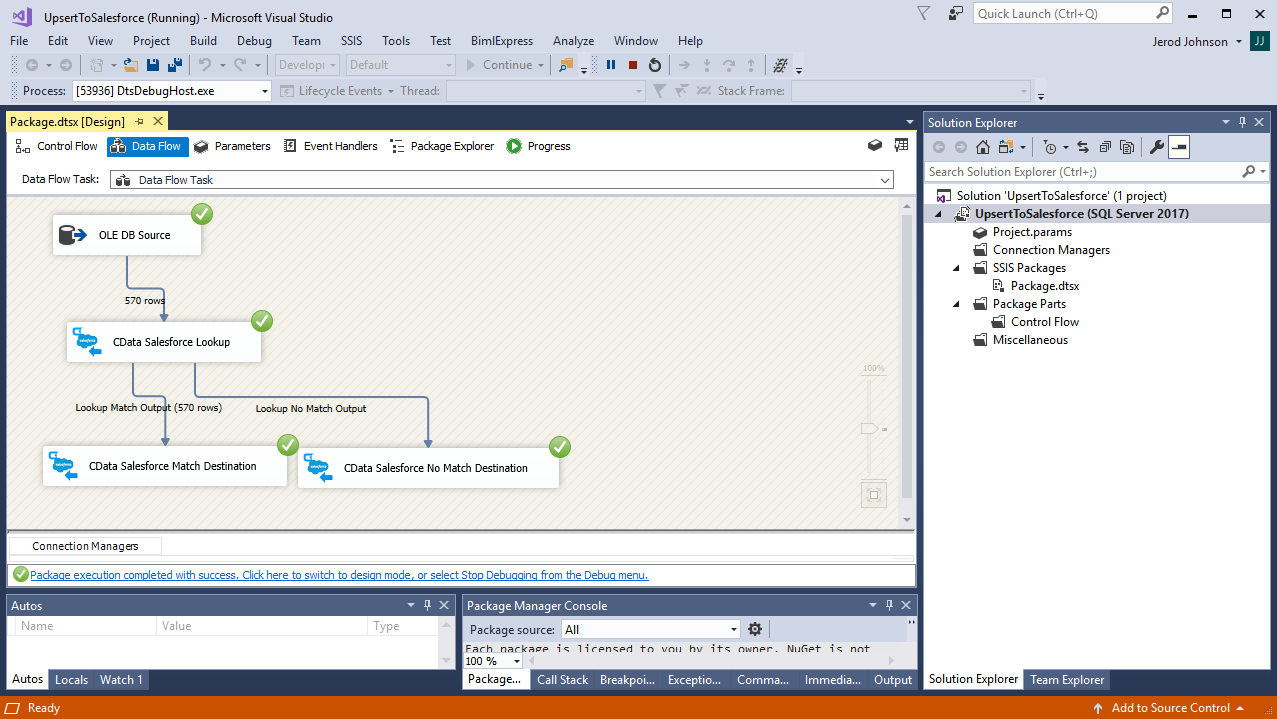
To get started, add a new OLE DB source, CData Azure Synapse lookup, and two CData Azure Synapse destinations (one to handle a lookup with a match and one to handle a lookup without a match) to a new data flow task.
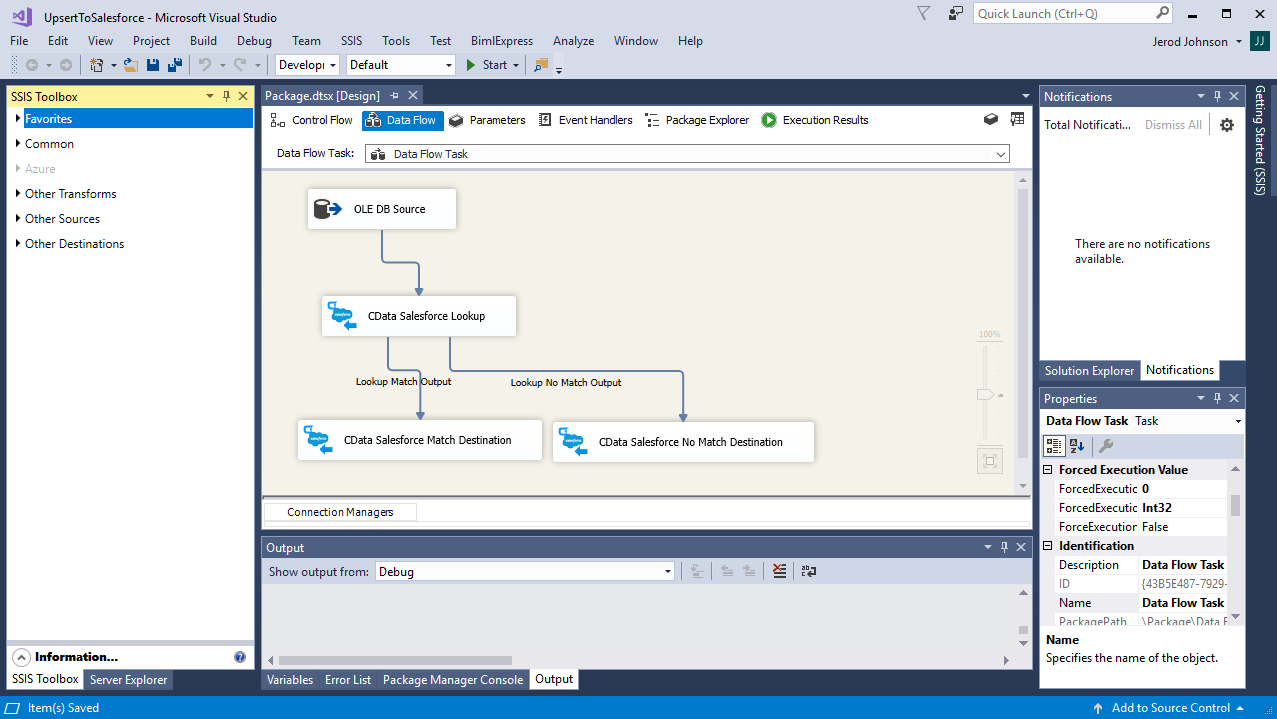
Configure the OLE DB Source
Follow the steps below to specify properties required to connect to the SQL Server instance.
- Open the OLE DB Source and add a new connection. Enter your server and database information here.
- In the Data access mode menu, select "Table or view" and select the table or view to export into Azure Synapse.
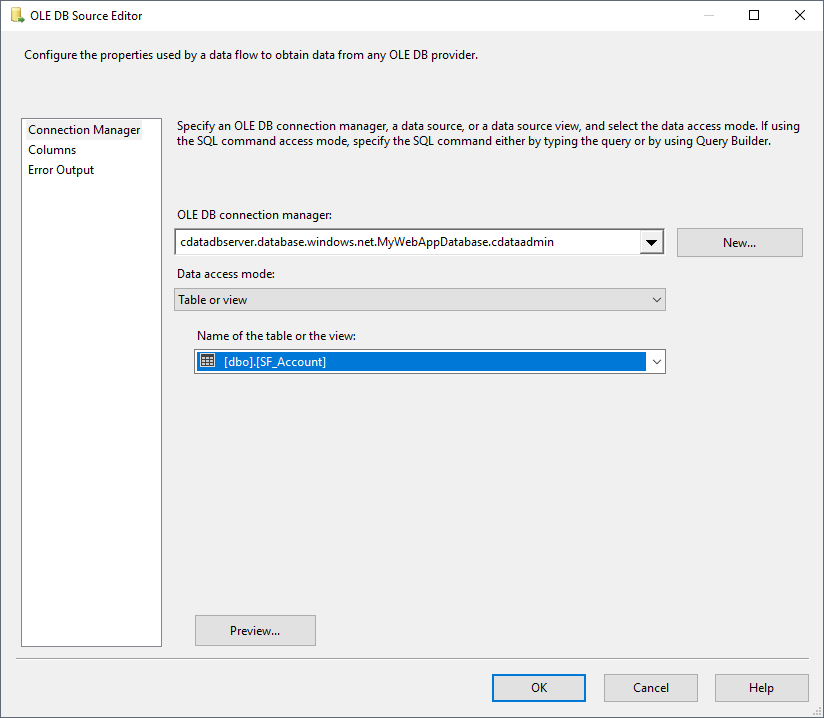
- Close the OLE DB Source wizard and connect it to the CData Azure Synapse Destination.
Create a New Connection Manager for Azure Synapse
Follow the steps below to save connection properties in the Connection Manager.
- Create a new Connection manager: In the Connection Manager window, right-click and then click New Connection. The Add SSIS Connection Manager dialog is displayed.
- In the Connection Manager type menu, select the CData Azure Synapse Connection Manager.
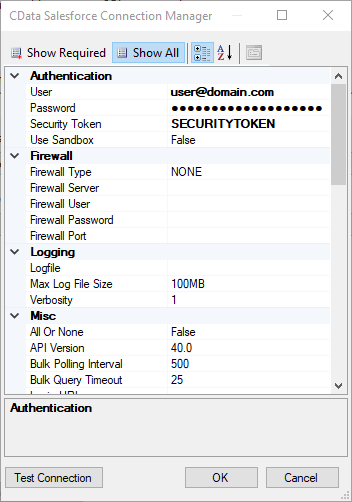
- Configure the connection properties. A typical Azure Synapse connection requires:
- User
- Password
- AccessToken
Configure the Azure Synapse Lookup
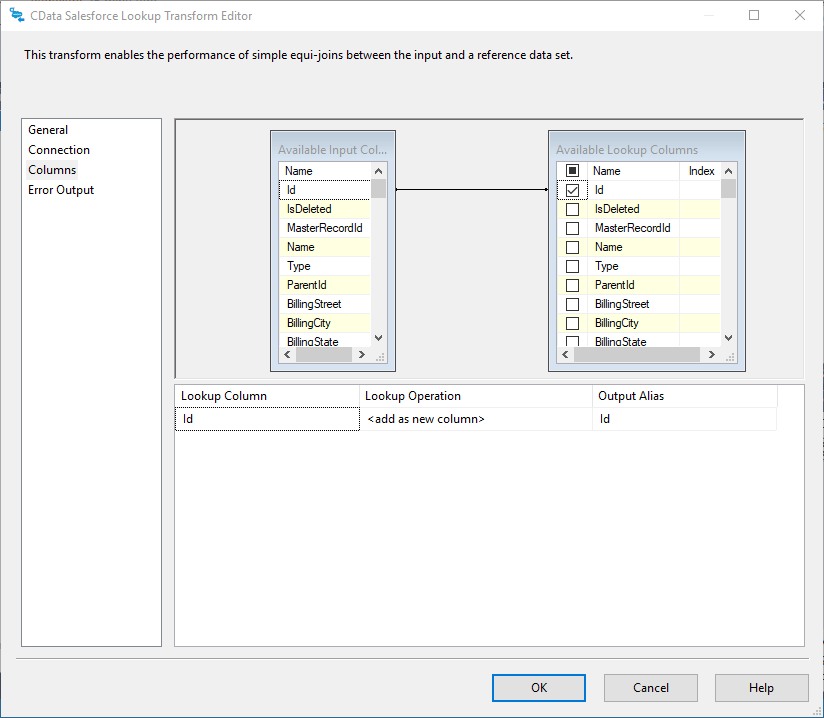
In the lookup component Transform Editor, define mappings from the SQL Server source table into the Azure Synapse lookup table.
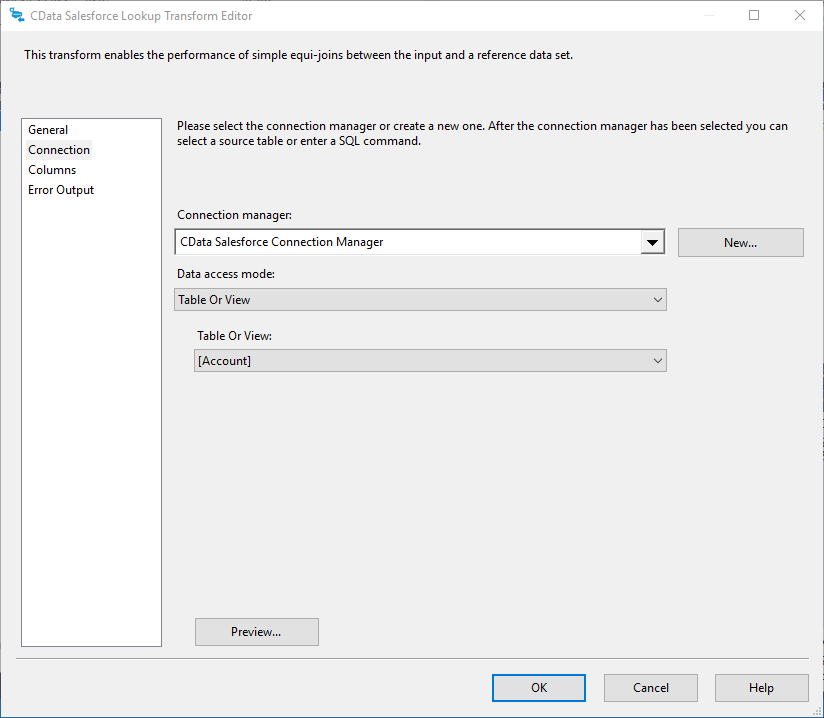
- Double-click the Azure Synapse lookup to open the lookup component editor.
- In the Connection tab, select the Connection manager previously created.
- On the Connection tab, specify the Connection manager (or create a new one) and the table into which the data will be upserted. In this case, you will transfer Account records.
- On the Columns tab, configure the mapping of the primary key from the input columns to the primary key of the lookup columns.
Configure the Azure Synapse Destinations
Using the lookup component, you know which entries from the data source already exist in Azure Synapse and which ones are new. Configure two Azure Synapse components to handle the situation where a match is found and a match is not found.
Lookup Match Destination
If the lookup component returns a match, update the existing record in Azure Synapse.
- Map the Lookup Match Output to a Azure Synapse destination component.
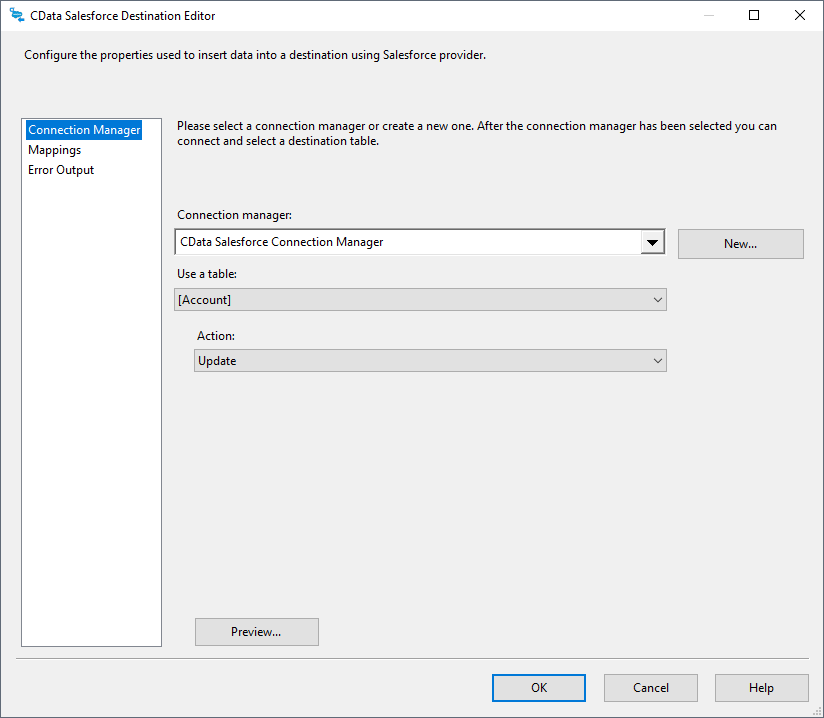
- Double-click the Azure Synapse destination to open the destination component editor.
- In the Connection Manager tab, select the Connection manager previously created.
- Specify the table which will be updated and set the Action to "Update."
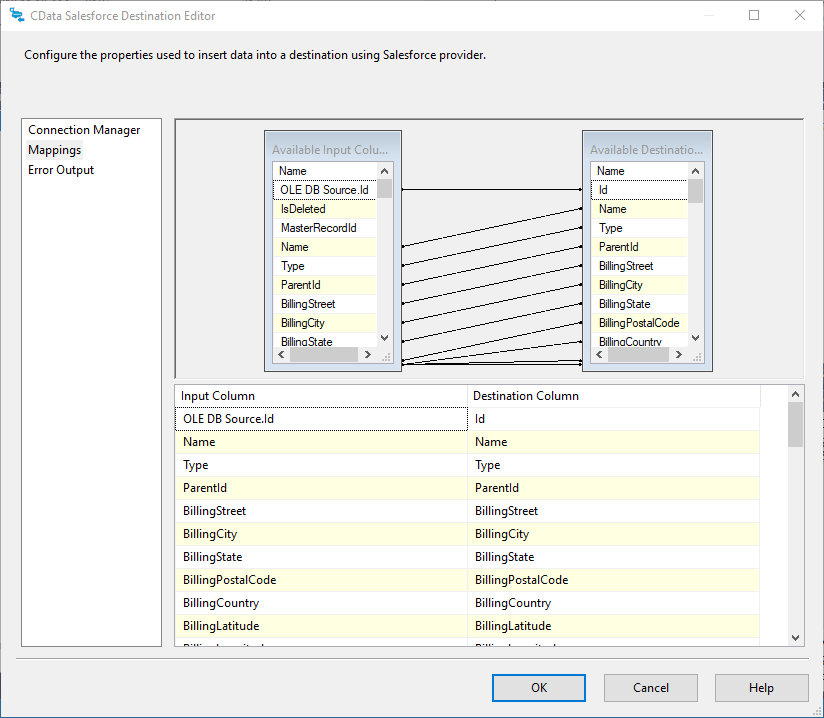
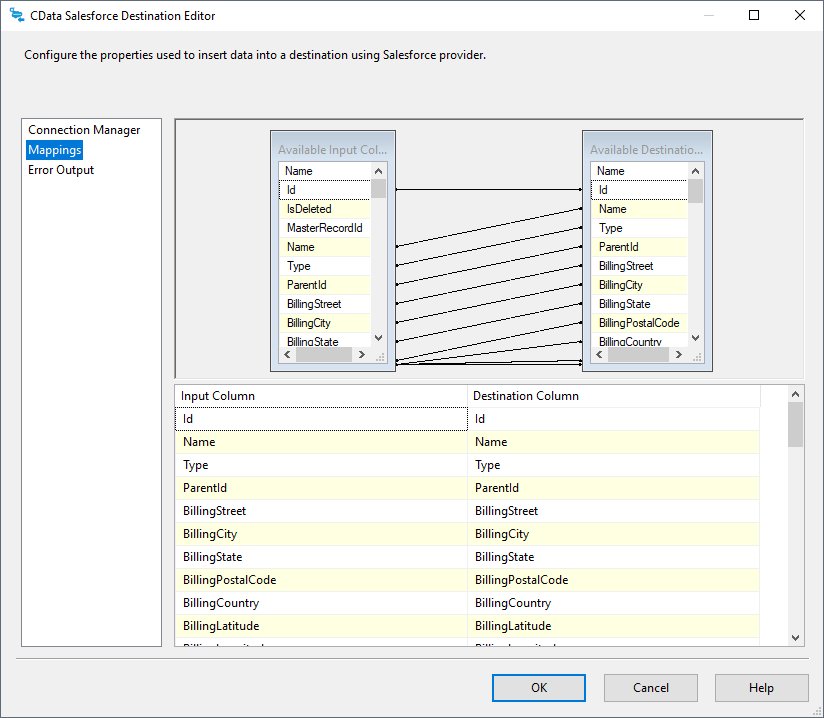
- On the Column Mappings tab, configure the mappings from the input columns to the destination columns (be sure to map the SQL Server primary key column to the Azure Synapse primary key column).
Lookup No Match Destination
If the lookup component does not return a match, add a new record to Azure Synapse.
- Map the Lookup No Match Output to a Azure Synapse destination component.
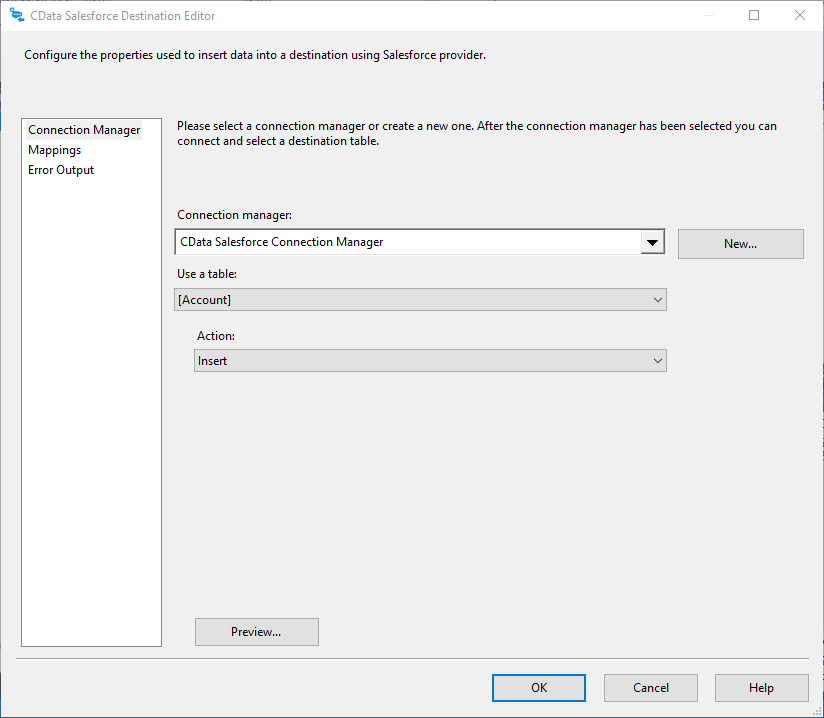
- Double-click the Azure Synapse destination to open the destination component editor.
- In the Connection Manager tab, select the Connection manager previously created.
- Specify the table into which the new record will be inserted and set the Action to "Insert."
- On the Column Mappings tab, configure the mappings from the input columns to the destination columns.
Run the Project
You can now run the project. After the SSIS Task has finished executing, data from your SQL table will be exported to the chosen table.
Ready to get started?
Download a free trial of the Azure Synapse SSIS Component to get started:
Download NowLearn more:
 Azure Synapse SSIS Components
Powerful SSIS Source & Destination Components that allow you to easily connect SQL Server with Azure Synapse through SSIS Workflows.
Use the Azure Synapse Data Flow Components to synchronize with Azure Synapse. Perfect for data synchronization, local back-ups, workflow automation, and more!