







Build AI/ML Models with Live Webflow Data using Dataiku

Dataiku is a data science and machine learning platform used for data preparation, analysis, visualization, and AI/ML model deployment, enabling collaborative and efficient data-driven decision-making. When paired with the CData API Driver for JDBC, Dataiku enhances data integration, preparation, real-time analysis, and reliable model deployment for Webflow data.
With built-in optimized data processing, the CData JDBC Driver offers unmatched performance for interacting with live Webflow data. When you issue complex SQL queries to Webflow, the driver pushes supported SQL operations, like filters and aggregations, directly to Webflow and utilizes the embedded SQL engine to process unsupported operations client-side (often SQL functions and JOIN operations). Its built-in dynamic metadata querying allows you to work with and analyze Webflow data using native data types.
This article shows how you can easily integrate to Webflow using CData API Driver for JDBC in Dataiku DSS (Data Science Studio) platform, allowing you to prepare the data and build custom AI/ML models.
Preparing the Dataiku DSS environment
In this section, we will explore how to set up Dataiku, as previously introduced, with Webflow data. Be sure to install Dataiku DSS (On-Prem version) for your preferred operating system, beforehand.
Install the CData API Driver for JDBC
First, install the CData API Driver for JDBC on the same machine as Dataiku. The JDBC Driver will be installed in the following path:
C:\Program Files\CData[product_name] 20xx\lib\cdata.jdbc.api.jar
Connecting the JDBC Driver in Dataiku DSS
To use the CData JDBC driver in Dataiku, you must create a new SQL database connection and add the JDBC Driver JAR file in the DSS connection settings.
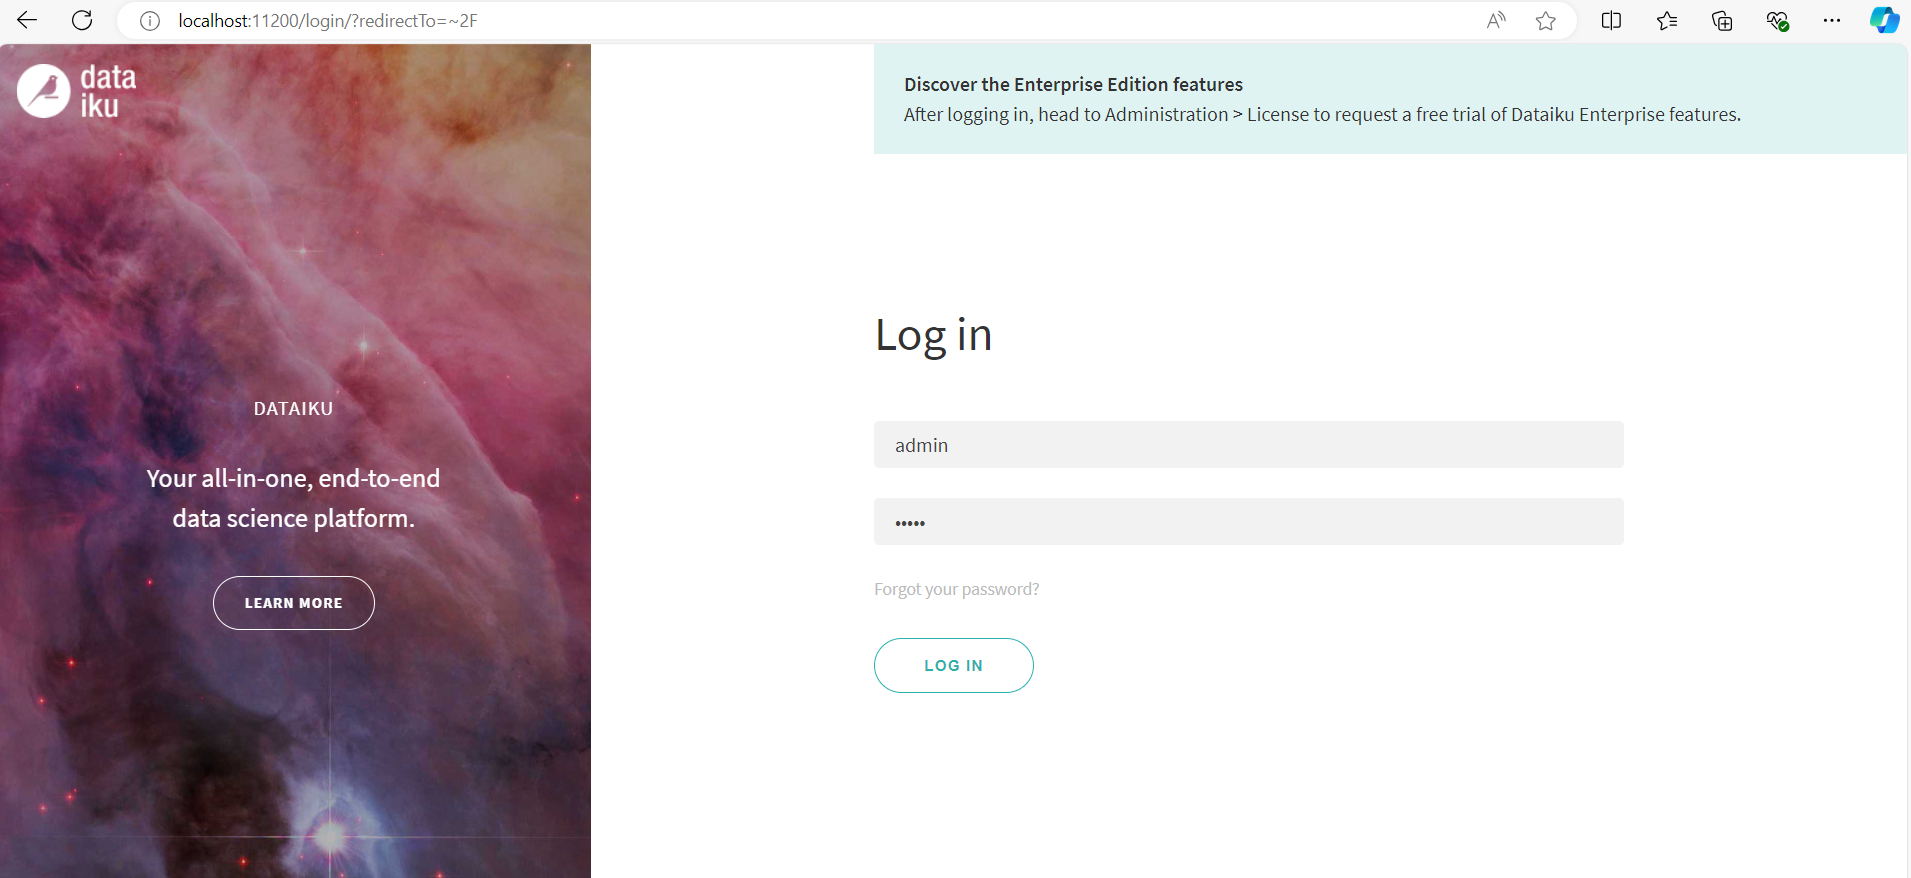
- Log into Dataiku DSS platform. It should open locally in your browser (e.g. localhost:11200)
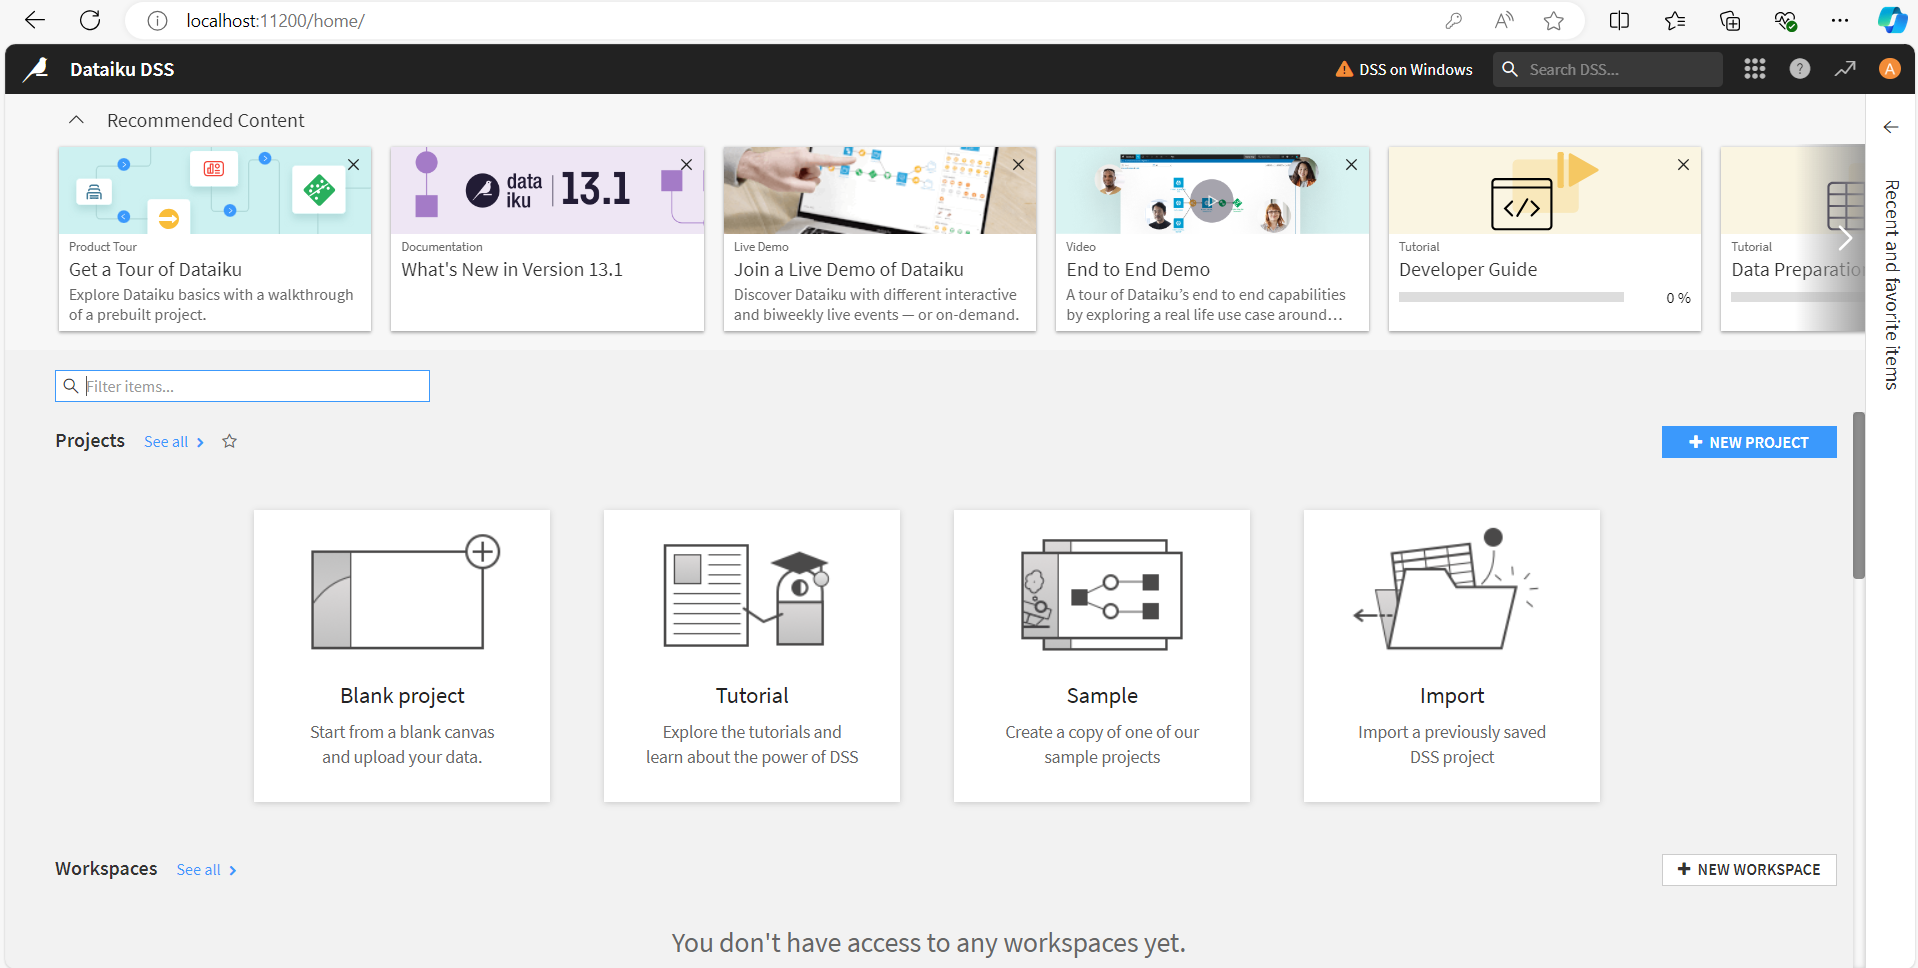
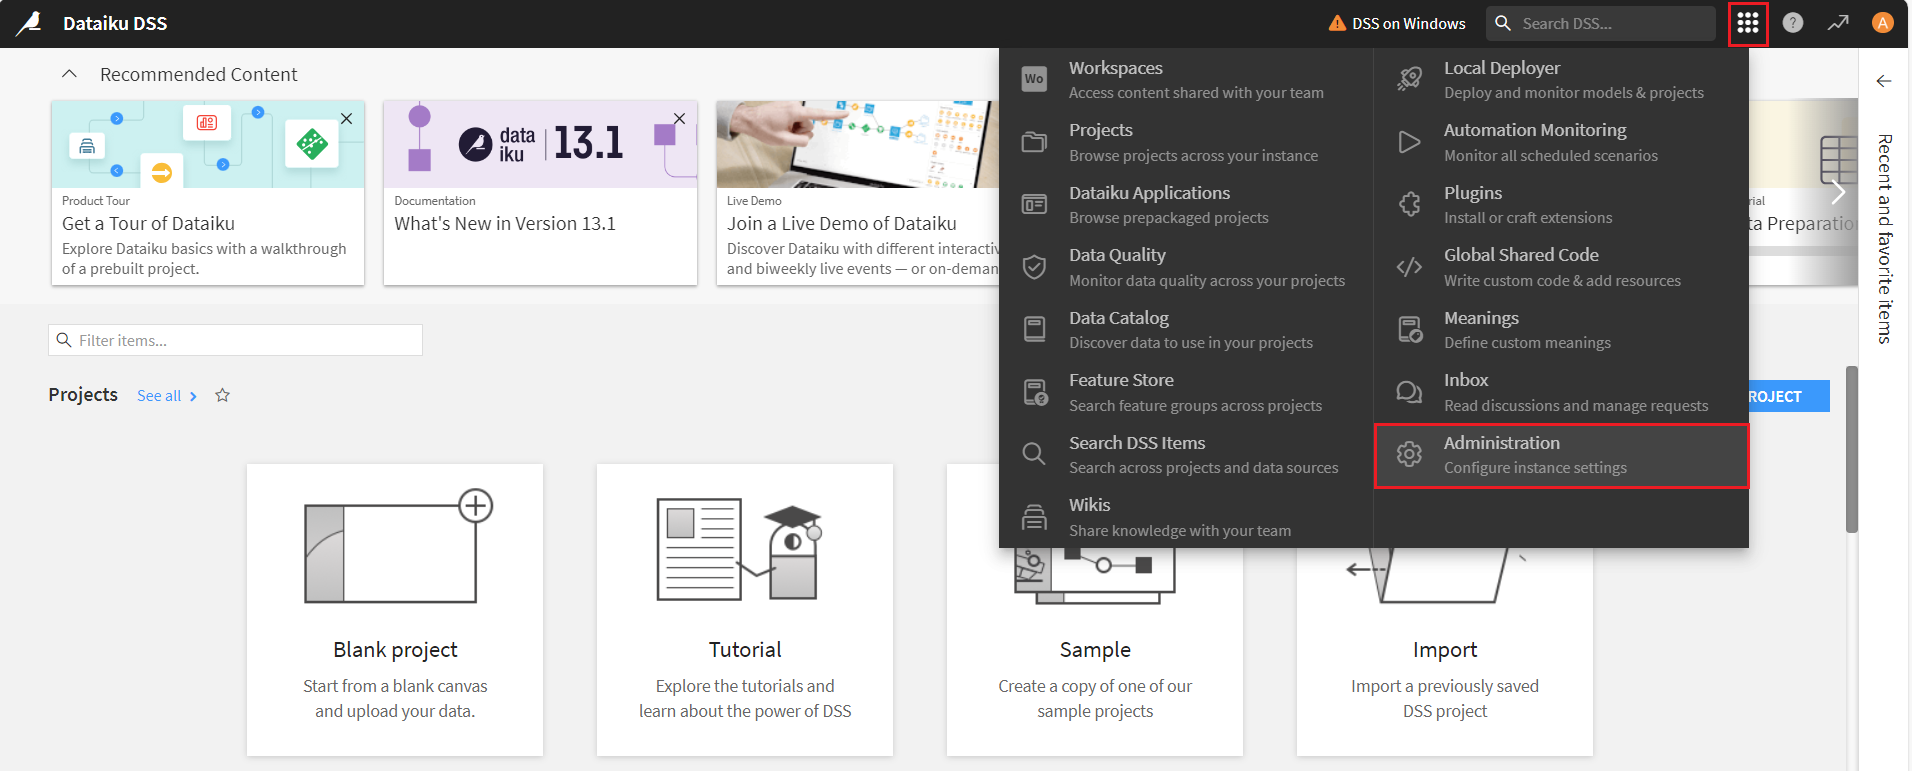
- Click on Navigate to other sections of Dataiku menu on the top right section of the platform and select Administration.
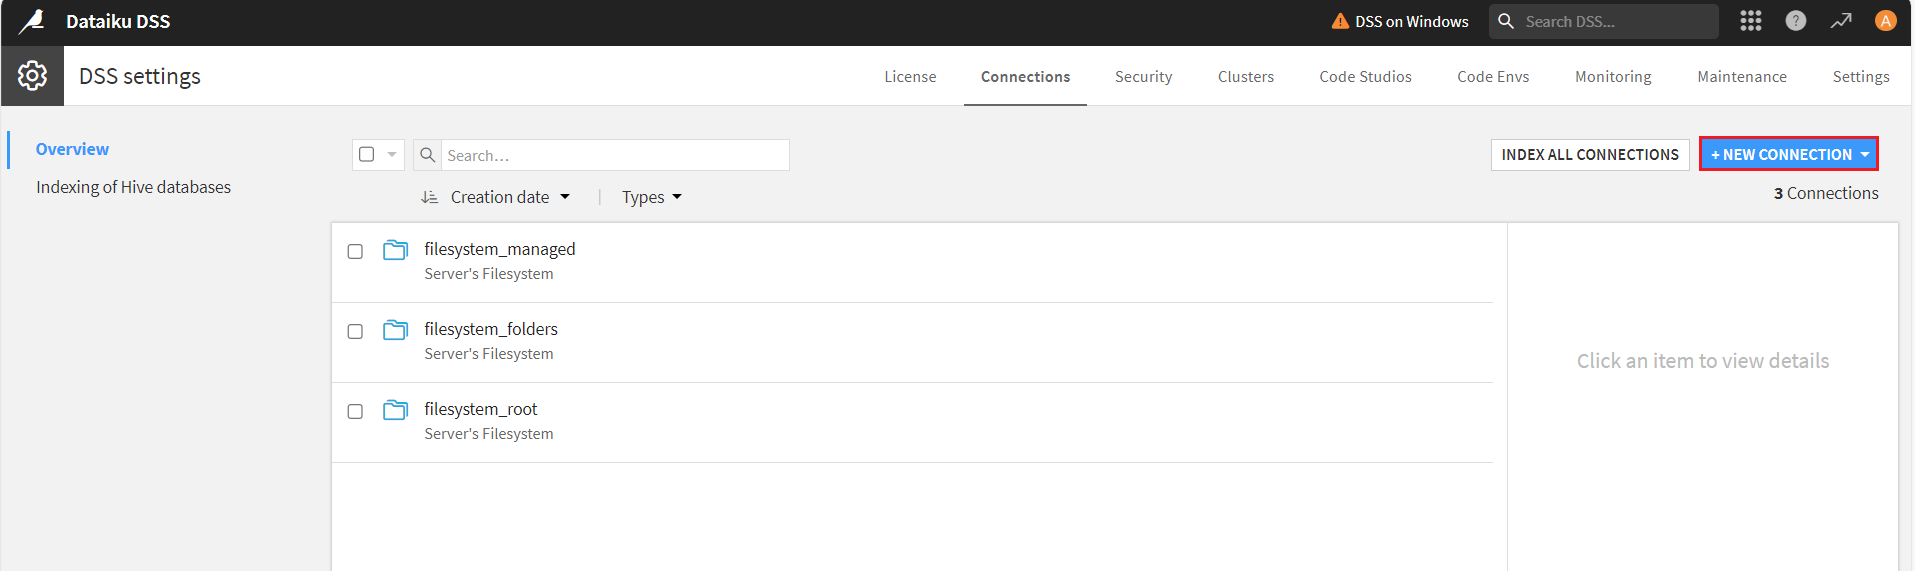
- Select the Connections tab.

- In Connections, click on New Connections button.
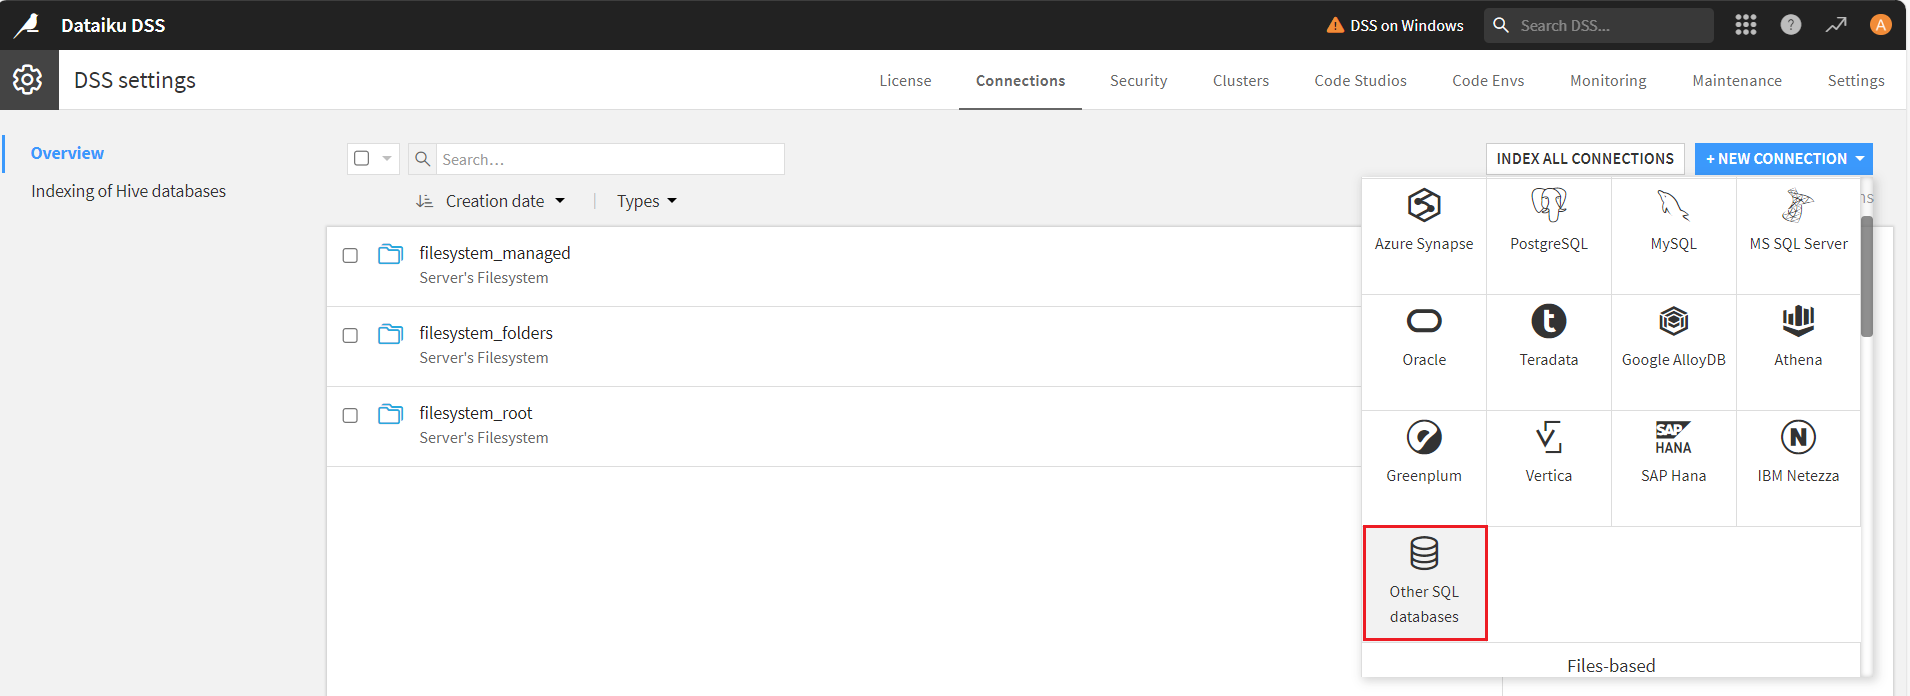
- Now, scroll down and select Other SQL databases.
Generate a JDBC URL for connecting to Webflow, beginning with jdbc:api: followed by a series of semicolon-separated connection string properties.
Authentication
Webflow uses OAuth 2.0 authentication to ensure secure access to sites, CMS collections, e-commerce data, and other resources. This authentication method allows you to securely connect to your Webflow workspace and manage resources with proper authorization.
OAuth 2.0 Setup and Configuration
Step 1: Create a Webflow OAuth Application
To set up OAuth authentication:
- Visit the Webflow Developer Portal
- Navigate to "Apps & Integrations" in your Webflow account
- Click "Register an App" to create a new OAuth application
- Configure the application name, description, and redirect URI (CallbackURL)
- Copy the Client ID and Client Secret for use in your connection
Required Connection Properties
- AuthScheme: Set this to OAuth (required)
- OAuthClientId: Client ID from your Webflow OAuth application (required)
- OAuthClientSecret: Client secret from your Webflow OAuth application (required)
- CallbackURL: Redirect URI specified in your OAuth application (required)
- InitiateOAuth: Set to GETANDREFRESH for automatic token management (recommended)
Required OAuth Scopes
The Webflow API Profile requires the following OAuth scopes:
- sites:read - Read access to site information and configuration
- pages:read - Read access to site pages
- cms:read - Read access to CMS collections and items
- forms:read - Read access to forms and form submissions
- assets:read - Read access to media assets and folders
- ecommerce:read - Read access to products, orders, and inventory
- authorized_user:read - Read access to the authorized user
Built-in Connection String Designer
For assistance in constructing the JDBC URL, use the connection string designer built into the Webflow JDBC Driver. Either double-click the JAR file or execute the jar file from the command-line.
java -jar cdata.jdbc.api.jar
Fill in the connection properties and copy the connection string to the clipboard.

A typical JDBC URL is given below:
jdbc:api:Profile=C:\profiles\Webflow.apip;AuthScheme=OAuth;InitiateOAuth=GETANDREFRESH;OAuthClientId=your_client_id;OAuthClientSecret=your_client_secret;CallbackUrl=your_callback_url;
- On the New SQL database (JDBC) connection screen, enter a name in the New connection name field and specify the basic parameters:
- JDBC Driver Class: cdata.jdbc.api.APIDriver
- JDBC URL: JDBC connection URL obtained in the previous step
- Driver jars directory: the folder path where the JAR file is installed on your system
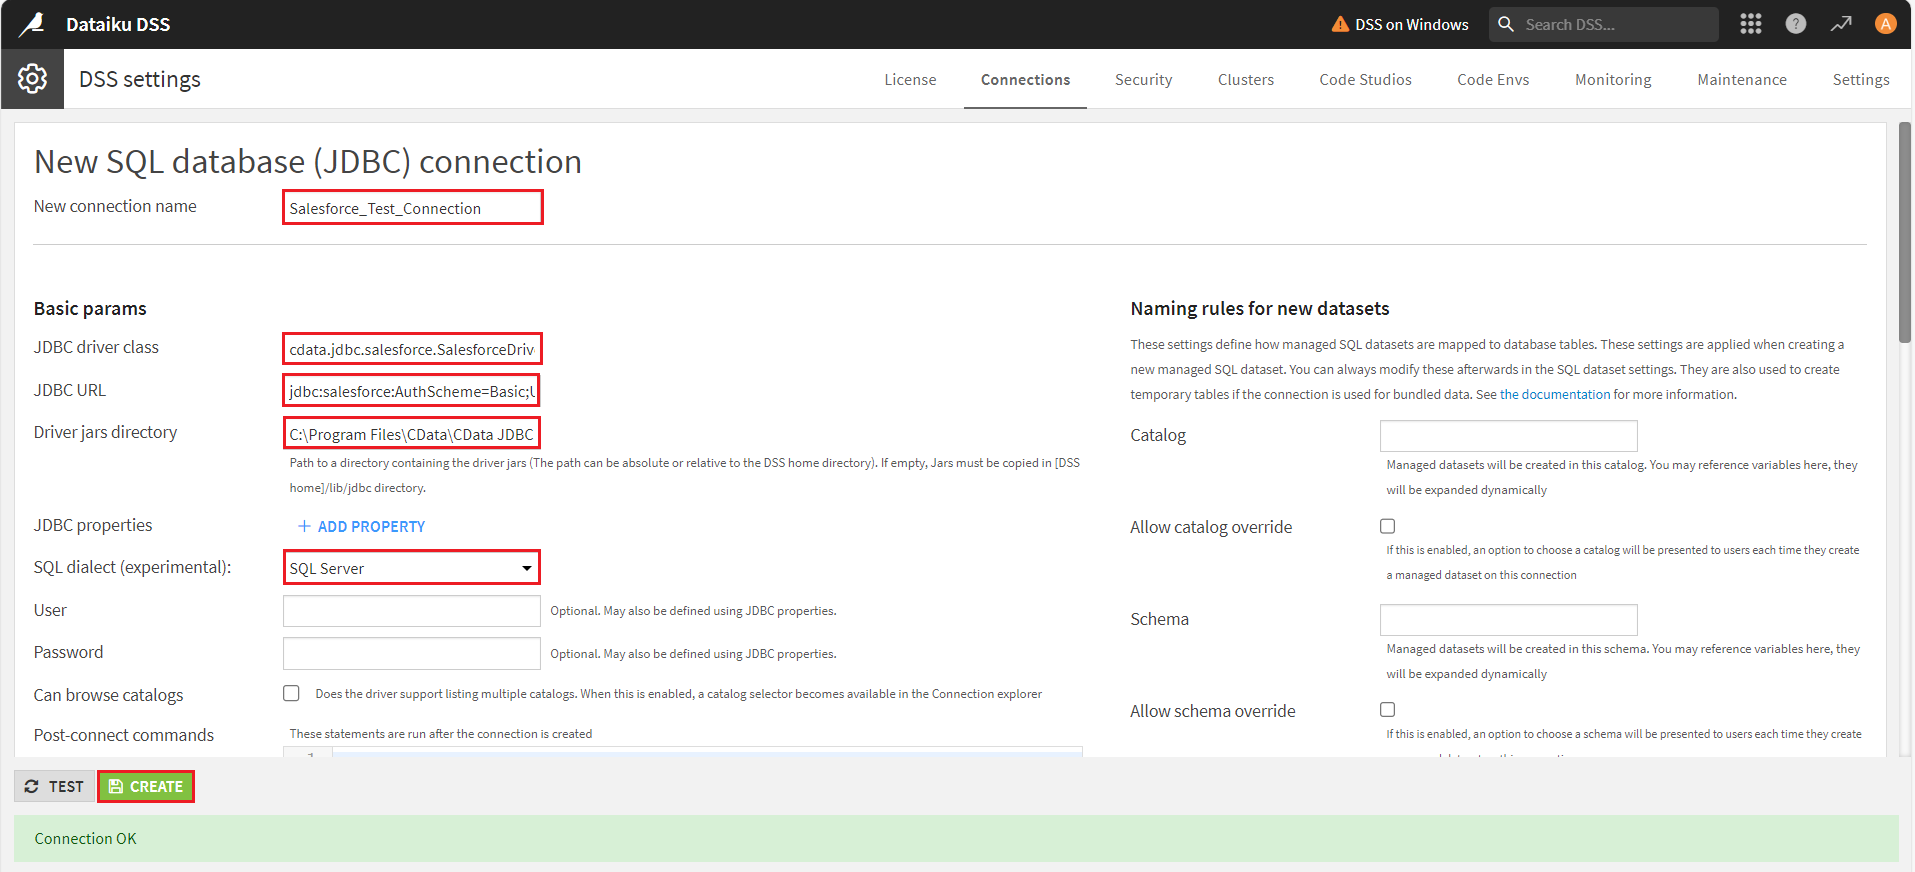
Next, select the SQL dialect of your choice. Here, we have selected 'SQL Server' as the preferred dialect. Click on Create. If the connection is successful, a prompt will display, saying 'Connection OK'.
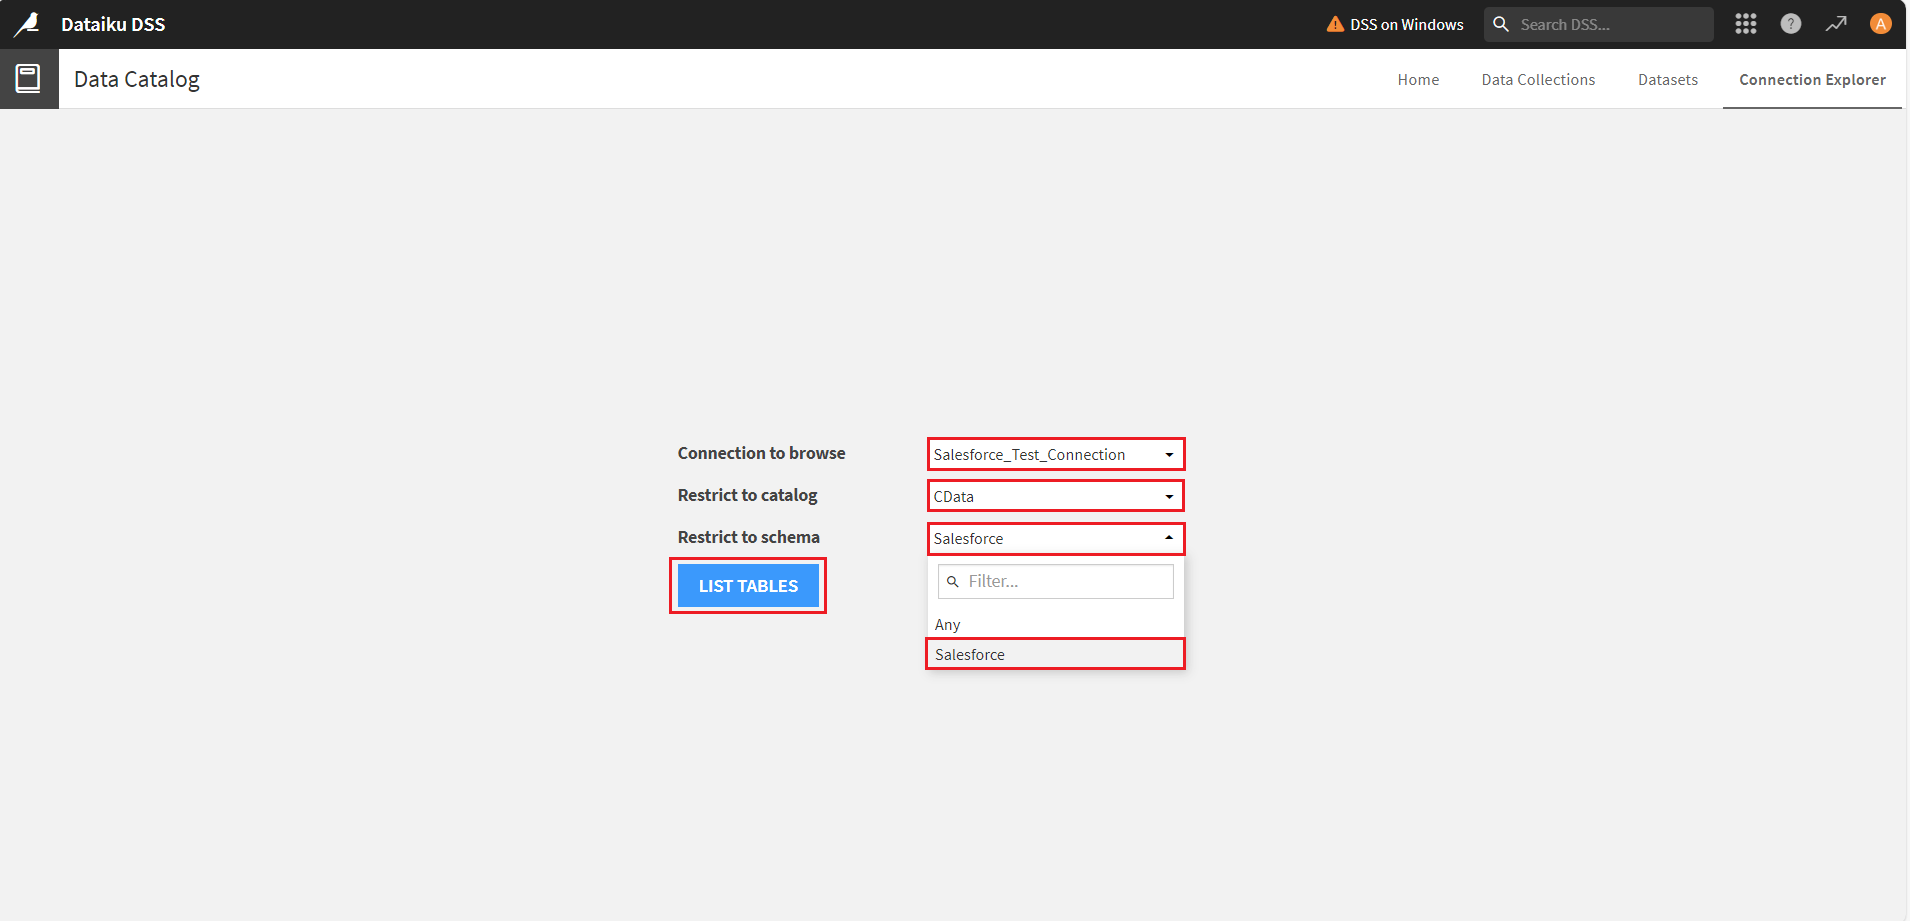
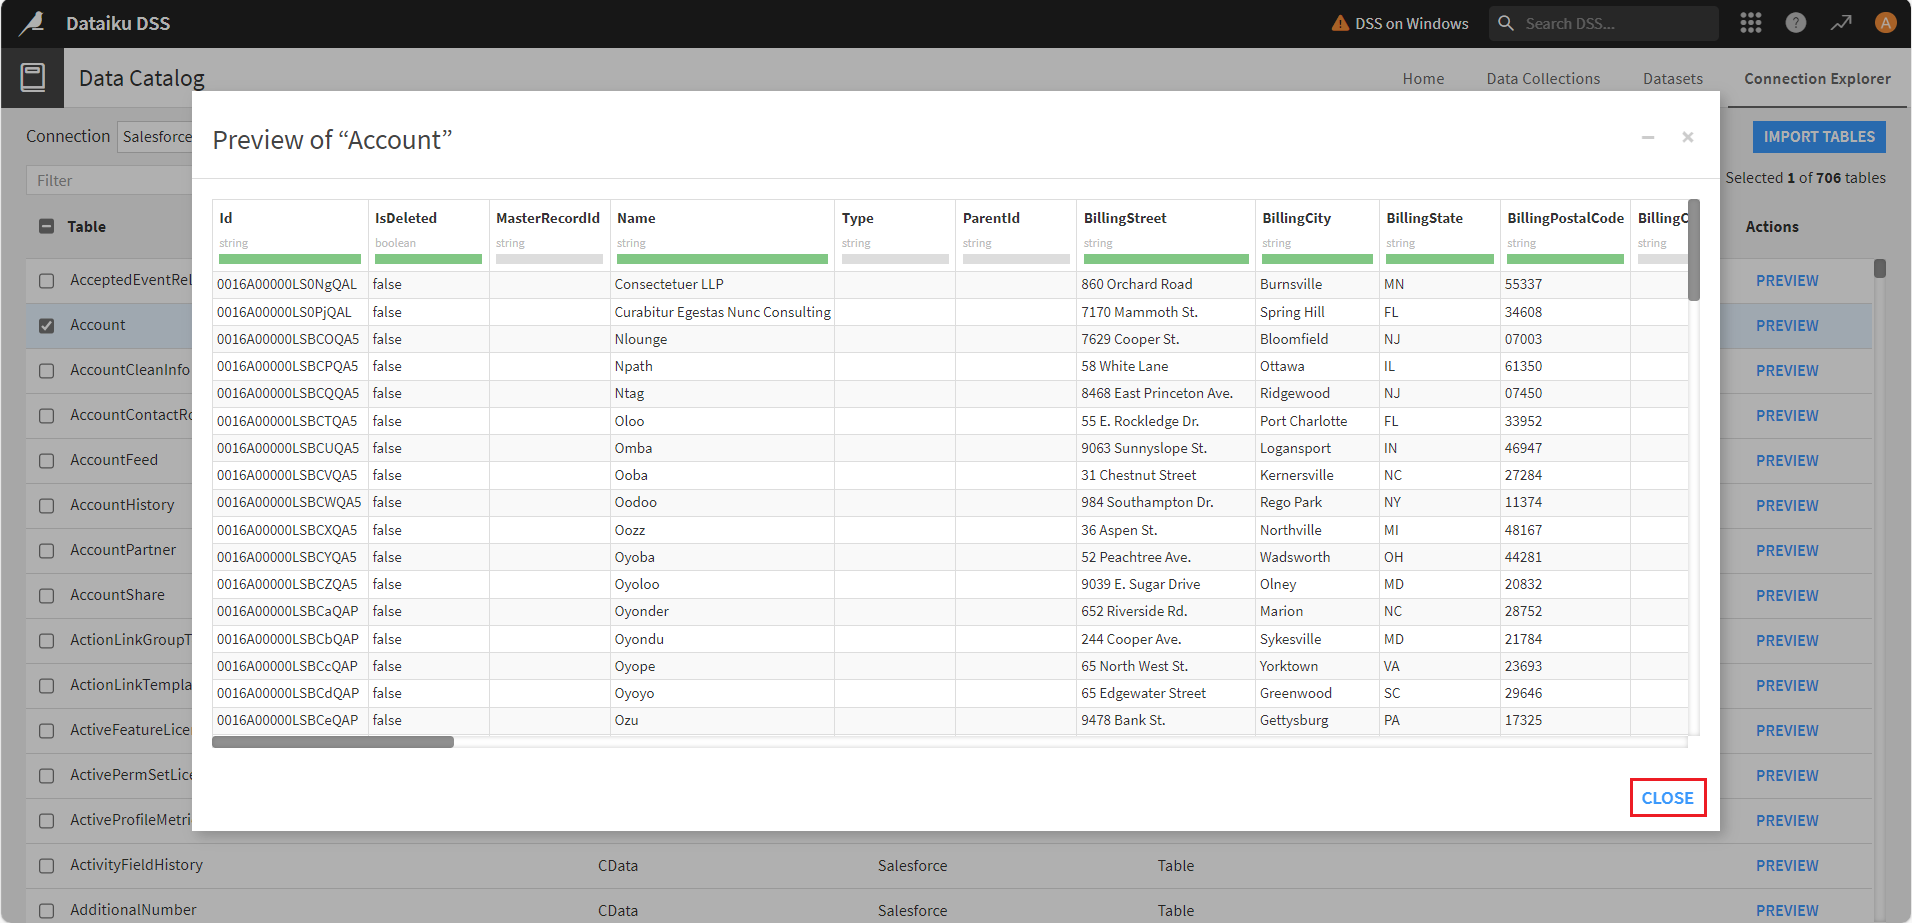
- The Data Catalog window will appear. Select the desired connection, catalog, and schema from the Connection to browse, Restrict to catalog, and Restrict to schema dropdowns, then click on List Tables. The Dataiku platform will list all the required tables.
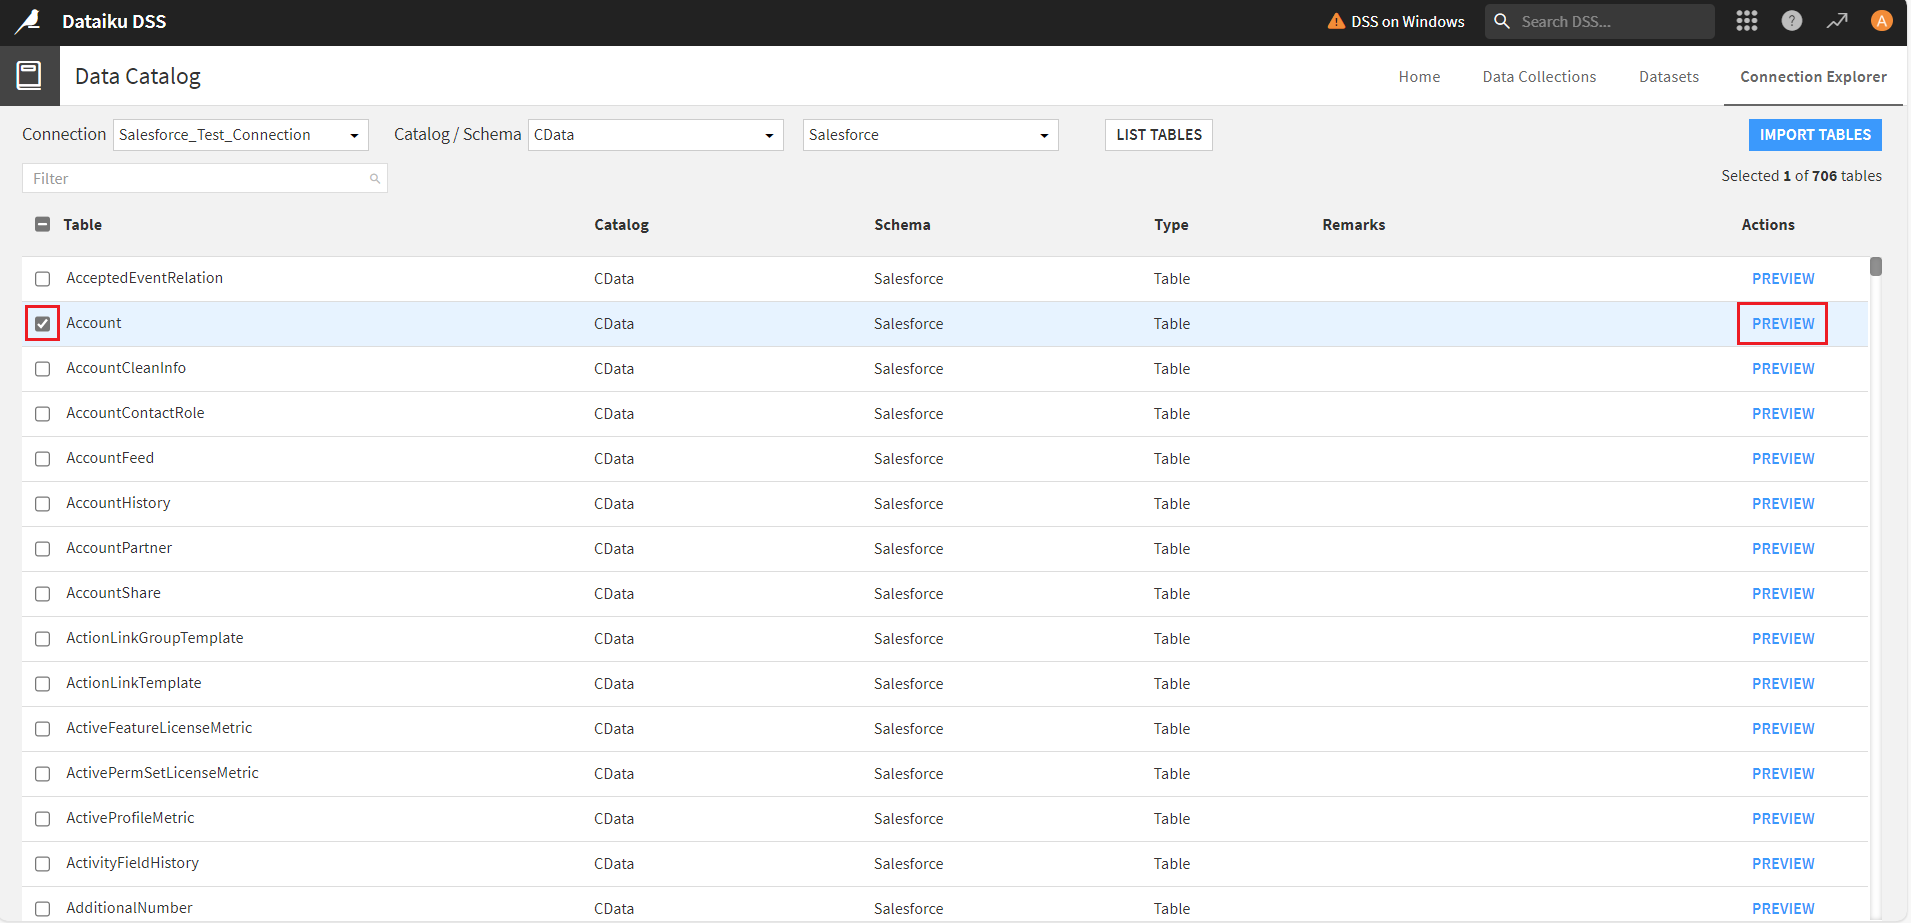
- Select any table from the list and click Preview to view the table data. Click Close to exit the window.
Creating a new project
To prepare data flows, create dashboards, analyze the Webflow data, and build AI and ML models in the Dataiku DSS platform, you need to first create a new project.
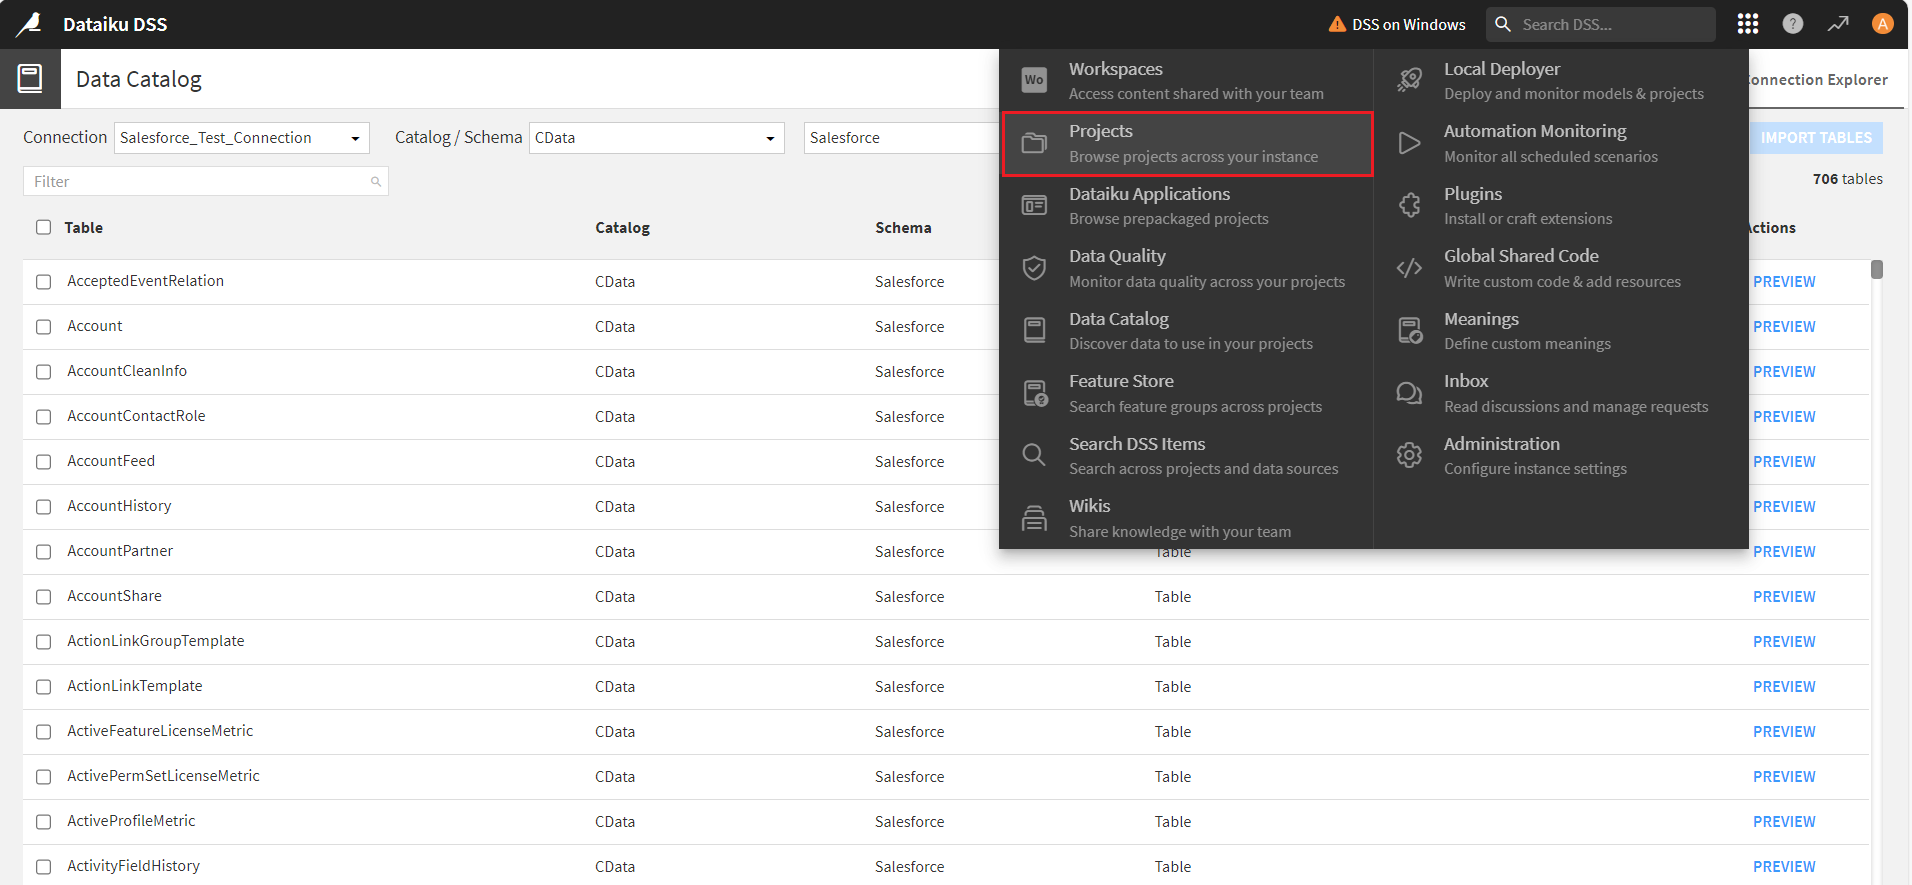
- Select Projects from the Navigate to other sections of Dataiku menu.
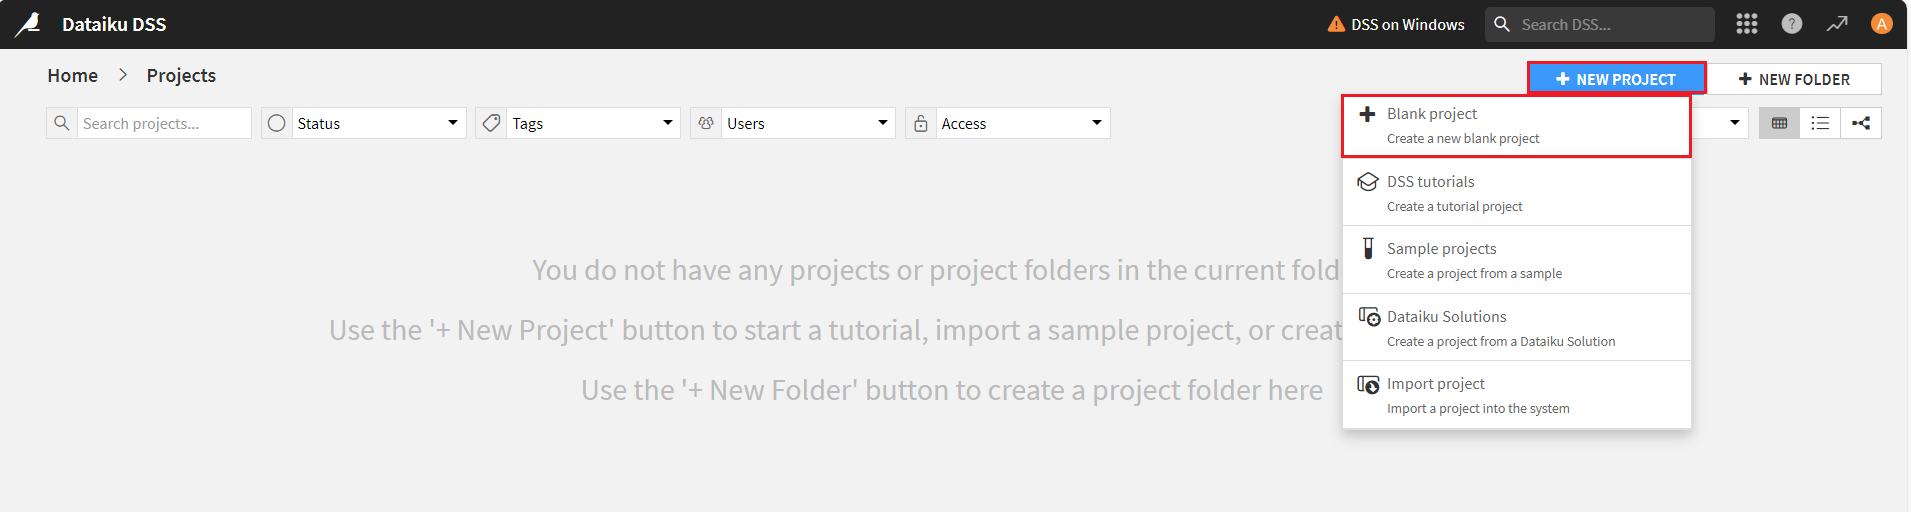
- In the Projects screen, click New Project and select + Blank Project.
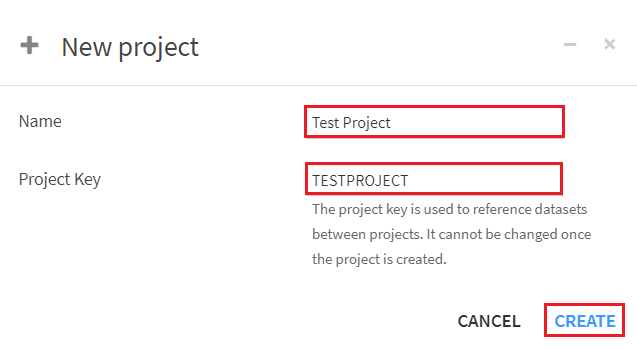
- In the New Project window, assign a Name and Project Key. Click Create. The new project dashboard opens up.
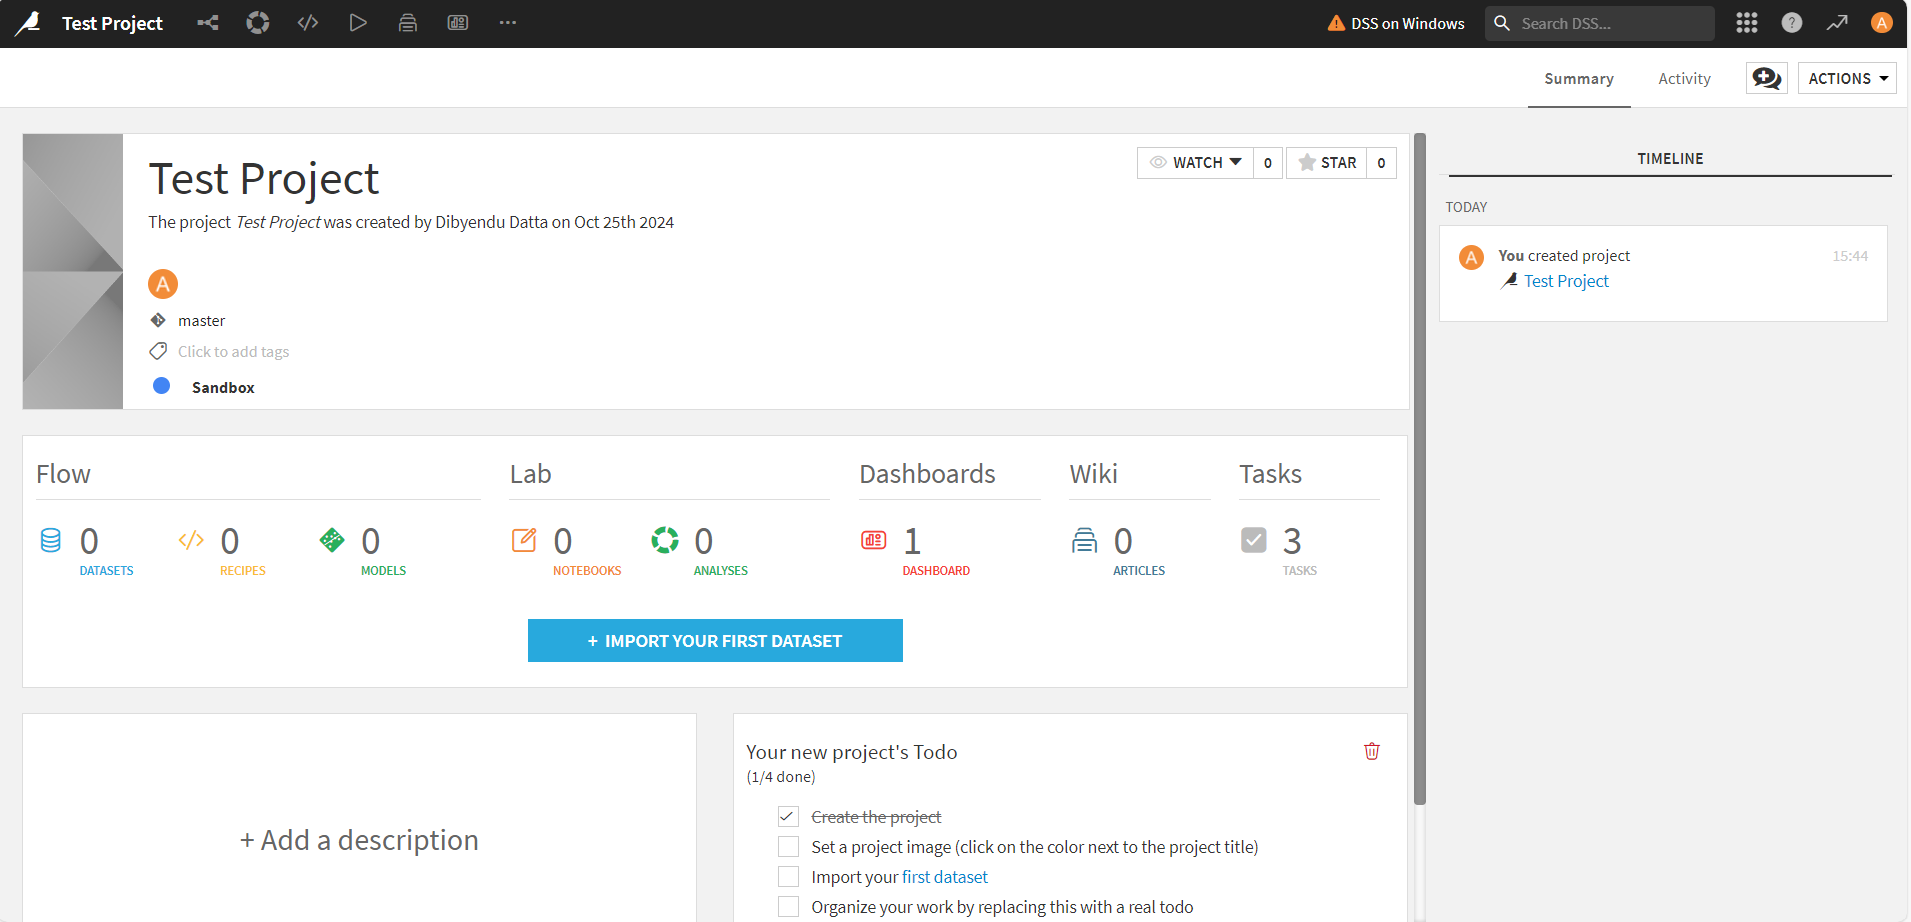
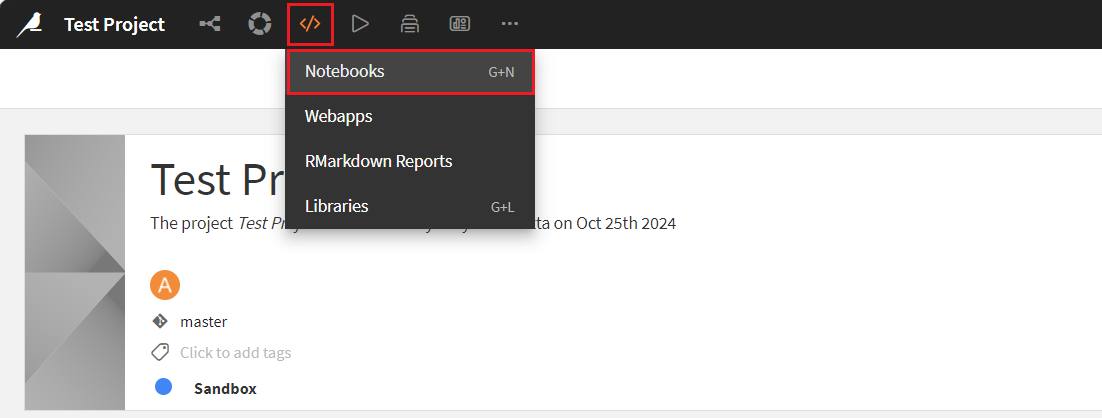
- Select Notebooks from the menu at the top of the project screen.
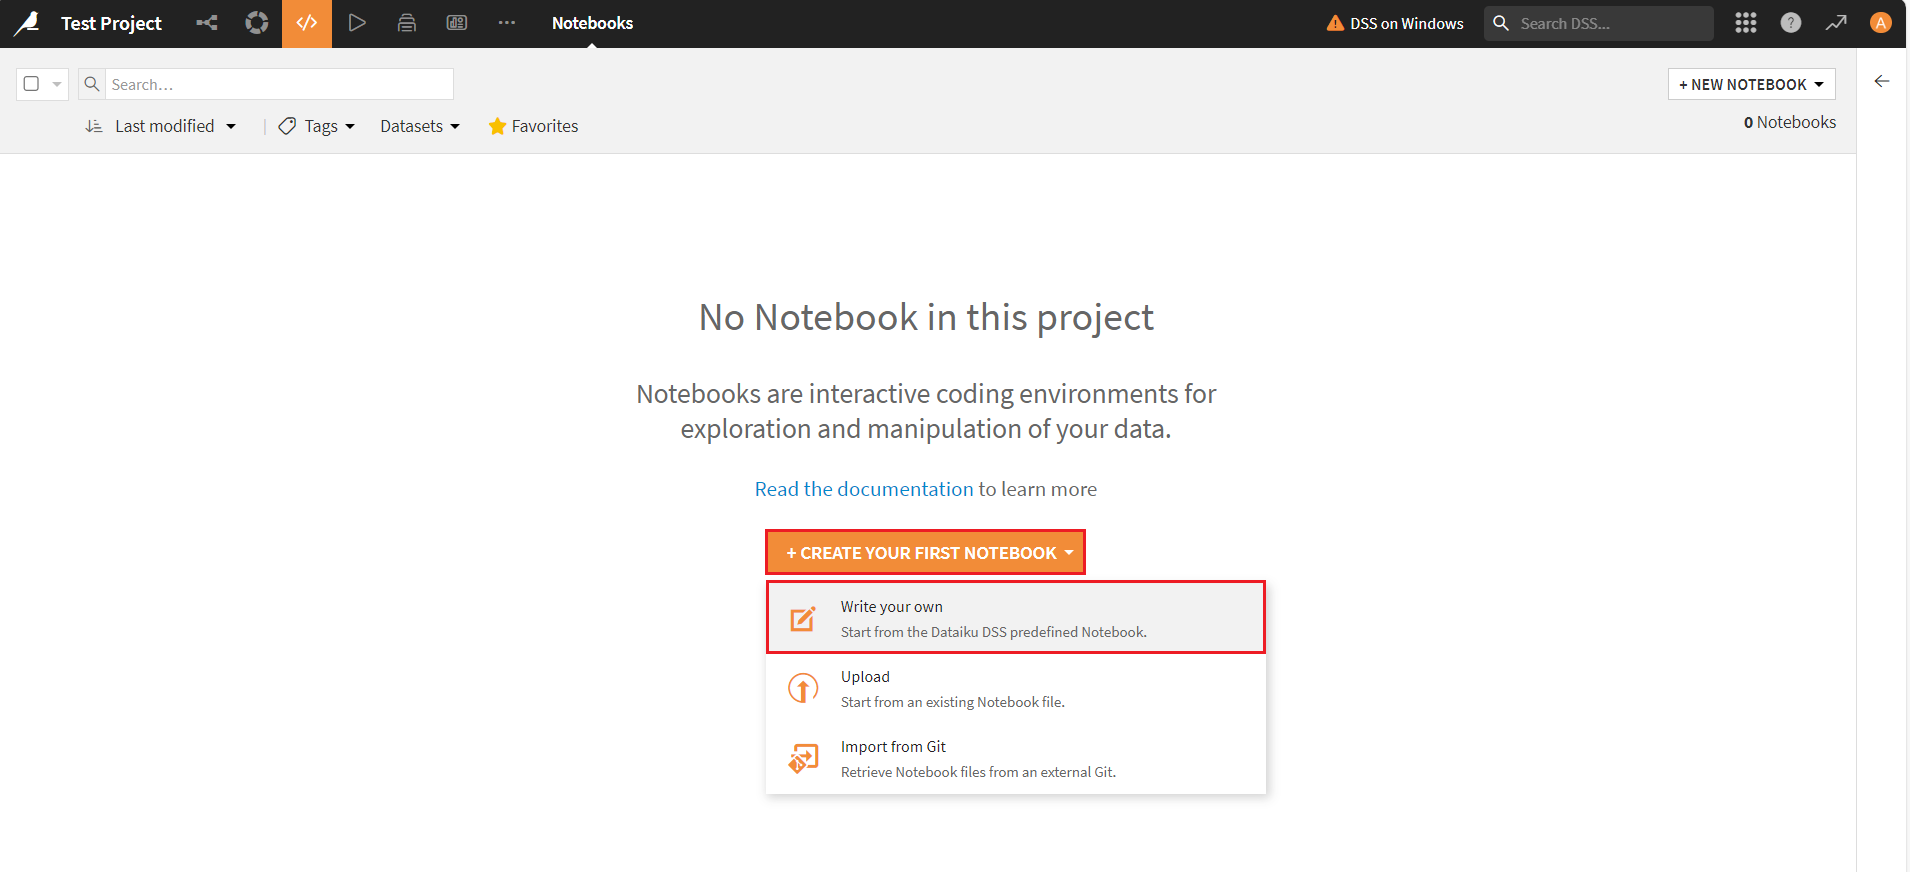
- Click on + Create Your First Notebook dropdown menu and select Write your own option.
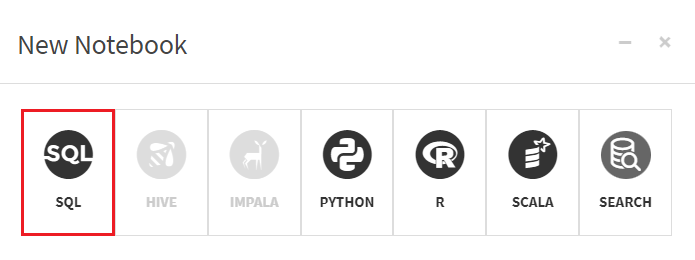
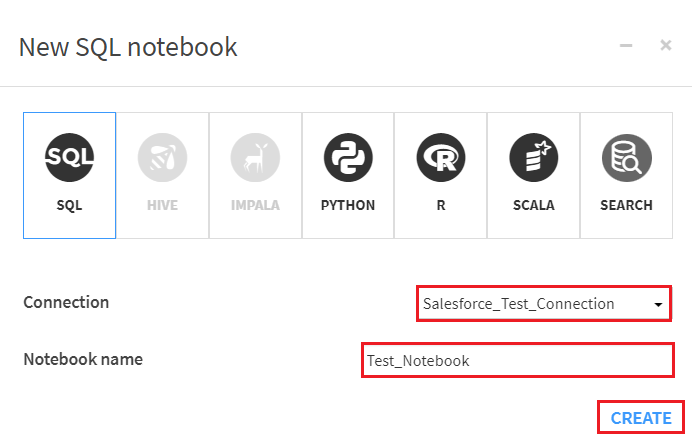
- In the New Notebook window, select SQL.
- Now, select the required connection from the Connection dropdown and enter a name in the Notebook Name field.
Testing the connection
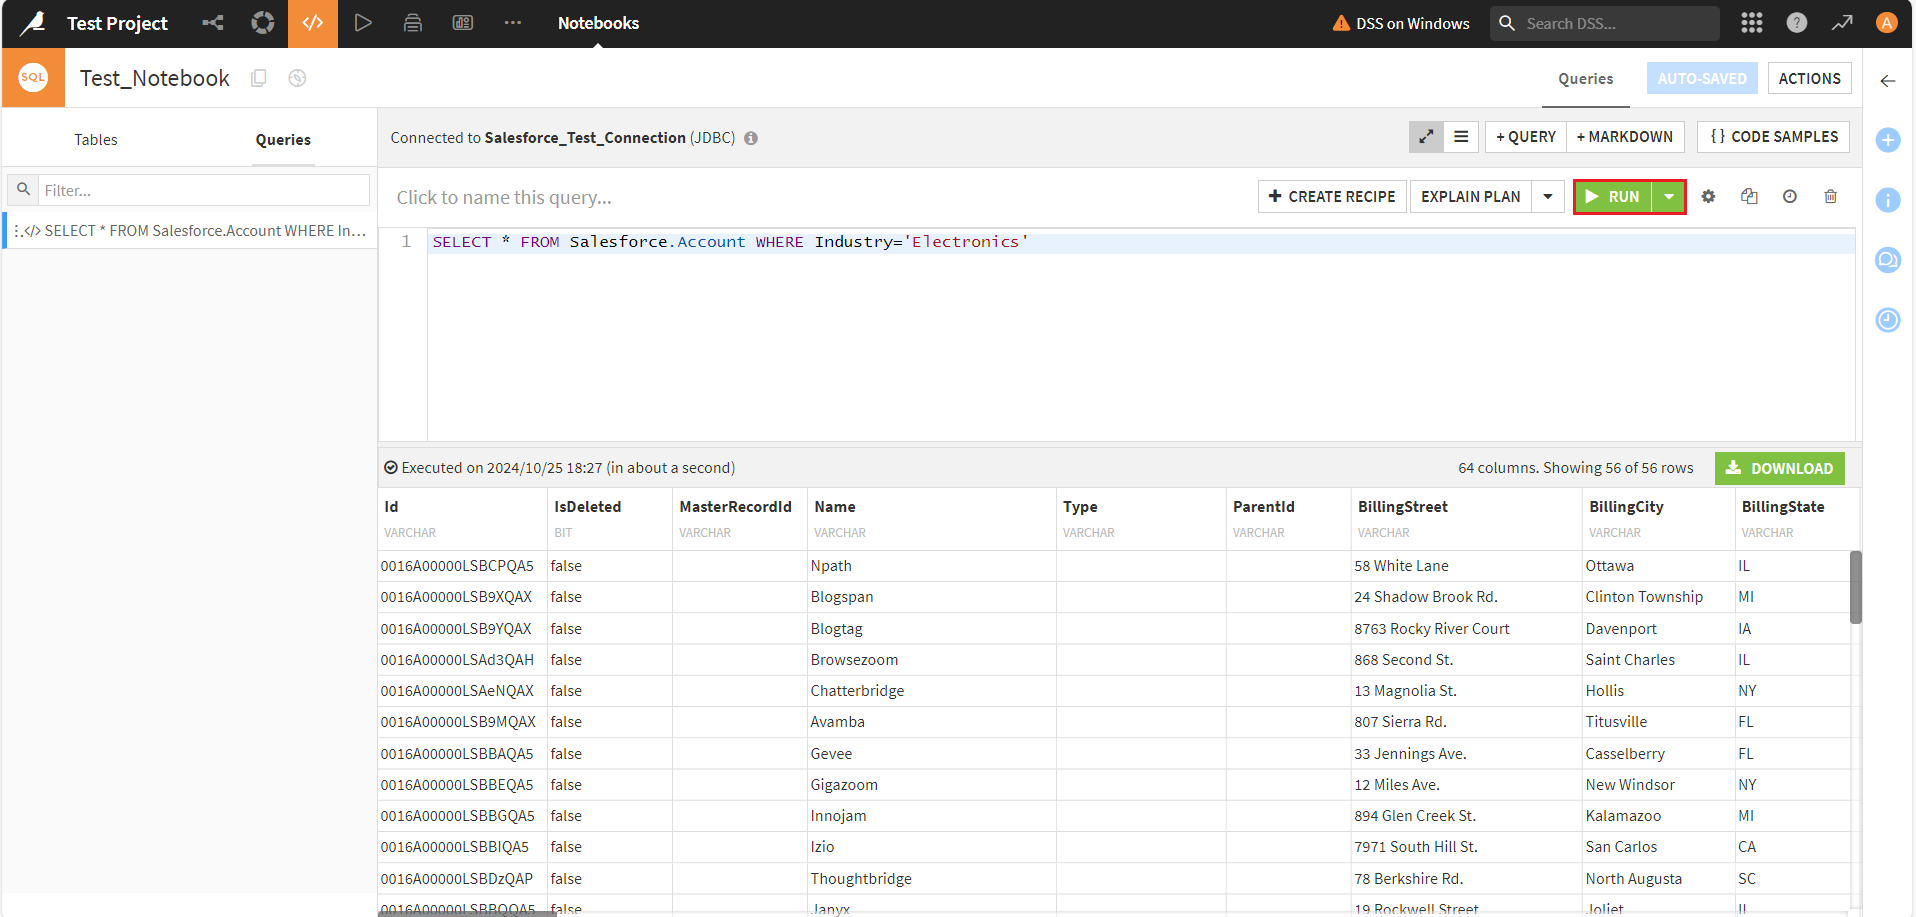
To test the Webflow connection and analyze the Webflow data, write a query in the query compiler and click Run. The queried/filtered Webflow data results will then appear on the screen.
Get Started Today
Download a free, 30-day trial of the CData API Driver for JDBC to integrate with Dataiku, and effortlessly build custom AI/ML models from Webflow data.
Reach out to our Support Team if you have any questions.