







How to Visualize Amazon Athena Data in Python with pandas via CData Connect AI

The rich ecosystem of Python modules lets you get to work quickly and integrate your systems more effectively. With the CData Connect AI Python SDK, the pandas and Matplotlib modules, you can build Amazon Athena-connected Python applications and scripts for visualizing Amazon Athena data. This article shows how to connect to Connect AI and use the pandas and Matplotlib built-in functions to query Amazon Athena data and visualize the results.
The Connect AI Python SDK (cdata-connect-ai) is a DB-API 2.0 (PEP 249) compliant client, so pandas can read query results directly from the SDK connection object. There is no driver to install per source and no SQLAlchemy engine to configure: connect with a Personal Access Token and pass the connection straight to pandas.read_sql.
About Amazon Athena Data Integration
CData provides the easiest way to access and integrate live data from Amazon Athena. Customers use CData connectivity to:
- Authenticate securely using a variety of methods, including IAM credentials, access keys, and Instance Profiles, catering to diverse security needs and simplifying the authentication process.
- Streamline their setup and quickly resolve issue with detailed error messaging.
- Enhance performance and minimize strain on client resources with server-side query execution.
Users frequently integrate Athena with analytics tools like Tableau, Power BI, and Excel for in-depth analytics from their preferred tools.
To learn more about unique Amazon Athena use cases with CData, check out our blog post: https://www.cdata.com/blog/amazon-athena-use-cases.
Getting Started
Connect to Amazon Athena in Connect AI
CData Connect AI uses a straightforward, point-and-click interface to connect to data sources.
- Log into Connect AI, click Sources, and then click Add Connection
- Select "Amazon Athena" from the Add Connection panel
-
Enter the necessary authentication properties to connect to Amazon Athena.
Authenticating to Amazon Athena
To authorize Amazon Athena requests, provide the credentials for an administrator account or for an IAM user with custom permissions: Set AccessKey to the access key Id. Set SecretKey to the secret access key.
Note: Though you can connect as the AWS account administrator, it is recommended to use IAM user credentials to access AWS services.
Obtaining the Access Key
To obtain the credentials for an IAM user, follow the steps below:
- Sign into the IAM console.
- In the navigation pane, select Users.
- To create or manage the access keys for a user, select the user and then select the Security Credentials tab.
To obtain the credentials for your AWS root account, follow the steps below:
- Sign into the AWS Management console with the credentials for your root account.
- Select your account name or number and select My Security Credentials in the menu that is displayed.
- Click Continue to Security Credentials and expand the Access Keys section to manage or create root account access keys.
Authenticating from an EC2 Instance
If you are using the CData Data Provider for Amazon Athena 2018 from an EC2 Instance and have an IAM Role assigned to the instance, you can use the IAM Role to authenticate. To do so, set UseEC2Roles to true and leave AccessKey and SecretKey empty. The CData Data Provider for Amazon Athena 2018 will automatically obtain your IAM Role credentials and authenticate with them.
Authenticating as an AWS Role
In many situations it may be preferable to use an IAM role for authentication instead of the direct security credentials of an AWS root user. An AWS role may be used instead by specifying the RoleARN. This will cause the CData Data Provider for Amazon Athena 2018 to attempt to retrieve credentials for the specified role. If you are connecting to AWS (instead of already being connected such as on an EC2 instance), you must additionally specify the AccessKey and SecretKey of an IAM user to assume the role for. Roles may not be used when specifying the AccessKey and SecretKey of an AWS root user.
Authenticating with MFA
For users and roles that require Multi-factor Authentication, specify the MFASerialNumber and MFAToken connection properties. This will cause the CData Data Provider for Amazon Athena 2018 to submit the MFA credentials in a request to retrieve temporary authentication credentials. Note that the duration of the temporary credentials may be controlled via the TemporaryTokenDuration (default 3600 seconds).
Connecting to Amazon Athena
In addition to the AccessKey and SecretKey properties, specify Database, S3StagingDirectory and Region. Set Region to the region where your Amazon Athena data is hosted. Set S3StagingDirectory to a folder in S3 where you would like to store the results of queries.
If Database is not set in the connection, the data provider connects to the default database set in Amazon Athena.

- Click Save & Test
- Navigate to the Permissions tab and update the user-based permissions.



Generate a Personal Access Token (PAT)
The Python SDK authenticates to Connect AI with your account email and a Personal Access Token (PAT). It is best practice to create a separate PAT for each application to maintain granularity of access.
- Click the Gear icon () at the top right of the Connect AI app to open the Settings page.
- On the Settings page, go to the Access Tokens section and click Create PAT.
- Give the PAT a name and click Create.

- The PAT is only visible at creation, so copy it and store it securely.
Install Required Modules
Install the SDK (with the pandas extra) and Matplotlib using the pip utility:
pip install "cdata-connect-ai[full]"
pip install matplotlib
Visualize Amazon Athena Data in Python
Import the modules, then connect to Connect AI with your account email and PAT. Identifiers are three-part: <Connection>.<Schema>.<Table>, where the connection name defaults to the source name (for example, AmazonAthena1).
import pandas
import matplotlib.pyplot as plt
import cdata_connect_ai

conn = cdata_connect_ai.connect(
    username="[email protected]",
    password="<your_pat>",
)
Query Amazon Athena with pandas
Use the read_sql function from pandas to execute a SQL statement and store the result set in a DataFrame. Pass the SDK connection directly, no engine required.
df = pandas.read_sql(
    "SELECT Name, TotalDue "
    "FROM [AmazonAthena1].[AmazonAthena].[Customers] "
    "WHERE CustomerId = '12345'",
    conn,
)
Note: pandas may print a UserWarning stating that it only officially supports SQLAlchemy connectables. This is expected when passing a DB-API connection directly—the query runs correctly and the warning is safe to ignore.
Visualize Amazon Athena Data
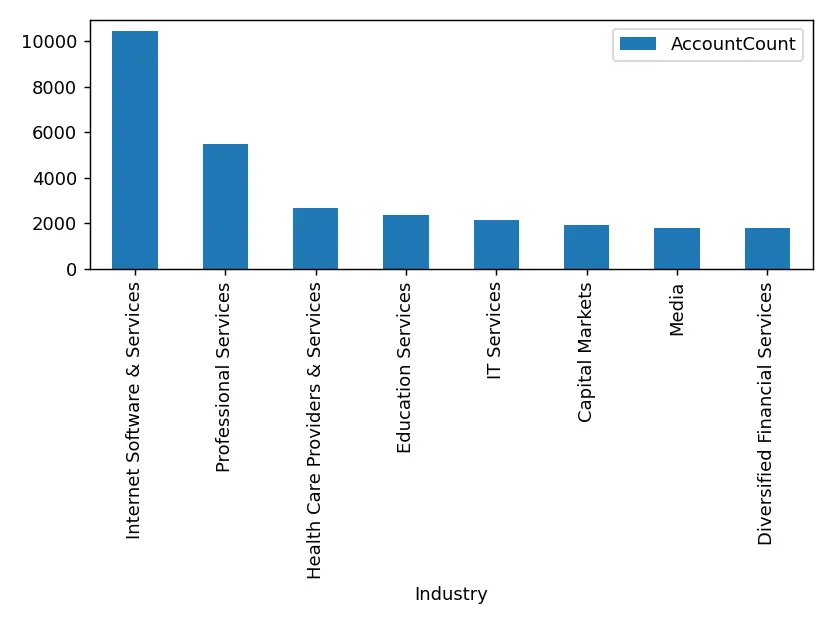
With the query results stored in a DataFrame, use the plot function to build a chart. The show method displays the chart in a new window.
df.plot(kind="bar", x="Name", y="TotalDue")
plt.show()

conn.close()
More Information and Free Trial
Now you can read live Amazon Athena data into pandas through the CData Connect AI Python SDK. For more information on connecting to Amazon Athena (and hundreds of other data sources), visit the Connect AI page. Sign up for a free trial and start working with live Amazon Athena data in Python.
Full Source Code
import pandas
import matplotlib.pyplot as plt
import cdata_connect_ai

conn = cdata_connect_ai.connect(
    username="[email protected]",
    password="<your_pat>",
)

df = pandas.read_sql(
    "SELECT Name, TotalDue "
    "FROM [AmazonAthena1].[AmazonAthena].[Customers] "
    "WHERE CustomerId = '12345'",
    conn,
)

df.plot(kind="bar", x="Name", y="TotalDue")
plt.show()

conn.close()