







Automated Continuous Okta Replication to IBM DB2

Always-on applications rely on automatic failover capabilities and real-time data access. CData Sync integrates live Okta data into your IBM DB2 instance, allowing you to consolidate all of your data into a single location for archiving, reporting, analytics, machine learning, artificial intelligence and more.
Configure IBM DB2 as a Replication Destination
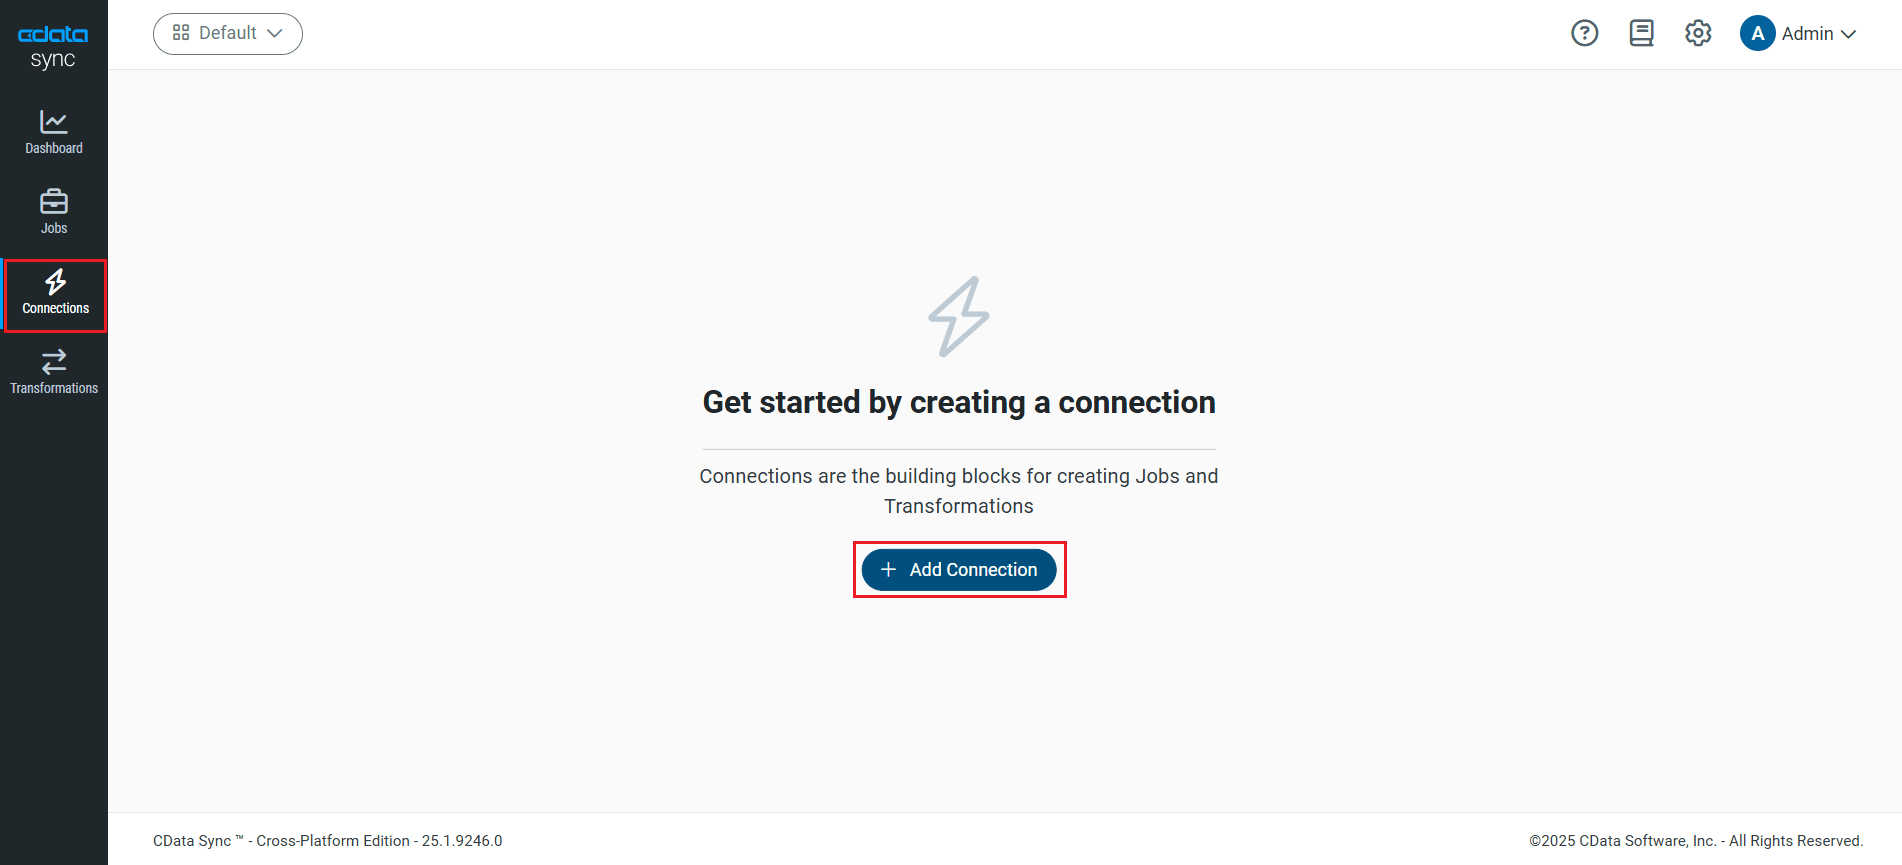
Using CData Sync, you can replicate Okta data to IBM DB2. To add a replication destination, navigate to the Connections tab.
- Click Add Connection.
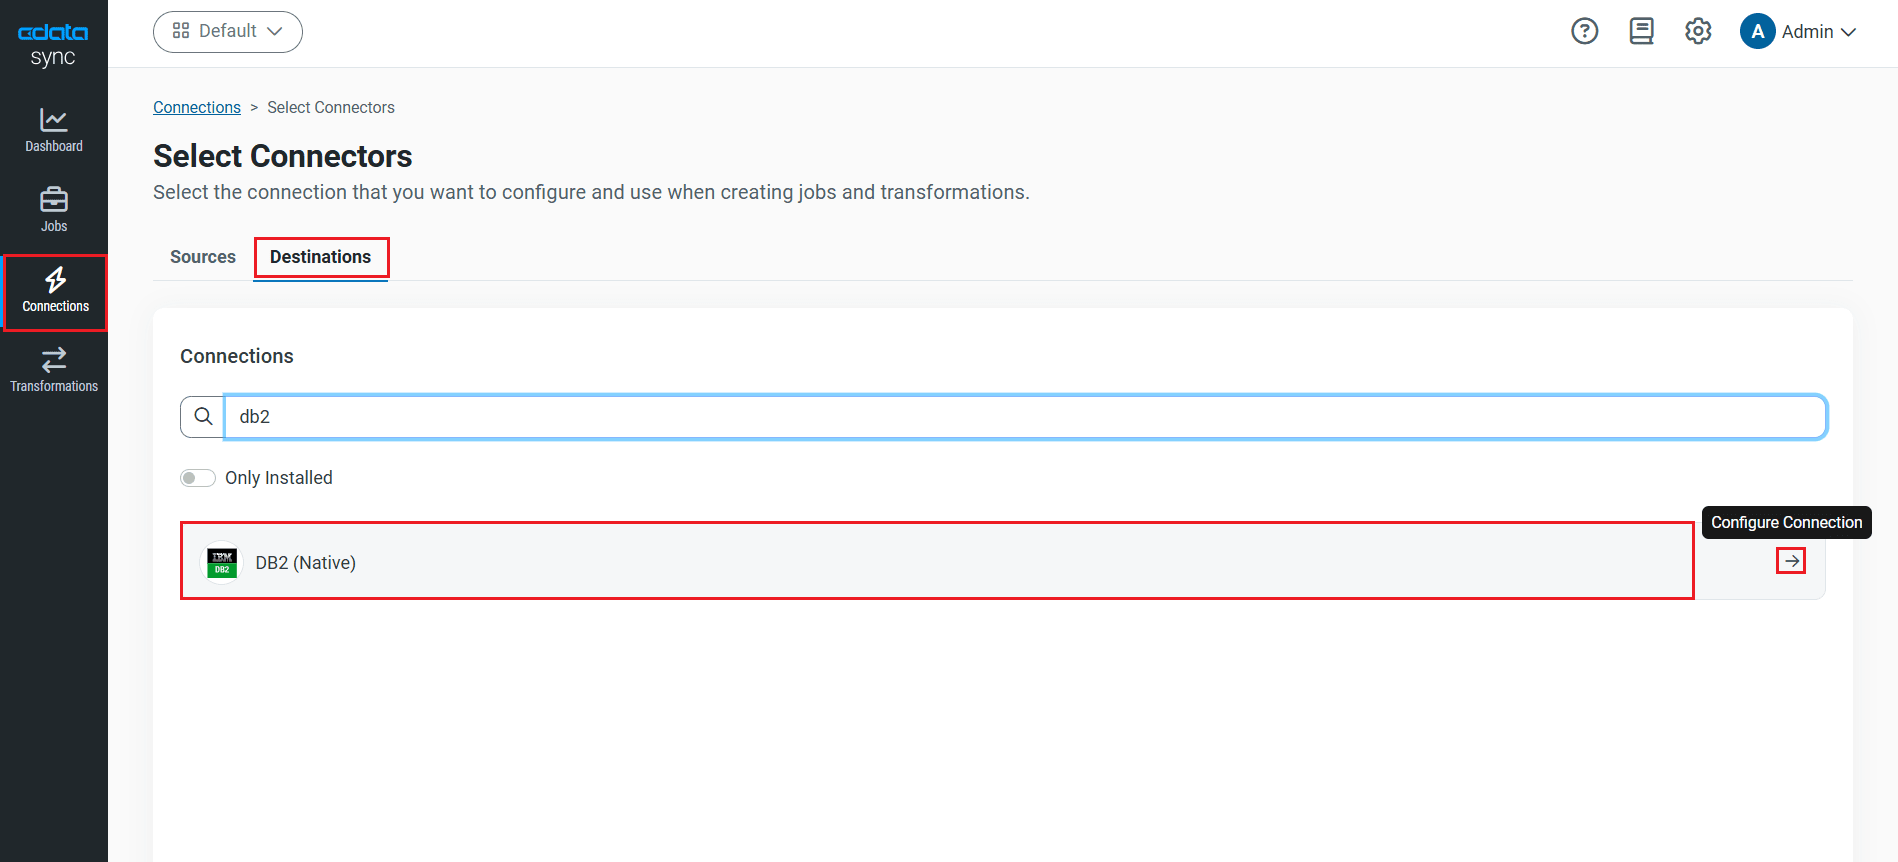
- Select the Destinations tab and locate the IBM DB2 connector.
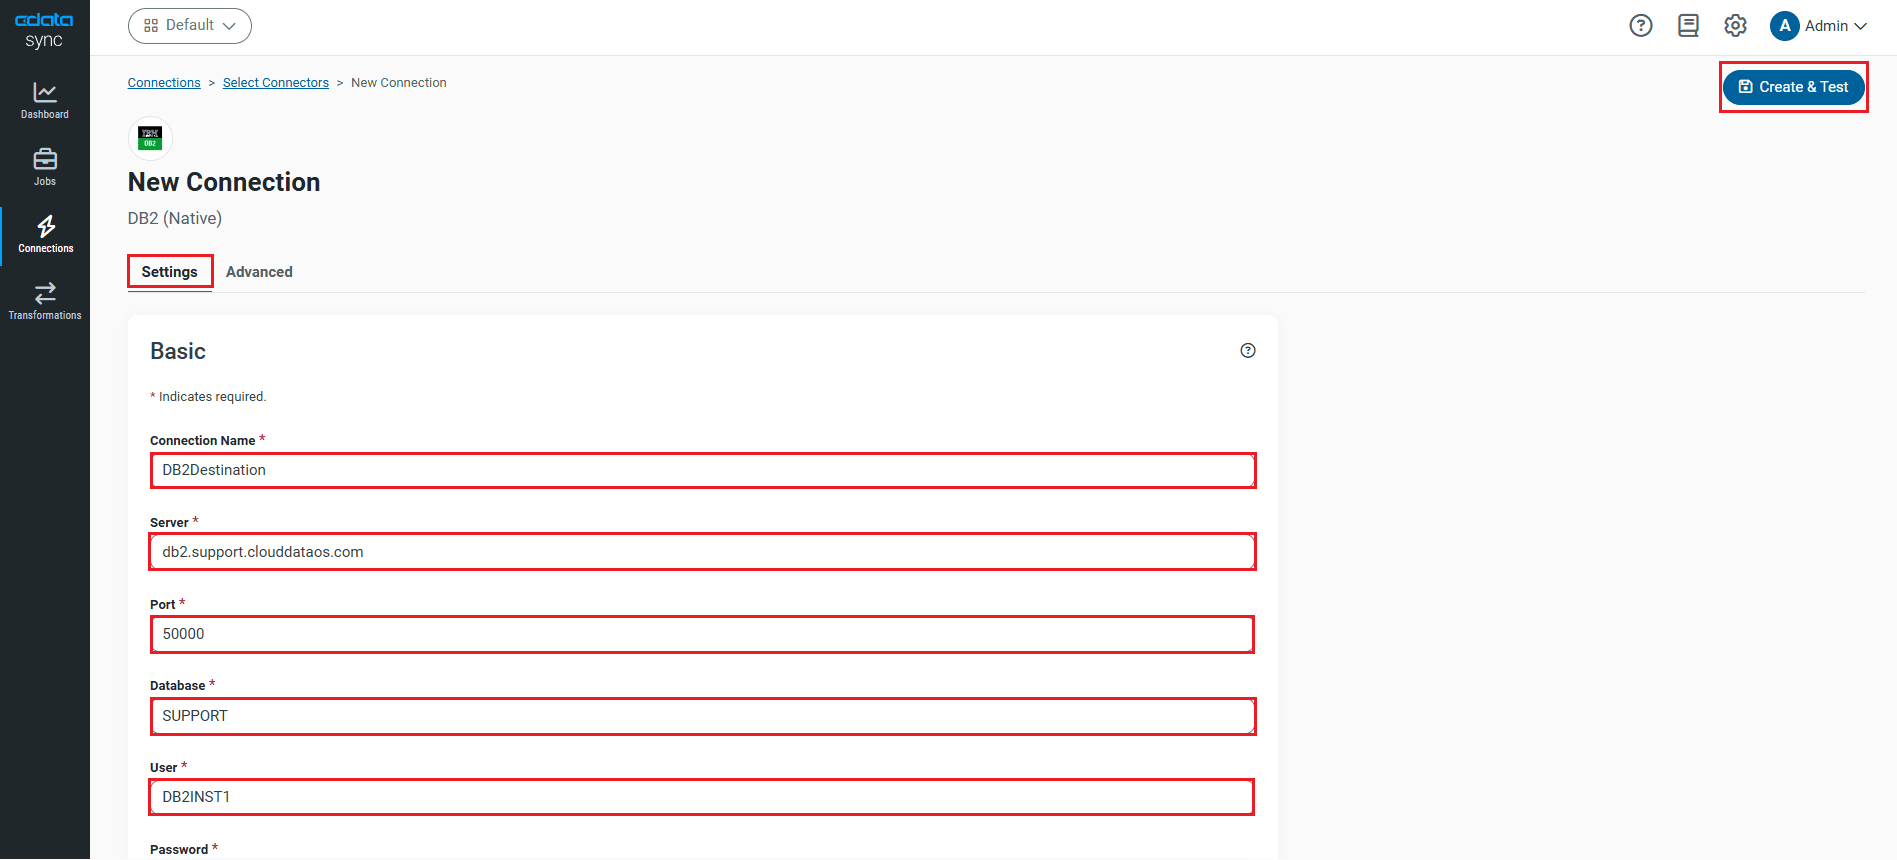
- Click the Configure Connection icon at the end of that row to open the New Connection page. Sync requires the db2jcc.jar driver to connect to your DB2 database. If you have not done so already, make sure to download the native DB2 JDBC driver from DB2 JDBC Driver Versions and Downloads web page.
- Copy the JDBC driver into the lib directory.
- Microsoft Windows: C:\Program Files\CData\CData Sync\lib
- UNIX or Mac OS X: ~/CData/CData Sync/lib
- To connect to IBM DB2, set the following connection properties:
- Connection Name: Enter a connection name of your choice for the IBM DB2 connection.
- Server: Enter either the host name or the IP address of the server that hosts your IBM DB2 instance.
- Port: Enter the port number of the server that hosts your instance of IBM DB2. The default port value is 50000.
- Database: Set this to the database you want to read from and write to.
- User: Set this to the database user.
- Password: Set this to the user's password.
- Once connected, click Create & Test to create, test and save the connection.
You are now connected to IBM DB2 and can use it as both a source and a destination.
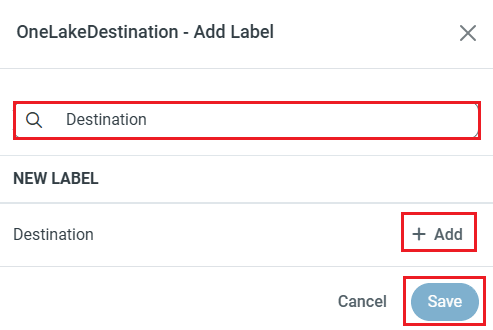
NOTE: You can use the Label feature to add a label for a source or a destination.
In this article, we will demonstrate how to load Okta data into IBM DB2 and utilize it as a destination.
Configure the Okta Connection
You can configure a connection to Okta from the Connections tab. To add a connection to your Okta account, navigate to the Connections tab.
- Click Add Connection.
- Select a source (Okta).
- Configure the connection properties.
To connect to Okta, set the Domain connection string property to your Okta domain.
You will use OAuth to authenticate with Okta, so you need to create a custom OAuth application.
Creating a Custom OAuth Application
From your Okta account:
- Sign in to your Okta developer edition organization with your administrator account.
- In the Admin Console, go to Applications > Applications.
- Click Create App Integration.
- For the Sign-in method, select OIDC - OpenID Connect.
- For Application type, choose Web Application.
- Enter a name for your custom application.
- Set the Grant Type to Authorization Code. If you want the token to be automatically refreshed, also check Refresh Token.
- Set the callback URL:
- For desktop applications and headless machines, use http://localhost:33333 or another port number of your choice. The URI you set here becomes the CallbackURL property.
- For web applications, set the callback URL to a trusted redirect URL. This URL is the web location the user returns to with the token that verifies that your application has been granted access.
- In the Assignments section, either select Limit access to selected groups and add a group, or skip group assignment for now.
- Save the OAuth application.
- The application's Client Id and Client Secret are displayed on the application's General tab. Record these for future use. You will use the Client Id to set the OAuthClientId and the Client Secret to set the OAuthClientSecret.
- Check the Assignments tab to confirm that all users who must access the application are assigned to the application.
- On the Okta API Scopes tab, select the scopes you wish to grant to the OAuth application. These scopes determine the data that the app has permission to read, so a scope for a particular view must be granted for the driver to have permission to query that view. To confirm the scopes required for each view, see the view-specific pages in Data Model < Views in the Help documentation.
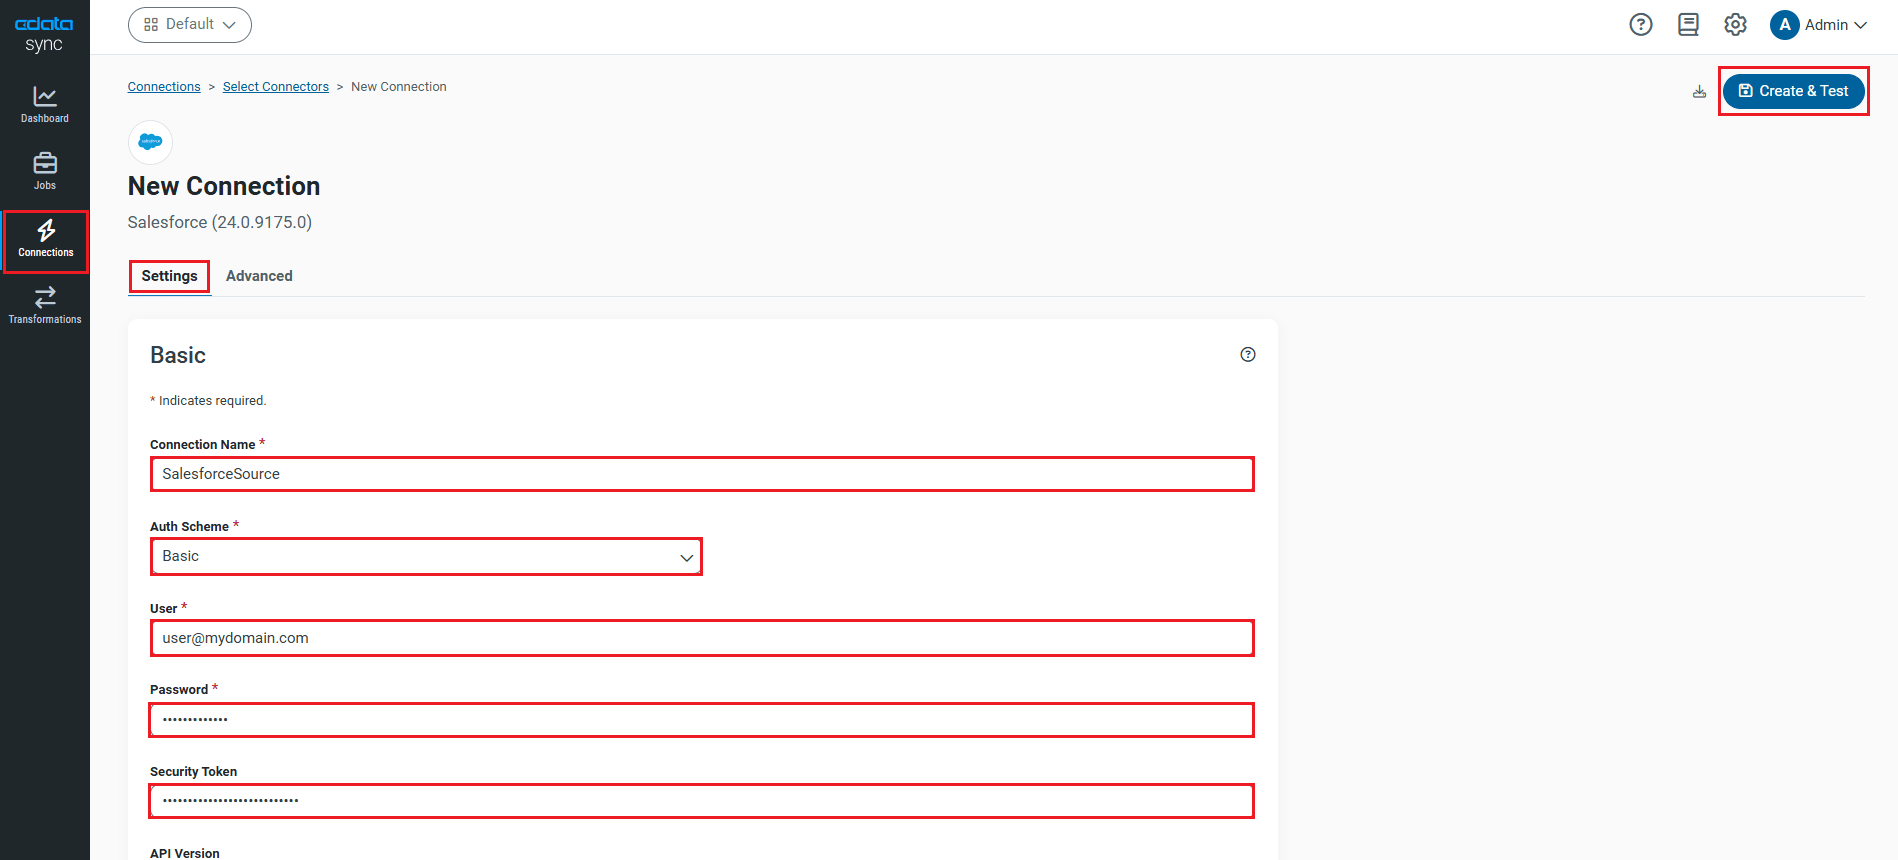
- Click Connect to Okta to ensure that the connection is configured properly.
- Click Save & Test to save the changes.
Configure Replication Queries
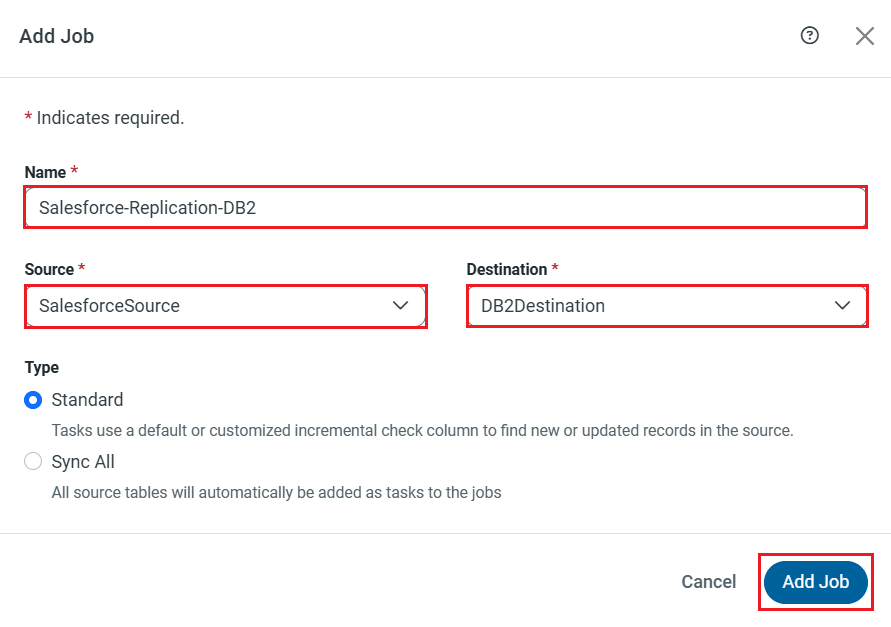
CData Sync enables you to control replication with a point-and-click interface and with SQL queries. For each replication you wish to configure, navigate to the Jobs tab and click Add Job. Select the Source and Destination for your replication.
Replicate Entire Tables
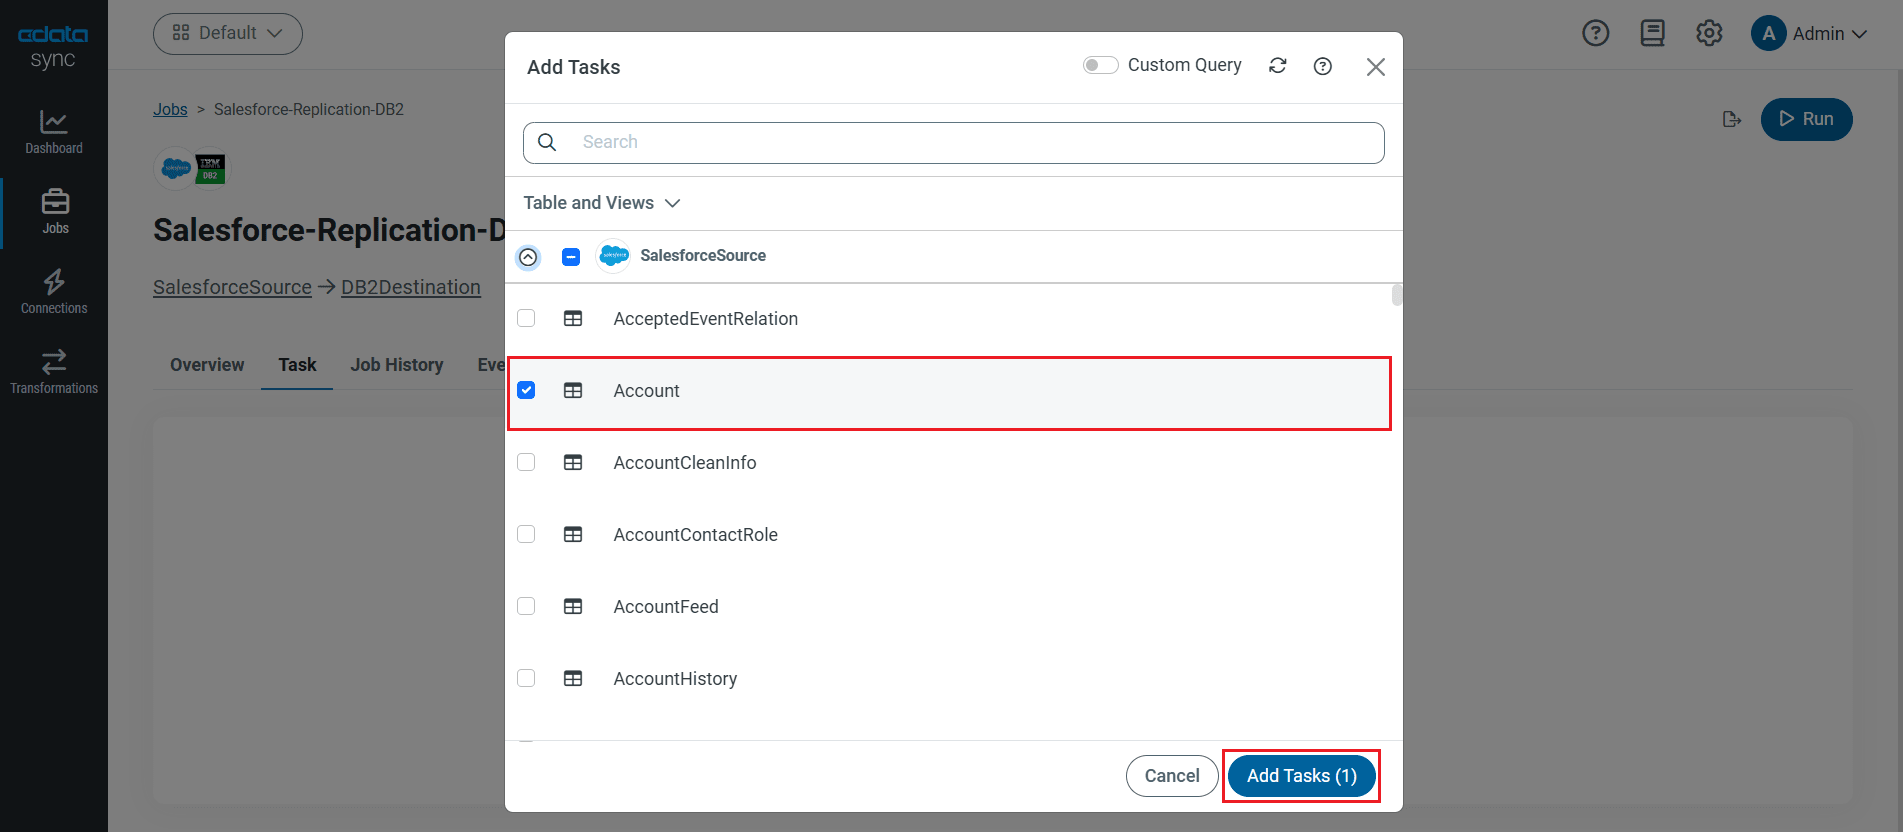
To replicate an entire table, navigate to the Task tab in the Job, click Add Tasks, choose the table(s) from the list of Okta tables you wish to replicate into IBM DB2, and click Add Tasks again.
Customize Your Replication
You can use the Columns and Query tabs of a task to customize your replication. The Columns tab allows you to specify which columns to replicate, rename the columns at the destination, and even perform operations on the source data before replicating. The Query tab allows you to add filters, grouping, and sorting to the replication with the help of SQL queries.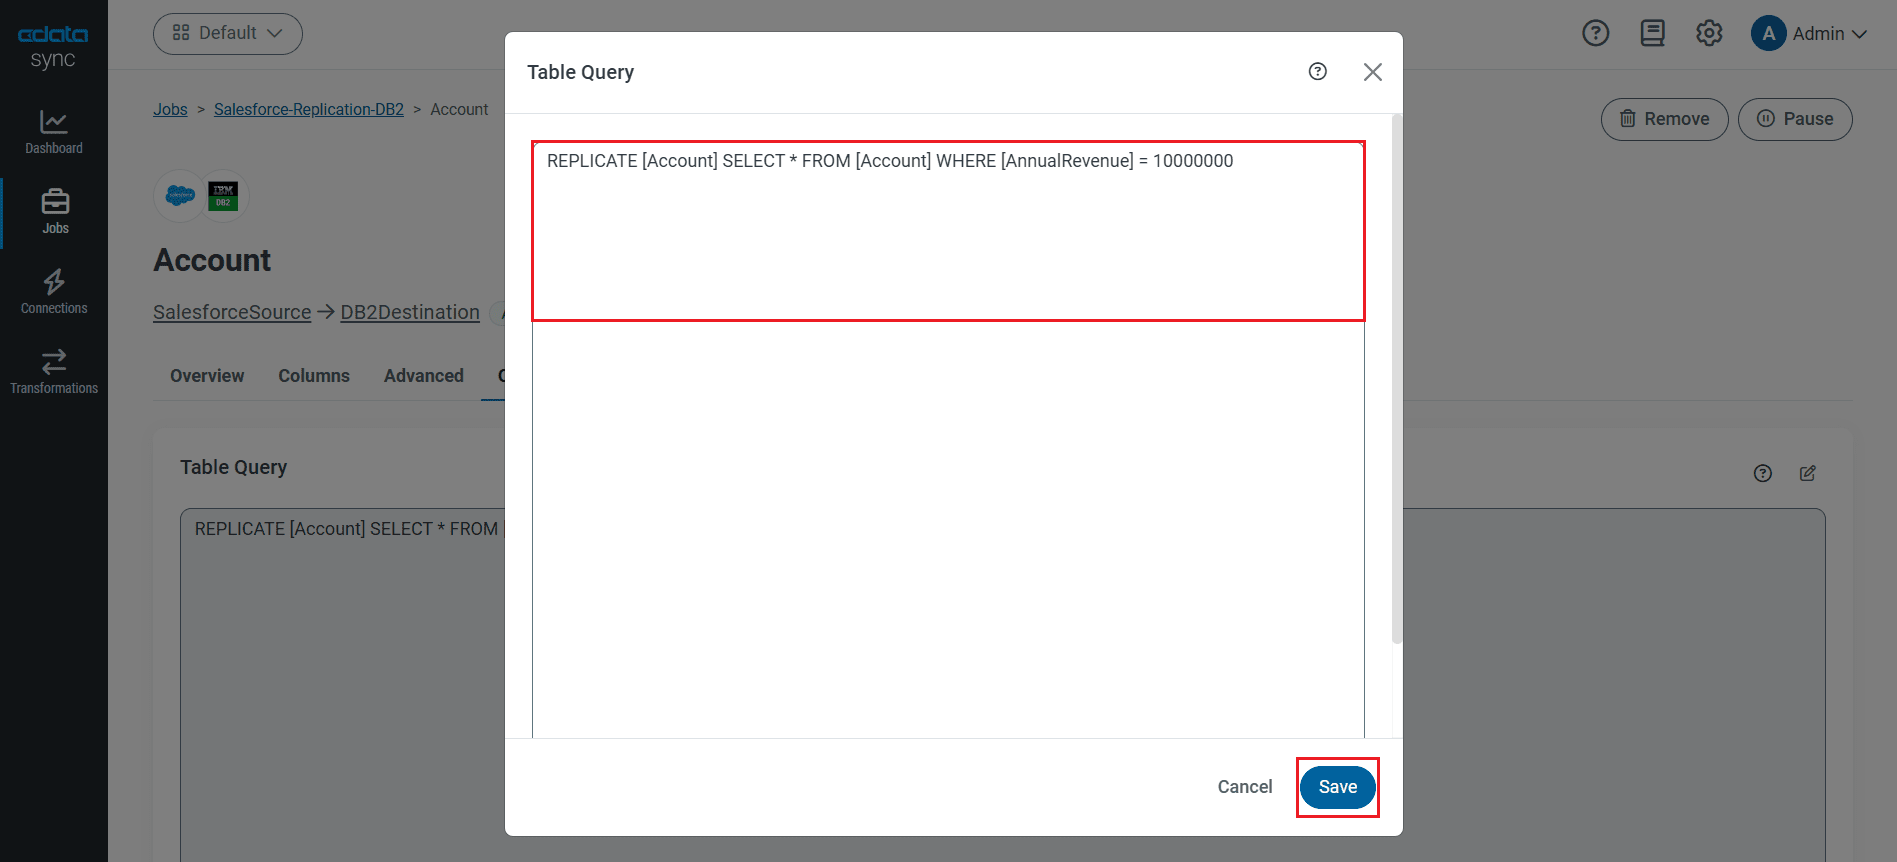
Schedule Your Replication
Select the Overview tab in the Job, and click Configure under Schedule. You can schedule a job to run automatically by configuring it to run at specified intervals, ranging from once every 10 minutes to once every month.
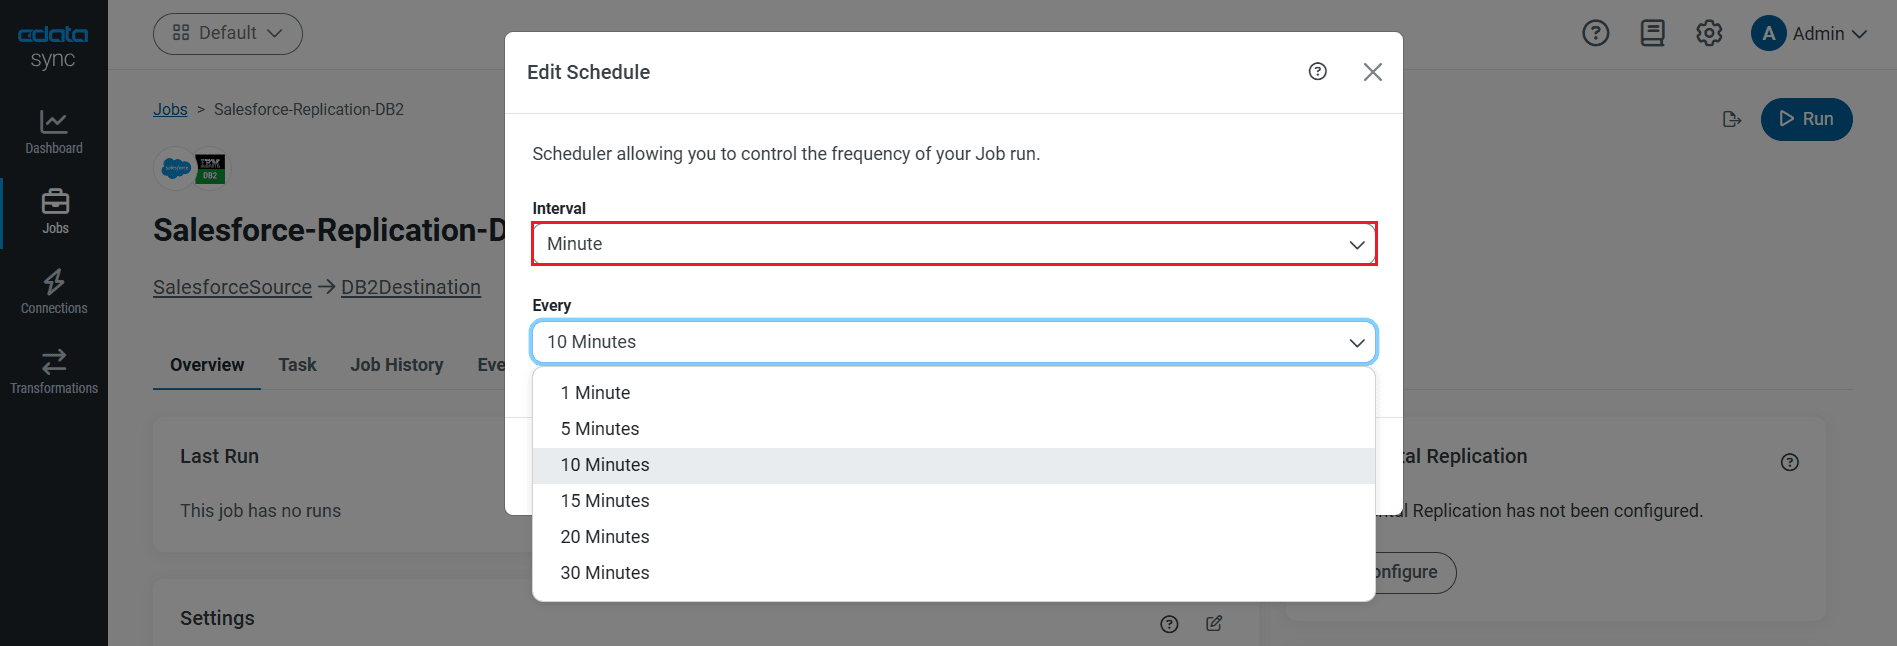
Once you have configured the replication job, click Save Changes. You can configure any number of jobs to manage the replication of your Okta data to IBM DB2.
Run the Replication Job
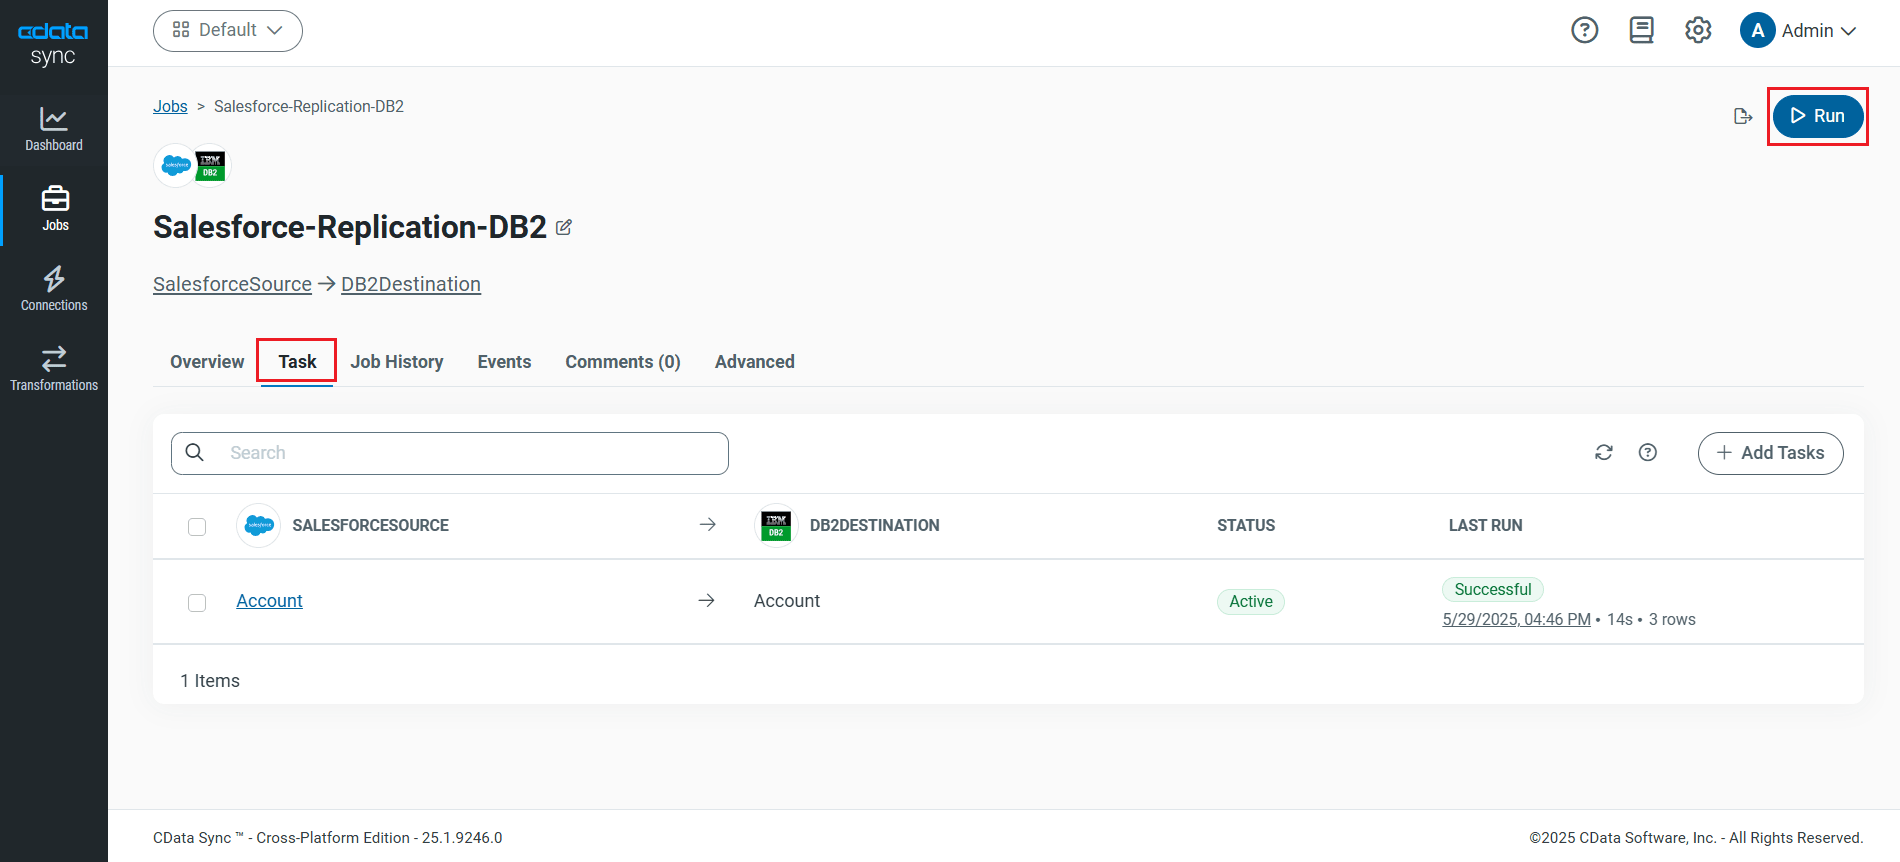
Once all the required configurations are made for the job, select the Okta table you wish to replicate and click Run. After the replication completes successfully, a notification appears, showing the time taken to run the job and the number of rows replicated.
Free Trial & More Information
Now that you have seen how to replicate Okta data into IBM DB2, visit our CData Sync page to explore more about CData Sync and download a free 30-day trial. Start consolidating your enterprise data today!
As always, our world-class Support Team is ready to answer any questions you may have.