







How to Visualize Paylocity Data in Python with pandas via CData Connect AI

The rich ecosystem of Python modules lets you get to work quickly and integrate your systems more effectively. With the CData Connect AI Python SDK, the pandas and Matplotlib modules, you can build Paylocity-connected Python applications and scripts for visualizing Paylocity data. This article shows how to connect to Connect AI and use the pandas and Matplotlib built-in functions to query Paylocity data and visualize the results.
The Connect AI Python SDK (cdata-connect-ai) is a DB-API 2.0 (PEP 249) compliant client, so pandas can read query results directly from the SDK connection object. There is no driver to install per source and no SQLAlchemy engine to configure: connect with a Personal Access Token and pass the connection straight to pandas.read_sql.
Connect to Paylocity in Connect AI
CData Connect AI uses a straightforward, point-and-click interface to connect to data sources.
- Log into Connect AI, click Sources, and then click Add Connection
- Select "Paylocity" from the Add Connection panel
-
Enter the necessary authentication properties to connect to Paylocity.
Set the following to establish a connection to Paylocity:
- RSAPublicKey: Set this to the RSA Key associated with your Paylocity, if the RSA Encryption is enabled in the Paylocity account.
This property is required for executing Insert and Update statements, and it is not required if the feature is disabled.
- UseSandbox: Set to true if you are using sandbox account.
- CustomFieldsCategory: Set this to the Customfields category. This is required when IncludeCustomFields is set to true. The default value for this property is PayrollAndHR.
- Key: The AES symmetric key(base 64 encoded) encrypted with the Paylocity Public Key. It is the key used to encrypt the content.
Paylocity will decrypt the AES key using RSA decryption.
It is an optional property if the IV value not provided, The driver will generate a key internally. - IV: The AES IV (base 64 encoded) used when encrypting the content. It is an optional property if the Key value not provided, The driver will generate an IV internally.
Connect Using OAuth Authentication
You must use OAuth to authenticate with Paylocity. OAuth requires the authenticating user to interact with Paylocity using the browser. For more information, refer to the OAuth section in the Help documentation.
The Pay Entry API
The Pay Entry API is completely separate from the rest of the Paylocity API. It uses a separate Client ID and Secret, and must be explicitly requested from Paylocity for access to be granted for an account. The Pay Entry API allows you to automatically submit payroll information for individual employees, and little else. Due to the extremely limited nature of what is offered by the Pay Entry API, we have elected not to give it a separate schema, but it may be enabled via the UsePayEntryAPI connection property.
Please be aware that when setting UsePayEntryAPI to true, you may only use the CreatePayEntryImportBatch & MergePayEntryImportBatchgtable stored procedures, the InputTimeEntry table, and the OAuth stored procedures. Attempts to use other features of the product will result in an error. You must also store your OAuthAccessToken separately, which often means setting a different OAuthSettingsLocation when using this connection property.

- RSAPublicKey: Set this to the RSA Key associated with your Paylocity, if the RSA Encryption is enabled in the Paylocity account.
- Click Save & Test
- Navigate to the Permissions tab and update the user-based permissions.



Generate a Personal Access Token (PAT)
The Python SDK authenticates to Connect AI with your account email and a Personal Access Token (PAT). It is best practice to create a separate PAT for each application to maintain granularity of access.
- Click the Gear icon () at the top right of the Connect AI app to open the Settings page.
- On the Settings page, go to the Access Tokens section and click Create PAT.
- Give the PAT a name and click Create.

- The PAT is only visible at creation, so copy it and store it securely.
Install Required Modules
Install the SDK (with the pandas extra) and Matplotlib using the pip utility:
pip install "cdata-connect-ai[full]"
pip install matplotlib
Visualize Paylocity Data in Python
Import the modules, then connect to Connect AI with your account email and PAT. Identifiers are three-part: <Connection>.<Schema>.<Table>, where the connection name defaults to the source name (for example, Paylocity1).
import pandas
import matplotlib.pyplot as plt
import cdata_connect_ai

conn = cdata_connect_ai.connect(
    username="[email protected]",
    password="<your_pat>",
)
Query Paylocity with pandas
Use the read_sql function from pandas to execute a SQL statement and store the result set in a DataFrame. Pass the SDK connection directly, no engine required.
df = pandas.read_sql(
    "SELECT FirstName, LastName "
    "FROM [Paylocity1].[Paylocity].[Employee] "
    "WHERE EmployeeId = '1234'",
    conn,
)
Note: pandas may print a UserWarning stating that it only officially supports SQLAlchemy connectables. This is expected when passing a DB-API connection directly—the query runs correctly and the warning is safe to ignore.
Visualize Paylocity Data
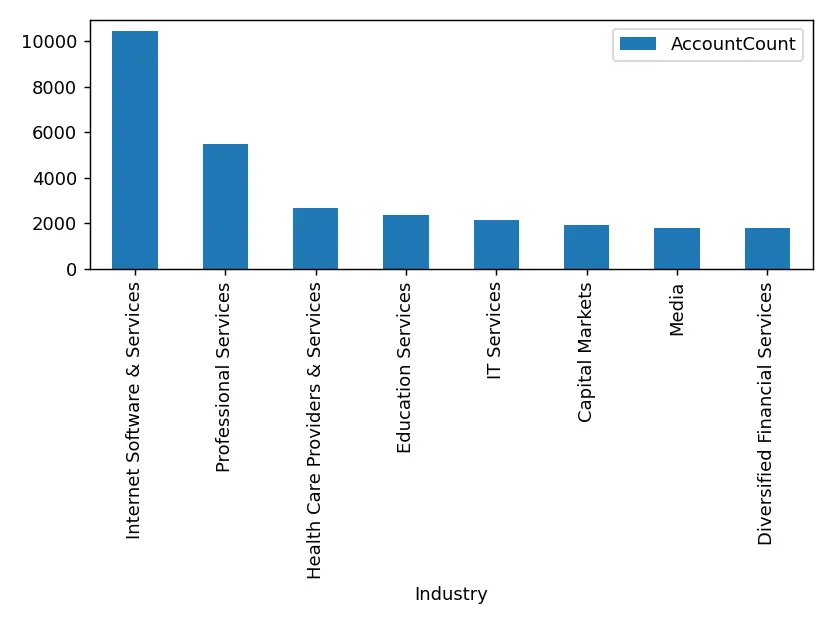
With the query results stored in a DataFrame, use the plot function to build a chart. The show method displays the chart in a new window.
df.plot(kind="bar", x="FirstName", y="LastName")
plt.show()

conn.close()
More Information and Free Trial
Now you can read live Paylocity data into pandas through the CData Connect AI Python SDK. For more information on connecting to Paylocity (and hundreds of other data sources), visit the Connect AI page. Sign up for a free trial and start working with live Paylocity data in Python.
Full Source Code
import pandas
import matplotlib.pyplot as plt
import cdata_connect_ai

conn = cdata_connect_ai.connect(
    username="[email protected]",
    password="<your_pat>",
)

df = pandas.read_sql(
    "SELECT FirstName, LastName "
    "FROM [Paylocity1].[Paylocity].[Employee] "
    "WHERE EmployeeId = '1234'",
    conn,
)

df.plot(kind="bar", x="FirstName", y="LastName")
plt.show()

conn.close()