Discover how a bimodal integration strategy can address the major data management challenges facing your organization today.
Get the Report →Excel Add-In Getting Started Guide
The CData Excel Add-In provides self-service integration with Microsoft Excel, linking your Excel spreadsheet to real-time data. That way, you can monitor enterprise data and keep it up-to-date for use in reporting and analysis. This article explains how to install the CData Excel Add-In, configure a connection to data, and import that data into Excel.
It is important to note that although this article references the Salesforce Excel Add-In, the same principles herein can be applied to any of the 250+ data sources that we support.
Download and Install the Excel Add-In
First, download and install the Excel Add-In from the CData website: https://www.cdata.com/drivers/salesforce/download/excel/
Fill in the appropriate contact information.
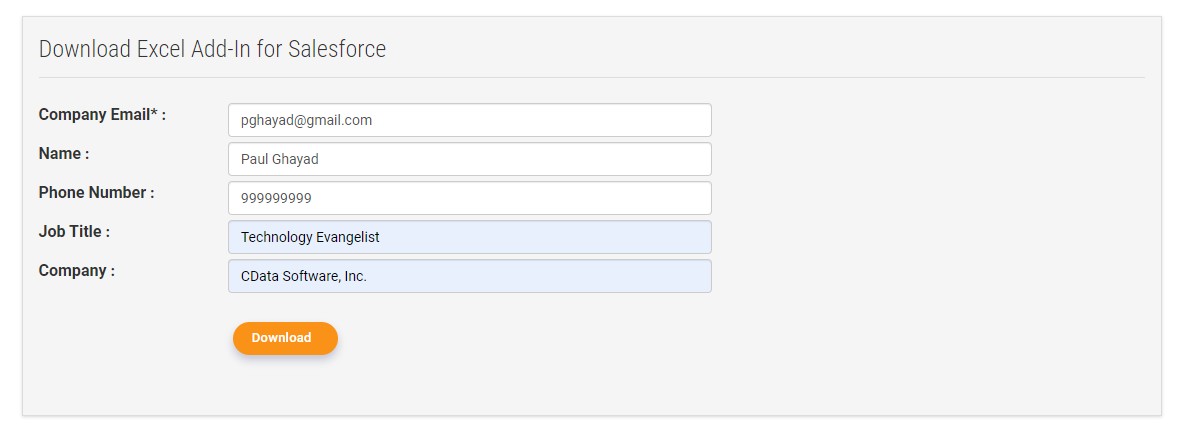
Note: If you are downloading a licensed installer, use your company email address and product key.
Import Data into Excel
Once you have installed the Excel Add-In, follow the steps below in order to import Salesforce data into Excel:
-
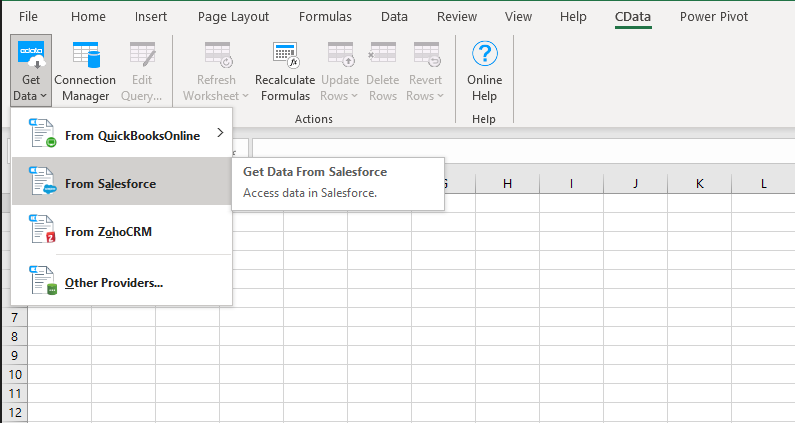
Open Excel and click the CData tab then Get Data -> From Salesforce
![Clicking button in Excel]()
-
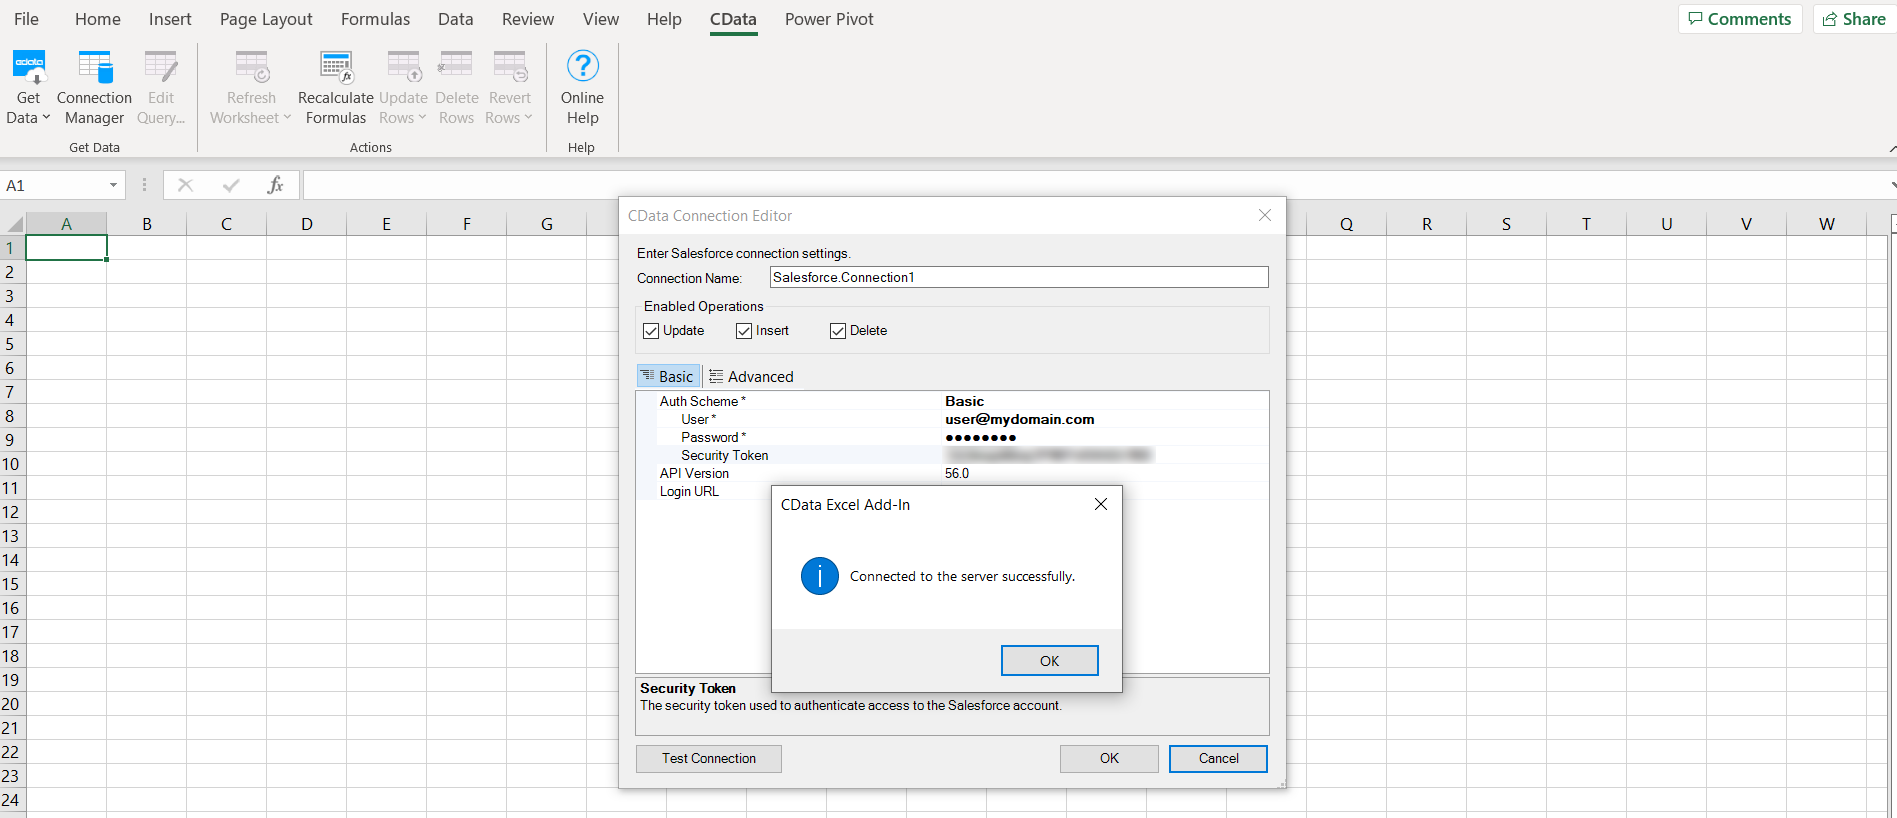
Choose Basic for the Auth Scheme. After filling in the connection properties (e.g. user, password, and security token),
click "Test Connection." Then, click OK.
![Configuring the connection]()
-
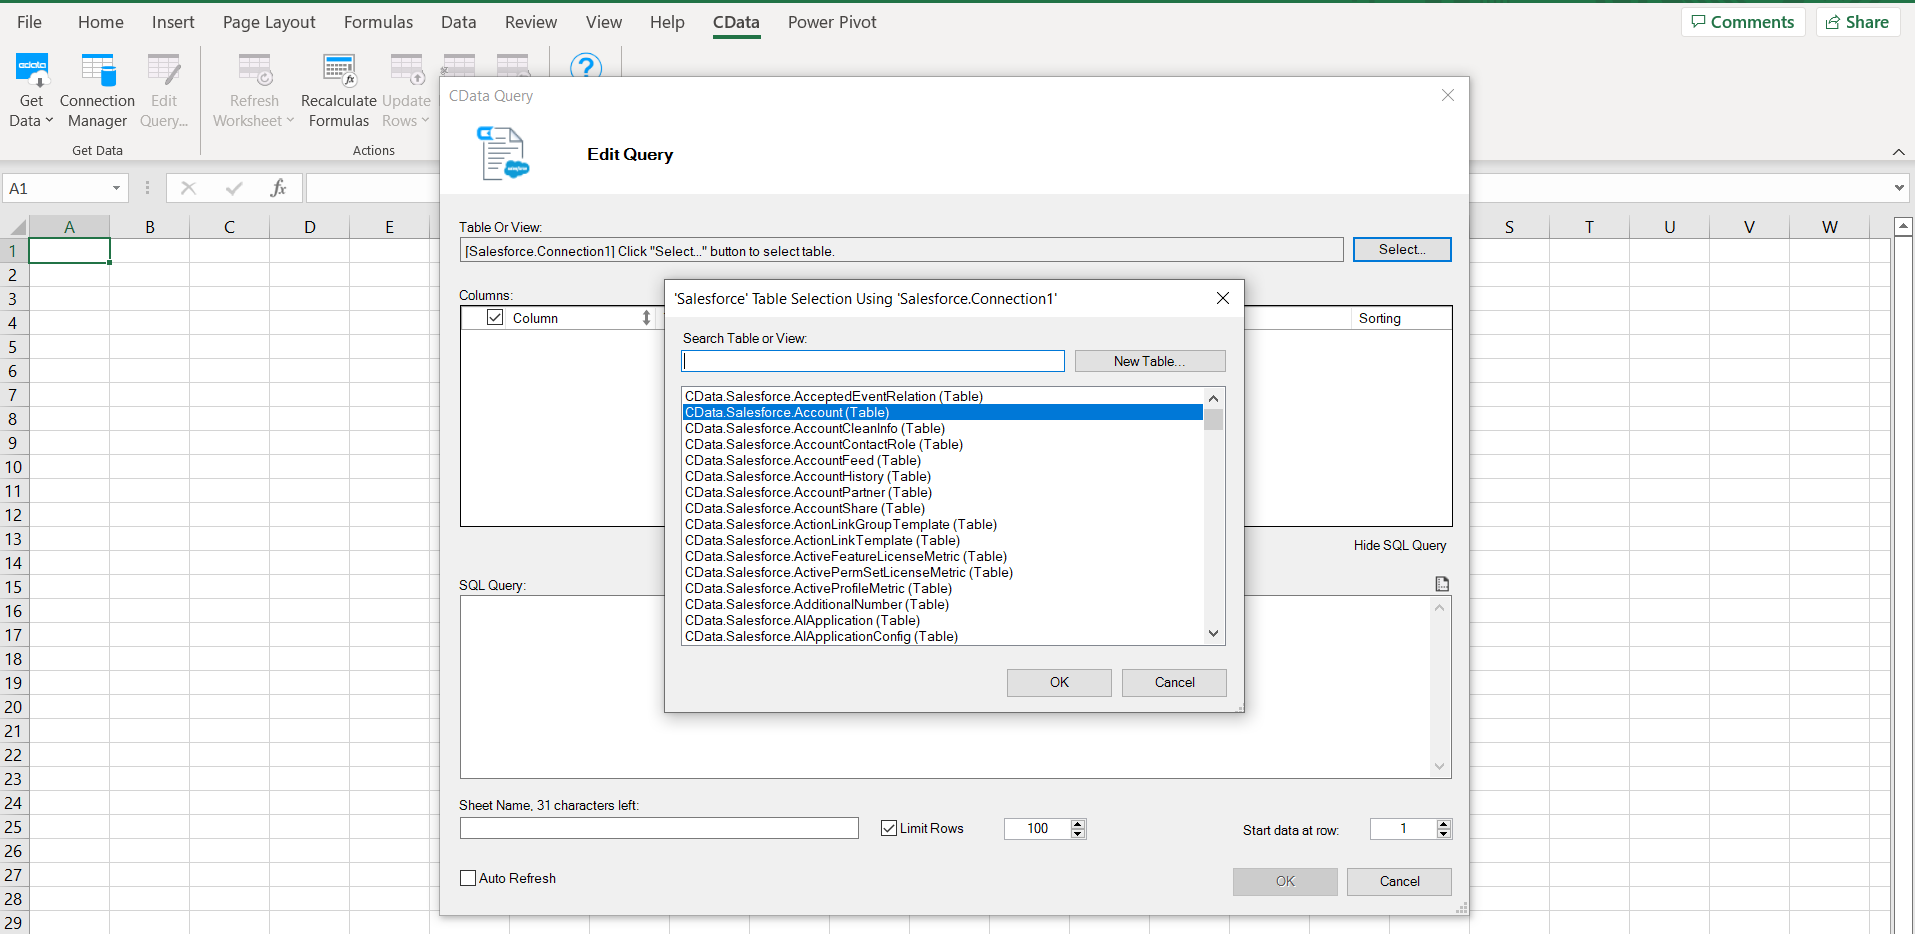
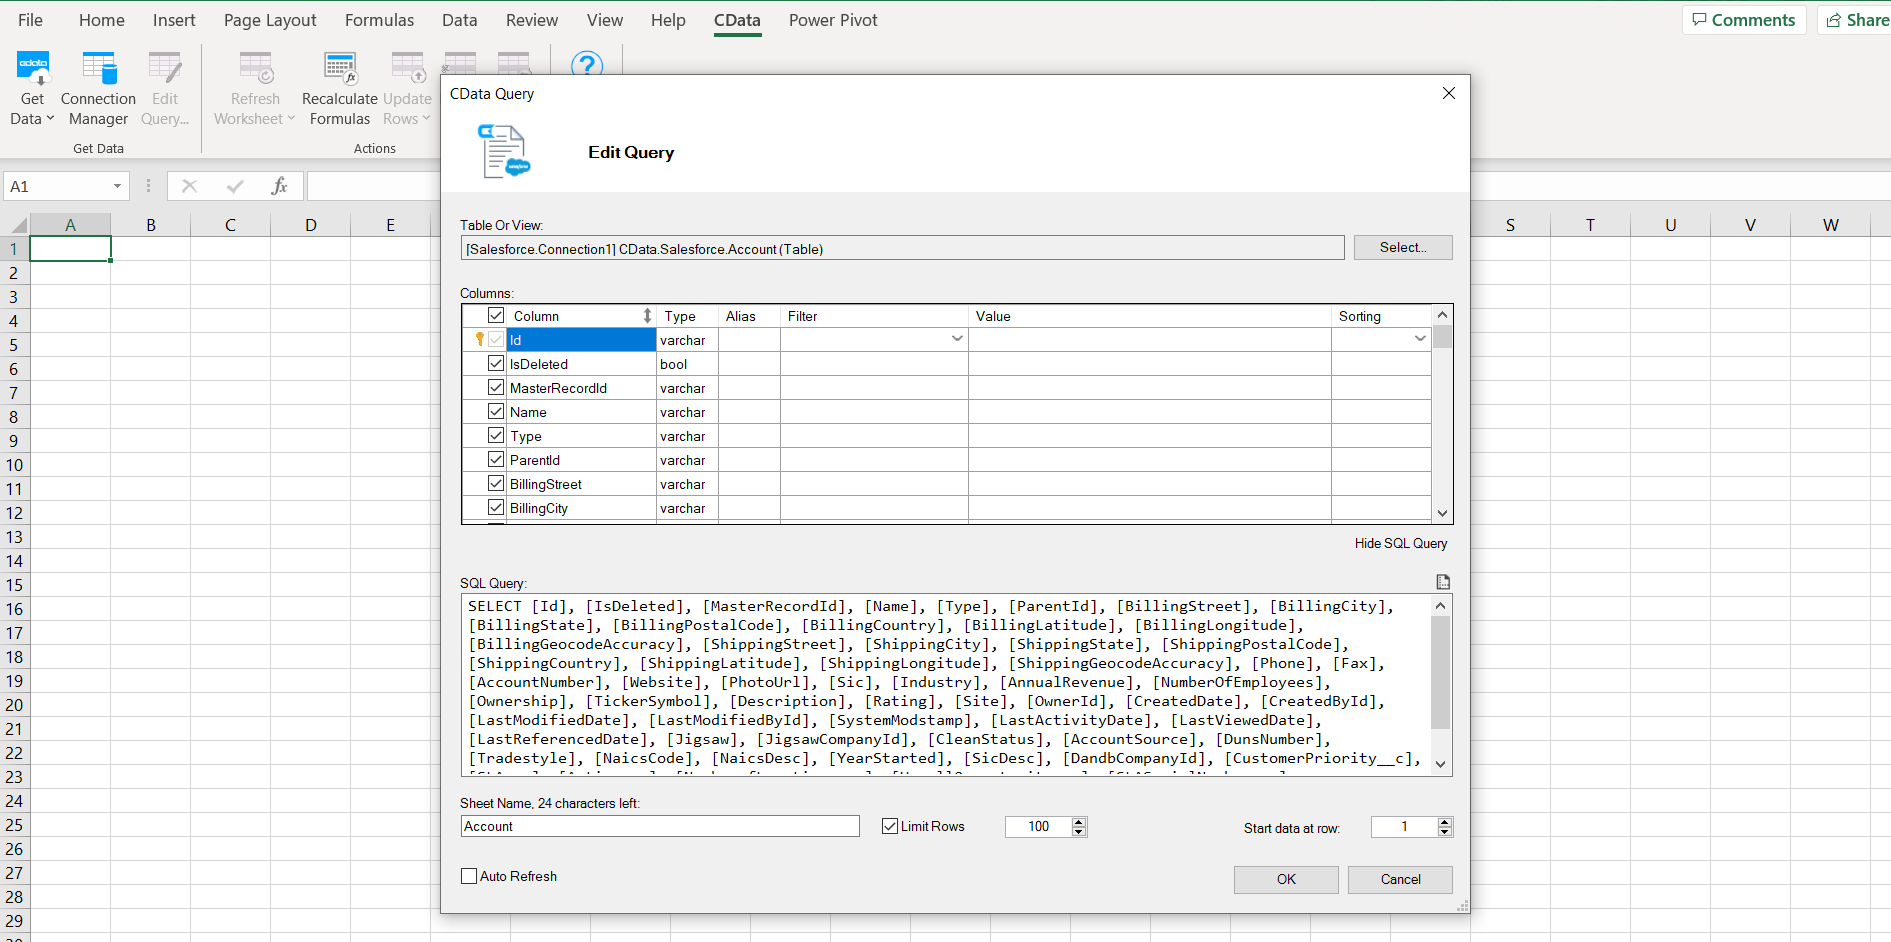
On the CData Query screen, click Select... and then choose a table and click OK.
![Choosing a table]()
-
Next, a SQL Query appears. This query populates the Excel spreadsheet with Salesforce data. Click OK.
![Displaying a SQL Query]()
-
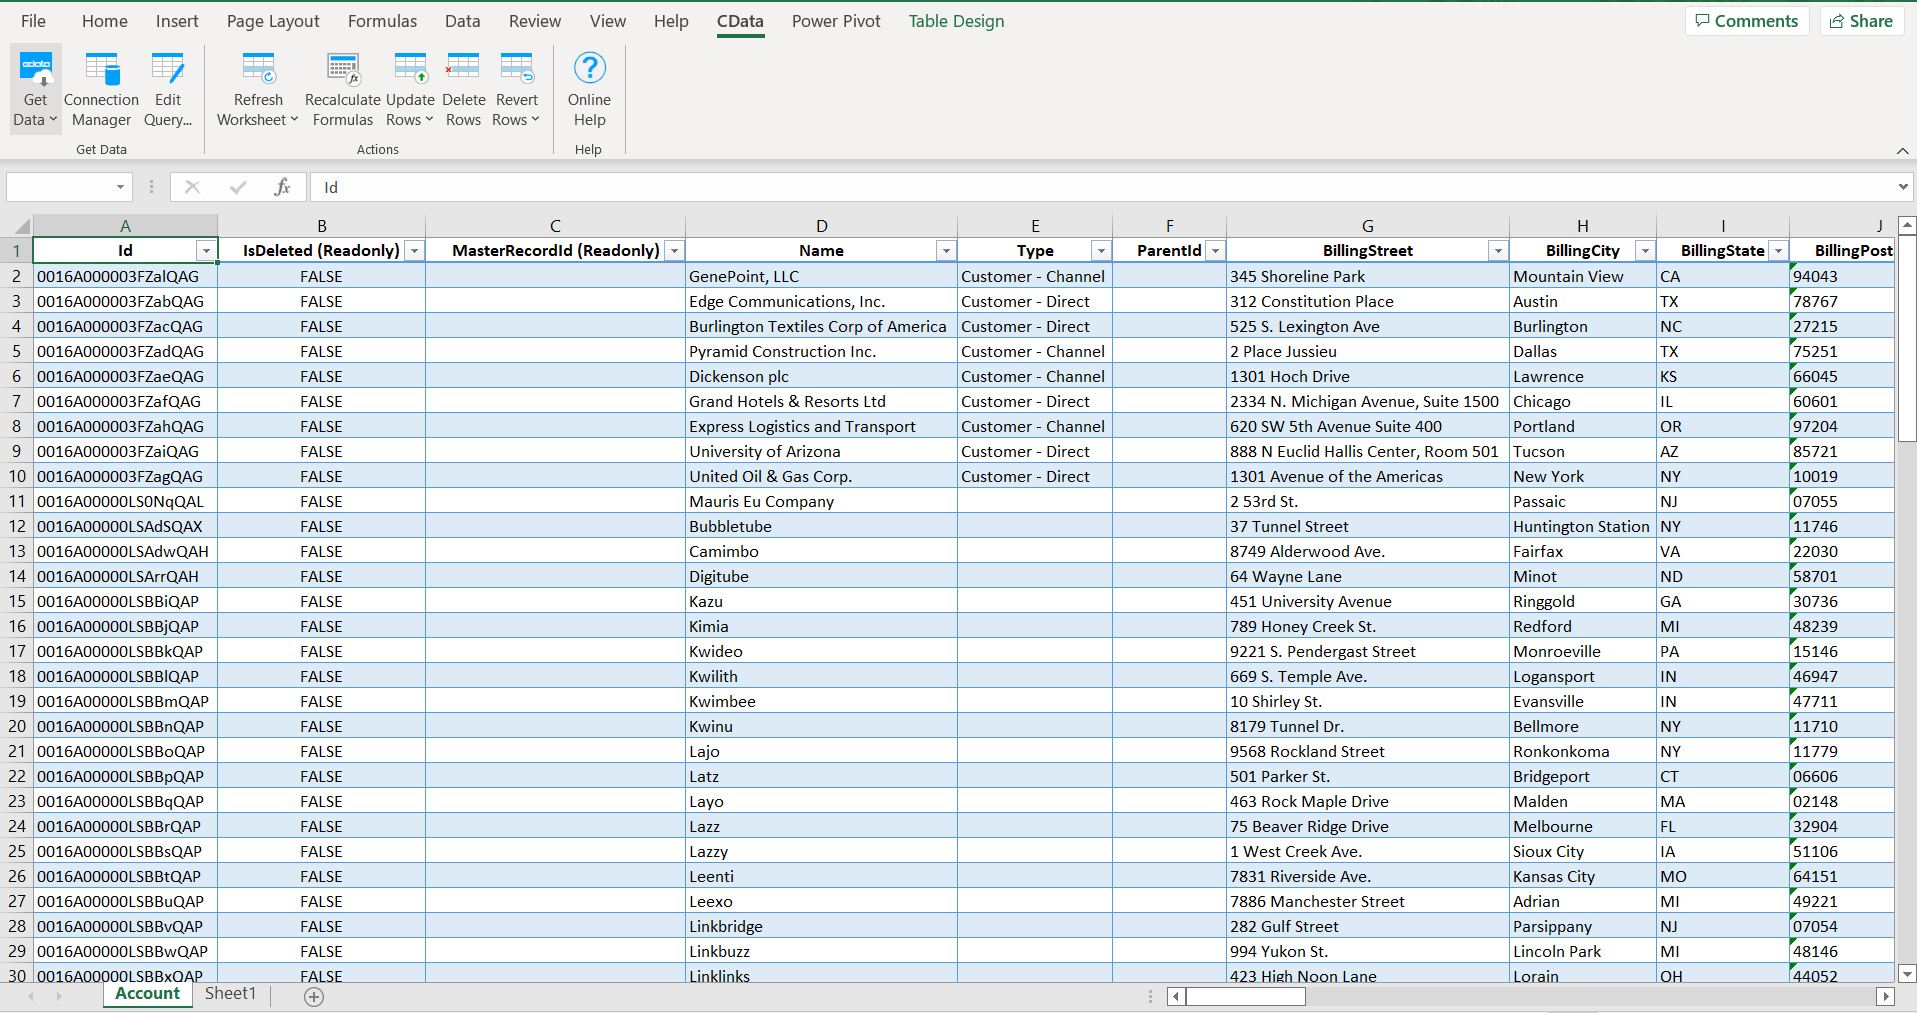
Finally, we have an Excel spreadsheet with Salesforce data!
![Displaying Excel spreadsheet]() Now, if we wanted, we could create charts and tables to analyze this data.
Now, if we wanted, we could create charts and tables to analyze this data.
CData Connectors for 250+ Data Sources
For more information on CData's suite of connectors, visit our Excel Add-In page .
Download a free 30-day trial of the CData Excel Add-In and get simplified access to your data today.


 Now, if we wanted, we could create charts and tables to analyze this data.
