Discover how a bimodal integration strategy can address the major data management challenges facing your organization today.
Get the Report →CData Sync - History Mode
CData Sync history mode provides a method for analyzing historical data in your data sources. With this option (Enable History Mode in the application), you can track the change history for data rows (records) and see how your data changes over time. History mode is available for all connectors that support replication by incremental check columns.
An incremental check column is either a datetime or integer-based column that Sync uses to identify new or modified records when replicating data. Each time that a record is added or updated in the source, the value for this column increases. Sync uses this column as a criterion during the extraction to ensure that only new or changed records are returned. Then, Sync stores the new maximum value of the column so it can be used in the next replication.
Replication that uses an incremental check column can work by using two different data types:
- DateTime incremental check columns: A Last Modified or a Date Updated column that represents when the record was last updated.
- Integer-based incremental check columns: An auto-incrementing Id or a row version type that increments each time a record is added or updated.
History mode works on a per-table basis. You can decide which tables you want to analyze and then activate the option for those tables only.
In standard mode, Sync merges and updates existing rows, whereas in history mode, Sync appends updated rows to the database table.
Restrictions and Limitations
With history mode, the following restrictions apply:
- The source table must support an incremental check column.
- The incremental check column is a timestamp.
- The incremental check column is not a pseudo column. (Pseudo columns do not have a value in the response and are used only as criteria).
- The destination table cannot exist. (Use the Drop Table option on the Advanced tab to re-create the table with history mode active.)
CData Sync currently supports history mode for the following destinations:
- SQL Server
- MySQL
- PostgreSQL
- Oracle DB
- Snowflake
- Databricks
- Redshift
NOTE: Additional destinations will be added in the future.
Setting up the Data Source
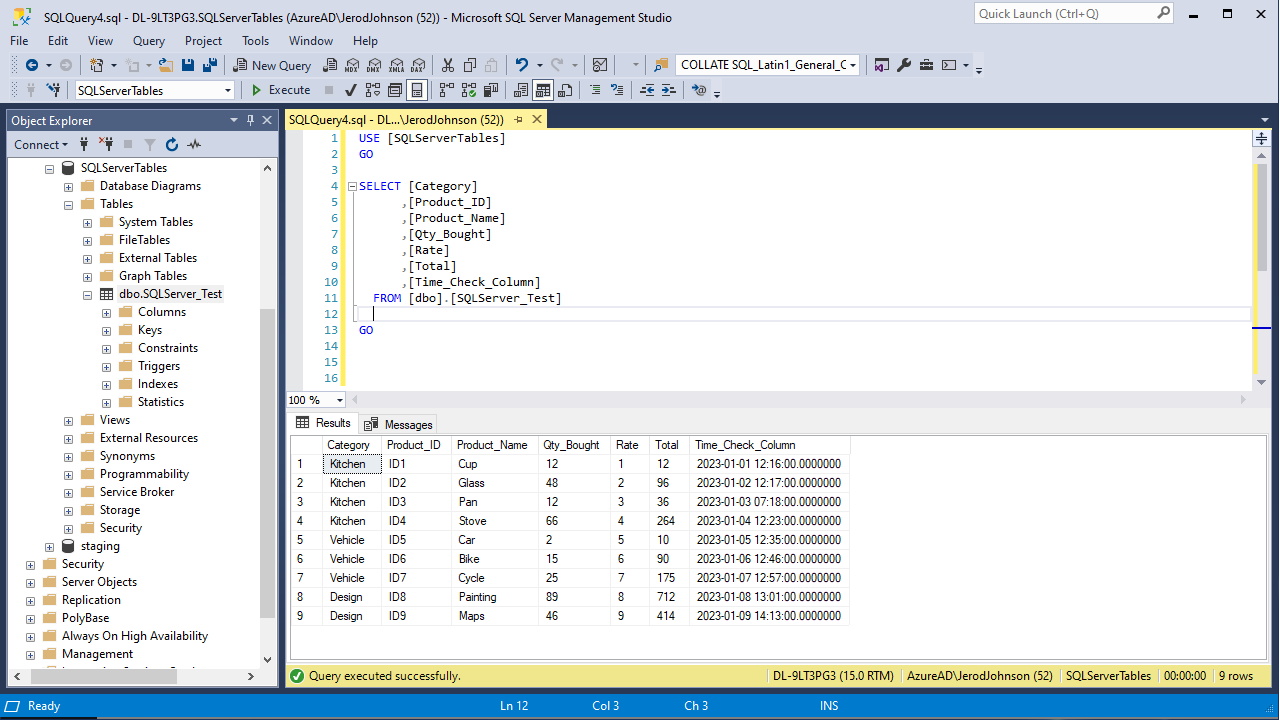
Make sure the data source table(s) you wish to replicate using History Mode have an Incremental Check Column in the SQL Server Table. The column can be a "DateTime incremental check column" or "Integer based incremental check column"
Configuring History Mode
Follow the steps below to configure History Mode in a replication job. For this article we use SQL Server and MySQL databases as reference connections, but the principals apply to any data source and replication destination.
- Start CData Sync Server.
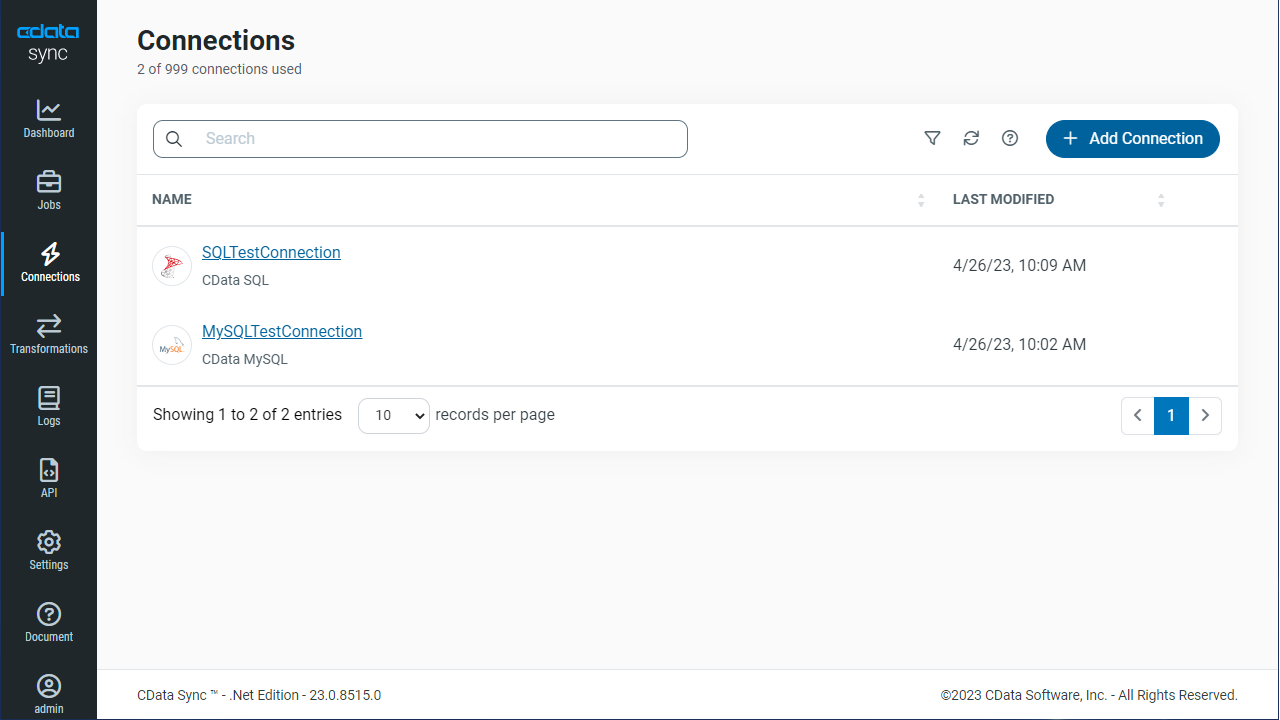
- Create a data source connection and a replication destination connection
![Configured connections in CData Sync]()
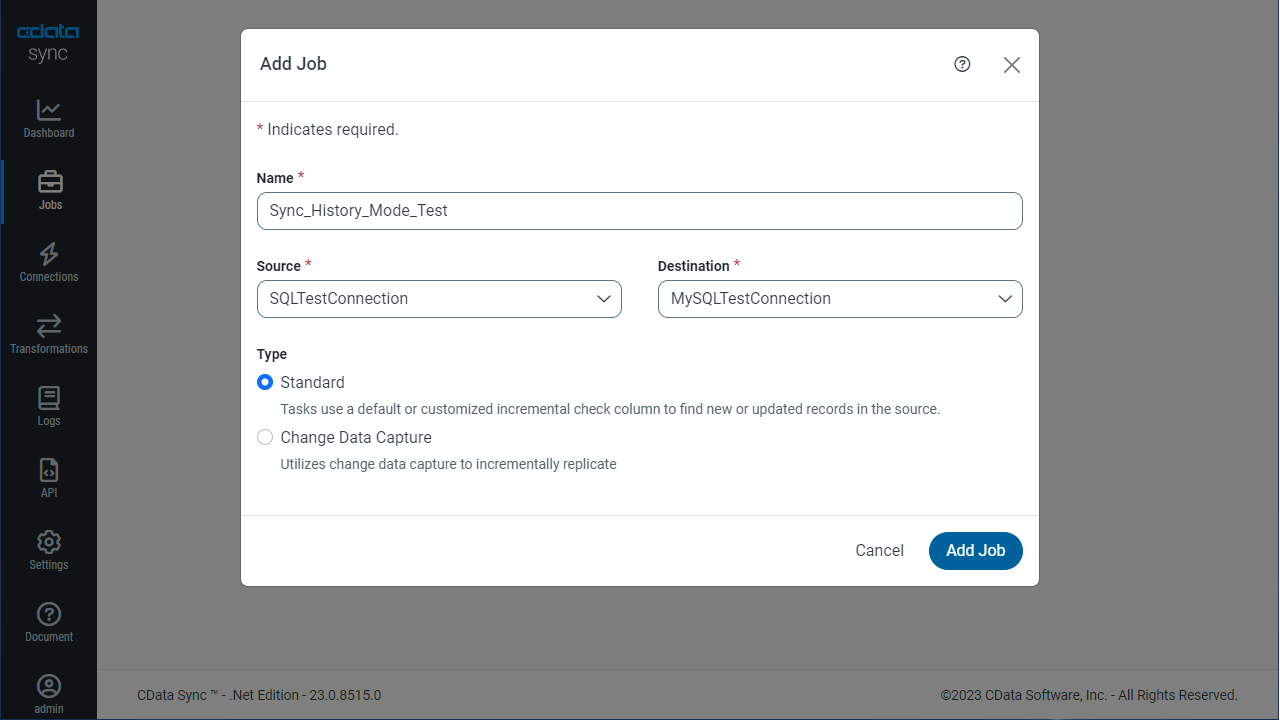
- Create a new job, select the source and destination and click "Create"
![Creating a replication Job in CData Sync]()
- Under Job Settings for the newly created Job, click on "Add Tasks"
- Select the table(s) to be replicated from the source database (SQL Server) in "Add Task" section. Click on "Add"
![Selecting tables to replicate]()
- Go to Advanced under Job Settings, select the History Mode checkbox, and save the changes
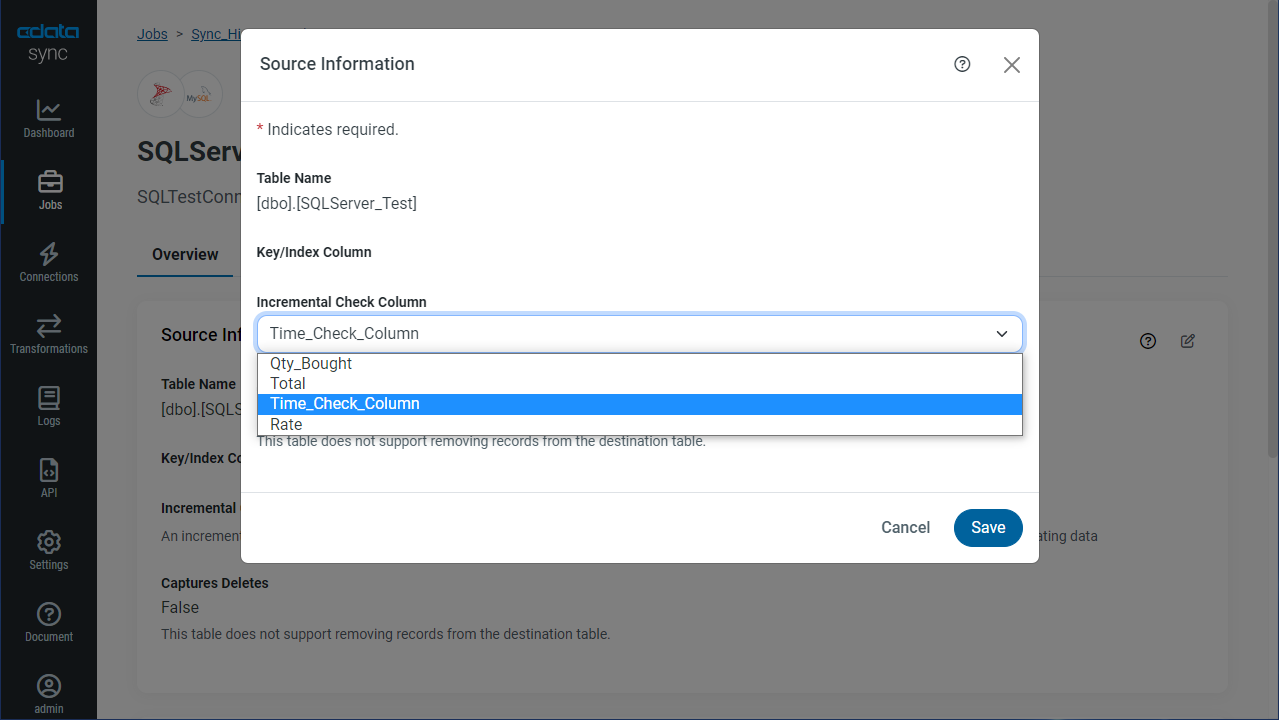
- Click on the Task to open Task Settings. Click to edit the "Source Information" section in the "Overview" tab. Click on the drop-down and select the column you want to use as an "Incremental Check Column" (Date Incremental check column in this situation)
![Configuring the Incremental Check column]()
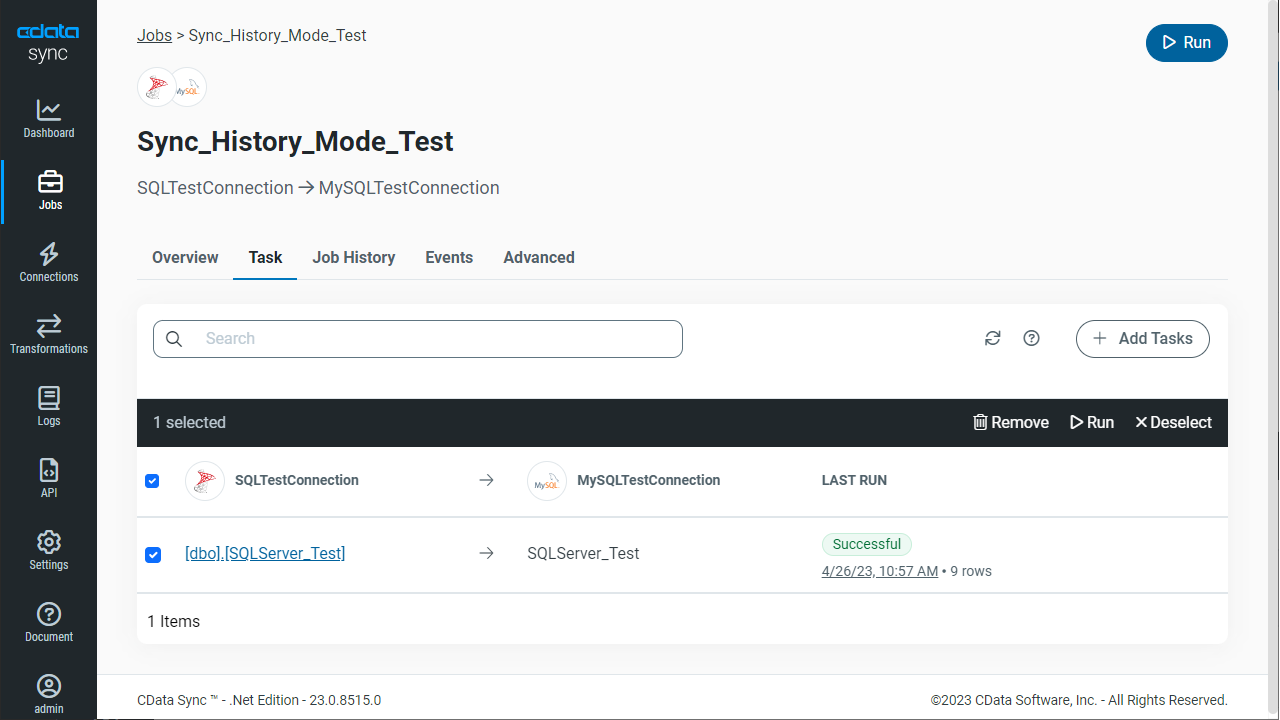
- Click on "Run" in the Tasks tab to run the table replication job. As soon as the job gets successfully executed, a success message pops up with the number of records being impacted or replicated. (See the below figures)
![Running the replication job]()
![The completed replication job]()
Checking the Destination Database (MySQL)
Once you run the job at the source database (SQL Server), you can check if the table is replicated to the Destination database (MySQL). The image below shows that all 9 records were replicated to the MySQL database.

Also, we can see that three new columns have been added (automatically) at the destination table. These columns are defined below:
| Column Name | Column Type | Description |
|---|---|---|
| _cdatasync_active | Boolean | Specifies whether a column is active. |
| _cdatasync_start | Datetime | Specifies the datetime value of the incremental check column when the data record became active. This value indicates when the record was created or modified in the source table, based on a timestamp that increments with each data update. |
| _cdatasync_end | Datetime | Specifies the datetime value of the incremental check column when the data record became inactive. A null value in this column indicates that the record is active. |
In short, when you activate history mode:
- Sync maintains a full history of data changes for each data record in the source database table
- Sync records the change versions to the corresponding table in your destination database table
(Optional) Capturing Updates
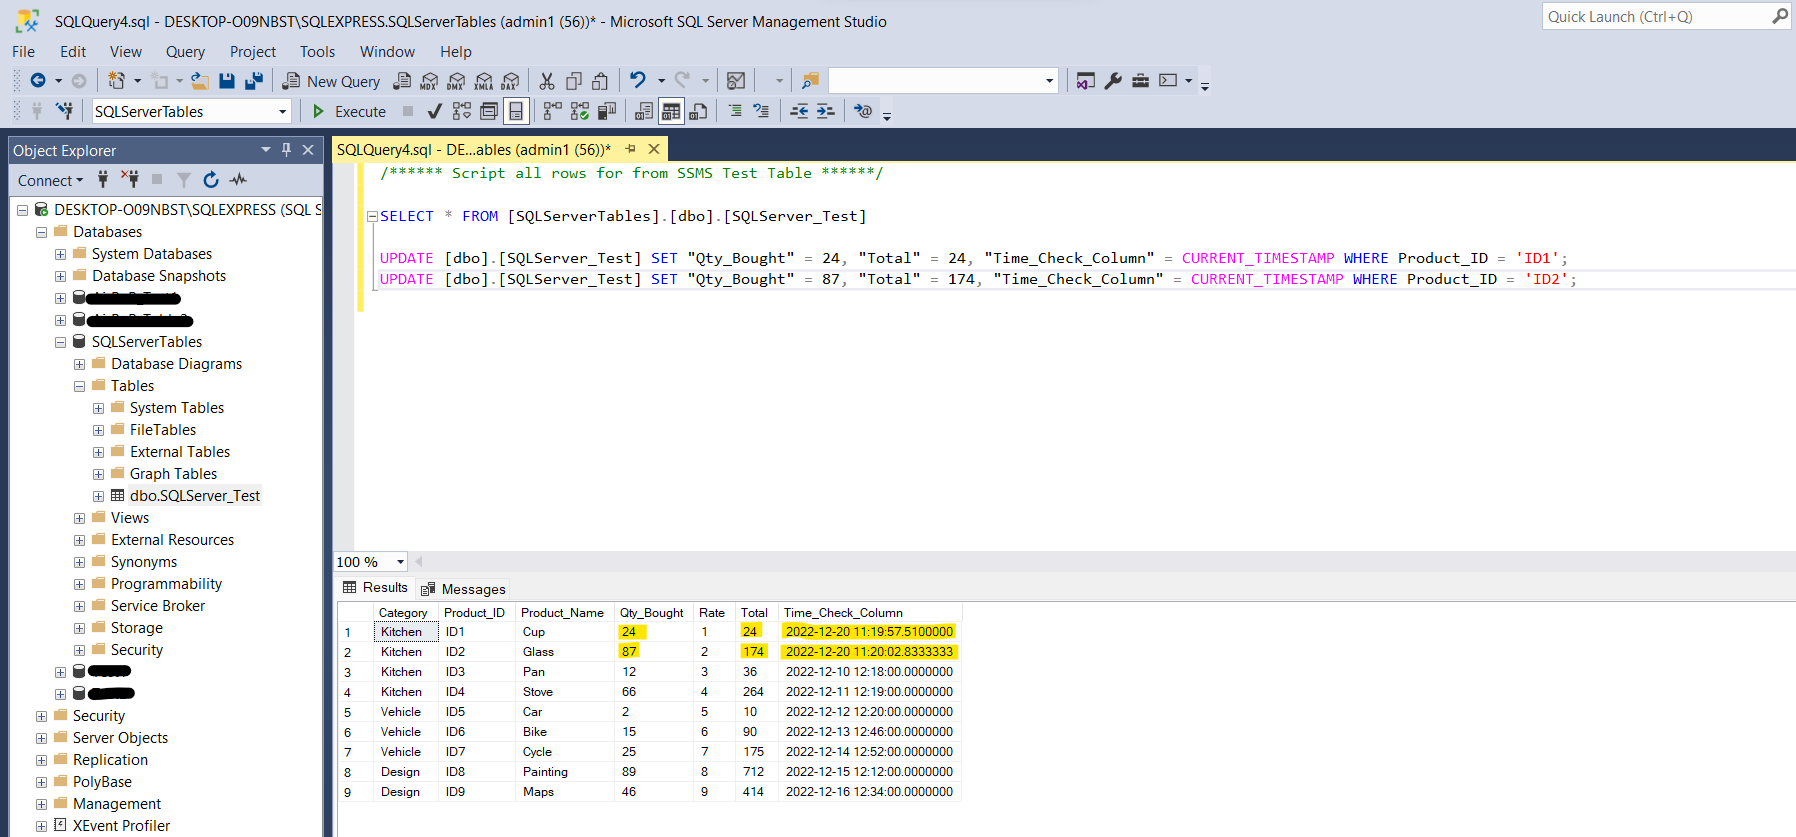
- Update or change some data in the source table. For example, update the "Qty Bought" column where "Product ID" is ID1 and ID2.
![Updating the source table]()
- Run the Job again. As shown in the screenshot, two records are updated as per the changes made at the source database (Step 1).
![Running the job after the updates]()
- Check the destination table in the MySQL database. The change versions are visible in accordance with the History Mode describeded in this article.
![Confirming the updates in the destination database]()
As you can see, the history/copy of the updated rows have "_cdatasync_active = 0" which specifies the datetime value of the incremental check column at the time the data record becomes inactive (_cdatasync_end). It also specifies the time the records were updated at source table.
The updated data (2 new rows) have "_cdatasync_active = 1" and it updates the "_cdatasync_start" with the time when the data was updated (which is also equal to the time the history data got inactive which can be referenced from the figure).
Free Trial and More Information
Now that you have seen how to use the History Mode feature in CData Sync, visit our CData Sync page to read more information about CData Sync and download a free trial. Start consolidating your enterprise data to a cloud data warehouse today! As always, our world-class Support Team is ready to answer any questions you may have.


