Discover how a bimodal integration strategy can address the major data management challenges facing your organization today.
Get the Report →Connect to ADP Data from PowerBuilder
This article demonstrates how to access ADP data from PowerBuilder using the ADP JDBC Driver.
The CData JDBC Driver for ADP is a standards-based control that can be used from any platform or development technology that supports JDBC, including PowerBuilder. This article shows how to use the CData JDBC Driver for ADP in PowerBuilder.
This article shows how to create a basic PowerBuilder application that uses the CData JDBC Driver for ADP to perform reads and writes.
Connect to ADP Data from PowerBuilder
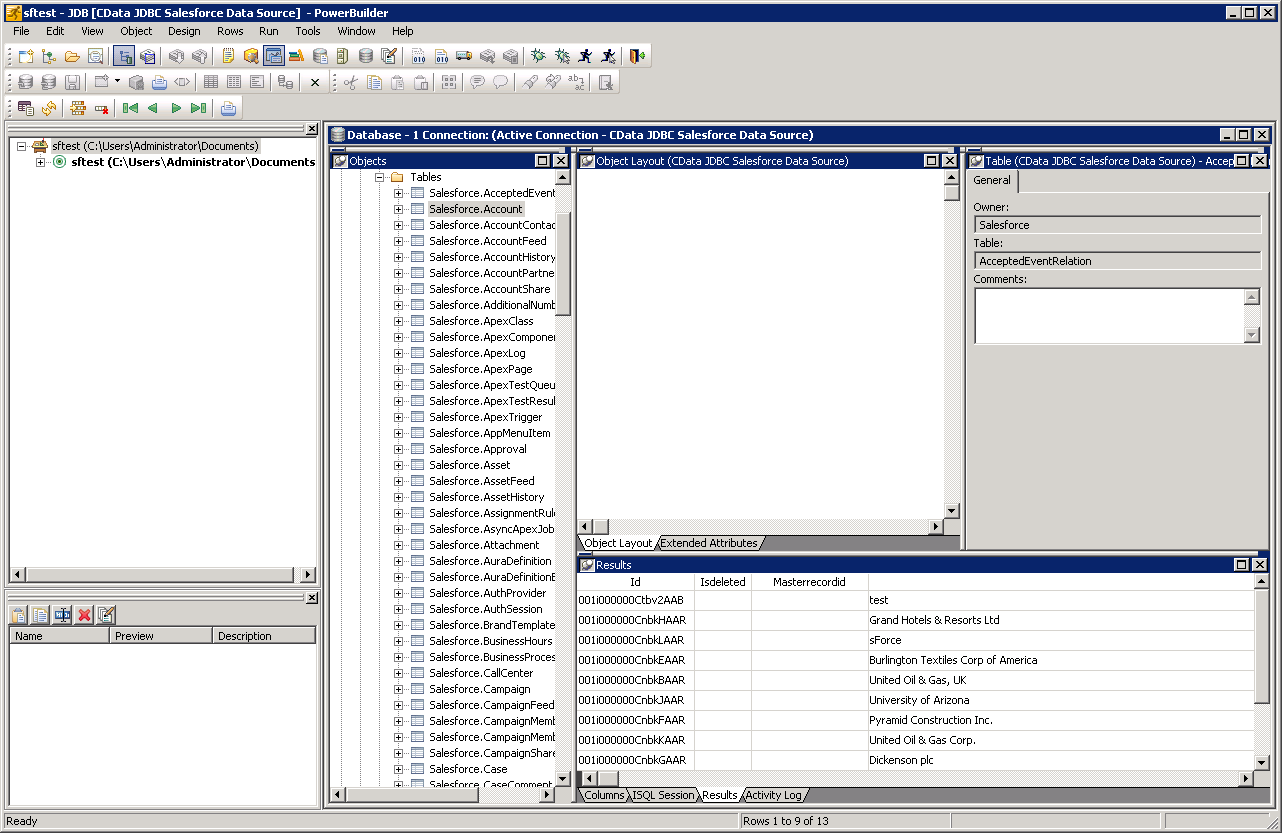
Follow the steps below to use the Database Painter tool to create a database profile based on an JDBC URL for ADP. You can use a database profile to save connection properties. In the Database Painter, you can graphically manipulate data as well as execute SQL queries.
Add the driver JAR to the PowerBuilder classpath. Set the CLASSPATH system environment variable to the path to the driver JAR, located in the lib subfolder of the installation directory.
Note: If you are using PowerBuilder Classic, you can also add the path to the driver JAR by clicking Tools -> System Options -> Java.
- Click Tools -> Database Painter.
- Right-click the JDBC node and click New Profile.
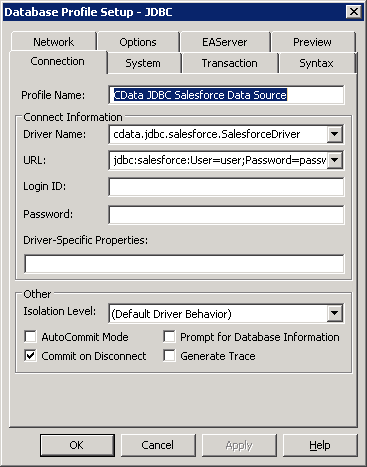
- In the Database Profile Setup dialog, enter the following:
- Profile Name: Enter a user-friendly name for the profile.
- Driver Name: Enter the class name of the driver, cdata.jdbc.adp.ADPDriver
- URL: Enter the JDBC URL.
Connect to ADP by specifying the following properties:
- SSLClientCert: Set this to the certificate provided during registration.
- SSLClientCertPassword: Set this to the password of the certificate.
- UseUAT: The connector makes requests to the production environment by default. If using a developer account, set UseUAT = true.
- RowScanDepth: The maximum number of rows to scan for the custom fields columns available in the table. The default value will be set to 100. Setting a high value may decrease performance.
The connector uses OAuth to authenticate with ADP. OAuth requires the authenticating user to interact with ADP using the browser. For more information, refer to the OAuth section in the Help documentation.
Built-in Connection String Designer
For assistance in constructing the JDBC URL, use the connection string designer built into the ADP JDBC Driver. Either double-click the JAR file or execute the jar file from the command-line.
java -jar cdata.jdbc.adp.jarFill in the connection properties and copy the connection string to the clipboard. A typical JDBC URL is below:
jdbc:adp:OAuthClientId=YourClientId;OAuthClientSecret=YourClientSecret;SSLClientCert='c:\cert.pfx';SSLClientCertPassword='admin@123'InitiateOAuth=GETANDREFRESH
![The JDBC data source defined in the Database Profile Setup dialog. (Salesforce is shown.)]()
- To view and modify a table, right-click a table and then click Edit Data -> Grid.

Using ADP Data with PowerBuilder Controls
You can use standard PowerBuilder objects to connect to JDBC data sources and execute queries. The following example shows how to retrieve ADP data into a DataWindow. You can add the following code to the open method:
SQLCA.DBMS = "JDBC"
SQLCA.AutoCommit = False
SQLCA.DBParm = "Driver='cdata.jdbc.adp.ADPDriver',URL='jdbc:adp:OAuthClientId=YourClientId;OAuthClientSecret=YourClientSecret;SSLClientCert='c:\cert.pfx';SSLClientCertPassword='admin@123'InitiateOAuth=GETANDREFRESH";
CONNECT USING SQLCA;
dw_workers.SetTransObject(SQLCA);
dw_workers.Retrieve();


