Discover how a bimodal integration strategy can address the major data management challenges facing your organization today.
Get the Report →How to Connect to & Open Dynamics CRM Data in Microsoft Excel
This article uses the CData ODBC driver for Dynamics CRM to import data in Excel with Microsoft Query. This article also demonstrates how to use parameters with Microsoft Query.
The CData ODBC driver for Dynamics CRM uses the standard ODBC interface to link Dynamics CRM data with applications like Microsoft Access and Excel. Follow the steps below to use Microsoft Query to import Dynamics CRM data into a spreadsheet and provide values to a parameterized query from cells in a spreadsheet.
If you have not already, first specify connection properties in an ODBC DSN (data source name). This is the last step of the driver installation. You can use the Microsoft ODBC Data Source Administrator to create and configure ODBC DSNs.
The connection string options meet the authentication and connection requirements of different Dynamics CRM instances. To connect to your instance, set the User and Password properties, under the Authentication section, to valid Dynamics CRM user credentials and set the Url to a valid Dynamics CRM server organization root. Additionally, set the CRMVersion property to 'CRM2011+' or 'CRMOnline'. IFD configurations are supported as well; set InternetFacingDeployment to true.
Additionally, you can provide the security token service (STS) or AD FS endpoint in the STSURL property. This value can be retrieved with the GetSTSUrl stored procedure. Office 365 users can connect to the default STS URL by simply setting CRMVersion.
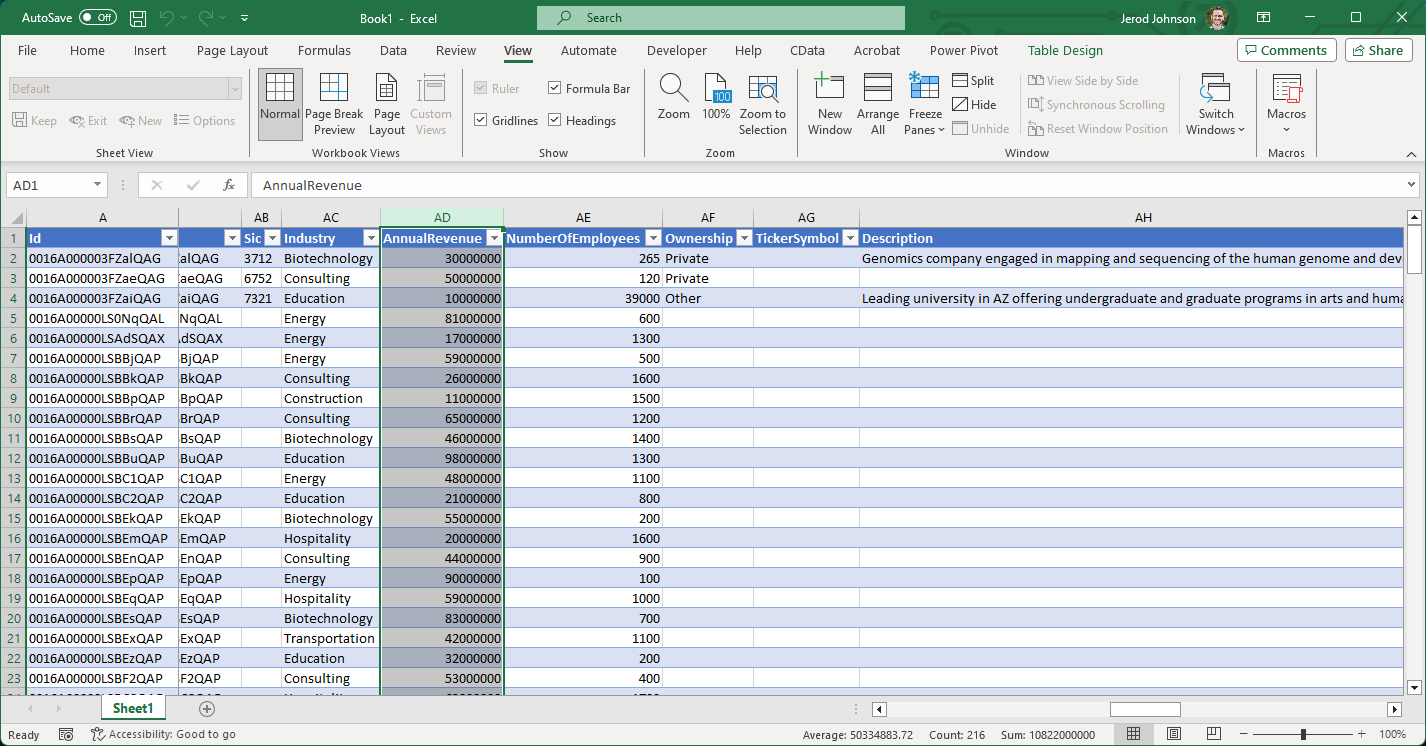
You can then work with live Dynamics CRM data in Excel.
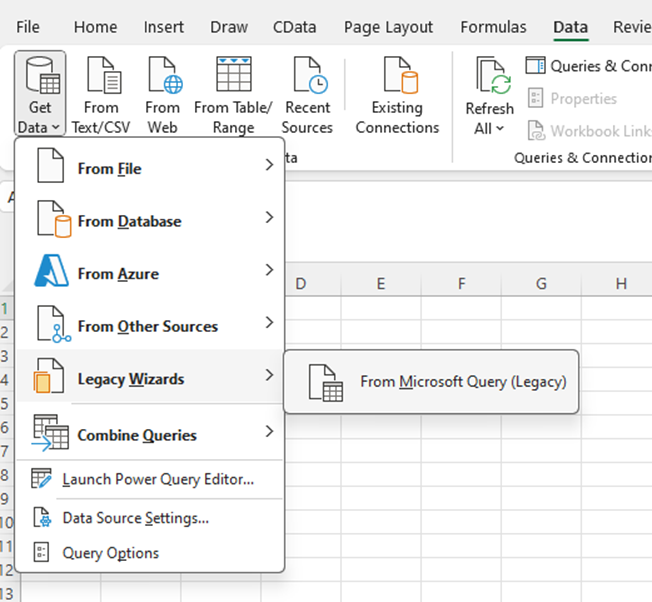
- In Excel, open the Data tab and choose Get Data -> From Other Sources -> From Microsoft Query.
![Open Microsoft Query from the Data tab.]()
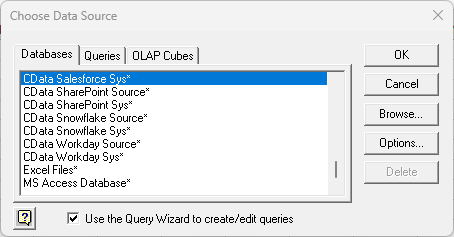
- Choose the DynamicsCRM DSN. Select the option to use Query Wizard to create/edit queries.
![The list of available ODBC DSNs in the Choose Data Source dialog.]()
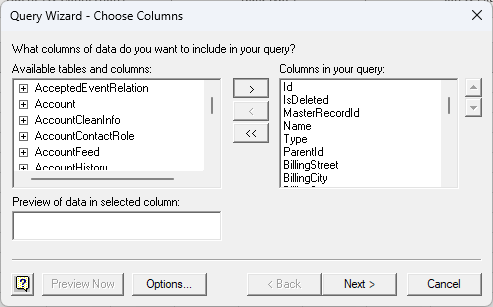
- In the Query Wizard, expand the node for the table you would like to import into your spreadsheet. Select the columns you want to import and click the arrow to add them to your query. Alternatively, select the table name to add all columns for that table.
![Available tables and columns in the Choose Columns step of the Query Wizard. (Salesforce is shown.)]()
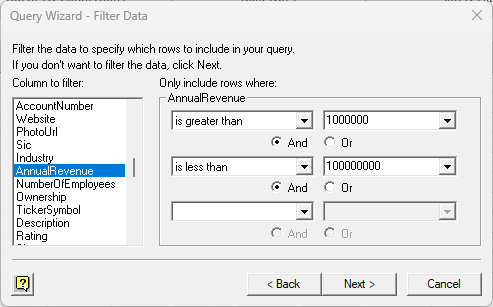
- The Filter Data page allows you to specify criteria. For example, you can limit results by setting a date range.
![The Filter Data step of the Query Wizard. (Salesforce is shown.)]()
- If you want to use parameters in your query, select the option to edit the query in Microsoft Query.
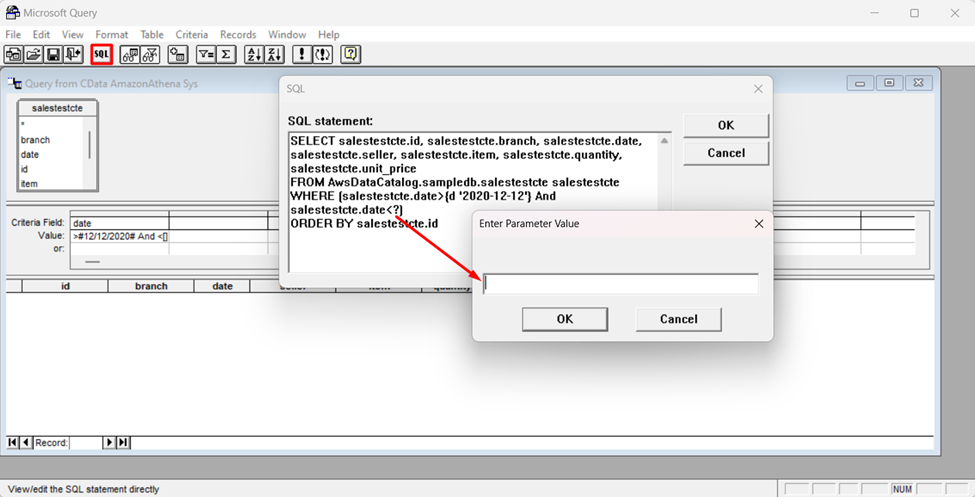
To set a parameter in the query, you will need to modify the SQL statement directly. To do this, click the SQL button in the Query Editor. If you set filter criteria earlier, you should have a WHERE clause already in the query.
To use a parameter, use a "?" character as the wildcard character for a field's value in the WHERE clause. For example, if you are importing the Account, you can set "FirstName=?".
- Close the SQL dialog when you are finished editing the SQL statement. You will be prompted to enter a parameter value. In the next step, you will select a cell to provide this value. So, leave the box in the dialog blank.
![The generated SQL statement. (Salesforce is shown.)]()
-
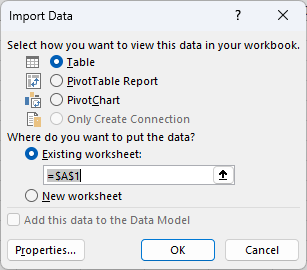
Click File -> Return Data to Microsoft Excel. The Import Data dialog is displayed. Enter a cell where results should be imported.
![The Import Data dialog.]()
- Close the Import Data dialog. You will be prompted to enter a parameter value. Click the button next to the parameter box to select a cell. Select the option to automatically refresh the spreadsheet when the value changes.
