Discover how a bimodal integration strategy can address the major data management challenges facing your organization today.
Get the Report →


Build Dynamics NAV-Connected ETL Processes in Google Data Fusion
Load the CData JDBC Driver into Google Data Fusion and create ETL processes with access live Dynamics NAV data.
Google Data Fusion allows users to perform self-service data integration to consolidate disparate data. Uploading the CData JDBC Driver for Dynamics NAV enables users to access live Dynamics NAV data from within their Google Data Fusion pipelines. While the CData JDBC Driver enables piping Dynamics NAV data to any data source natively supported in Google Data Fusion, this article walks through piping data from Dynamics NAV to Google BigQuery,
Upload the CData JDBC Driver for Dynamics NAV to Google Data Fusion
Upload the CData JDBC Driver for Dynamics NAV to your Google Data Fusion instance to work with live Dynamics NAV data. Due to the naming restrictions for JDBC drivers in Google Data Fusion, create a copy or rename the JAR file to match the following format driver-version.jar. For example: cdatadynamicsnav-2020.jar
- Open your Google Data Fusion instance
- Click the to add an entity and upload a driver
![]()
- On the "Upload driver" tab, drag or browse to the renamed JAR file.
- On the "Driver configuration" tab:
- Name: Create a name for the driver (cdata.jdbc.dynamicsnav) and make note of the name
- Class name: Set the JDBC class name: (cdata.jdbc.dynamicsnav.DynamicsNAVDriver)
")
- Click "Finish"

")
Connect to Dynamics NAV Data in Google Data Fusion
With the JDBC Driver uploaded, you are ready to work with live Dynamics NAV data in Google Data Fusion Pipelines.
- Navigate to the Pipeline Studio to create a new Pipeline
- From the "Source" options, click "Database" to add a source for the JDBC Driver

- Click "Properties" on the Database source to edit the properties
NOTE: To use the JDBC Driver in Google Data Fusion, you will need a license (full or trial) and a Runtime Key (RTK). For more information on obtaining this license (or a trial), contact our sales team.
- Set the Label
- Set Reference Name to a value for any future references (i.e.: cdata-dynamicsnav)
- Set Plugin Type to "jdbc"
- Set Connection String to the JDBC URL for Dynamics NAV. For example:
jdbc:dynamicsnav:RTK=5246...;http://myserver:7048;User=myserver\Administrator;Password=admin;ServerInstance=DYNAMICSNAV71;Before you can connect, OData Services will need to be enabled on the server. Once OData Services are enabled, you will be able to query any Services that are published on the server.
The User and Password properties, under the Authentication section, must be set to valid Dynamics NAV user credentials. In addition, you will need to specify a URL to a valid Dynamics NAV server organization root and a ServerInstance. If there is not a Service Default Company for the server, you will need to set the Company as well.
Built-in Connection String Designer
For assistance in constructing the JDBC URL, use the connection string designer built into the Dynamics NAV JDBC Driver. Either double-click the JAR file or execute the jar file from the command-line.
java -jar cdata.jdbc.dynamicsnav.jarFill in the connection properties and copy the connection string to the clipboard.
")
- Set Import Query to a SQL query that will extract the data you want from Dynamics NAV, i.e.:
SELECT * FROM Customer

- From the "Sink" tab, click to add a destination sink (we use Google BigQuery in this example)
- Click "Properties" on the BigQuery sink to edit the properties
- Set the Label
- Set Reference Name to a value like dynamicsnav-bigquery
- Set Project ID to a specific Google BigQuery Project ID (or leave as the default, "auto-detect")
- Set Dataset to a specific Google BigQuery dataset
- Set Table to the name of the table you wish to insert Dynamics NAV data into


")


With the Source and Sink configured, you are ready to pipe Dynamics NAV data into Google BigQuery. Save and deploy the pipeline. When you run the pipeline, Google Data Fusion will request live data from Dynamics NAV and import it into Google BigQuery.
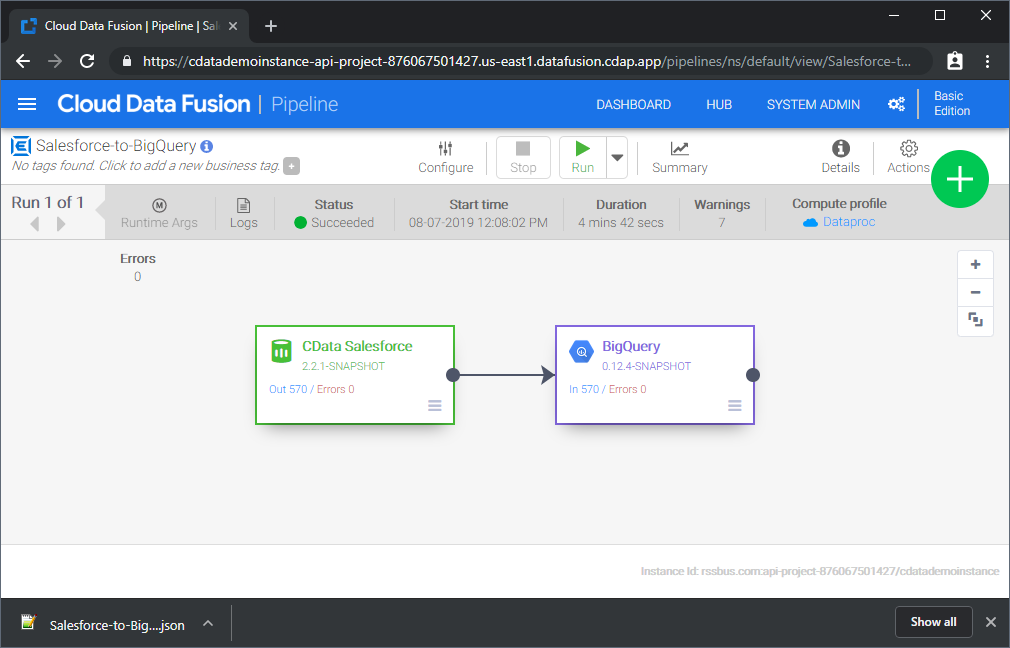
While this is a simple pipeline, you can create more complex Dynamics NAV pipelines with transforms, analytics, conditions, and more. Download a free, 30-day trial of the CData JDBC Driver for Dynamics NAV and start working with your live Dynamics NAV data in Google Data Fusion today.
Ready to get started?
Download a free trial of the Dynamics NAV Driver to get started:
Download NowLearn more:
Rapidly create and deploy powerful Java applications that integrate with Dynamics NAV account data including Items, Sales Orders, Purchase Orders, and more!
Data Connectors
ETL/ ELT Solutions
Cloud & API Connectivity
OEM & Custom Drivers