Discover how a bimodal integration strategy can address the major data management challenges facing your organization today.
Get the Report →Back Up Sage 50 UK data to SQL Server through SSIS
Effortlessly backup data to SQL Server by utilizing the CData ADO.NET Provider for Sage 50 UK. In this article, we will employ an SSIS workflow to populate a database with Sage 50 UK data data.
This article illustrates using the Sage 50 UK ADO.NET Data Provider within a SQL Server SSIS workflow for the direct transfer of Sage 50 UK data to a Microsoft SQL Server database. It's worth noting that the identical process detailed below is applicable to any CData ADO.NET Data Providers, enabling the direct connection of SQL Server with remote data through SSIS.
- Open Visual Studio and create a new Integration Services project.
- Add a new Data Flow task from the toolbox onto the Control Flow screen.
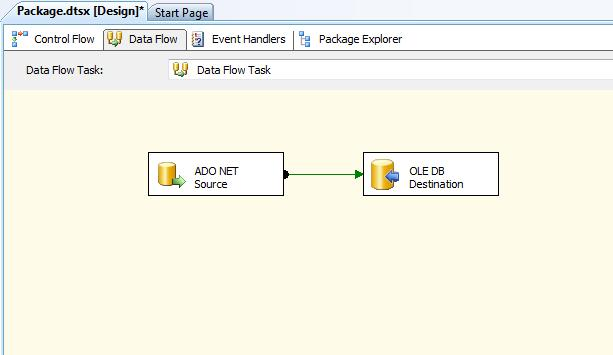
In the Data Flow screen, add an ADO.NET Source and an OLE DB Destination from the toolbox.
![The components used in the data task in this example.]()
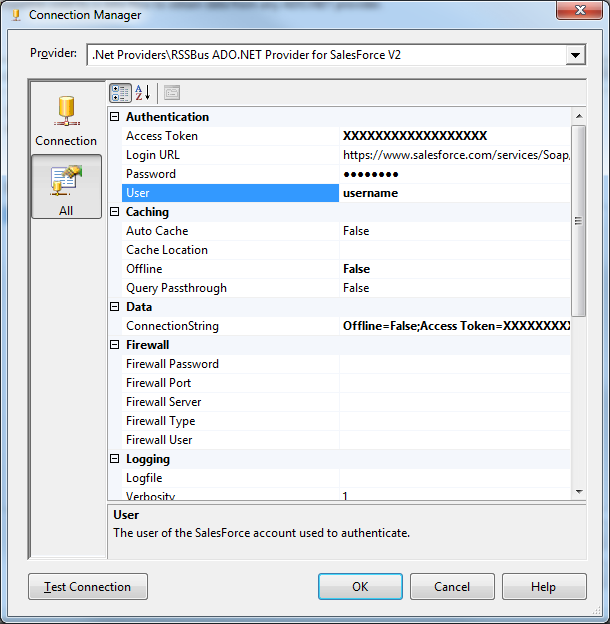
- Add a new connection and select .NET Providers\CData ADO.NET Provider for Sage 50 UK.
In the connection manager, enter the connection details for Sage 50 UK data.
Note: Only Sage 50 UK 2012 and above are supported.
The User and Password properties, under the Connection section, must be set to valid Sage 50 UK user credentials. These values will be the same used to log in to the Sage 50 UK software.
Additionally, the URL property, under the Connection section, will need to be set to the address of the company dataset desired. To obtain the address, do the following:
- If you have not already done so, open the Sage 50 UK software.
- Click Tools -> Internet Options.
- Select the SData Settings tab.
- Click the Details button next to Sage 50 Accounts. A window is displayed containing a list of company names along with the address to their corresponding datasets.
- Set the URL property to the value in the address field next to the company desired.
![Connection properties in the Connection Manager dialog. (Salesforce is shown.)]()
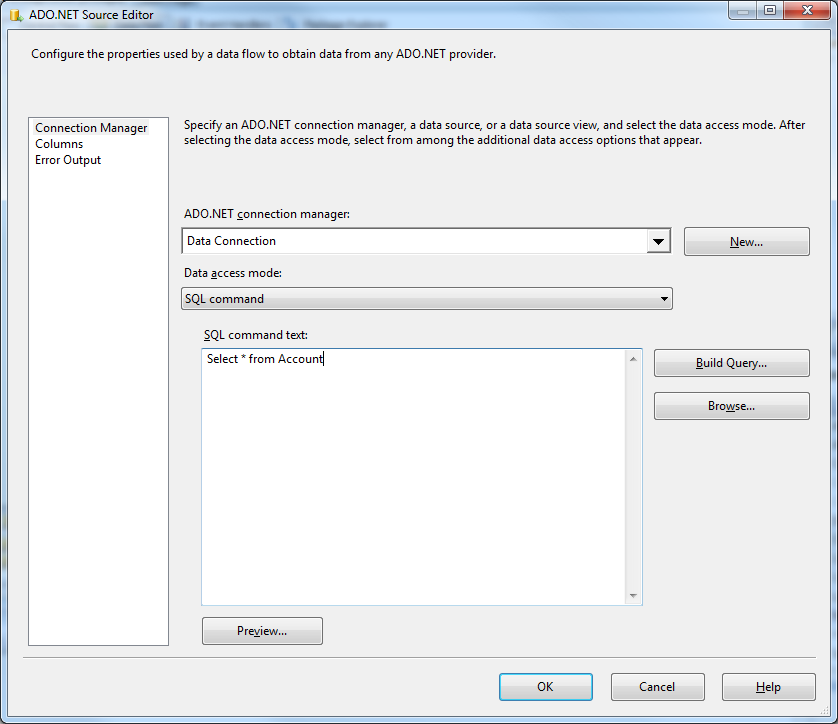
Open the DataReader editor and set the following information:
- ADO.NET connection manager: In the Connection Managers menu, select the Data Connection you just created.
- Data access mode: Select 'SQL command'.
- SQL command text: In the DataReader Source editor, open the Component Properties tab and enter a SELECT command, such as the one below:
SELECT Name, FinanceBalance FROM TradingAccounts
![The connection and query specified in the source component properties. (Salesforce is shown.)]()
- Close the DataReader editor and drag the arrow below the DataReader Source to connect it to the OLE DB Destination.
Open the OLE DB Destination and enter the following information in the Destination Component Editor.
- Connection manager: Add a new connection. Enter your server and database information here. In this example, SQLExpress is running on a separate machine.
- Data access mode: Set your data access mode to "table or view" and select the table or view to populate in your database.
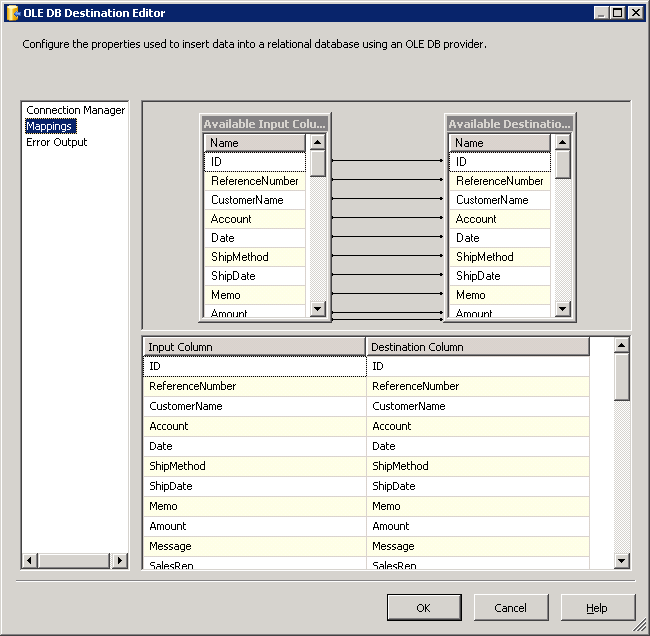
Configure any properties you wish on the Mappings screen.
![Input and destination columns in the OLE DB Destination Editor.]()
- Close the OLE DB Destination Editor and run the project. After the SSIS task has finished executing, your database will be populated with data obtained from Sage 50 UK data.


