Discover how a bimodal integration strategy can address the major data management challenges facing your organization today.
Get the Report →Connect to Salesforce Marketing Data in HULFT Integrate
Connect to Salesforce Marketing as a JDBC data source in HULFT Integrate
HULFT Integrate is a modern data integration platform that provides a drag-and-drop user interface to create cooperation flows, data conversion, and processing so that complex data connections are easier than ever to execute. When paired with the CData JDBC Driver for Salesforce Marketing Cloud, HULFT Integrate can work with live Salesforce Marketing data. This article walks through connecting to Salesforce Marketing and moving the data into a CSV file.
With built-in optimized data processing, the CData JDBC Driver offers unmatched performance for interacting with live Salesforce Marketing data. When you issue complex SQL queries to Salesforce Marketing, the driver pushes supported SQL operations, like filters and aggregations, directly to Salesforce Marketing and utilizes the embedded SQL engine to process unsupported operations client-side (often SQL functions and JOIN operations). Its built-in dynamic metadata querying allows you to work with and analyze Salesforce Marketing data using native data types.
Enable Access to Salesforce Marketing
To enable access to Salesforce Marketing data from HULFT Integrate projects:
- Copy the CData JDBC Driver JAR file (and license file if it exists), cdata.jdbc.sfmarketingcloud.jar (and cdata.jdbc.sfmarketingcloud.lic), to the jdbc_adapter subfolder for the Integrate Server
- Restart the HULFT Integrate Server and launch HULFT Integrate Studio
Build a Project with Access to Salesforce Marketing Data
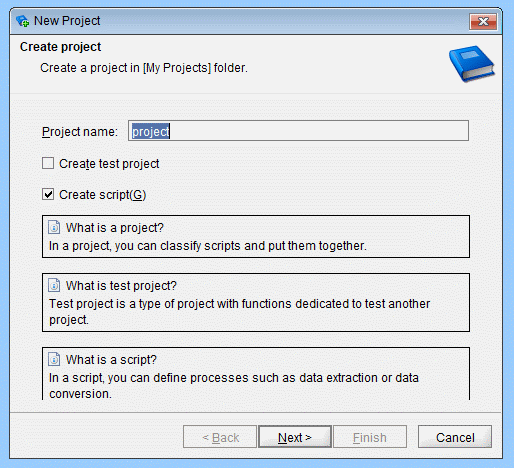
Once you copy the JAR files, you can create a project with access to Salesforce Marketing data. Start by opening Integrate Studio and creating a new project.
- Name the project
- Ensure the "Create script" checkbox is checked
- Click Next
![Creating a new project.]()
- Name the script (e.g.: SFMarketingCloudtoCSV)
Once you create the project, add components to the script to copy Salesforce Marketing data to a CSV file.
Configure an Execute Select SQL Component
Drag an "Execute Select SQL" component from the Tool Palette (Database -> JDBC) into the Script workspace.
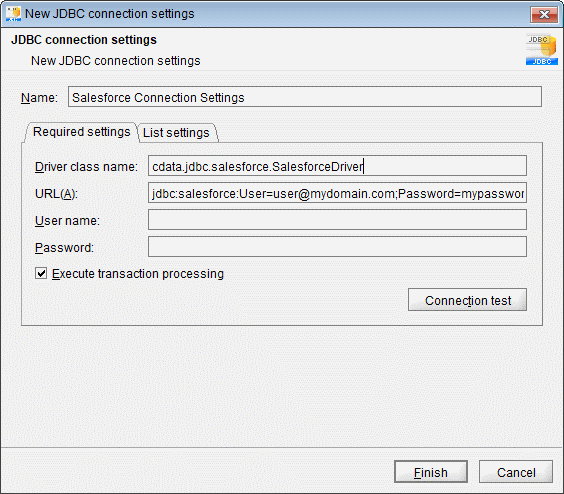
- In the "Required settings" tab for the Destination, click "Add" to create a new connection for Salesforce Marketing. Set the following properties:
- Name: Salesforce Marketing Connection Settings
- Driver class name: cdata.jdbc.sfmarketingcloud.SFMarketingCloudDriver
- URL: jdbc:sfmarketingcloud:User=myUser;Password=myPassword;InitiateOAuth=GETANDREFRESH
![JDBC connection settings (Salesforce is shown).]()
Built-in Connection String Designer
For assistance constructing the JDBC URL, use the connection string designer built into the Salesforce Marketing JDBC Driver. Either double-click the JAR file or execute the JAR file from the command-line.
java -jar cdata.jdbc.sfmarketingcloud.jarFill in the connection properties and copy the connection string to the clipboard.
Authenticating to the Salesforce Marketing Cloud APIs
Set the User and Password to your login credentials, or to the credentials for a sandbox user if you are connecting to a sandbox account.
Connecting to the Salesforce Marketing Cloud APIs
By default, the data provider connects to production environments. Set UseSandbox to true to use a Salesforce Marketing Cloud sandbox account.
The default Instance is s7 of the Web Services API; however, if you use a different instance, you can set Instance.
![Using the built-in connection string designer to generate a JDBC URL (Salesforce is shown.)]()
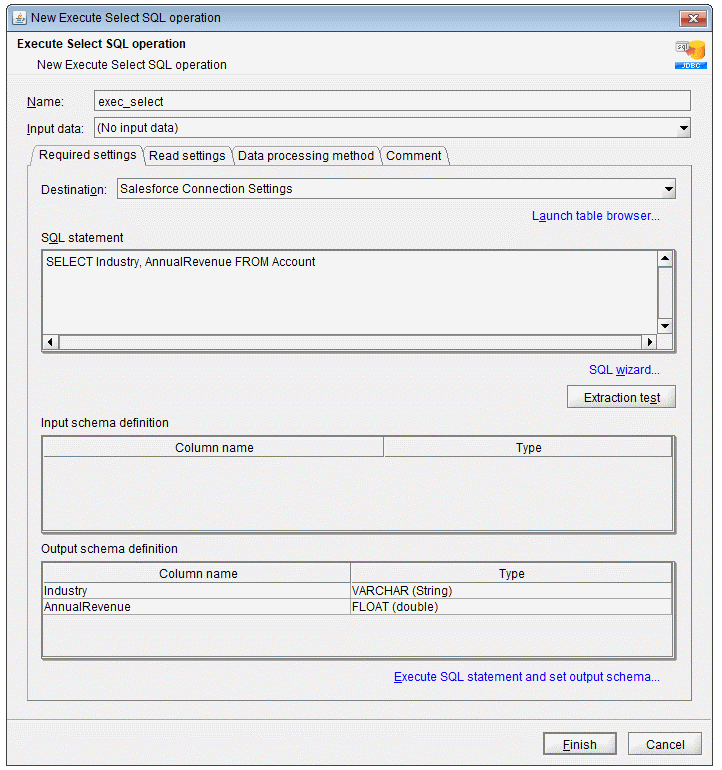
- Write your SQL statement. For example:
SELECT Id, Status FROM Subscriber
- Click "Extraction test" to ensure the connection and query are configured properly
- Click "Execute SQL statement and set output schema"
- Click "Finish"
![Configuring the Execute Select SQL operation]()
Configure a Write CSV File Component
Drag a "Write CSV File" component from the Tool Palette (File -> CSV) onto the workspace.
- Set a file to write the query results to (e.g. Subscriber.csv)
- Set "Input data" to the "Select SQL" component
- Add columns for each field selected in the SQL query
- In the "Write settings" tab, check the checkbox to "Insert column names into first row"
- Click "Finish"
Map Salesforce Marketing Fields to the CSV Columns
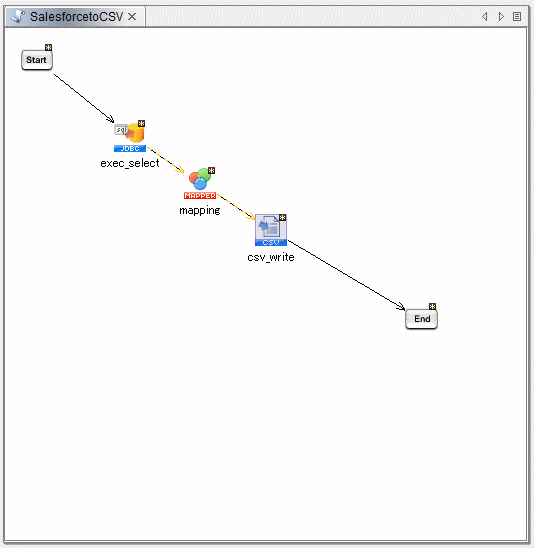
Map each column from the "Select" component to the corresponding column for the "CSV" component.
Finish the Script
Drag the "Start" component onto the "Select" component and the "CSV" component onto the "End" component. Build the script and run the script to move Salesforce Marketing data into a CSV file.

Download a free, 30-day trial of the CData JDBC Driver for Salesforce Marketing Cloud and start working with your live Salesforce Marketing data in HULFT Integrate. Reach out to our Support Team if you have any questions.


