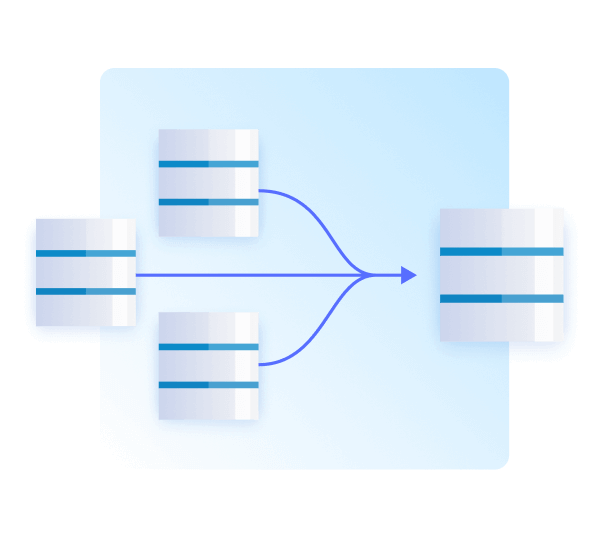
Linked Servers are a powerful feature in Microsoft SQL Server that allows communication with other ODBC-compliant databases. This functionality enables SQL Server to execute a Transact-SQL statement that includes tables in another instance of SQL Server, or another database product such as Oracle. The ability to access data from outside of SQL Server, and issue federated queries, updates, commands, and transactions on heterogeneous data sources across the enterprise are some of the advantages offered by linked servers.
To guarantee the effectiveness of a linked server setup, it is imperative to pay careful attention to specific configurations. These involve defining the remote data source and assigning a server name, configuring authentication settings, and comprehending the security context associated with the login on the remote server. Additionally, using linked servers appropriately is vital to avoid potential performance issues.
In the upcoming sections, we will delve into creating and configuring a SQL Server linked server, considering these crucial aspects.
What is a linked server?
Within Microsoft SQL Server, a linked server establishes a connection between your SQL Server instance and an external data source. This external source can be:
- Another SQL Server instance
- A different database system entirely (like Oracle or MySQL)
- Even non-database data sources that comply with ODBC standards.
Key benefits:
- Consolidated data access: Query and manipulate data from various sources as though it were part of your primary SQL Server database. This simplifies data analysis and decision-making across platforms.
- Distributed transactions: Execute transactions that span multiple databases, maintaining data integrity across the operations.
- Enhanced performance (in specific cases): In some scenarios, linked servers can optimize query performance by pushing processing to the remote data source rather than bringing all data into your local server.
Potential downsides:
- Security considerations: Linked Servers increase your potential attack surface. Careful configuration of authentication and security settings is crucial.
- Performance overhead: Improperly constructed queries or poorly configured linked servers can degrade performance rather than improve it.
- Complexity: Managing and troubleshooting linked servers can add to the complexity of your database administration tasks.
Using linked servers
Linked Servers provide a solution when you need to:
- Integrate data from multiple databases without complex data replication or ETL processes.
- Run queries and reports involving data spread across different systems.
- Occasionally update or manage data stored on a remote server.
Best practices
To maximize the benefits and minimize risks, always consider:
- Security: Use strong authentication methods and limit permissions on both your local SQL Server and the remote server.
- Performance: Analyze your query patterns to assess whether linked servers introduce bottlenecks or if better approaches exist for your specific use case.
How to create a linked server in SQL Server in 9 steps
You can create a linked server in SQL Server by following these nine basic steps:
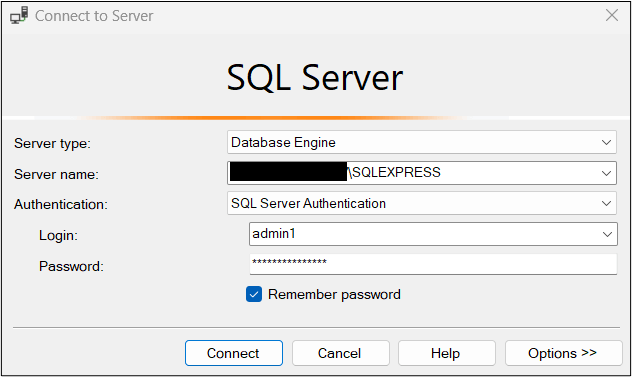
- Open SQL Server Management Studio (SSMS): Launch the SSMS application on your machine.
- Connect to the SQL Server instance: In SSMS, connect to the SQL Server instance where you want to create the linked server.
- Navigate to “Server Objects”: In the Object Explorer pane of SSMS, expand the “Server Objects” folder.
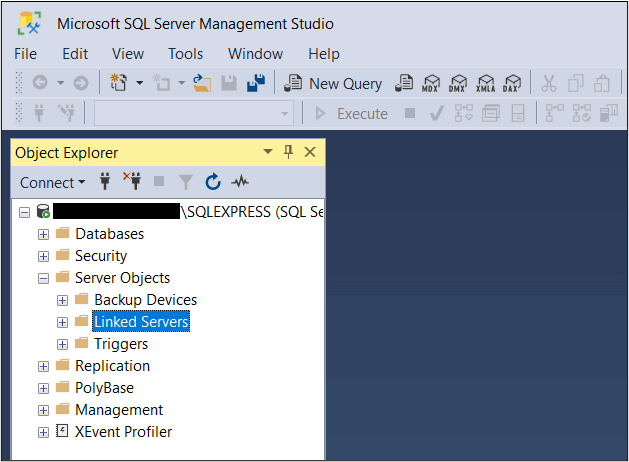
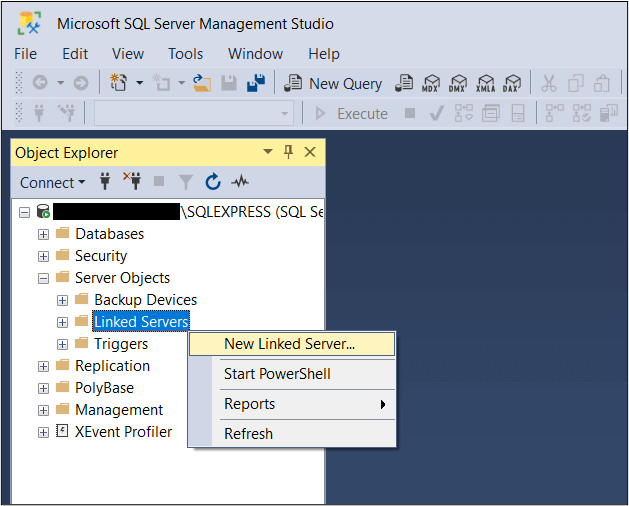
- Access “Linked Servers”: Right-click on the “Linked Servers” folder under "Server Objects".
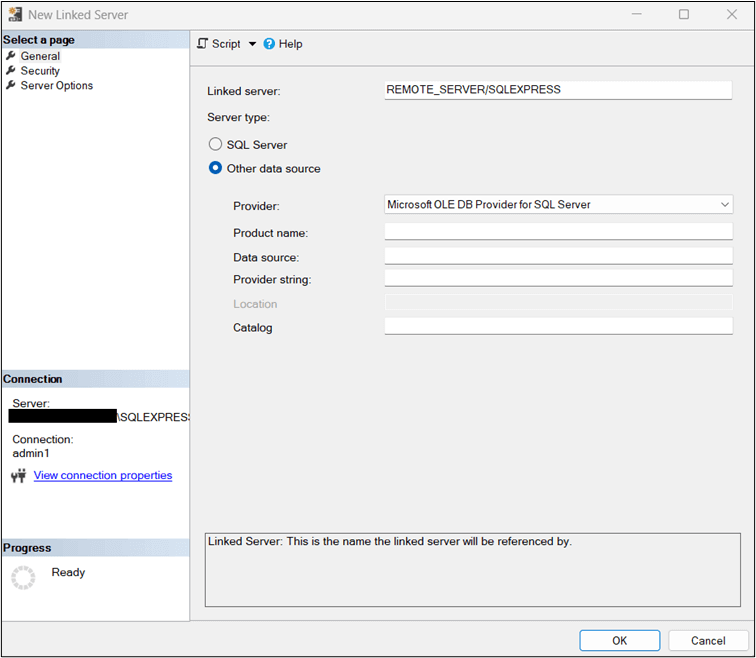
- Create a new linked server: From the context menu, select “New Linked Server” to open the dialog box.
- Specify linked server details: In the dialog box, provide a name for the linked server and select “SQL Server” as the server type. The name specified in the “Linked Server” text box must be the name of the remote SQL Server.
- Specify instance details: If the SQL Server instance is a default instance, type the name of the computer that hosts the instance of the SQL Server. If the SQL Server is a named instance, type the name of the computer and the name of the instance separated by a slash (e.g., ComputerName\InstanceName).
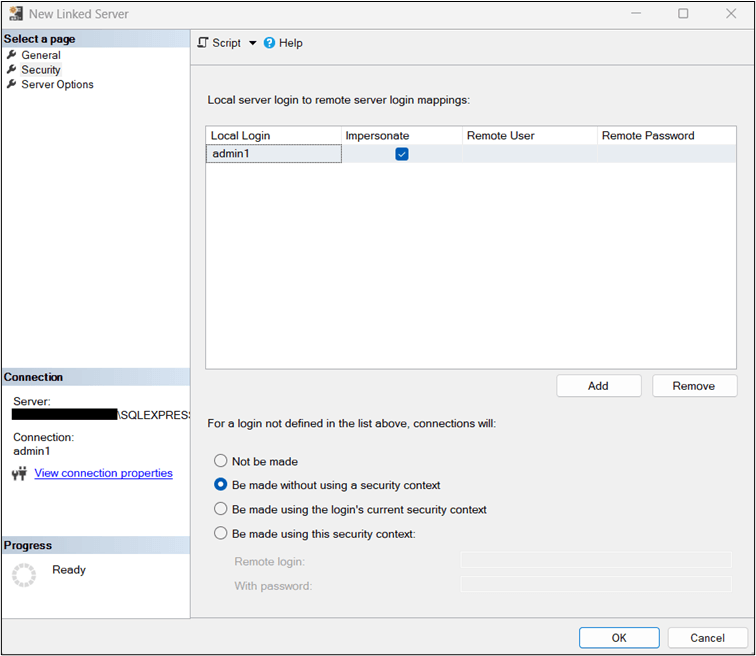
- Configure security settings: Navigate to the “Security” page of the dialog box. Here, you can specify how users will authenticate to the linked server.
- Complete the setup: After configuring the necessary settings, click “OK” to create the linked server.
Please note that the exact steps may vary slightly based on the version of SSMS and the specific configuration of your SQL Server environment.
SQL Server-linked server permissions
Here is a brief overview of the four security options available when configuring a linked server in SQL Server:
- Not to be made: This option creates the linked server without specifying any login behavior. Without any mapped logins, the linked server is essentially useless. It tries to make an anonymous connection to the remote server, which usually fails.
- Be made without using a security context: This option explicitly creates a mapped login of NULL with @useself = ‘False’, meaning it is explicitly told not to pass a security context to the remote server. This differs from the first option where it tried an anonymous connection.
- Be made using the login’s current security context: This option uses the current login’s security context for the linked server. The permissions of that login on the remote server ultimately determine what the user can and can’t do.
- Be made using this security context: Unfortunately, this choice is both the most frequently employed and the least secure method for managing the security configuration of your linked server. Every user utilizing the linked server will undergo authentication on the remote server using the provided credentials.
Linked server in SQL Server use cases
Here are some use cases for linked servers in SQL Servers:
- Querying smaller datasets: Linked servers can be used to query smaller datasets from another SQL Server instance or any other ODBC-compliant database. This is useful when you need to access data that is not stored in your local SQL Server instance.
- ETL for smaller datasets: Linked servers can be used in Extract, Transform, and Load (ETL) processes for smaller datasets. You can extract data from a remote server, transform it as needed, and then load it into your local server.
- Alternative to complex data integrations: If you have multiple databases that need to share data, setting up a linked server can be a simpler alternative to more complex data integration solutions. It allows you to use T-SQL queries to access and manipulate data on the remote server.
- Accessing different data sources: Linked servers can be used to access data from different data sources such as Oracle, MySQL, and others. This can be particularly useful in heterogeneous database environments.
- Federated queries: Linked servers enable the SQL Server to execute federated queries. A federated query is a distributed query that accesses data from multiple databases on different servers. This can be useful in scenarios where data is spread across several databases and needs to be queried together.
The CData difference
CData provides a robust and efficient solution for connecting any CData ODBC data source as a linked server. By leveraging the TDS Remoting feature of the SQL Gateway, users can set up a linked server either through the UI in SQL Server Management Studio or by calling stored procedures. This flexibility allows users to work with their ODBC data source as they would with a linked SQL Server instance. The process involves connecting to a data source using the ODBC Driver running the TDS Remoting Service, and finally creating a linked server for the ODBC data source. This seamless integration offered by CData enhances data accessibility and interoperability, thereby optimizing data management and analysis tasks. For detailed steps, refer to our documentation.
To get live and on-demand data access to hundreds of SaaS, Big Data, and NoSQL sources directly from the SQL Server, sign up for a 30-day free trial of any of our ODBC drivers.
As always, our support team is ready to answer any questions you have. Have you joined the CData Community? Ask questions, get answers, and share your knowledge in CData connectivity tools. Join us!
Try CData today
Get direct, live connectivity to the data you need from any application, system, or database. Try CData Drivers today.


