Discover how a bimodal integration strategy can address the major data management challenges facing your organization today.
Get the Report →CData AWS Glue Connector for Salesforce Deployment Guide
AWS Glue is an ETL service from Amazon that allows you to easily prepare and load your data for storage and analytics. With Glue Studio, you can build no-code and low-code ETL jobs that work with data through CData Glue Connectors. In this article, we walk through configuring the CData Glue Connector for Salesforce and creating and running an AWS Glue job that works with live Salesforce data.
Typical Customer Deployment
The CData AWS Glue Connector for Salesforce is a custom Glue Connector that makes it easy for you to transfer data from SaaS applications and custom data sources to your data lake in Amazon S3. Customers can subscribe to the Connector from the AWS Marketplace and use it in their AWS Glue jobs and deploy them into their product Apache Spark applications that run on AWS Glue.
The Glue Connector for Salesforce can be deployed to any region and can be subscribed to and deployed in an AWS Glue job in just a few minutes.
Prerequisites and Requirements
There are no external operating system, database type, or storage requirements for using the CData AWS Glue Connector for Salesforce. Customers will need familiarity with AWS Glue, AWS Glue Studio, and Python/Apache Spark to best utilize the Glue Connector for Salesforce. Customers will need an AWS account and a subscription to the AWS Glue Connector. AWS Glue and Glue Studio jobs run on Amazon EC2 instances; the CData AWS Glue Connector is a container image that runs on Amazon ECS; and the sample Glue job in this walkthrough stores data in Amazon S3.
Architecture
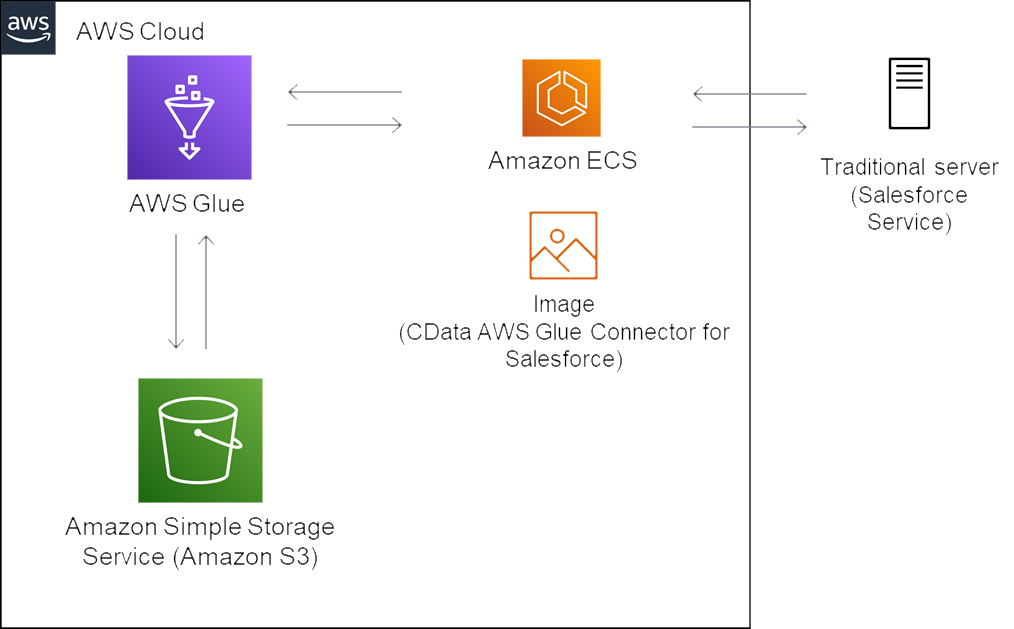
The CData AWS Glue Connector for Salesforce is an Amazon ECR image that is used from Amazon Glue Jobs to read and write data from the Salesforce service.
Update Permissions for your IAM Role
When you create the AWS Glue job, you specify an AWS Identity and Access Management (IAM) role for the job to use. The role must grant access to all resources used by the job, including Amazon S3 for any sources, targets, scripts, temporary directories, and AWS Glue Data Catalog objects. The role must also grant access to the CData Glue Connector for Salesforce from the AWS Glue Marketplace.
NOTE: Do not use the root user for any deployments or operations.
The following policies should be added to the IAM role for the AWS Glue job, at a minimum:
- AWSGlueServiceRole (For accessing Glue Studio and Glue Jobs)
- AmazonEC2ContainerRegistryReadOnly (For accessing the CData AWS Glue Connector for Salesforce)
If you will be accessing data found in Amazon S3, add:
- AmazonS3FullAccess (For reading from and writing to Amazon S3)
And lastly, if you will be using AWS Secrets Manager to store confidential connection properties (see more below), you will need to add an inline policy similar to the following, granting access to the specific secrets needed for the Glue Job:
{
    "Version": "2012-10-17",
    "Statement": [
        {
            "Effect": "Allow",
            "Action": [
                "secretsmanager:GetResourcePolicy",
                "secretsmanager:GetSecretValue",
                "secretsmanager:DescribeSecret",
                "secretsmanager:ListSecretVersionIds"
            ],
            "Resource": [
                "arn:aws:secretsmanager:us-west-2:111122223333:secret:aes128-1a2b3c",
                "arn:aws:secretsmanager:us-west-2:111122223333:secret:aes192-4D5e6F",
                "arn:aws:secretsmanager:us-west-2:111122223333:secret:aes256-7g8H9i"
            ]
        }
    ]
}
For more information about granting access to AWS Glue Studio and Glue Jobs, see Setting up IAM Permissions for AWS Glue in the AWS Glue documentation.
For more information about granting access to the Amazon S3 buckets, see Identity and access management in the Amazon Simple Storage Service Developer Guide.
For more information on setting up access control for your secrets, see Authentication and Access Control for AWS Secrets Manager in the AWS Secrets Manager documentation and Limiting Access to Specific Secrets in the AWS Secrets Manager User Guide. The credential retrieved from AWS Secrets Manager (a string of key-value pairs) is used in the JDBC URL used by the CData Glue Connector when connecting to the data source, as shown above.
For more general information on IAM and IAM best practices, refer to theAWS IAM page.
Collect Salesforce Connection Properties
There are several authentication methods available for connecting to Salesforce: Login, OAuth, and SSO. The Login method requires you to have the username, password, and security token of the user.
If you do not have access to the username and password or do not wish to require them, you can use OAuth authentication.
SSO (single sign-on) can be used by setting the SSOProperties, SSOLoginUrl, and TokenUrl connection properties, which allow you to authenticate to an identity provider. See the "Getting Started" chapter in the help documentation for more information.
OAuth Verifier
Salesforce supports connecting via OAuth. To connect using OAuth, you need to follow the Headless OAuth instructions in the Help documentation for the Connector and save the OAuth Verifier code.
Make a note of the necessary properties for use with the CData Glue Connector for Salesforce.
(Optional) Store Salesforce Connection Properties Credentials in AWS Secrets Manager
To safely store and use your connection properties, you can save them in AWS Secrets Manager.
Note: You must host your AWS Glue ETL job and secret in the same region. Cross-region secret retrieval is not supported currently.
- Sign in to the AWS Secrets Manager console.
- On either the service introduction page or the Secrets list page, choose Store a new secret.
- On the Store a new secret page, choose Other type of secret. This option means you must supply the structure and details of your secret.
- You can read more about the required properties to connect to Salesforce in the "Activate" section below. Once you know which properties you wish to store, create a key-value pair for each property. For example:
- Username: account user (for example, [email protected])
- Password: account password
- Add any additional private credential key-value pairs required by the CData Glue Connector for Salesforce
For more information about creating secrets, see Creating and Managing Secrets with AWS Secrets Manager in the AWS Secrets Manager User Guide.
- Record the secret name, which is used when configuring the connection in AWS Glue Studio.
Subscribe to the CData Glue Connector for Salesforce
To work with the CData Glue Connector for Salesforce in AWS Glue Studio, you need to subscribe to the Connector from the AWS Marketplace. If you have already subscribed to the CData Glue Connector for Salesforce, you can jump to the next section.
Pricing Information
Monthly Subscription Fee: $300.00
You are charged $300.00 once a month regardless of how many instances you launch after subscribing.
Use of Local Zones or WaveLength infrastructure deployment may alter your final pricing.
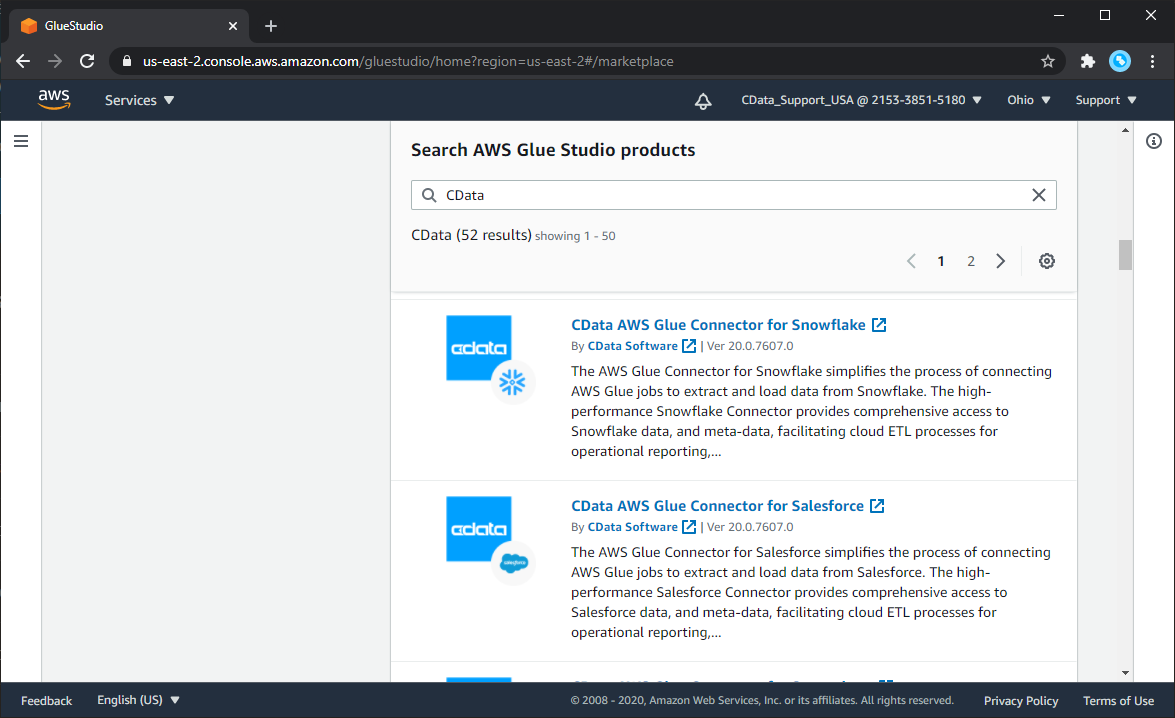
- Navigate to AWS Glue Studio
- Click Connectors
- Click AWS Marketplace
- Search for the Connector "CData Salesforce"
![Selecting a CData AWS Glue Connector]()
- Click "Continue to Subscribe"
- Accept the terms for the Connector and wait for the request to be processed
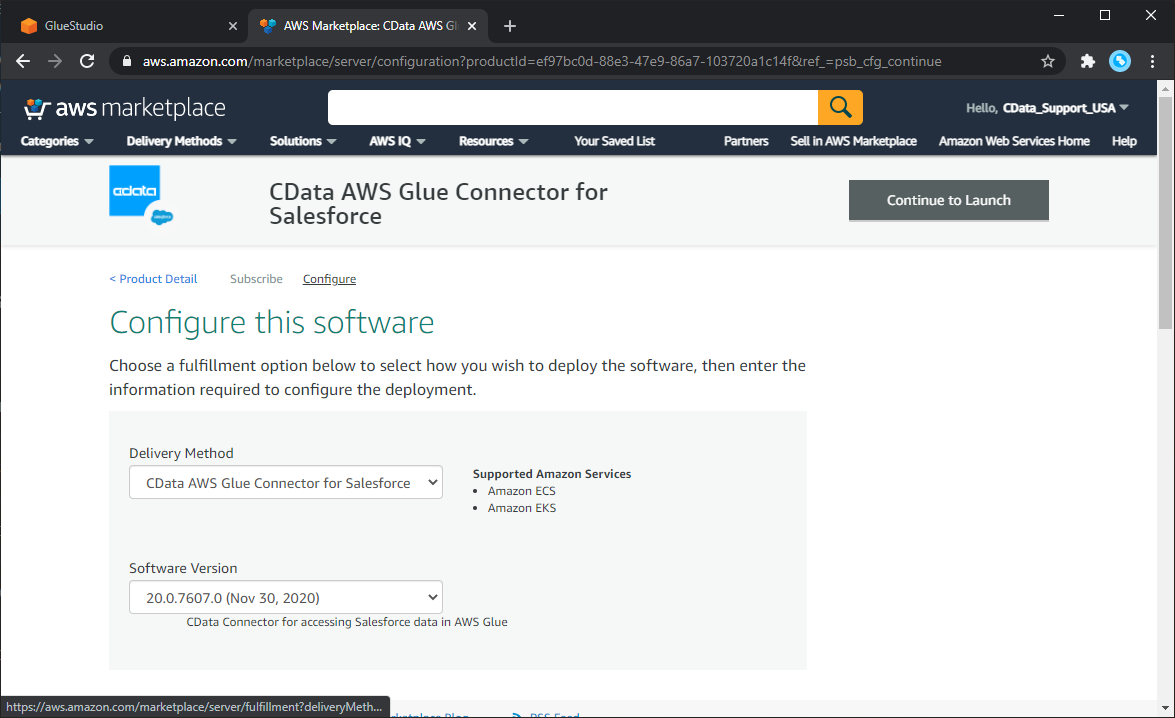
- Click "Continue to Configuration"
![Accepted Terms and continuing Configuration]()
Activate the CData Glue Connector for Salesforce in Glue Studio
To use the CData Glue Connector for Salesforce in AWS Glue, you need to activate the subscribed connector in AWS Glue Studio. The activation process creates a connector object and connection in your AWS account.
- Once you subscribe to the connector, a new Config tab shows up in the AWS Marketplace connector page.
- Choose the delivery options and click the "Continue to Launch" button.
![Launching the Connector]()
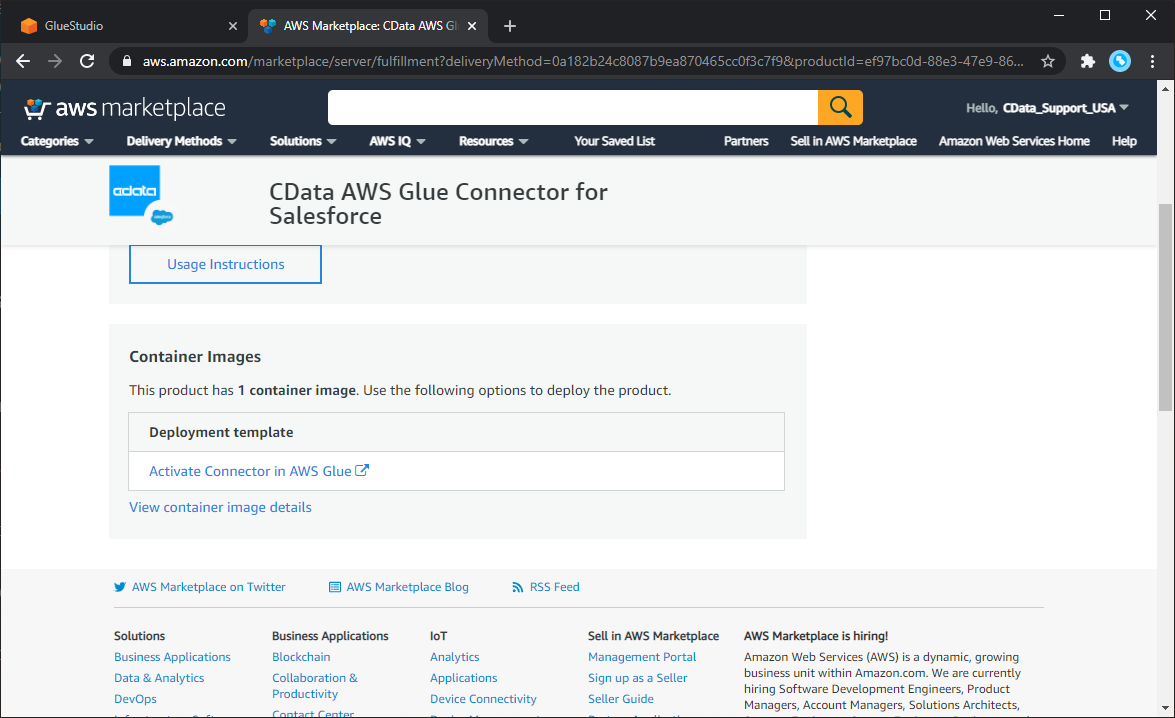
- On the launch tab, click "Usage Instructions" and follow the link that appears to create and configure the connection.
![Activate the Connector]()
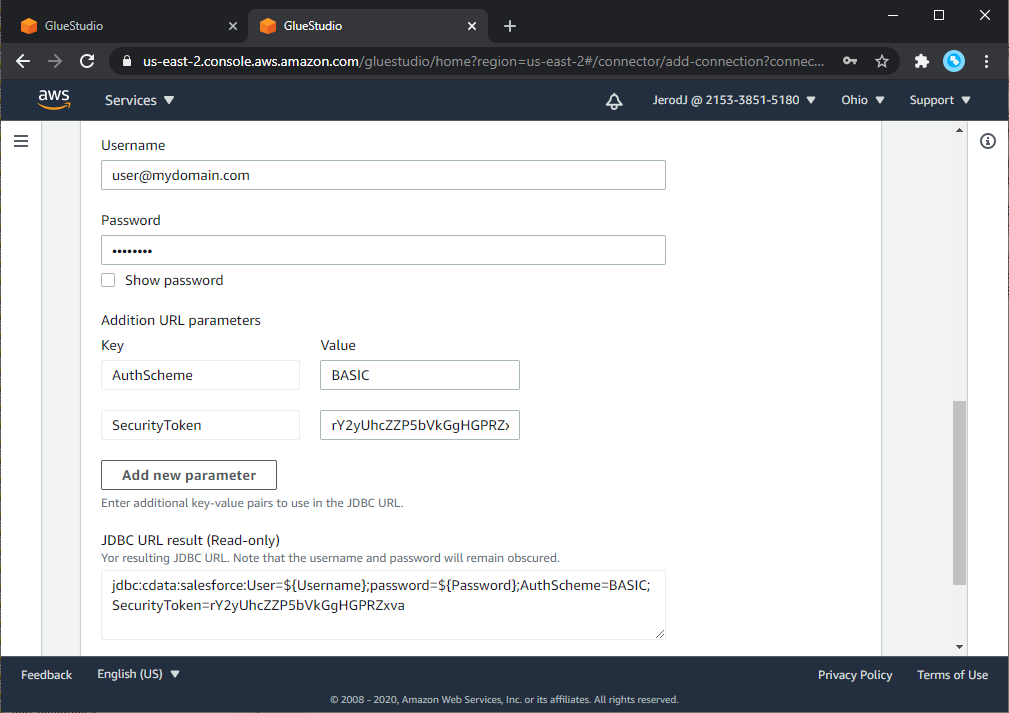
Under Connection access, select the JDBC URL format and configure the connection. Below you will find sample connection string(s) for the JDBC URL format(s) available for Salesforce. You can read more about authenticating with Salesforce in the Help documentation for the Connector.
If you opted to store properties in the AWS Secrets Manager, leave the placeholder values (e.g. ${Property1}), otherwise, the values you enter in the AWS Glue Connection interface will appear in the (read-only) JDBC URL below the properties.
Username & Password
jdbc:cdata:Salesforce:AuthScheme=BASIC;User=${Username};Password=${Password};SecurityToken=${SecurityToken}OAuth
jdbc:cdata:Salesforce:AuthScheme=OAuth;OAuthSettingsLocation=${OAuthSettingsLocation};InitiateOAuth=REFRESH;OAuthVerifier=${OAuthVerifier};OAuthClientID=${OAuthClientID};OAuthClientSecret=${OAuthClientSecret}OneLogin
jdbc:cdata:Salesforce:AuthScheme=OneLogin;SSOLoginUrl=${SSOLoginUrl};SSOTokenUrl=${SSOTokenUrl};SSOProperties='IdPName=OneLogin;APIKey=${OneLoginAPIKey}'PingFederate
jdbc:cdata:Salesforce:AuthScheme=PingFederate;SSOLoginUrl=${SSOLoginUrl};SSOTokenUrl=${SSOTokenUrl};SSOProperties='IdPName=PingFederate;RelyingParty=${SalesforceDomain}'OKTA
jdbc:cdata:Salesforce:AuthScheme=OKTA;SSOLoginUrl=${SSOLoginUrl};SSOTokenUrl=${SSOTokenUrl};SSO+Properties='idpname=okta;domain=${OrgDomain};apiToken=${OktaAPIKey};'ADFS
jdbc:cdata:Salesforce:AuthScheme=ADFS;InitiateOAuth=REFRESH;OAuthClientId=${OAuthClientID};OauthClientSecret=${OAuthClientSecret};SSOProperties='IDPName=AzureAD;Resource=${SalesforceApplicationIDURI};Tenant=${AzureADTenant};';SSOTokenUrl=${SSOTokenURL};![Configure the Connection (Salesforce is shown)]()
- (Optional): Enable logging for the Connector.
If you want to log the functionality from the CData Glue Connector for Salesforce you will need to append two properties to the JDBC URL:
- Logfile: Set this to "STDOUT://"
- Verbosity: Set this to an integer (1-5) for varying depths of logging. 1 is the default, 3 is recommended for most debugging scenarios.
- Configure the Network options and click "Create Connection."
Configure the Amazon Glue Job
Once you have configured a Connection, you can build a Glue Job.
Create a Job that Uses the Connection
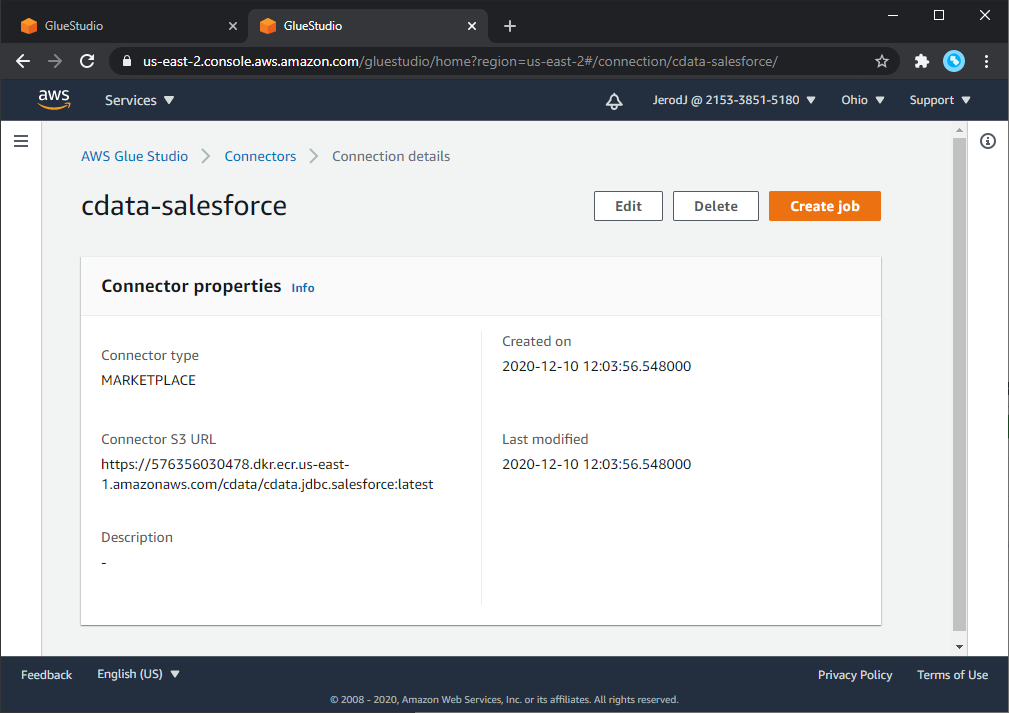
- In Glue Studio, under "Your connections," select the connection you created
- Click "Create job"
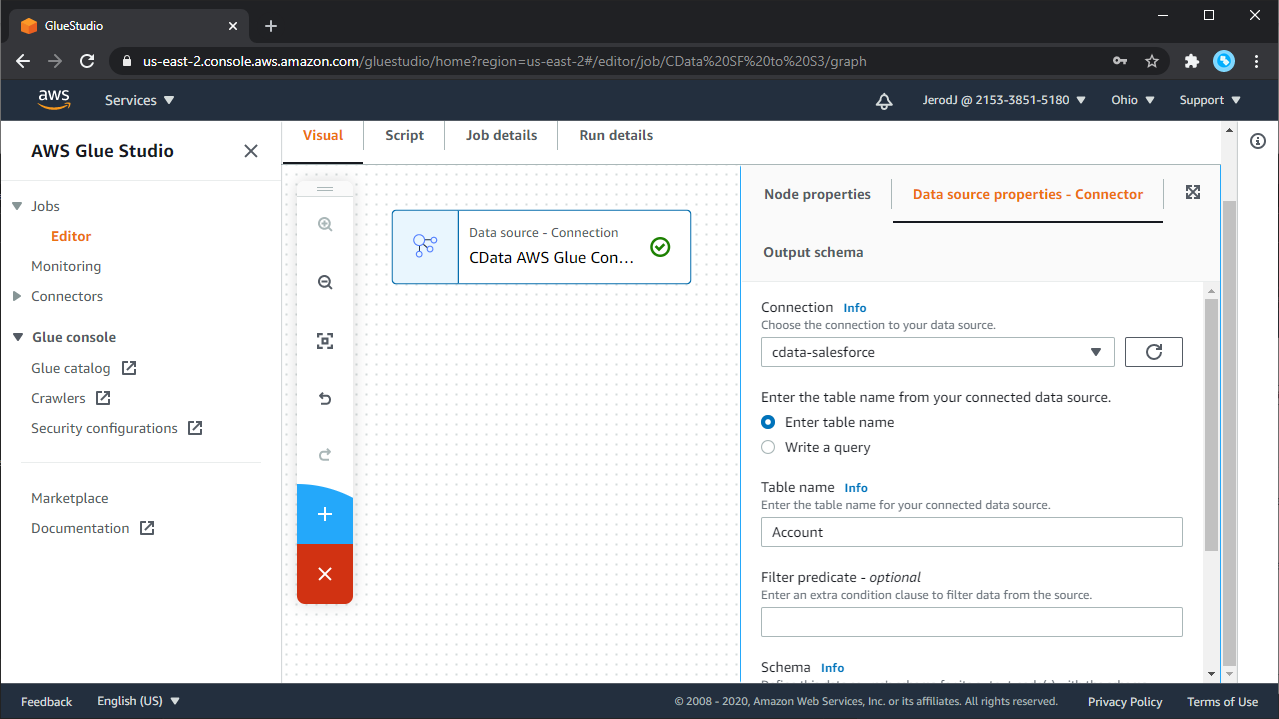
The visual job editor appears. A new Source node, derived from the connection, is displayed on the Job graph. In the node details panel on the right, the Source Properties tab is selected for user input.
Configure the Source Node properties:
You can configure the access options for your connection to the data source in the Source properties tab. Refer to the AWS Glue Studio documentation for more information. Here we provide a simple walk-through.
- In the visual job editor, make sure the Source node for your connector is selected. Choose the Source properties tab in the node details panel on the right, if it is not already selected.
- The Connection field is populated automatically with the name of the connection associated with the marketplace connector.
- Enter information about the data location in the data source. Provide either a source table name or a query to use to retrieve data from the data source. An example of a query is SELECT Industry, AnnualRevenue FROM Account WHERE Name = 'GenePoint'.
![Configuring the Source node.]()
- To pass information from the data source to the transformation nodes, AWS Glue Studio must know the schema of the data. Select "Use Schema Builder" to specify the schema interactively.
- Configure the remaining optional fields as needed. You can configure the following:
- Partitioning information - for parallelizing the read operations from the data source
- Data type mappings - to convert data types used in the source data to the data types supported by AWS Glue
- Filter predicate - to select a subset of the data from the data source
See "Use the Connection in a Glue job using Glue Studio" for more information about these options.
- You can view the schema generated by this node by choosing the Output schema tab in the node properties panel.
Edit, Save, & Run the Job
Edit the job by adding and editing the nodes in the job graph. See Editing ETL jobs in AWS Glue Studio for more information.
After you complete editing the job, enter the job properties.
- Select the Job properties tab above the visual graph editor.
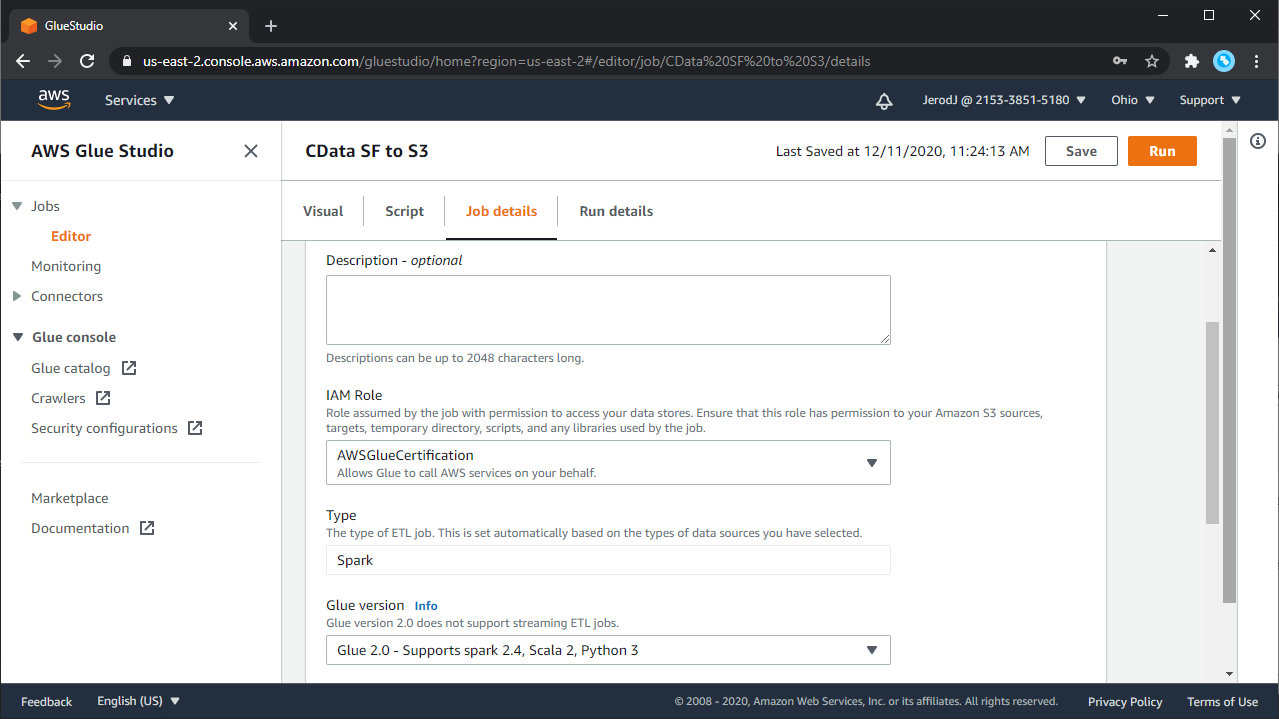
- Configure the following job properties when using custom connectors:
- Name: Provide a job name.
- IAM Role: Choose (or create) an IAM role with the necessary permissions, as described previously.
- Type: Choose "Spark."
- Glue version: Choose "Glue 2.0 - Supports spark 2.4, Scala 2, Python 3."
- Language: Choose "Python 3."
- Use the default values for the other parameters. For more information about job parameters, see "Defining Job Properties" in the AWS Glue Developer Guide.
![Configuring the job properties.]()
- At the top of the page, choose "Save."
- A green top banner appears with the message "Successfully created Job."
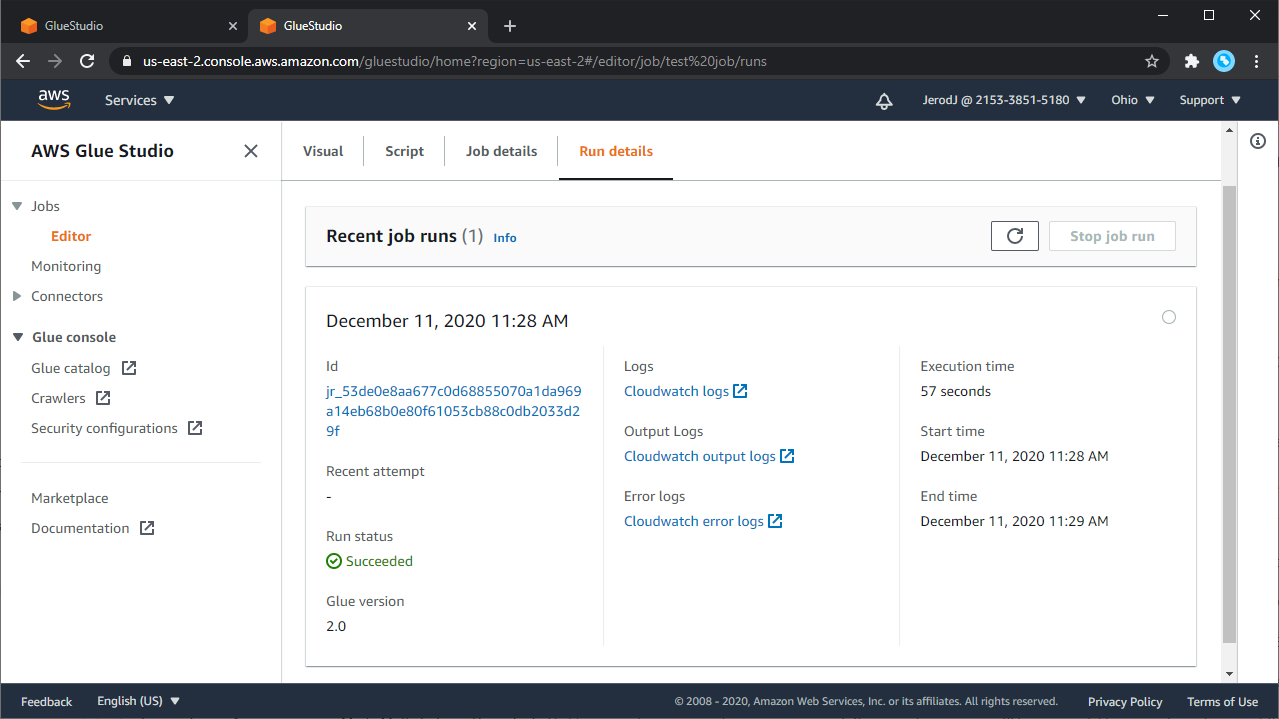
- After you successfully save the job, you can choose "Run" to run the job.
- To view the generated script for the job, choose the "Script" tab at the top of the visual editor. The "Job runs" tab shows the job run history for the job. For more information about job run details, see "View information for recent job runs."
![Completed job run details.]()
Review the Generated Script
At any point in the job creation, you can click on the Script tab to review the script being created by Glue Studio. If you create a simple job to write Salesforce data to an Amazon S3 bucket, your script will look similar to the following:
Sample Script
import sys
from awsglue.transforms import *
from awsglue.utils import getResolvedOptions
from pyspark.context import SparkContext
from awsglue.context import GlueContext
from awsglue.job import Job

## @params: [JOB_NAME]
args = getResolvedOptions(sys.argv, ['JOB_NAME'])

sc = SparkContext()
glueContext = GlueContext(sc)
spark = glueContext.spark_session
job = Job(glueContext)
job.init(args['JOB_NAME'], args)
## @type: DataSource
## @args: [connection_type = "marketplace.jdbc", connection_options = {"dbTable":"Account","connectionName":"cdata-[id]"}, transformation_ctx = "DataSource0"]
## @return: DataSource0
## @inputs: []
DataSource0 = glueContext.create_dynamic_frame.from_options(connection_type = "marketplace.jdbc", connection_options = {"dbTable":"Account","connectionName":"cdata-[id]"}, transformation_ctx = "DataSource0")
## @type: DataSink
## @args: [connection_type = "s3", format = "json", connection_options = {"path": "s3://PATH/TO/BUCKET/", "partitionKeys": []}, transformation_ctx = "DataSink0"]
## @return: DataSink0
## @inputs: [frame = DataSource0]
DataSink0 = glueContext.write_dynamic_frame.from_options(frame = DataSource0, connection_type = "s3", format = "json", connection_options = {"path": "s3://PATH/TO/BUCKET/", "partitionKeys": []}, transformation_ctx = "DataSink0")
job.commit()
Using the CData Glue Connector for Salesforce in AWS Glue Studio, you can easily create ETL jobs to load Salesforce data into an S3 bucket or any other destination. You can also use the Glue Connector to add, update, or delete Salesforce data in your Glue Jobs.
Health Check
The CData Glue Connector for Salesforce is used as part of AWS Glue jobs. As such, you can use CloudWatch and the built-in logging (see the optional logging instructions above) to monitor the health of the Glue job and the functionality of the Connector.
Backup & Recovery
The CData Glue Connector for Salesforce is a deployed container. Backup and recovery consists of simply resubscribing to the Connector in the event of a failure or corrupted deployment.
Routine Maintenance
There are several pieces of routine maintenance involved with the CData Glue Connectors:
- Rotating credentials & keys: Follow the guidance of your IT administration for the rotation of any credentials & keys stored in the AWS Secrets Manager
- Software patches & upgrades: The CData Glue Connector will be only be patched for breaking errors. Upgrades will be released quarterly. Monitor the "Latest Version" in the AWS Marketplace listing and simply re-subscribe if the Latest Version is greater than your currently subscribed version.
- Managing license: Licenses can be managed (subscriptions discontinued as needed) in the AWS License Manager
Technical Support
The CData Support Team is available for any specific issues encountered with the Glue Connector itself. For issues with the AWS environment(s), reach out to the AWS Support Team.
Information on available CData Support tiers can be found on the CData Software Support page. Information on available AWS Support tiers can be found on the AWS Support page.


