Discover how a bimodal integration strategy can address the major data management challenges facing your organization today.
Get the Report →How to Connect DBeaver to Microsoft Planner via a JDBC Driver
Manage Microsoft Planner data with visual tools in DBeaver like the query browser.
The CData JDBC Driver for Microsoft Planner implements JDBC standards that enable third-party tools to interoperate, from wizards in IDEs to business intelligence tools. This article shows how to connect to Microsoft Planner data with wizards in DBeaver and browse data in the DBeaver GUI.
Create a JDBC Data Source for Microsoft Planner Data
Follow the steps below to load the driver JAR in DBeaver.
- Open the DBeaver application and, in the "Database" menu, select the "Driver Manager" option. Click "New" to open the "Create new driver" form.
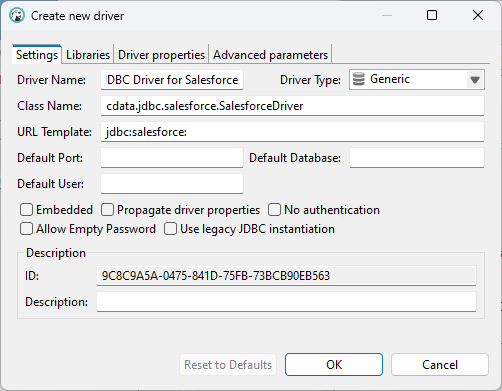
- In the Settings tab:
- Set Driver Name to a user-friendly name for the driver (e.g. CData JDBC Driver for Microsoft Planner).
- Set Class Name to the class name for the JDBC driver: cdata.jdbc.microsoftplanner.MicrosoftPlannerDriver.
- Set URL Template to jdbc:microsoftplanner:.
![Configure the new driver settings (Salesforce is shown).]()
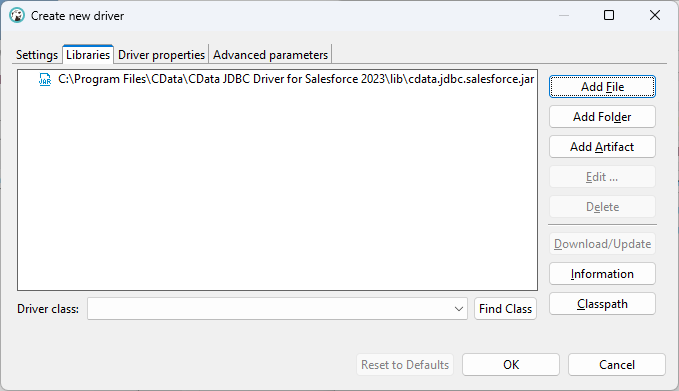
- In the Libraries tab, click "Add File," navigate to the "lib" folder in the installation directory (C:\Program Files\CData[product_name] XXXX\) and select the JAR file (cdata.jdbc.MicrosoftPlanner.jar).
![Loading the JDBC JAR file (Salesforce is shown).]()
Create a Connection to Microsoft Planner Data
Follow the steps below to add credentials and other required connection properties.
- In the "Database" menu, click "New Database Connection."
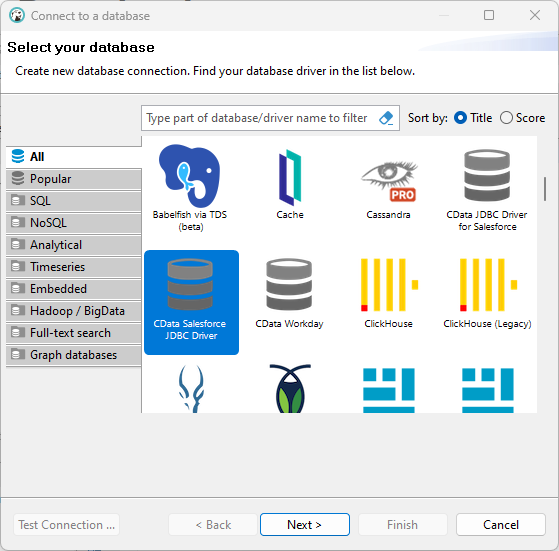
- In the "Connect to a database" wizard that results, select the driver you just created (e.g. CData JDBC Driver for Microsoft Planner) and click "Next >."
![Selecting the driver (Salesforce is shown).]()
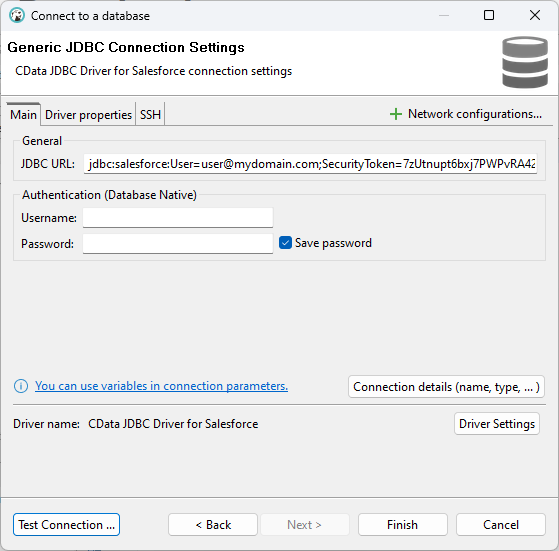
- On the Main tab of the configuration wizard, set the JDBC URL, using the required connection properties:
You can connect without setting any connection properties for your user credentials. Below are the minimum connection properties required to connect.
- InitiateOAuth: Set this to GETANDREFRESH. You can use InitiateOAuth to avoid repeating the OAuth exchange and manually setting the OAuthAccessToken.
- Tenant (optional): Set this if you wish to authenticate to a different tenant than your default. This is required to work with an organization not on your default Tenant.
When you connect the Driver opens the MS Planner OAuth endpoint in your default browser. Log in and grant permissions to the Driver. The Driver then completes the OAuth process.
- Extracts the access token from the callback URL and authenticates requests.
- Obtains a new access token when the old one expires.
- Saves OAuth values in OAuthSettingsLocation to be persisted across connections.
Built-in Connection String Designer
For assistance in constructing the JDBC URL, use the connection string designer built into the Microsoft Planner JDBC Driver. Either double-click the JAR file or execute the jar file from the command-line.
java -jar cdata.jdbc.microsoftplanner.jarFill in the connection properties and copy the connection string to the clipboard.
![Using the built-in connection string designer to generate a JDBC URL (Salesforce is shown.)]()
Below is a typical connection string:
jdbc:microsoftplanner:OAuthClientId=MyApplicationId;OAuthClientSecret=MySecretKey;CallbackURL=http://localhost:33333;InitiateOAuth=GETANDREFRESH![Configuring the JDBC URL (Salesforce is shown).]()
- Click "Test Connection ..." to ensure you have configured the connection properly.
![A successfully configured connection (Salesforce is shown).]()
- Click "Finish."
Query Microsoft Planner Data
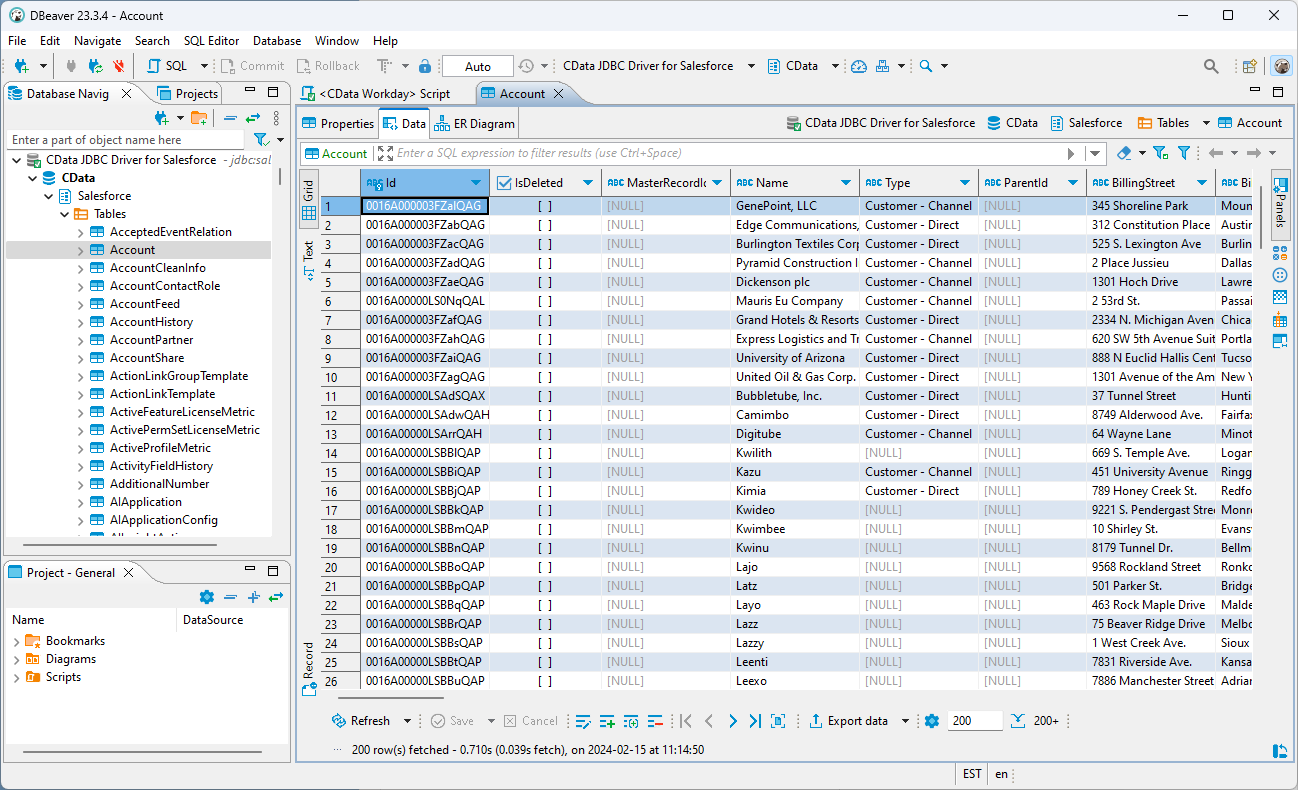
You can now query information from the tables exposed by the connection: Right-click a Table and then click View Table. The data is available on the Data tab.
