Discover how a bimodal integration strategy can address the major data management challenges facing your organization today.
Get the Report →Integrating Procore Data in Talend Cloud Data Management Platform
Connect Procore Data with Talend Cloud Data Management Platform using the CData API Driver for JDBC.
Qlik's Talend Cloud Data Management Platform supports various data environments, enabling analytics for smarter decisions, operational data sharing, data and application modernization, and establishing data excellence for risk reduction. When paired with the CData API Driver for JDBC, you can improve data integration, quality, and governance for your Procore Data. This article shows how you can easily integrate to Procore using a CData JDBC Driver in Talend Cloud Data Management, and then view the data for simultaneous use in your workflow.
Prerequisites
Before connecting the CData JDBC Driver to view and work with your data in Talend Cloud Data Management Platform, make sure to download and install the latest version of Talend Studio on your system. Also, ensure that you have the required prerequisites.
- A Talend Cloud Data Management account with appropriate permissions.
- The CData API Driver for JDBC, which can be downloaded from the CData website.
Connect to Procore in Talend as a JDBC data source
Access Talend Data Management Cloud
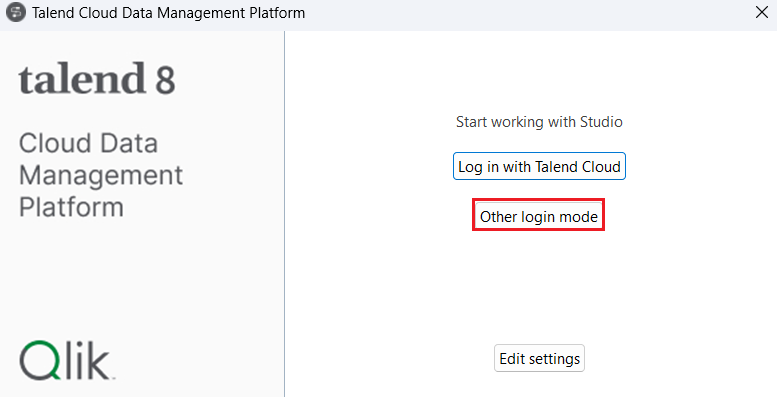
- Run the Talend Cloud Data Management Platform installed on your local system and click on Other Login Mode.
![Log into Talend Cloud Data Management Platform locally]()
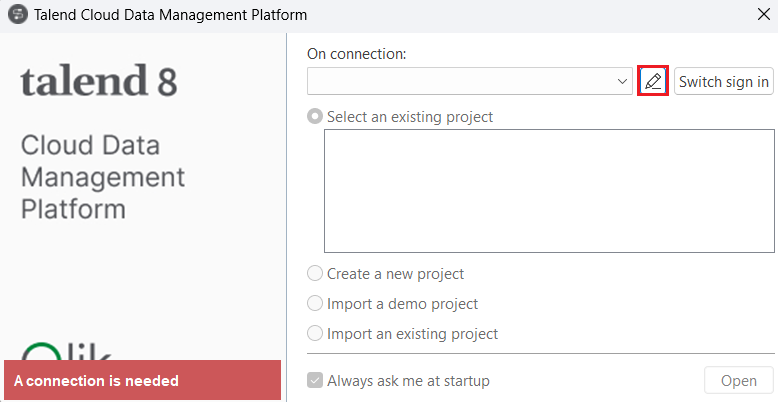
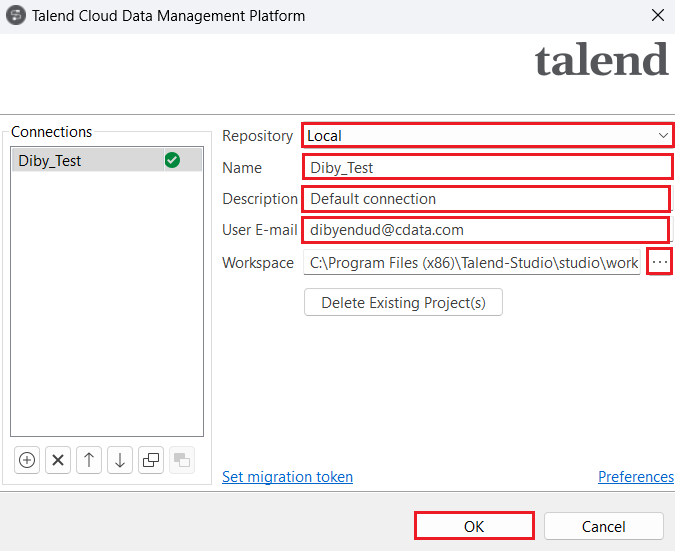
- Click on Manage Connections. Set Repository to "Local" and enter the Name, Description and User E-mail in the respective spaces. Set the Workspace path and click on OK.
![Manage a connection.]()
![Create a connection in Talend Data Management Cloud]()
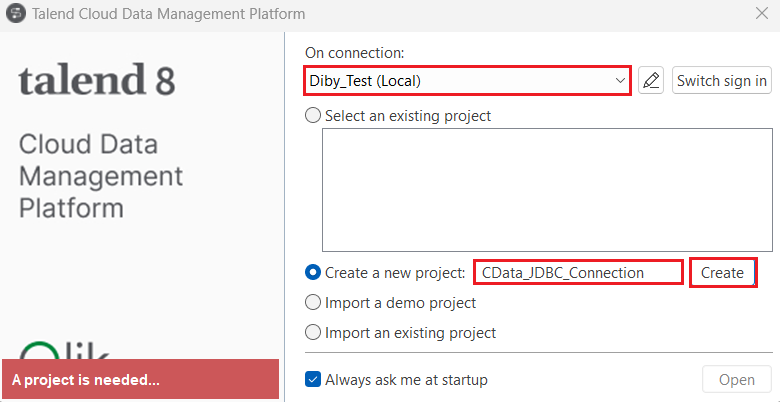
- Now, select the Create a new project radio button to add a new project name and click on Create.
![Create a new project.]()
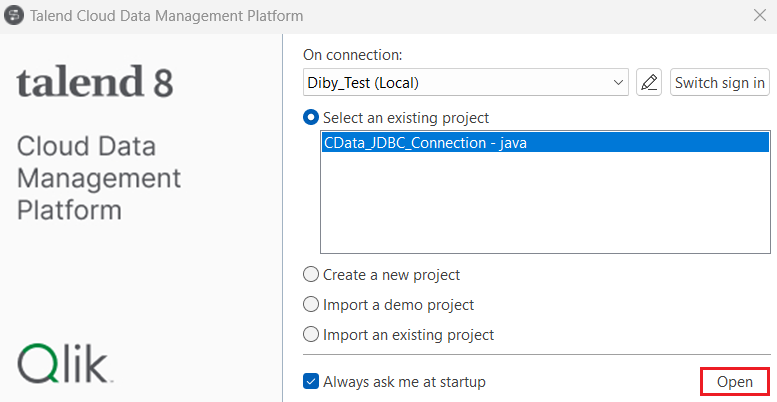
- The new project should appear under the Select an existing project section. Click on Open. The Talend Cloud Data Management Platform workspace opens up.
![Open the Talend Cloud Data Management Platform workspace.]()
Create a new connection
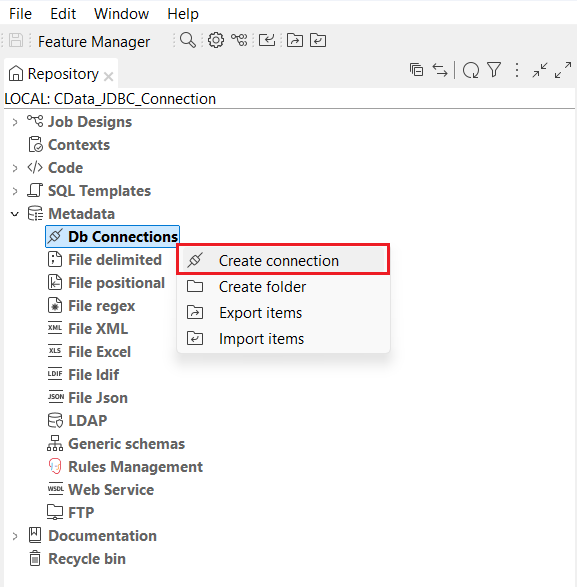
- In the navigation pane, locate and expand the Metadata dropdown. Right-click on Db Connections and select Create Connection.
![Create a new connection in the Talend platform under Db connections.]()
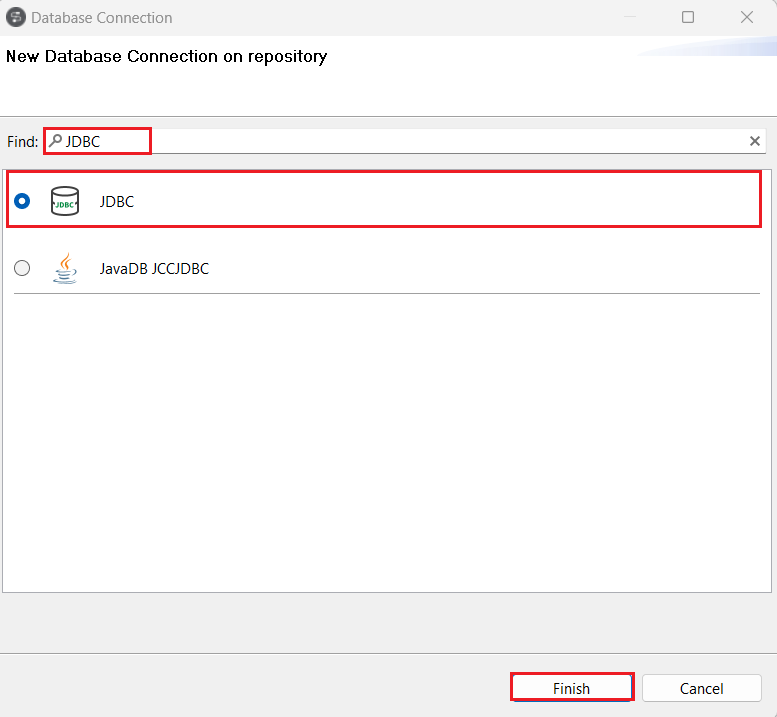
- Search for and select 'JDBC' in the Find section of the Database Connection window. Then, click on Finish.
![Search and select the JDBC connector.]()
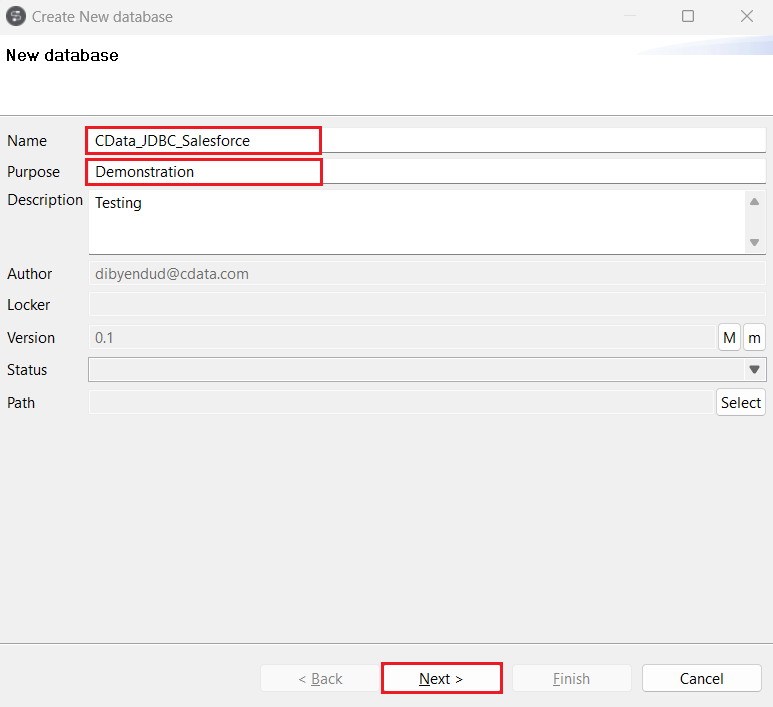
- Enter the Name, Purpose and Description of the new database in Talend where you need to load the Procore data. Click on Next.
![Enter details of the database toload the source data.]()
- Generate a JDBC URL for connecting to Procore, beginning with jdbc:api: followed by a series of semicolon-separated connection string properties.
Start by setting the Profile connection property to the location of the Procore Profile on disk (e.g. C:\profiles\Procore.apip). Next, set the ProfileSettings connection property to the connection string for Procore (see below).
Procore API Profile Settings
To authenticate to Procore, and connect to your own data or to allow other users to connect to their data, you can use the OAuth standard.
First, you will need to register an OAuth application with Procore. You can do so by logging to your Developer Account and going to Create New App. Follow all necessary steps to register your app. First you will need to create a new version of Sandbox Manifest and then promote it to Production in order to get your Production Crendentials. Your Oauth application will be assigned a client id and a client secret.
After setting the following connection properties, you are ready to connect:
- AuthScheme: Set this to OAuth.
- InitiateOAuth: Set this to GETANDREFRESH. You can use InitiateOAuth to manage the process to obtain the OAuthAccessToken.
- OAuthClientId: Set this to the client_id that is specified in you app settings.
- OAuthClientSecret: Set this to the client_secret that is specified in you app settings.
- CallbackURL: Set this to the Redirect URI that is specified in your app settings
Built-in Connection String Designer
For assistance in constructing the JDBC URL, use the connection string designer built into the Procore JDBC Driver. Either double-click the JAR file or execute the jar file from the command-line.
java -jar cdata.jdbc.api.jarFill in the connection properties and copy the connection string to the clipboard.
![Using the built-in connection string designer to generate a JDBC URL (Salesforce is shown.)]()
A typical JDBC URL is below:
jdbc:api:Profile=C:\profiles\Procore.apip;Authscheme=OAuth;OAuthClientId=your_client_id;OAuthClientSecret=your_client_secret;CallbackUrl=your_callback_url;InitiateOAuth=GETANDREFRESH Enter the JDBC URL copied from CData API Driver for JDBC in Edit new database.
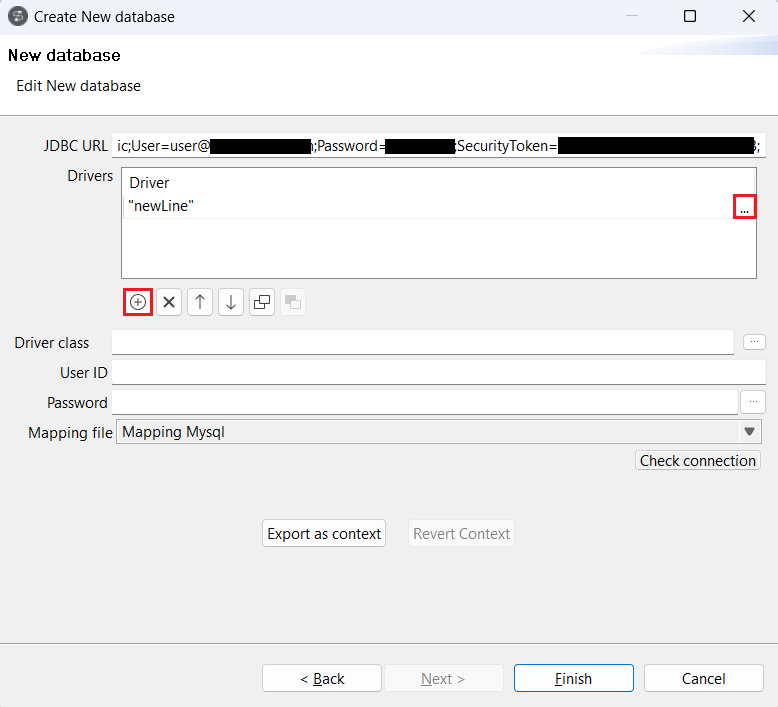
![Enter the JDBC URL (Salesforce is shown).]()
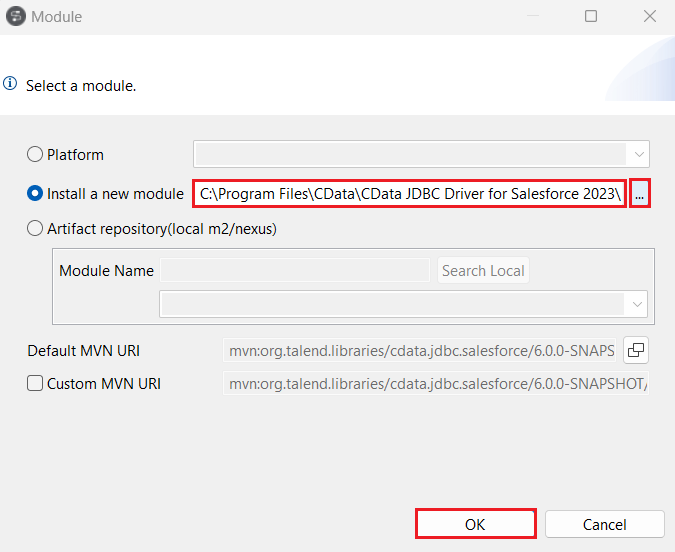
- Click on the "(+) Add" button under Drivers. A 'newLine' will appear in the Drivers board. Click on (...) at the end of the new line, select the Install a new module radio button, and click on (...) to add the path to the JAR file, located in the 'lib' subfolder of the installation directory. Click on OK.
![Add a new line in Drivers board to add the path to the Procore JAR file (Salesforce is shown).]()
![The lib folder which contains the Procore JAR file (Salesforce is shown).]()
![Add the JAR installation path in 'Install a new module' (Salesforce is shown).]()
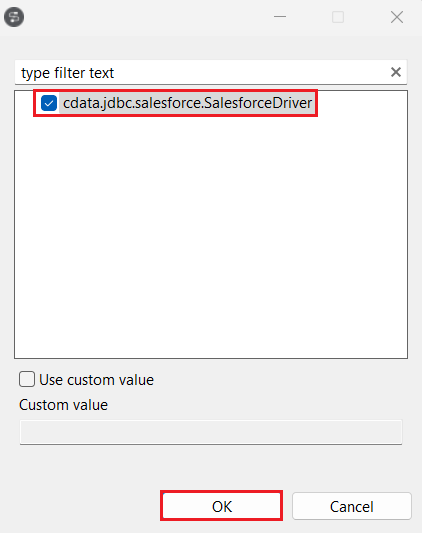
- Select the Driver Class as cdata.jdbc.api (JAR file obtained from your installation directory given in the previous step).
![Add the Driver class.]()
Test the new connection
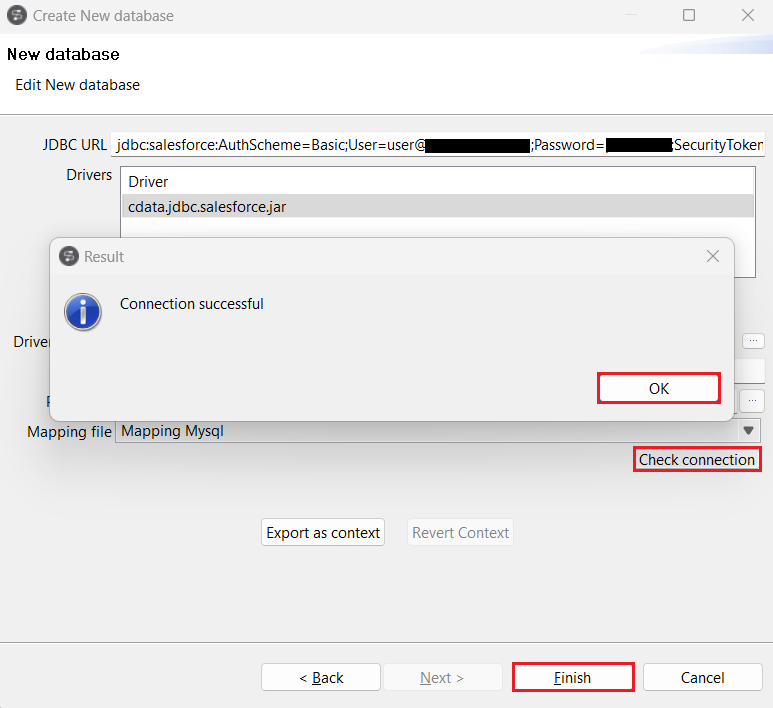
- Click on Check Connection. If the entered details are correct, a "Connection successful" confirmation prompt will appear. Click on "OK" and "Finish".
![Check the connection.]()
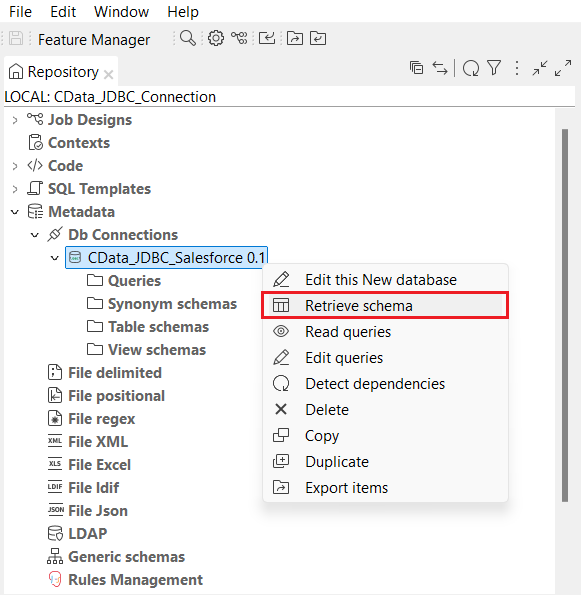
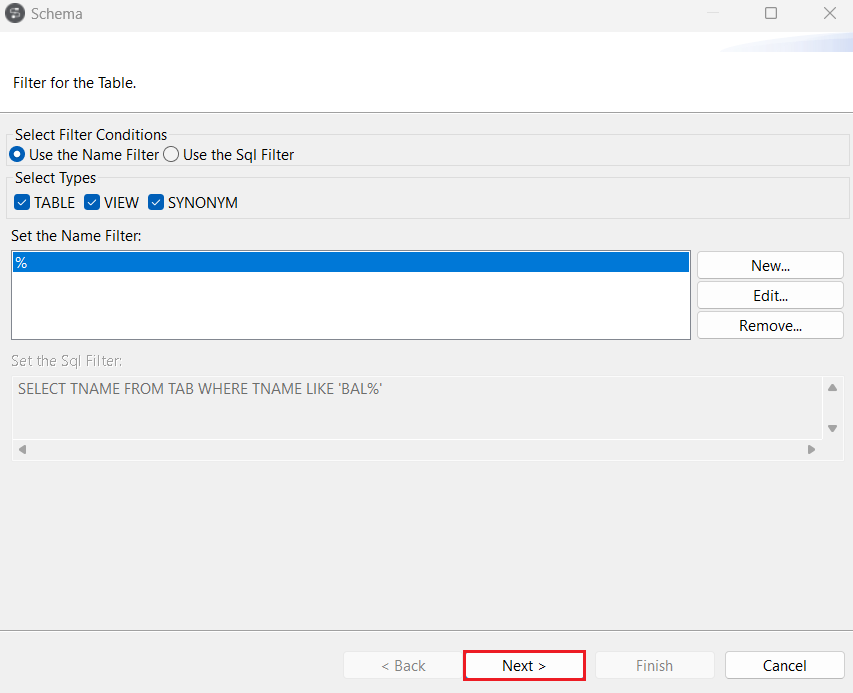
- Once the connection is established, right-click on the newly created connection and select Retrieve Schema. You can use the filters as well to retrieve the data as per your requirements. Click on Next.
![Retrieve schema from the datasource.]()
![Add the necessary filters.]()
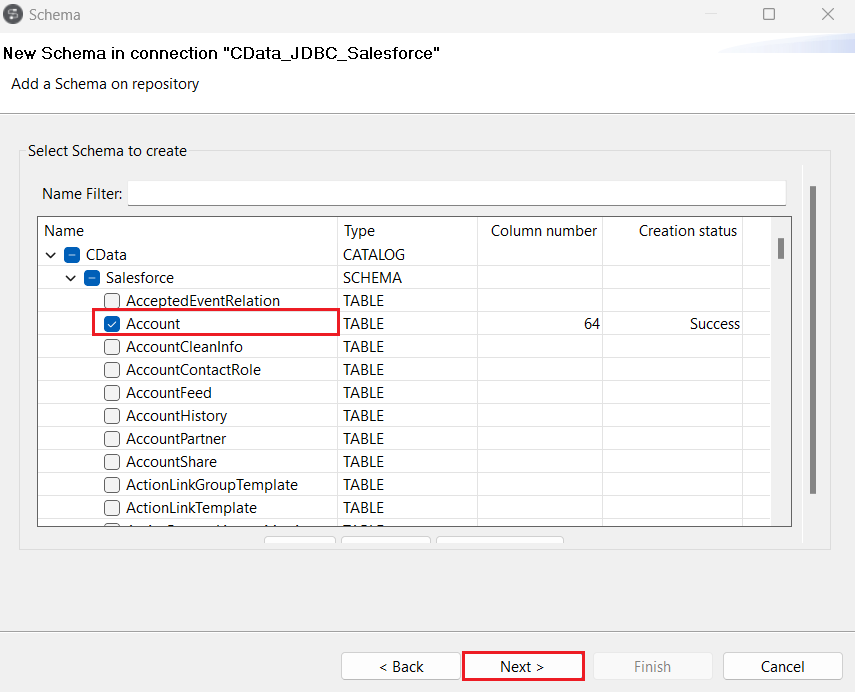
- Expand the "CData" catalog in the Schema window and select the tables you want to import from the Procore schema. Click on Next.
![Select a table from the Procore schema.]()
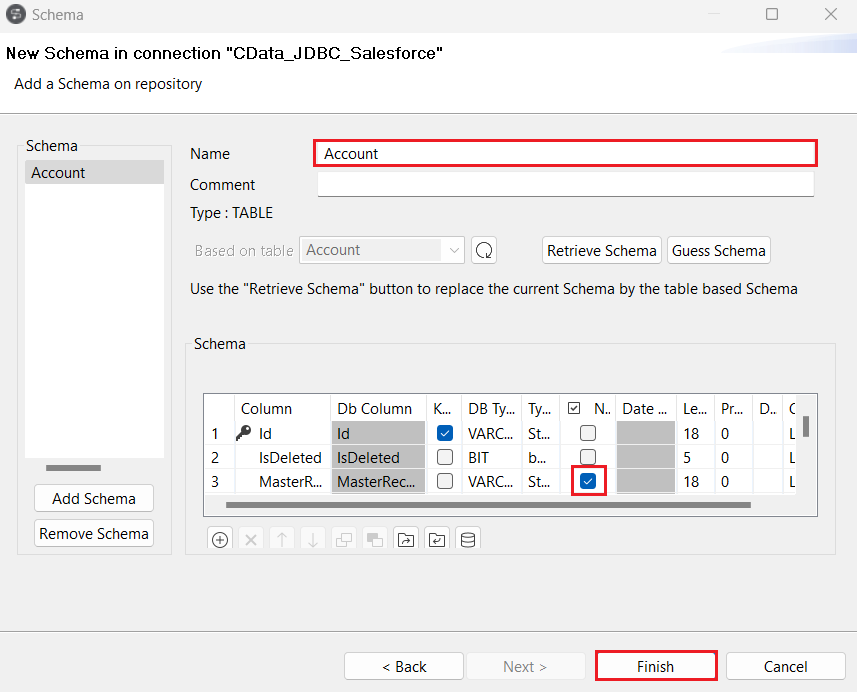
- In the next step, select the columns you want to view from the table and click on Finish.
![Select the necessary columns from the selected table.]()
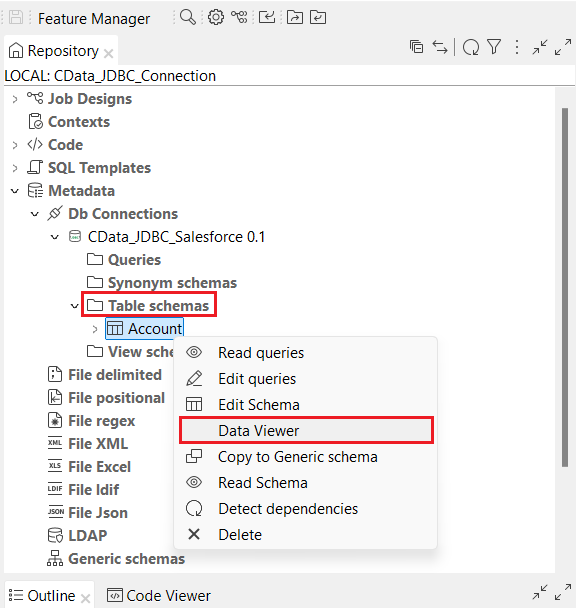
- All the selected tables from the Procore schema are now populated under the Table Schemas section of the JDBC connection.
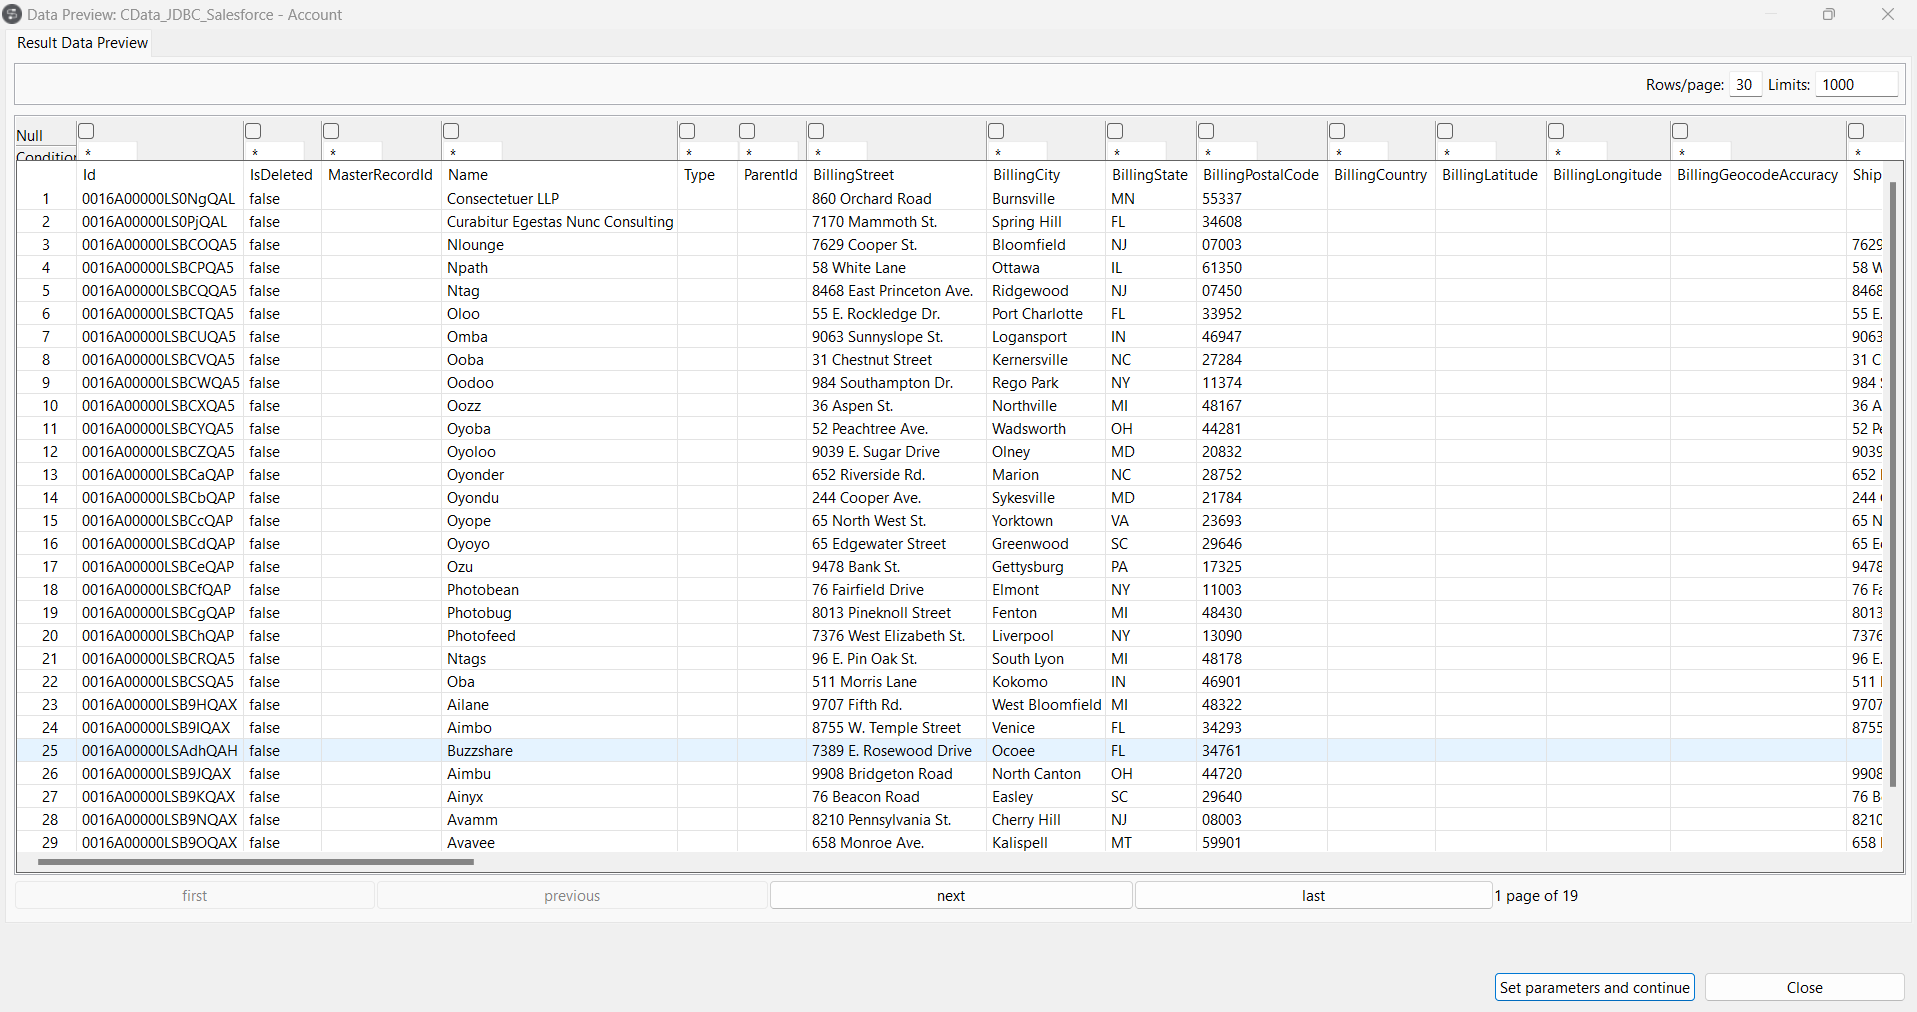
- Right-click on any of the selected tables and click on Data Viewer to preview the data from the data source.
![Click on Data Viewer to view the source data.]()
![Display the source table view.]()
Get Started Today
Download a free, 30-day trial of the CData API Driver for JDBC and integrate Procore data into Talend Cloud Data Management Platform. Reach out to our Support Team if you have any questions.


