
Managing Jira data can be a complex task due to the vast amount of information generated in the form of issues, tickets, and project details. Exporting this data to Microsoft Excel and other tools not only simplifies data management but also enhances data analysis, leading to more informed decision-making.
This article aims to guide you through six proven methods to export your Jira issues and tickets to Excel and beyond. By exploring these techniques, you can find the best approach that suits your needs, unlocking the true potential of your Jira data.
Explore different ways to streamline your Jira-to-Excel workflows, gain valuable insights from your projects, and elevate your project management to new heights.
Benefits of exporting Jira tickets to Excel and other formats
Exporting Jira tickets to Excel and other formats offers a multitude of benefits that enhance project management, data analysis, and collaboration. Here are some key benefits:
- Enhanced collaboration: Exporting Jira data to Excel allows for easy sharing of reports with stakeholders. This facilitates better collaboration among team members and with external parties.
- Data analysis: Excel is a powerful tool for data analysis. By exporting Jira data to Excel, you can leverage Excel’s functionalities to analyze your project data in depth.
- Customized reports: Excel’s robust features allow the transformation of raw Jira data into customized reports. This enables you to create reports tailored to your specific needs.
- Data auditing: Exporting Jira data can be beneficial for auditing purposes. It allows auditors to explore the data at their own pace with the tools they master.
- Data visualization options: Excel provides various data visualization options, such as diagrams, graphs, and pivot tables. This allows you to gain more insights from the data.
- Data migration capabilities: Exporting Jira data to Excel can facilitate data migration projects. It provides an easy way to extract all your issue data without any losses.
- Backup capabilities: You can use the exported Excel data to back up your Jira instance. This can be particularly useful in case of data loss.
How do I export from Jira to Excel? 6 easy methods
Getting your Jira data into Excel opens various analysis and reporting possibilities. This guide offers several proven methods for a smooth Jira to Excel export, letting you choose the approach that best suits your requirements and technical proficiency.
Export Jira to Excel using CData Connect AI
CData Connect AI provides the most robust and flexible solution for exporting Jira data to Excel. This cloud-based platform features a vast library of pre-built connectors, making it simple to integrate Jira with numerous business systems. To see the process in detail, read our knowledge base article. In short, here’s how:
- Create a CData Connect AI account:
Visit the CData Connect AI website and create a CData Connect AI account.

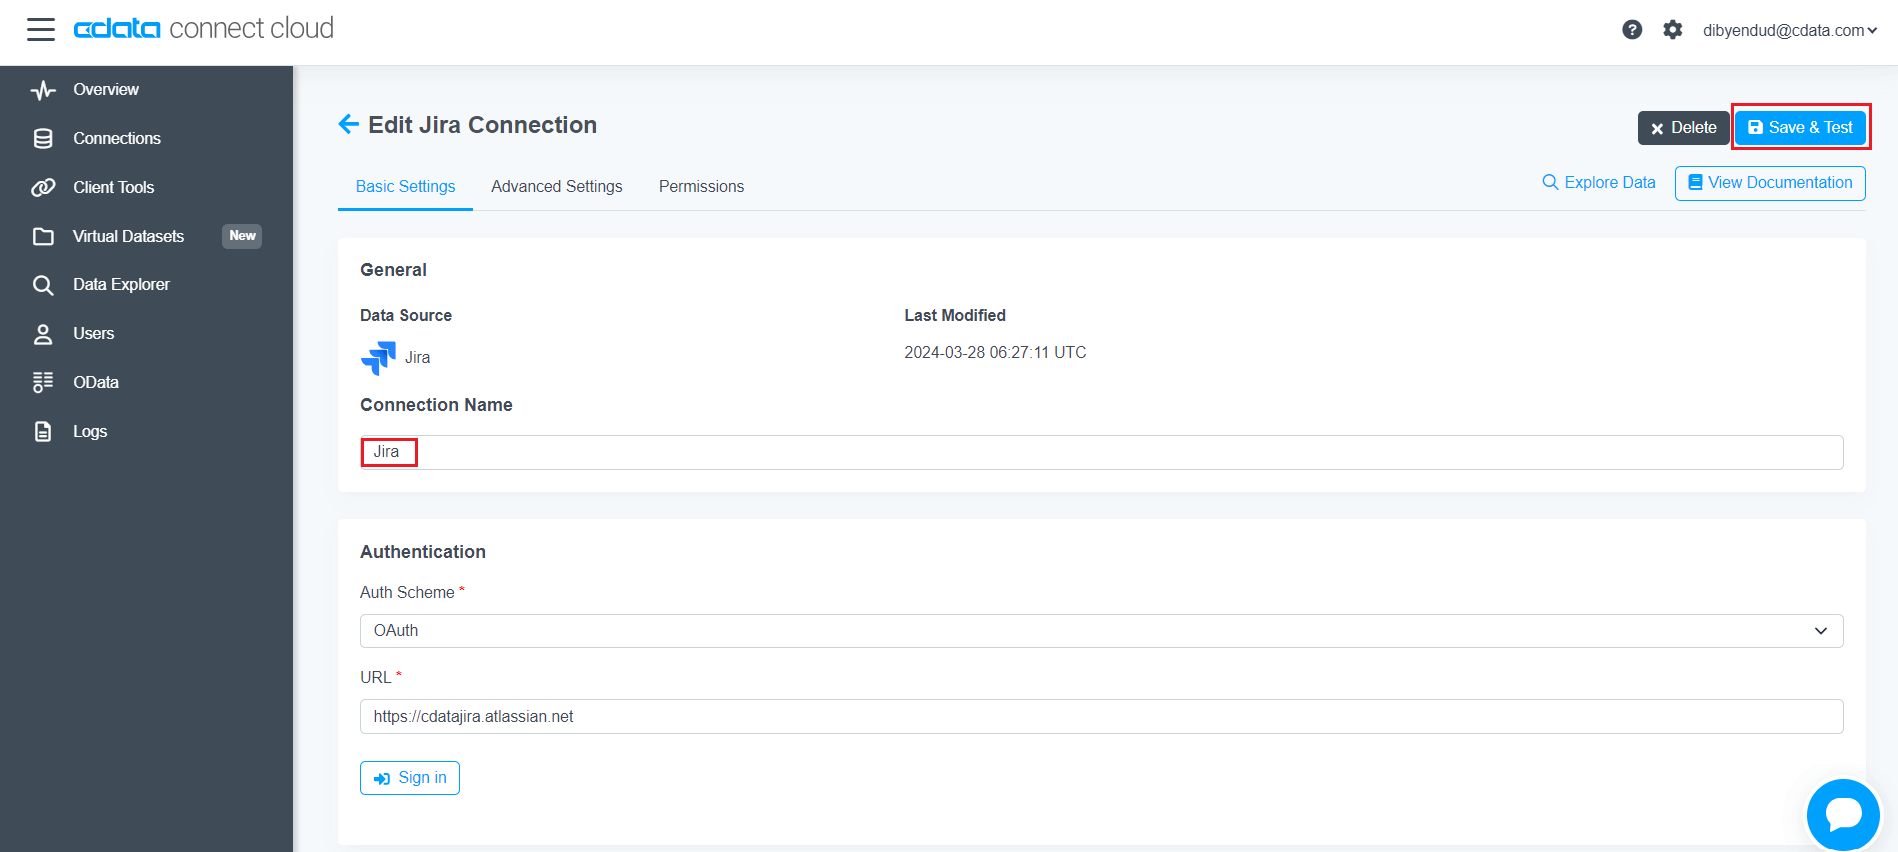
- Connect to Jira: Add a Jira connection from the Connections page and provide your Jira account details.
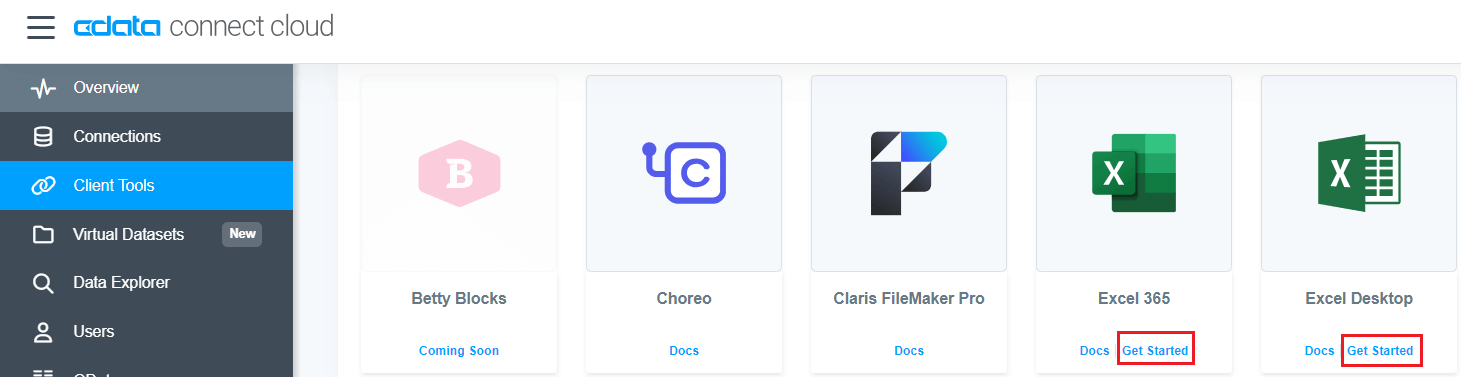
- Select a client: Select Excel from the Client Tools page.
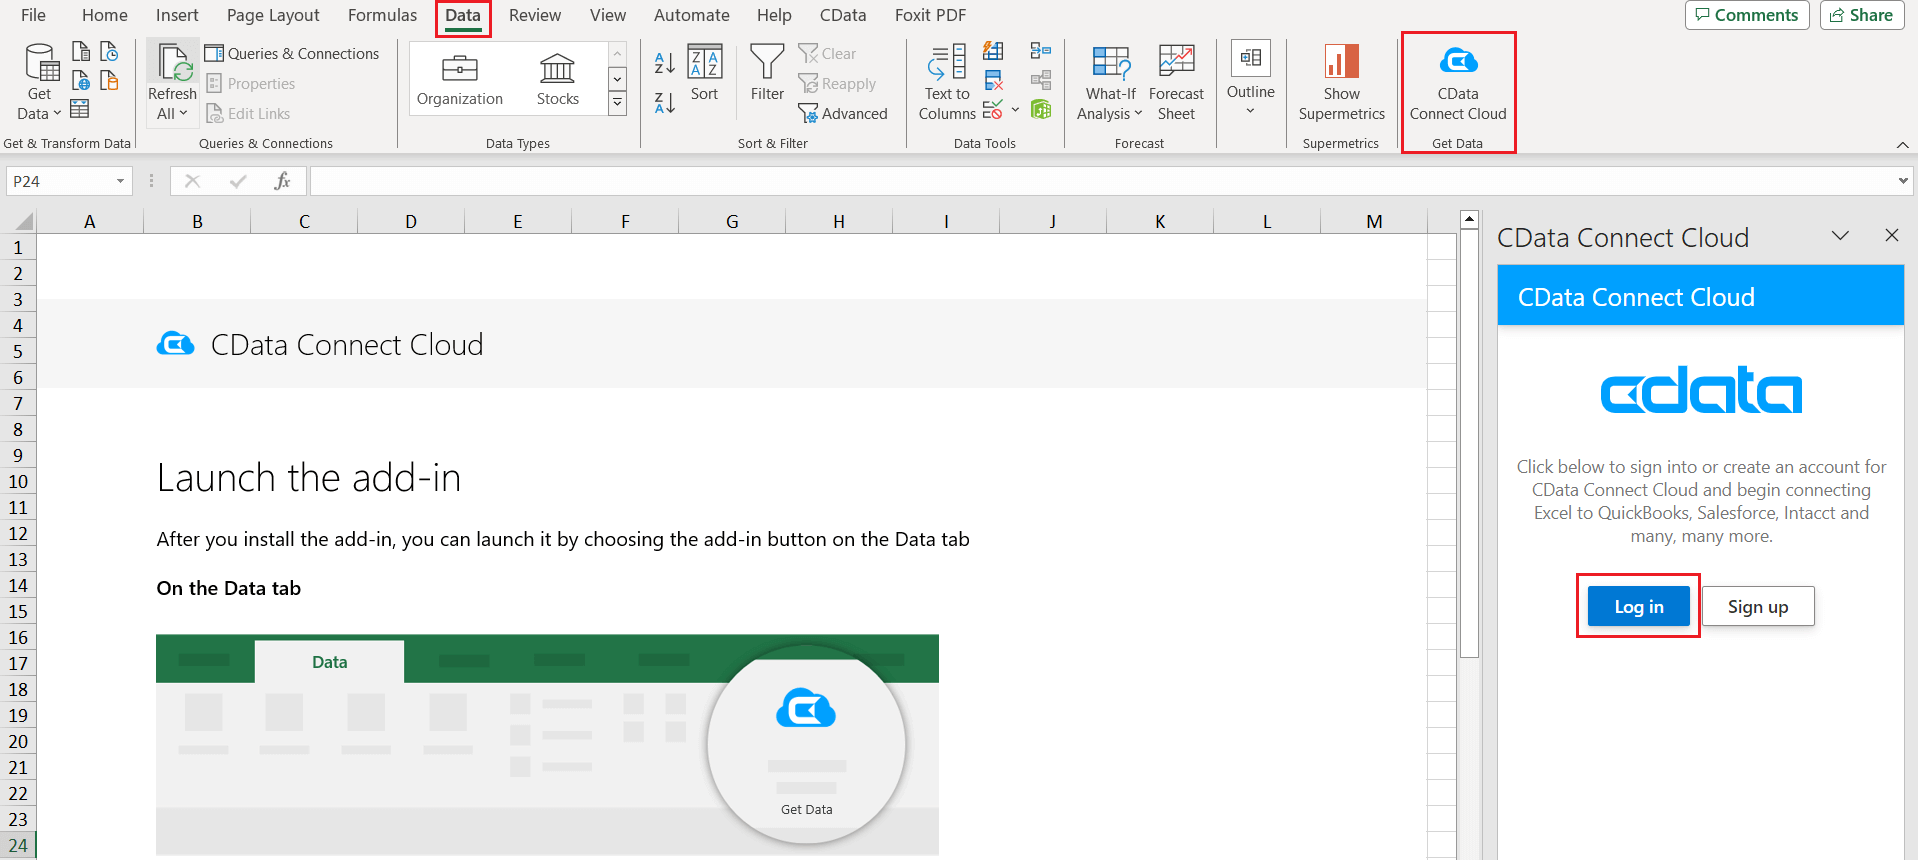
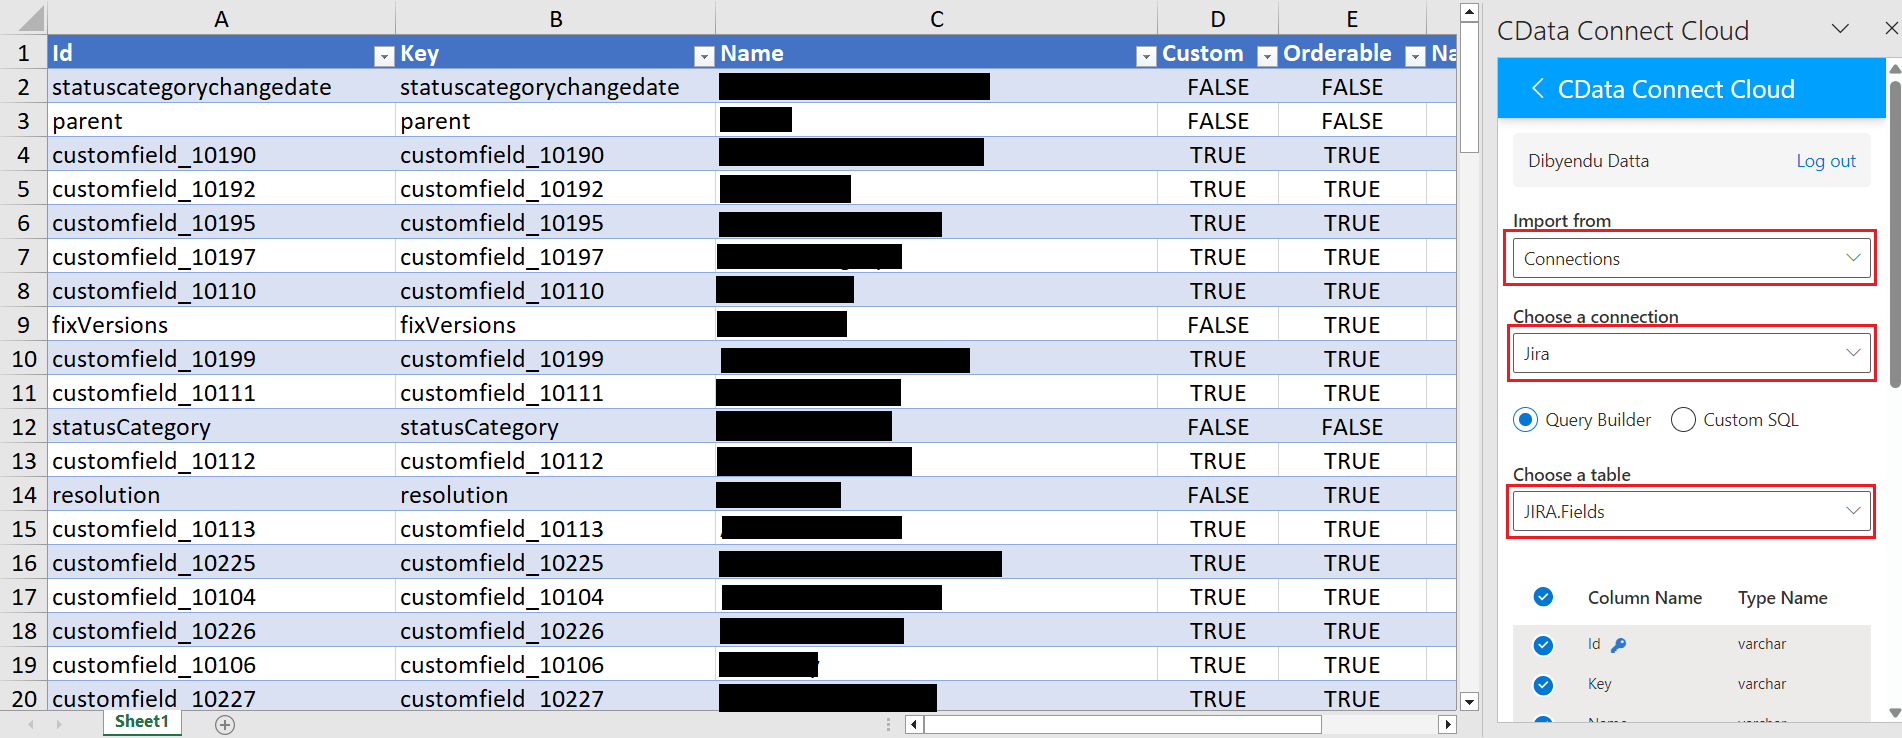
- Access Jira from Excel: Open Excel, log into CData Connect AI (from the Data ribbon), select your Jira connection, and select the available Jira entities you wish to import into Excel.
- Work with your data: CData Connect AI loads the selected data from Jira into your Excel sheet, making it ready for manipulation and analysis.
Export Jira to Excel manually as a CSV
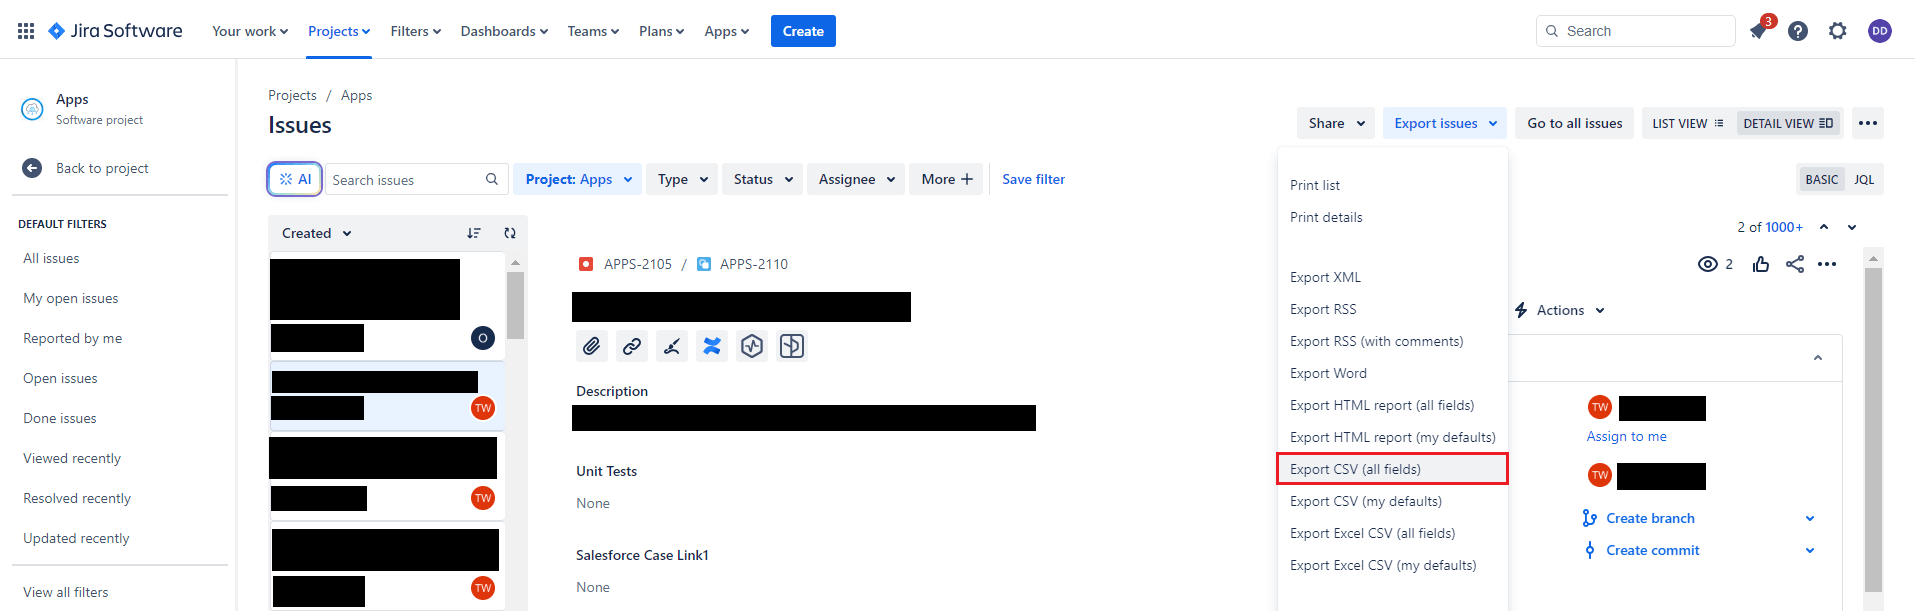
- Navigate to Jira issue search: In Jira, go to "Issues" and select "Search for issues."
- Filter and export: Use the search criteria to find the specific issues you want to export. Once you have the desired result set, click the "Export issues" button (upper right corner).
- Choose CSV format: Select "Export CSV (all fields)" from the dropdown.
- Run export: Jira will generate a CSV file and will download it to your machine.
- Open in Excel: Locate the downloaded CSV file and open it in Excel.
Export Jira to Excel using the Jira Cloud for Excel Add-in
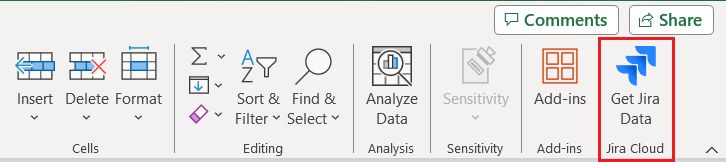
- Install the Add-in: Get the JIRA Cloud for Excel add-in from Microsoft AppSource and click on “Open in Excel.”
- Connect to Jira: Open the Jira Cloud add-in pane and follow the prompts to connect to your Jira instance.
- Select data: Choose the Jira project and issue types you wish to include in your Excel sheet.
- Import into Excel: Click the import button and the add-in will populate your Excel sheet with the selected Jira data.
Export Jira to Excel via API with Excel Power Query
- Obtain a Jira API token: In your Jira settings, under “Manage Account,” generate an API token from “Create and manage API tokens.”
- Excel Power Query: In Excel, go to the "Data" tab and select "Get Data" -> "From Other Sources" -> "From Web."
- Configure URL and Auth: Create a URL in the format: [Jira Base URL] + [REST API] + “?” + [JQL Query]. Paste your Jira REST API endpoint in the given format (adjust for your desired data). For example:
https://cdatajira.atlassian.net/rest/api/latest/search?jql=projectxcreated%20DESC
- Enter this URL in the “From Web” pop-up.
- Set authentication to "Basic" and enter your Jira username and API token.
- Transform data: Power Query will load the JSON response. Use its tools to select necessary fields and shape it as a table.
- Load to sheet: Click "Close & Load" to import the data into an Excel sheet.


Export Jira to Excel by configuring the Jira properties file:
- Locate
jira-config.properties: Find this file in your Jira installation directory.
- Add parameter: Open the file in a text editor and add the line:
jira.search.views.default.max = unlimited (or a desired limit).
- Restart Jira: Restart the Jira service for the change to take effect.
- Export manually: Now, when performing a manual CSV export, the limit on exported issues is significantly increased.
Export Jira to Excel via REST API (requires technical proficiency):
- Identify API endpoints: Consult Jira's REST API documentation for the endpoints relevant to your export needs.
- Choose a tool: Select a tool or programming language for making API calls (Postman, cURL, Python with Requests library, etc.).
- Authentication: Include your Jira credentials or API token.
- Make API calls: Construct API requests according to the documentation and store the JSON responses.
- Process JSON: Parse the JSON data and convert it into a suitable format for Excel (like CSV).
- Import to Excel: Save as a CSV and open in Excel.
How do I export from Jira to other tools?
Jira's built-in export capabilities are useful, but sometimes you need more flexibility in formatting or want to integrate issue data directly into other tools. This section explores proven methods to export Jira issues into formats like Word, XML, other project management tools, and even custom destinations using the API – ensuring you have the right method for your specific needs.
Export Jira issues manually as Word or XML
- Run Jira search: Search for issues using Jira's filtering options to define the dataset you want to export.
- Export options: Click "Export" in the upper right and you'll see options including:
- Word: Generates a Word document for reporting.
- XML: Exports data in XML format for potential import into other systems.
Export Jira issues and other Jira content via an Atlassian marketplace app
- Xblend Xporter: Flexible output to Word, Excel, PDF, and more.
- Deiser exporter: Advanced control over formatting and included data.
- BrizoIT document generation & issue export: Create styled documents.
- Midori better PDF exporter for Jira: Enhanced PDF exporting.
- Appfire big template: Powerful customization for various export formats.
- Kanban analytics advanced export: For Kanban-specific project data.
Export Jira issues for migration or backup as XML from Jira Cloud:
- Go to administration: In Jira, navigate to "System" -> "Import and Export" -> "Backup Manager.”
- Choose scope: Select the projects or the entire instance.
- Run export: Jira generates an XML file that you can use to migrate your data or as a backup.
Export Jira issues in several different formats with the Java API:
- Set up environment: Create a development environment with the Atlassian SDK installed.
- Reference Jira API: Consult the Jira Java API documentation for exporting functions.
- Write code: Create a script or program that:
- Authenticates to Jira.
- Fetches issue data with tailored search queries.
- Formats the data into desired output (CSV, XML, JSON, etc.)
The CData difference
CData Connect AI revolutionizes the way you interact with your Jira project data in Excel. It provides real-time, two-way connectivity, enabling you to scrutinize issues, monitor progress, and create reports, all within the familiar environment of Excel. This opens a plethora of powerful applications. You can delve into Jira data using Excel’s formulas and pivot tables for a more profound understanding and can also construct custom reports and visualizations from your Jira project data.
Additionally, Connect AI allows you to merge Jira data with other data sources in Excel for a comprehensive analysis. Sharing Excel workbooks containing synchronized Jira project information becomes effortless, promoting collaboration. If you’re ready to harness the potential of your Jira data in Excel, sign up for a 30-day free trial today and discover how well it simplifies your use case.
As always, our support team is ready to answer any questions you have. Have you joined the CData Community? Ask questions, get answers, and share your knowledge in CData connectivity tools. Join us!


