
Power BI and Excel are powerful tools from Microsoft that play significant roles in data analysis, each offering unique yet synergistic features. Power BI, a robust business intelligence tool, allows users to craft interactive visualizations and dashboards. Conversely, Excel, a universally recognized spreadsheet application, offers a user-friendly platform for data organization and manipulation. This article delves into the smooth integration of Power BI and Excel, with a particular emphasis on linking Power BI to SharePoint Excel files.
By elucidating each step of the integration process, this guide aims to empower users to harness the combined capabilities of Power BI and Excel for enhanced data visualization and analysis, thereby facilitating informed decision-making and driving business intelligence efforts efficiently.
How to connect Power BI to SharePoint Excel file: A step-by-step guide
Both Power BI and Excel are pivotal in the roles they perform. While Excel is well-suited for personal or small-scale data analysis tasks, Power BI excels in handling large datasets, providing advanced data modeling, and creating interactive visualizations. It is designed for business intelligence and data analysis at scale. Connecting Power BI to a SharePoint Excel file offers several benefits:
- Easy Automatic Refreshing: Once the connection is established, Power BI can automatically refresh the data from the SharePoint Excel file. This feature is particularly useful when the Excel file is updated regularly, ensuring that your Power BI reports and dashboards always display the most recent data.
- Easy Connection Setup: The process of connecting Power BI to a SharePoint Excel file is straightforward and can be accomplished in a few steps. This simplicity makes it accessible even to those who are not tech-savvy.
- Multiple-User Access to Datasets: SharePoint allows multiple users to access and update the Excel file. When this file is connected to Power BI, any changes made to the data by any user will be reflected in the Power BI reports and dashboards. This feature facilitates collaborative data analysis and decision-making.
5 easy methods for Power BI to get data from SharePoint Excel files
In this section, we’ll explore five simple methods to connect Power BI to SharePoint Excel files, enhancing data visualization and business intelligence capabilities.
1. Connect SharePoint Excel data in Power BI using CData Connect AI
CData Connect AI features a vast library of pre-built connectors, making it simple to integrate SharePoint Excel data with business intelligence tools like Power BI. To see the process in detail, read our Knowledge Base article. In short, here’s how:
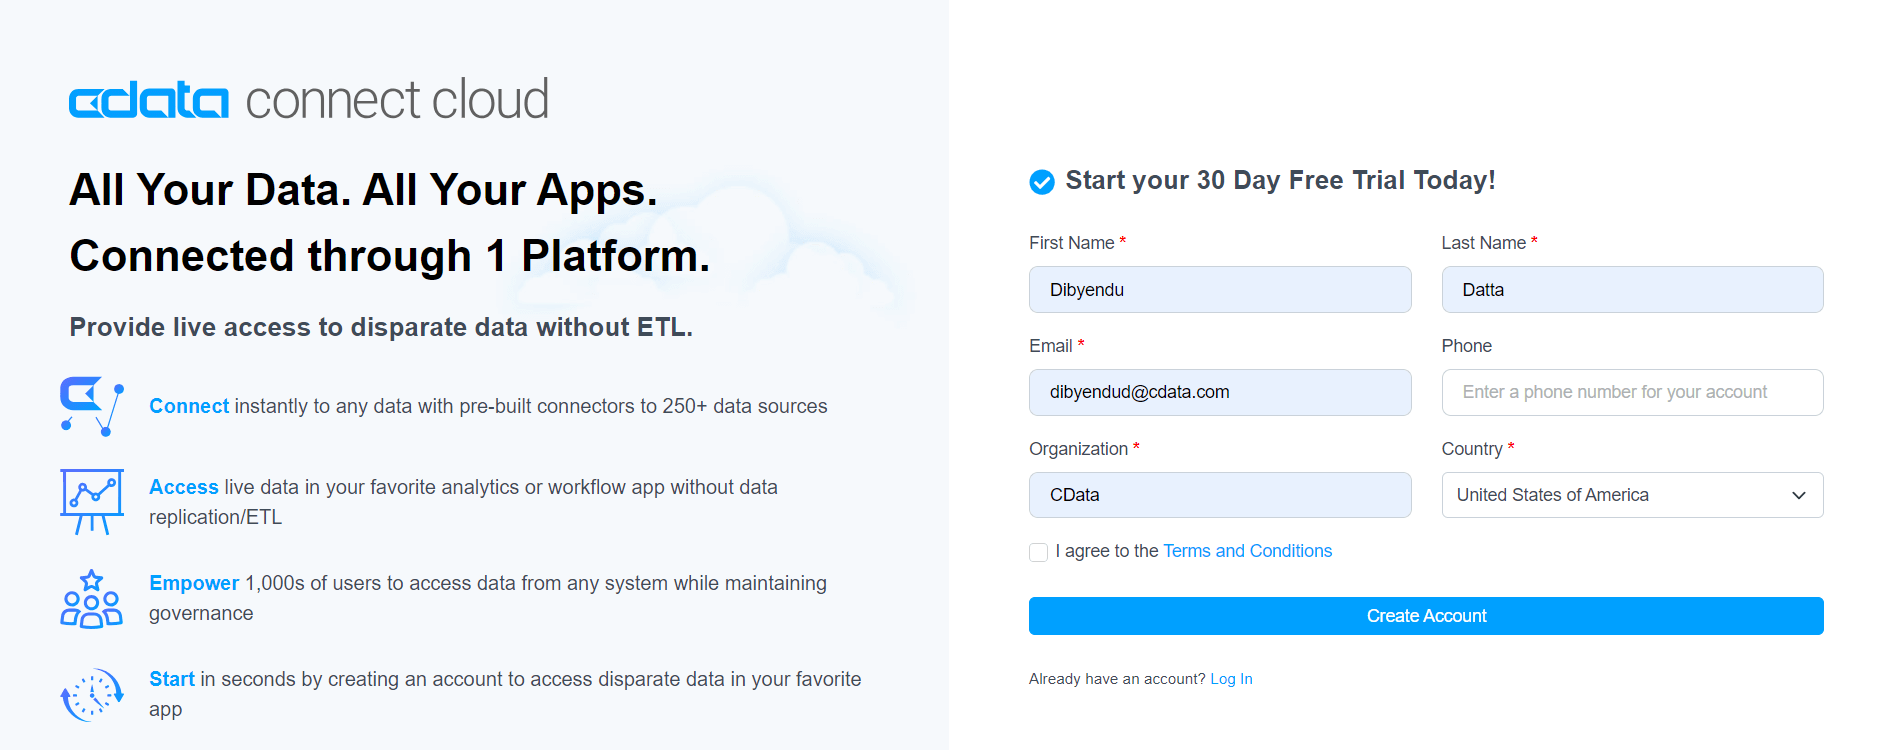
- Create a CData Connect AI account: Visit the CData Connect AI website and create a CData Connect AI account.
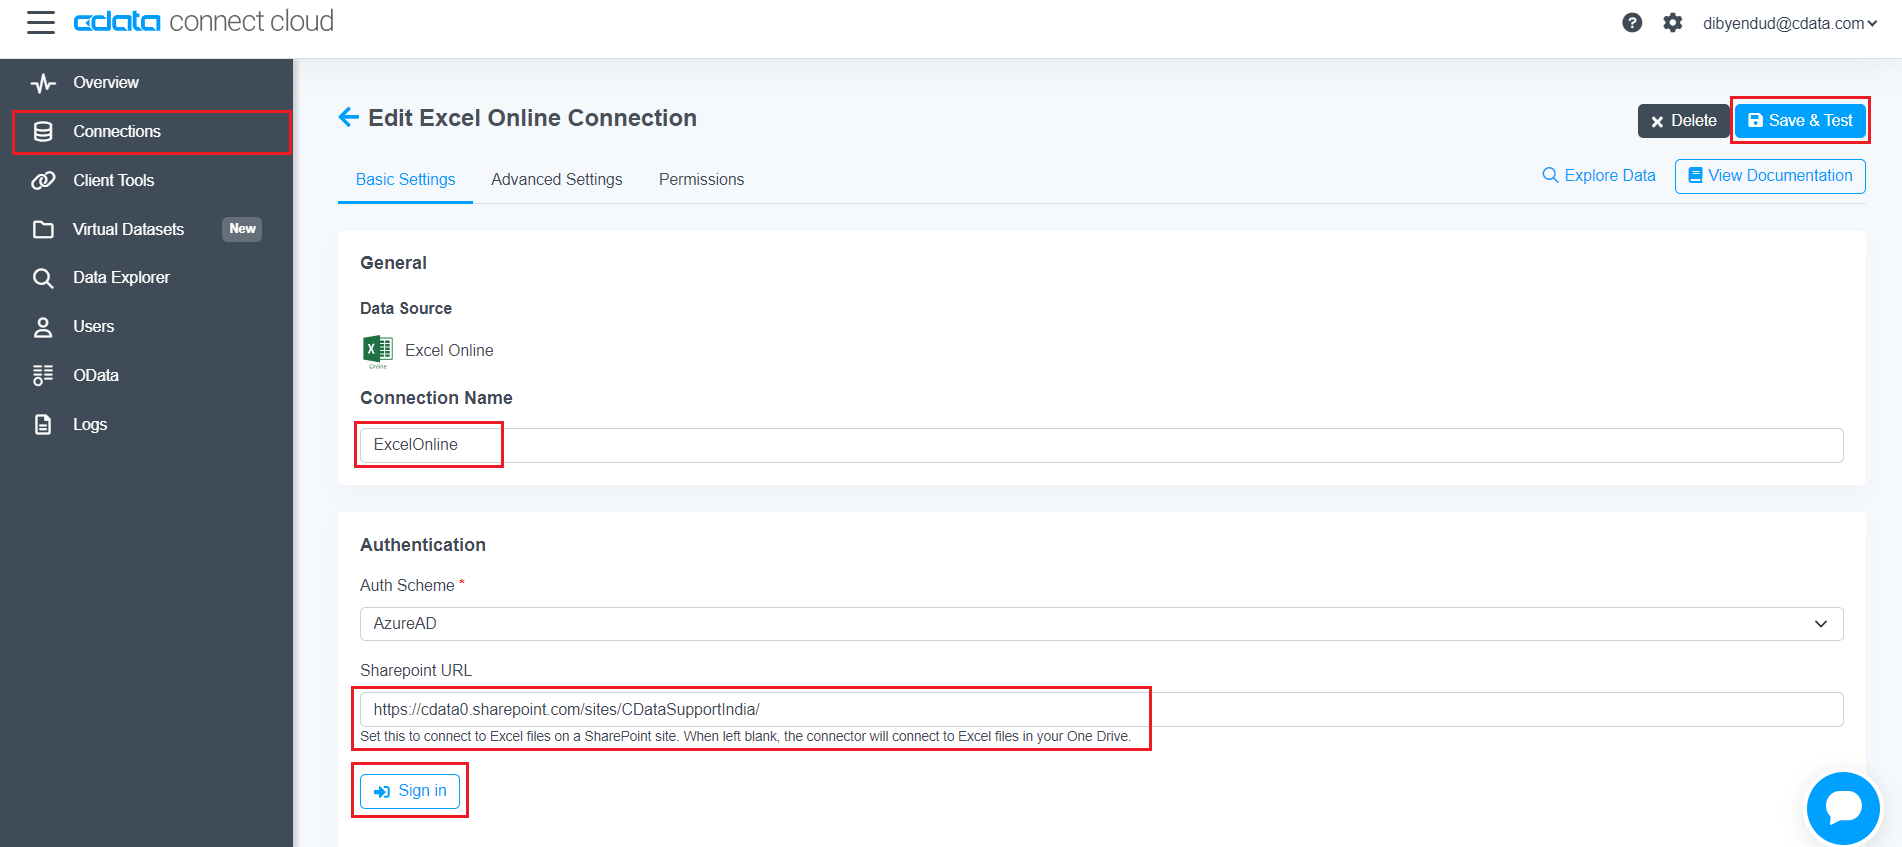
- Configure Excel Online for Power BI: Add an Excel Online connection from the Connections page and provide your Excel Online account details.
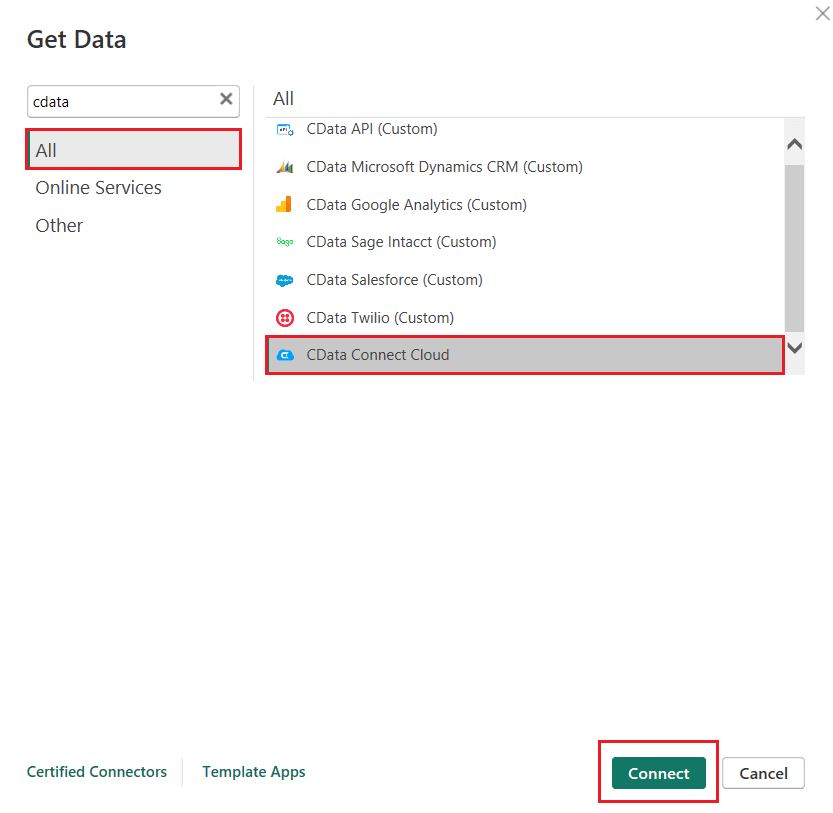
- Connect to CData Connect AI in Power BI: Search and select CData Connect AI in Power BI and click on “Connect”.
- Access Excel files in SharePoint from Power BI: Select tables needed for analysis from the “Navigator” dialog box.
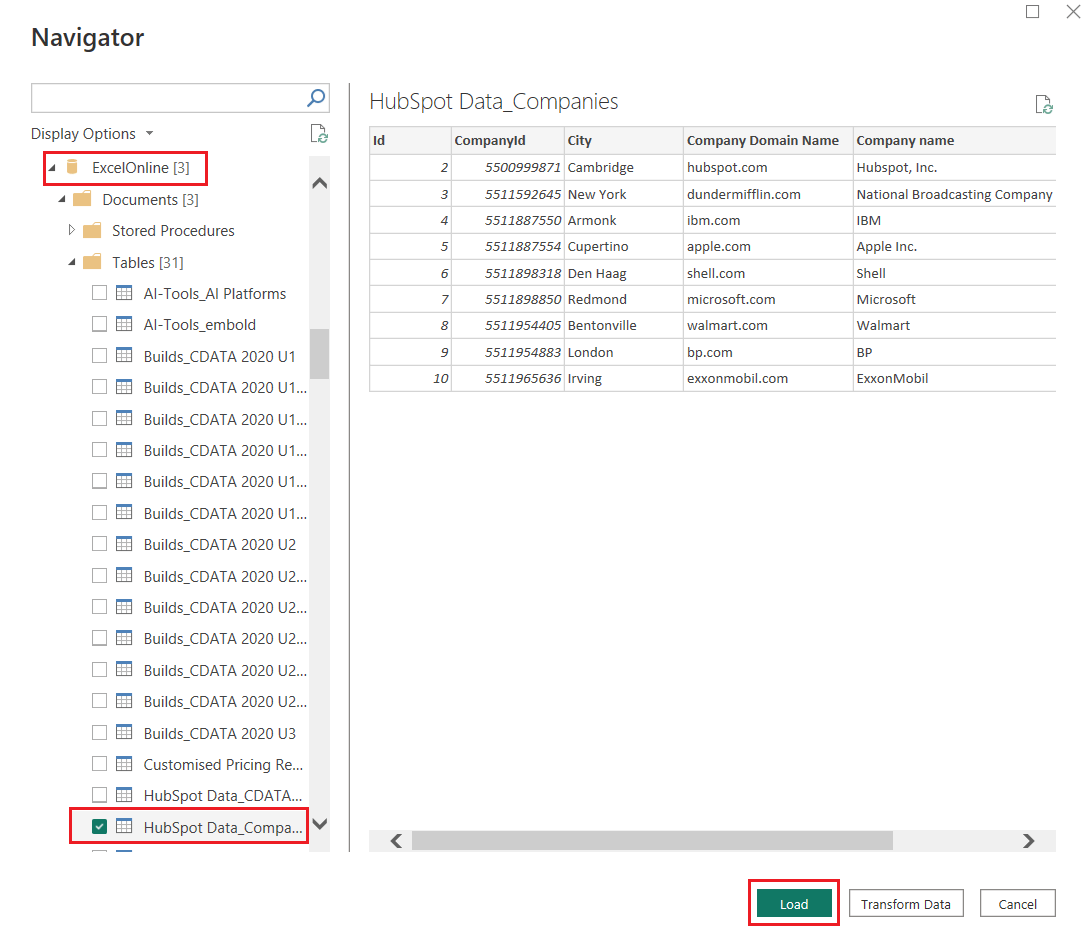
- Work with your data: CData Connect AI loads the selected Excel data from SharePoint into Power BI, making it ready for manipulation and analysis.
2. Copying the Excel file path from Excel on the desktop
- Open the Excel file stored in SharePoint Online in the Excel Desktop App.
- Click on File > Info > Copy path.
- Open Power BI Desktop.
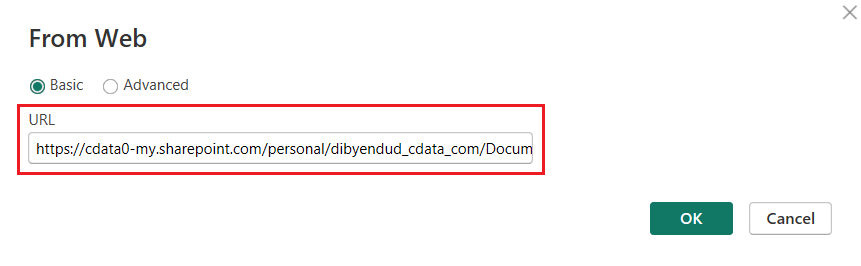
- Click Get data > Web > Paste the path copied from Excel in the URL text box.
- Delete the “?web=1” from the end of the copied path and click OK.
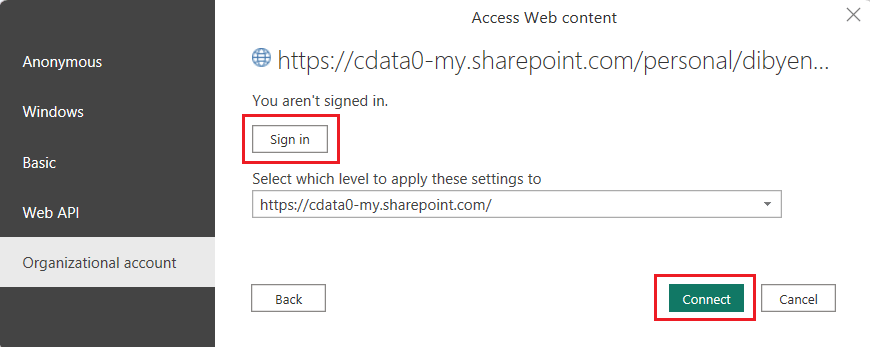
- From the Access Web Content page, click Organizational account.
- Click Sign in and pass your credentials.
- Click Connect.
3. Copying the Excel file path from SharePoint
- Navigate to the SharePoint site containing the file.
- Right-click on the file and select Details.
- Copy the URL under Path.
- Follow the steps from step 6 onwards in the second method (copying the Excel file path from Excel on the desktop).
4. Creating a data source as a SharePoint folder
- Create a new data source as a SharePoint folder.
- Put the root address of SharePoint, credentials and select the desired file from the list that is presented.
- Create a “Blank Query”, and with it selected, open the Advanced Editor and copy and paste the code below.
- Replace
SITE with the base URL for your SharePoint site.
- Replace
ROOT_DIRECTORY with the home directory for your SharePoint site.
- Replace
EXCEL_WORKBOOK with the name of your Excel file.
- Replace
PATH_TO_FILE with the path to your Excel file.
The following code quickly informs Power BI where the data file is directly:
let
   Source = SharePoint.Files ("https://SITE.sharepoint.com/sites/ROOT_DIRECTORY/", [ApiVersion = 15]),
   #\"ExcelFile\" = #\"Source\" {[Name=\"EXCEL_WORKBOOK.xlsx\",#\"Folder
   Path\"=\"https://SITE.sharepoint.com/sites/ROOT_DIRECTORY/Shared
   documents/PATH_TO_FILE/\"]} [Content],
   #\"Imported Excel Workbook\" = Excel.Workbook (#\"ExcelFile\"),
   #\"Sheet\" = Table.SelectRows (#\"Imported Excel Workbook\", each [Kind] = \"Sheet\")
   {0} [Data], #\"Promoted Headers\" = Table.PromoteHeaders (#\"Sheet\", [PromoteAllScalars=true])
in
   #\"Promoted Headers\"

5. Getting data from multiple Excel files in a folder into Power BI
- Login to the SharePoint
- In Power BI, select Get Data and choose the SharePoint Folder
- Paste the URL of the SharePoint Library. This should be the root URL to the SharePoint site itself.
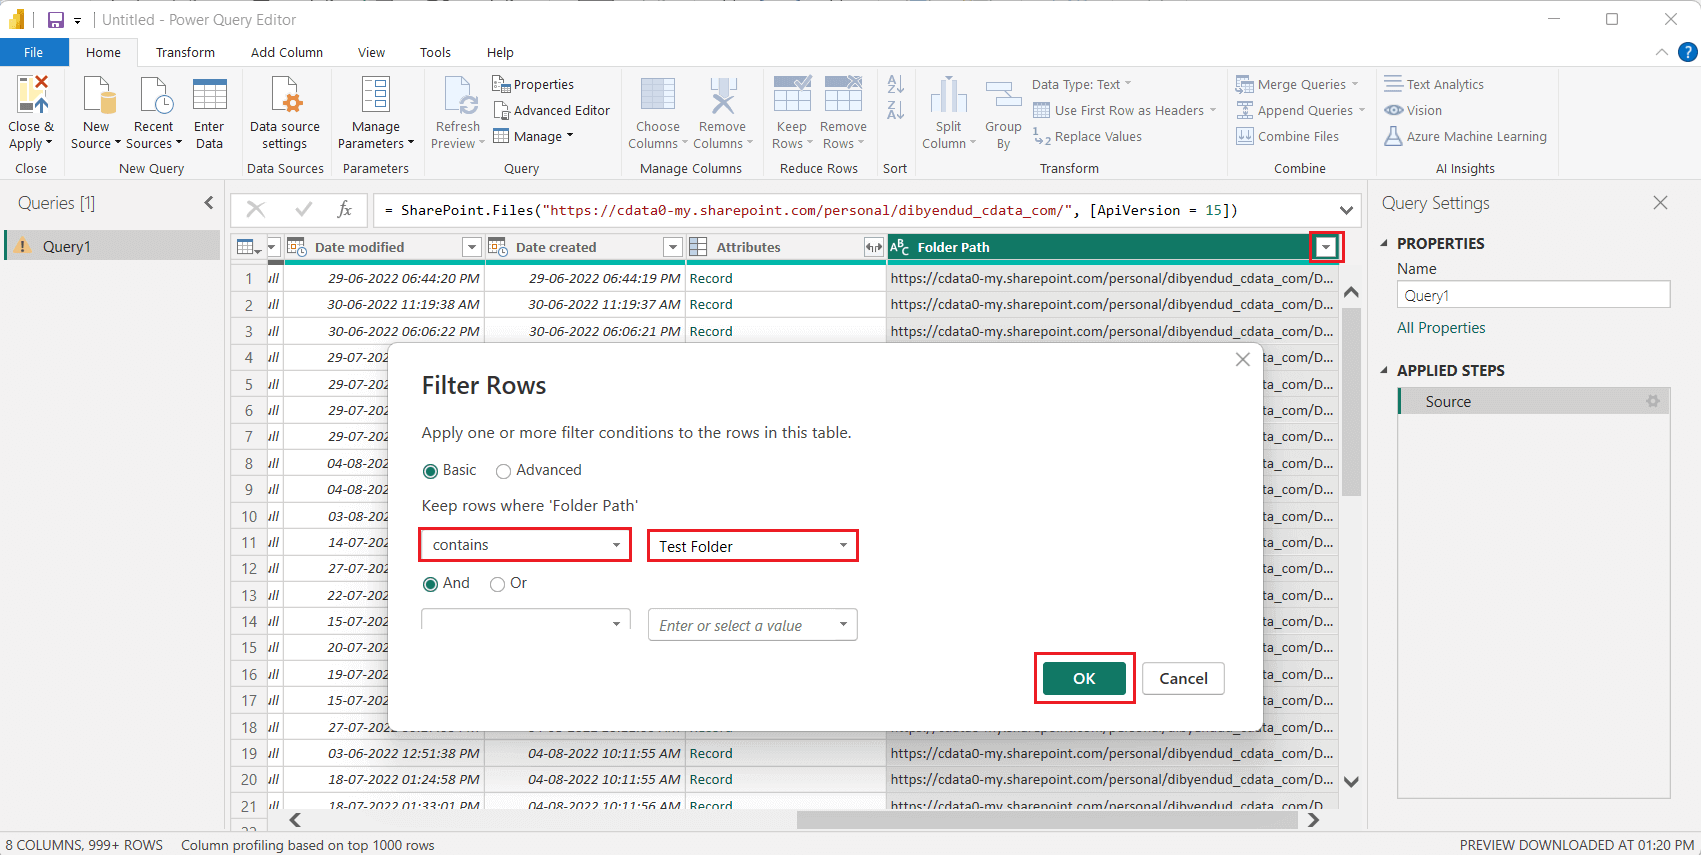
- Once connected, click on Transform Data and apply filter on “Folder Path” to find the required folder with Excel files.
- Click on “Combine Files” button under Content column to get the Combine Files
- Finally, clean and transform the data to make it more manageable to use with Power BI Desktop.
The CData difference
In the context of data management, CData Connect AI is a pivotal tool, offering governed access to a multitude of cloud apps, databases, and warehouses. It facilitates direct, live connectivity to Excel files in SharePoint, Salesforce, Workday, and more, eliminating the need for additional software installations. This seamless integration empowers businesses to harness their data effectively, fostering informed decision-making and strategic planning.
The ease of access and comprehensive coverage offered by CData Connect AI truly revolutionizes the way businesses interact with their data ecosystems. To explore more, sign up for a 30-day free trial!
As always, our support team is ready to answer any questions you have. Have you joined the CData Community? Ask questions, get answers, and share your knowledge in CData connectivity tools. Join us!


