Do you have on-premises or cloud-based data that you would love to access from Power BI (or any of the new Microsoft workflow tools like PowerApps, Azure Logic Apps, and Flow)? CData Drivers are just the tools for you. Paired with the Microsoft Power BI Gateway, the CData JDBC and ODBC Drivers and CData Sync let you access your data exactly where you want.
This article will show you how to connect to your data through the Microsoft Power BI Gateway using two distinct methods:
- With CData Sync, replicate data from any source or application to the database, data warehouse, or data lakehouse of your choice for analytics efforts in Power BI.
- Using CData Power BI Connectors, get instant access to live data from hundreds of data sources directly within your Power BI reporting platform.
What is Power BI?
Microsoft Power BI is a business intelligence (BI) tool that enables users to visualize and analyze data from various sources across their tech stack. It allows users to create interactive reports and dashboards that provide insights into business and sales health and other key performance indicators.
With CData Power BI connectivity solutions, Power BI users can seamlessly integrate your data from hundreds of on-prem and cloud applications, systems, and tools into Power BI for data-driven decision-making across your business.
Connecting to your QuickBooks data
Option 1: Use CData Sync
CData Sync for QuickBooks allows you to replicate your QuickBooks data to SQL Server (or any other database). To do so, you will need to download Sync, and get access to a SQL Server database
Replicating your QuickBooks data takes three simple steps:
- Configure your connection to QuickBooks (Online Help for a local QuickBooks instance and a networked or remote instance).
- Configure your connection to the SQL Server database (Online Help).
- Select tables, set a replication interval, and click Run.
For detailed instructions, check out our Knowledge Base article.
With your data replicated to a SQL Server database, you can make use of the DirectQuery for SQL Server feature of the Power BI Gateway and you can configure CData Sync to ensure that the data in the SQL Server database is, at most, 15 minutes old.
Get a free trial of CData Sync today.
Option 2: Use the CData Power BI Connector
The CData Power BI Connector for QuickBooks supports both import and DirectQuery (live) access to QuickBooks data from Power BI.
Connecting directly to QuickBooks data takes two simple steps:
- Configure your Data Source Name (DSN) connection to QuickBooks (Online Help for a local QuickBooks instance and a networked or remote instance).
- Connect Power BI to your DSN and build visualizations on top of your QuickBooks data.
For detailed instructions, check out our Knowledge Base article.
With your connection configured, you can build real-time visualizations of your QuickBooks data in Power BI. Note, if you're working with a cloud data source, you can use CData Connect AI and bypass the data gateway altogether.
Read more to get started with our Power BI Connectors and download a free trial.
Connect to QuickBooks data in Power BI using the on-premises data gateway
This section gives an abridged walk-through for connecting to your data through an Enterprise Power BI Gateway. For more thorough instructions, please refer to the documentation found on the Power BI site:
Our abridged instructions follow.
Step 1: Install the Power BI on-premises data gateway
The first step will be installing the Power BI data gateway onto your machine. You will need to install the gateway on the machine that contains the SQL Server database or on which the MySQL proxy is running. It would be ideal to install the standard data gateway, but you will be able to get some base functionality if you are using a personal gateway.
Standard vs. Personal gateways
When you install a gateway, you can choose between standard and personal. Personal gateways are used by a single user to publish their own reports with imported data or datasets with scheduled refreshes. The gateway is managed by the user and supports connecting to datasets from Power BI only. Standard gateways can be used to set up data access for an entire organization and also support live connections and DirectQuery. The gateway is managed by a BI admin or developer and supports connecting to datasets from the entire Microsoft Power Platform.
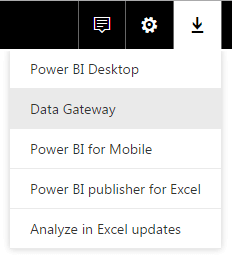
For more information, and to download the gateway, visit the Power BI site or choose ’Download’, ‘Data Gateway’ from Power BI Online.
Step 2: Add a data source in Power BI online
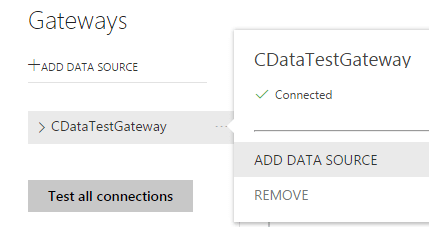
Once you have installed the Gateway, you can add a data source to the Gateway by signing into Power BI Online and selecting the Manage Gateways option from the Settings menu (the gear icon towards the top-right of the page).
With a Gateway selected, click on +ADD DATA SOURCE and fill in the appropriate fields. You can use the in-network name or IP address of the Server machine hosting the data.
- When using the CData Power BI connector, you will need to use the anonymous authentication method.
- If you have replicated your data to a SQL Server database, then you will need to use the appropriate credentials for accessing the SQL Server database (either Windows credentials or database credentials).
Step 3: Connect to the Data Source from Power BI Desktop
Now that you have added data sources via the on-premises data gateway, you will need to publish the data sets that you wish to access from Power BI. To do so, you will need to install Power BI Desktop and access the data in the SQL Server database or through the Power BI connector. Click Get Data, select the appropriate data source (SQL Server Database or the CData data source), and enter the appropriate credentials, including the Server name, database, and user/password.


Microsoft offers the following instructions when it comes to connecting to the data source and creating the data set:
Note: Server and database name have to match between Power BI Desktop and the data source within the on-premises data gateway!
The link between your dataset and the data source within the gateway is based on your server name and database name. These have to match. For example, if you supply an IP Address for the server name, within Power BI Desktop, you will need to use the IP Address for the data source within the gateway configuration. If you use SERVER\INSTANCE, in Power BI Desktop, you will need to use the same within the data source configured for the gateway.
Step 4: Publish a dataset to Power BI from Power BI Desktop
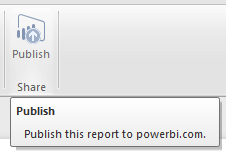
Once you have connected to the data source from Power BI desktop, you are ready to publish a new Dataset to Power BI Online. While connected to a data source, select the Tables you wish to publish as a dataset (they will be named in the format [database].[table_name]) and click Load. With the data loaded, click the Publish button. You will now be able to access the data from Power BI, through the on-premises data gateway.
If you have configured a DirectQuery connection, then any time the SQL Server database is updated, you will immediately have access to the updated data through the published Dataset. If you have configured an import connection, then you will need manually update the dataset (or configure the dataset to refresh) in order to see any local changes to the data.
Creating visualizations of your data in Power BI
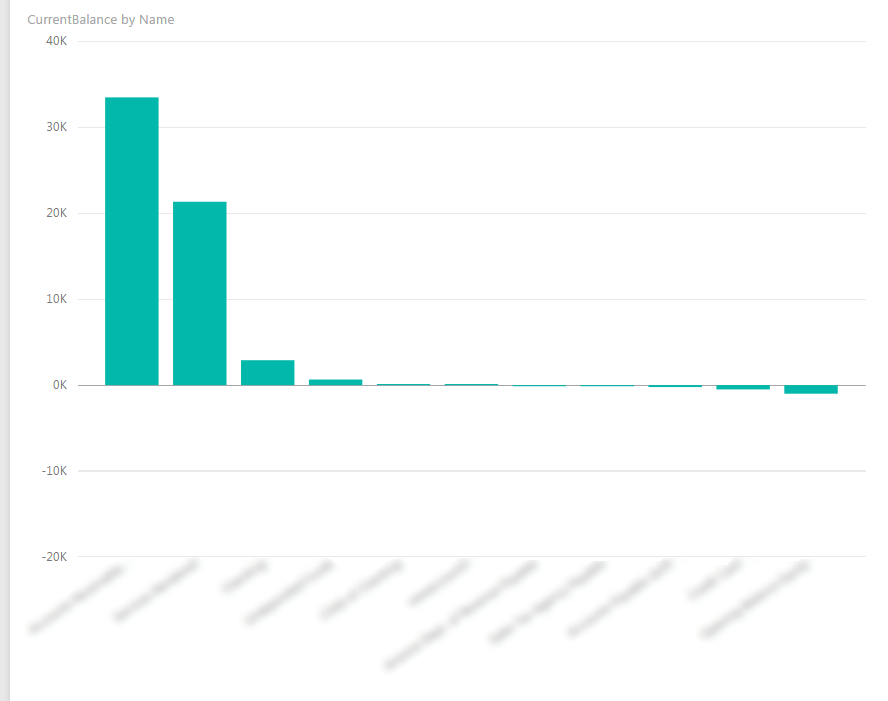
With the Dataset linked to Power BI, you are now able to create visualizations, reports, and dashboards based on your data. The chart below shows the balances in a QuickBooks company listed by name. This is a very simple example of the powerful visualization features available in Power BI.
Get more Information and a free trial
Watch a video (added October 2020) that shows how to use the CData Power BI Connector to create a simple visualization of QuickBooks Desktop data.
You can read more information, and see a complete list of the data sources we support, on the platform-specific pages on our website:
We offer free 30-day trials for all of our products, so find your data source, download a trial, and start working with your data in Power BI today!


