Discover how a bimodal integration strategy can address the major data management challenges facing your organization today.
Get the Report →


ODBC Driver Getting Started Guide
With built-in optimized data processing, the CData ODBC Driver offers unmatched performance for interacting with live data. When issuing complex SQL queries to your application, the driver pushes supported SQL operations, like filters and aggregations, directly to the app and utilizes the embedded SQL engine to process unsupported operations client-side (e.g. often in SQL functions and JOIN operations). In addition, the driver's built-in dynamic metadata querying allows you to work with and analyze application data using native data types.
This article explains how to install the CData ODBC Driver and configure a connection to a data source.
It is important to note that although this article references the Salesforce ODBC Driver, the same principles herein can be applied to any of the 250+ data sources that we support.
Download and Install the ODBC Driver
First, download and install the ODBC driver from the CData website: https://www.cdata.com/drivers/salesforce/download/odbc/
Fill in the appropriate contact information.
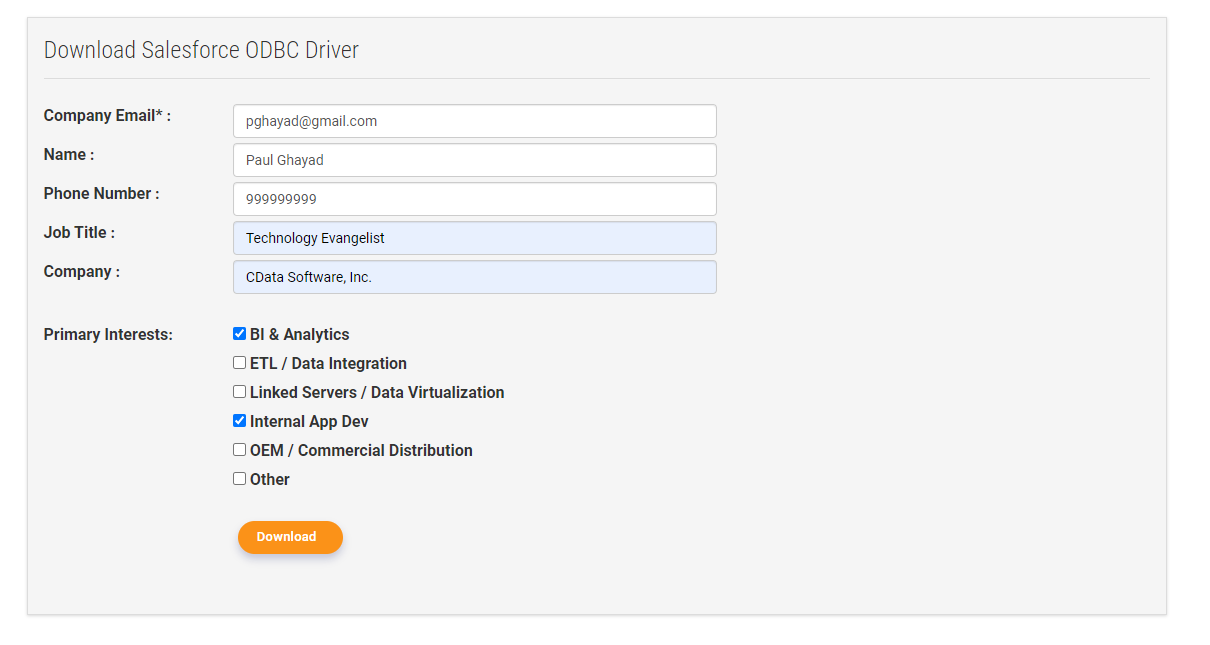
Note: If you are downloading a licensed installer, use your company email address and product key.
Configure the Connection
On Windows, search for "ODBC Data Sources" and open the ODBC Data Source Administrator. Then, click Add... in the top right corner.
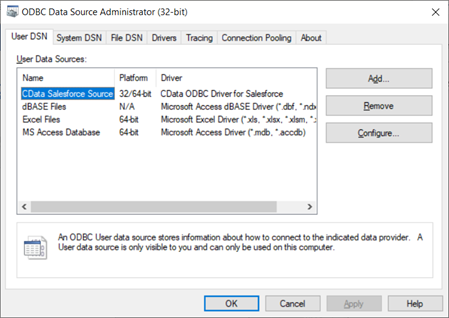
Select the CData ODBC Driver and then click Finish.

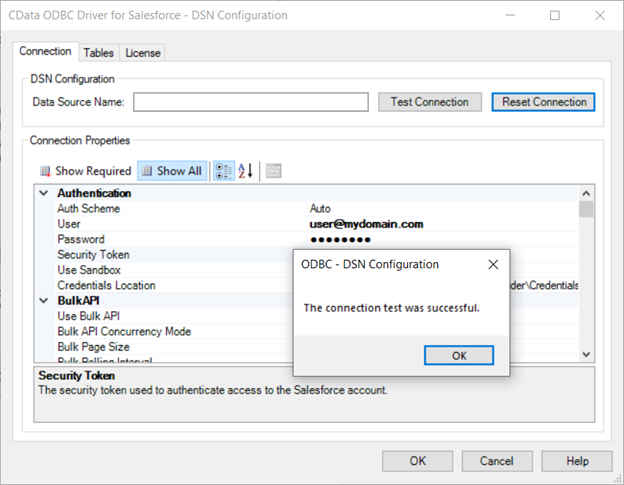
Next, fill in the connection properties and then click Test Connection.
Explore Your Data
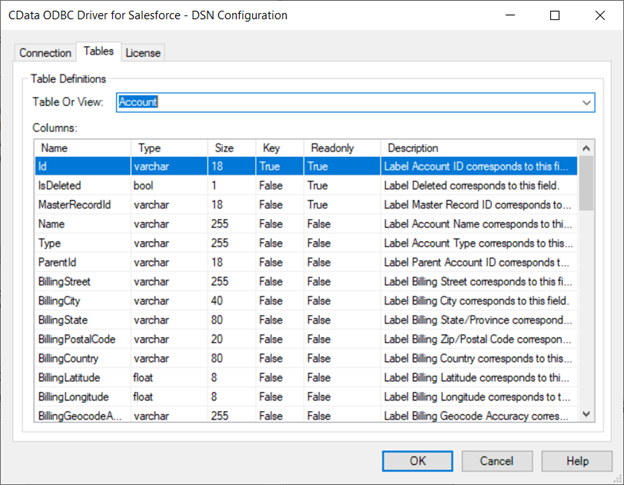
Now, at the top of the window, click on the Tables tab to explore the schema for your data source.
ODBC Drivers for 250+ Data Sources
For more information on CData's suite of ODBC drivers, visit our ODBC Driver page.
Download a free 30-day trial or full version of the CData ODBC Driver and get simplified access to your data today.
Data Connectors
ETL/ ELT Solutions
Cloud & API Connectivity
OEM & Custom Drivers