Discover how a bimodal integration strategy can address the major data management challenges facing your organization today.
Get the Report →


Update Multiple Invoices using the CData Excel Add-In for QuickBooks
The CData Excel Add-In for QuickBooks makes it easy to modify your QuickBooks data right in Excel. This article explains how to mark multiple Invoices for printing and e-mailing.
The CData Excel Add-In for QuickBooks simplifies bulk updates: Retrieve the fields you need, edit, then save. Updating records in this manner is very helpful when managing multiple transactions at once. This kind of mass update is not limited to just these fields; this technique can be used for most editable fields in QuickBooks.
Establish a Connection
Before getting started, you will need to establish a connection to QuickBooks. Click the From QuickBooks button on the CData tab to launch the Data Selection wizard. To enable updates for the connection, add a connection to QuickBooks with the "Update" option checked.
See the "Getting Started" chapter in the help documentation for a step-by-step guide to establish a connection to local and remote company files and QuickBooks Online companies.
Retrieve and Bulk Update Invoices
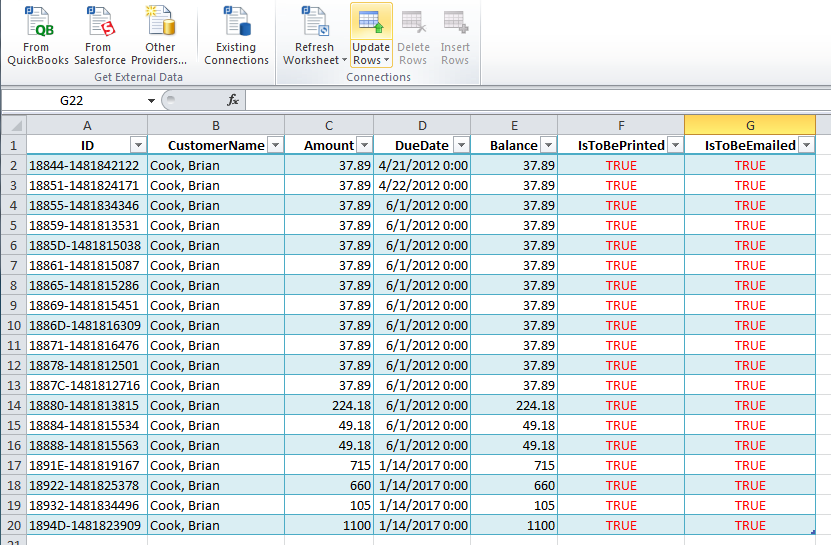
When you retrieve data, you link the spreadsheet to the live QuickBooks data. Follow the steps below to query QuickBooks for the Invoices you want to update
- Click From QuickBooks.
- In the Data Selection dialog, select the Invoices table from the menu. Use the following query to search for all the Invoices with the desired CustomerName. For example, 'Cook, Brian':
SELECT * FROM Invoices WHERE CustomerName = 'Cook, Brian'
![]()
- After you have retrieved the Invoices, you can now change the state of the IsToBePrinted column and IsToBeEmailed columns.
![]()
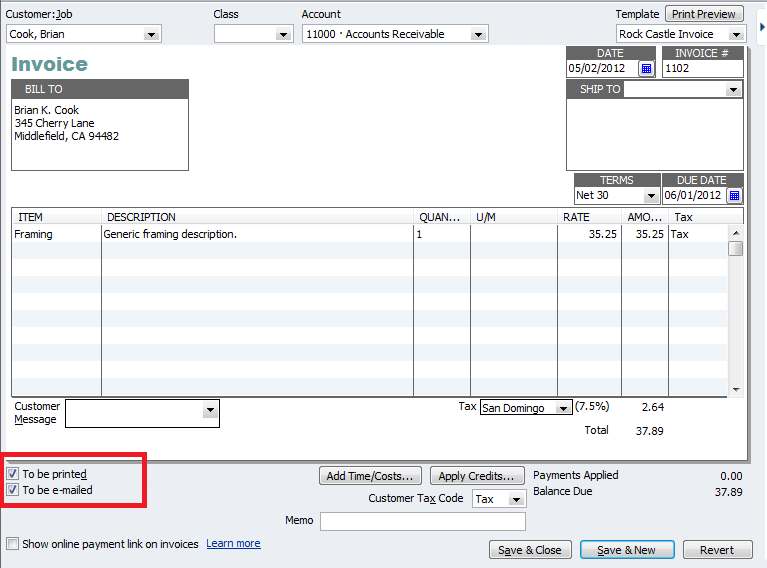
- After you have made the changes you want, highlight the updated rows, and click the "Update Rows" button in the CData tab.
- You can open the same Invoices in QuickBooks and see your changes.

Data Connectors
ETL/ ELT Solutions
Cloud & API Connectivity
OEM & Custom Drivers