Discover how a bimodal integration strategy can address the major data management challenges facing your organization today.
Get the Report →Connect to Adobe Commerce Data in RunMyProcess through Connect Cloud
Use CData Connect Cloud to create on OData API for Adobe Commerce Data and connect to Adobe Commerce data in Akorbi Digital RunMyProcess.
Akorbi Digital RunMyProcess makes it easy to create applications for complex business applications, such as budget application and contract management. CData Connect Cloud creates a live connection to Adobe Commerce and can be used to generate an OData API (natively supported in RunMyProcess) for Adobe Commerce. By pairing RunMyProcess with CData Connect Cloud, you get true cloud-to-cloud connectivity to all your SaaS and cloud-based Big Data and NoSQL sources - no need to migrate your data or write your own integrations. Simply connect to Connect Cloud from RunMyProcess as you would any other REST service and get instant, live access to your Adobe Commerce data.
In this article, we walk through connecting to Adobe Commerce from CData Connect Cloud and accessing Adobe Commerce data through an OData feed in RunMyProcess.
Connect to Adobe Commerce from RunMyProcess
To work with live Adobe Commerce data in RunMyProcess, we need to connect to Adobe Commerce from Connect Cloud, provide user access to the connection, and create OData endpoints for the Adobe Commerce data.
(Optional) Add a New Connect Cloud User
As needed, create Users to connect to Adobe Commerce through Connect Cloud.
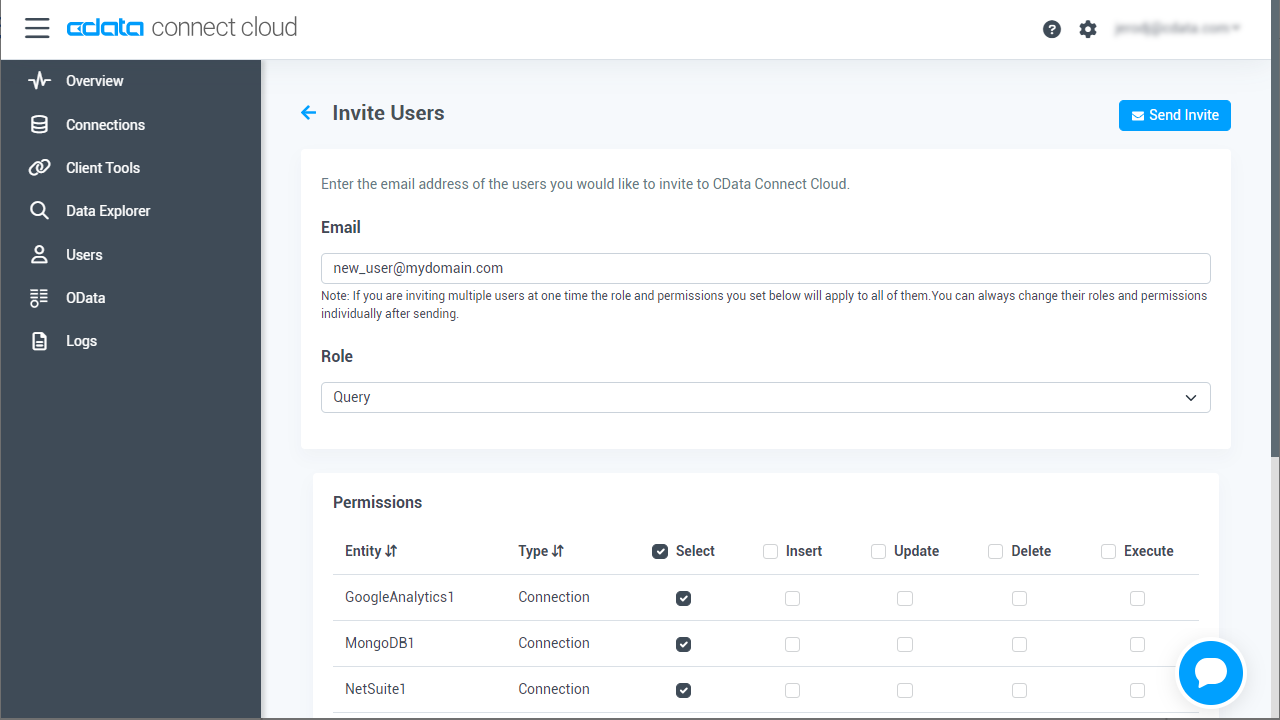
- Navigate to the Users page and click Invite Users
- Enter the new user's email address and click Send to invite the user
![Inviting a new user]()
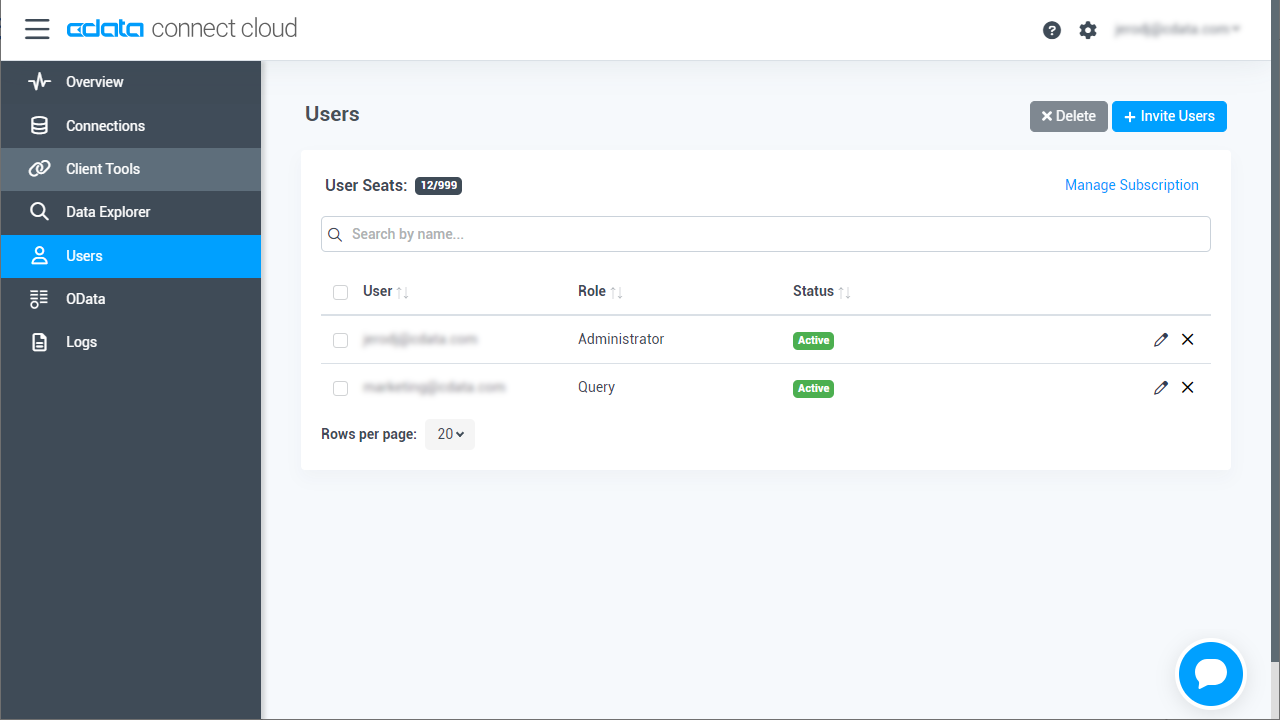
- You can review and edit users from the Users page
![Connect Cloud users]()
Add a Personal Access Token
If you are connecting from a service, application, platform, or framework that does not support OAuth authentication, you can create a Personal Access Token (PAT) to use for authentication. Best practices would dictate that you create a separate PAT for each service, to maintain granularity of access.
- Click on your username at the top right of the Connect Cloud app and click User Profile.
- On the User Profile page, scroll down to the Personal Access Tokens section and click Create PAT.
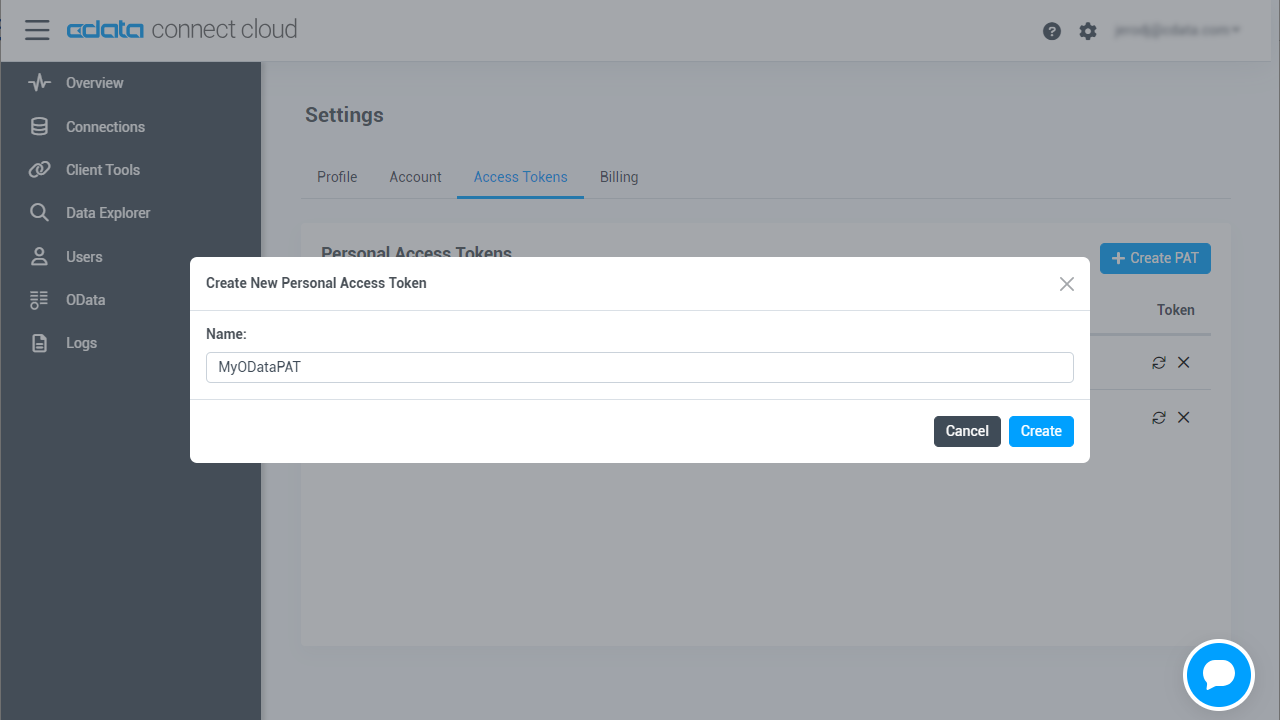
- Give your PAT a name and click Create.
![Creating a new PAT]()
- The personal access token is only visible at creation, so be sure to copy it and store it securely for future use.
Connect to Adobe Commerce from Connect Cloud
CData Connect Cloud uses a straightforward, point-and-click interface to connect to data sources.
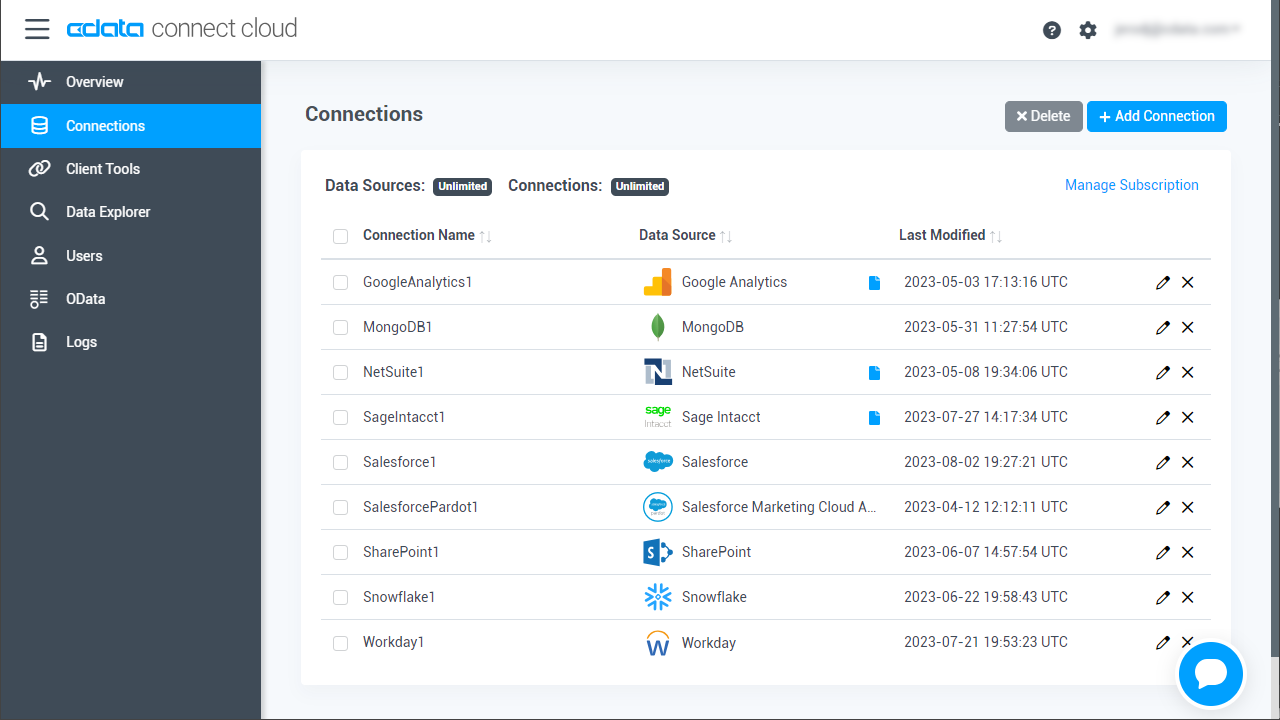
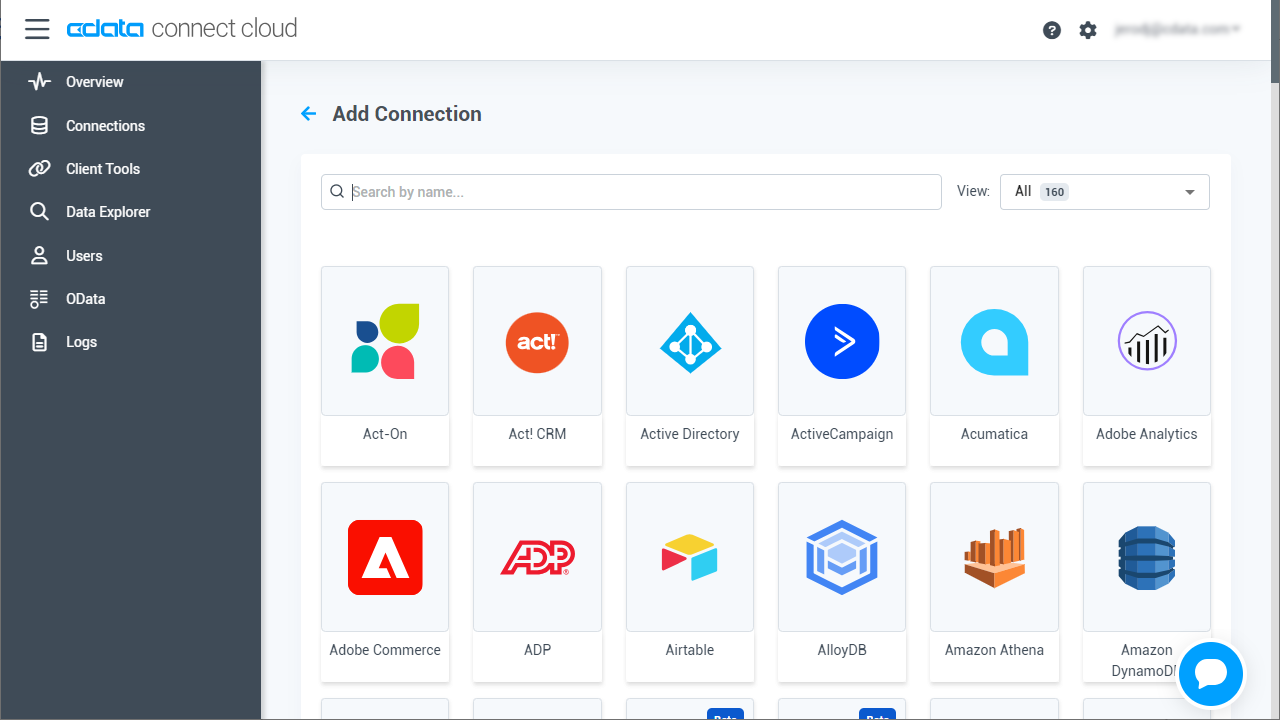
- Log into Connect Cloud, click Connections and click Add Connection
![Adding a Connection]()
- Select "Adobe Commerce" from the Add Connection panel
![Selecting a data source]()
-
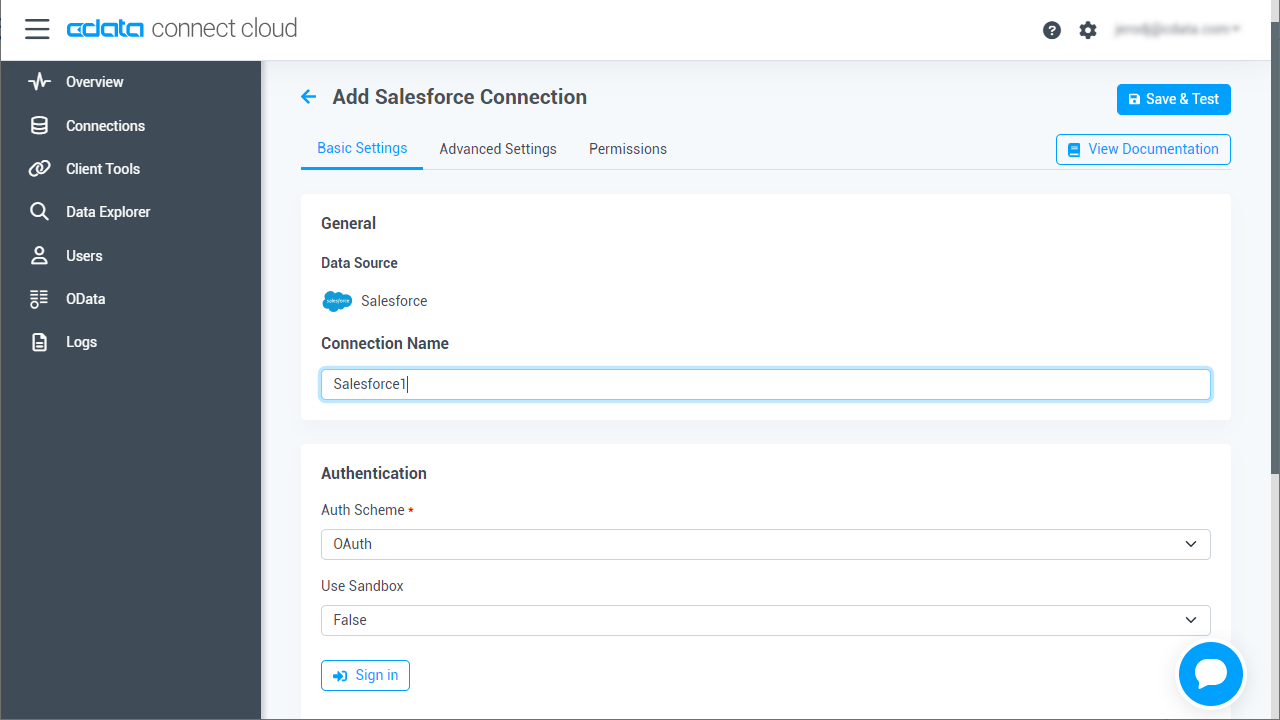
Enter the necessary authentication properties to connect to Adobe Commerce.
Adobe Commerce uses the OAuth 1 authentication standard. To connect to the Adobe Commerce REST API, you will need to obtain values for the OAuthClientId, OAuthClientSecret, and CallbackURL connection properties by registering an app with your Adobe Commerce system. See the "Getting Started" section in the help documentation for a guide to obtaining the OAuth values and connecting.
You will also need to provide the URL to your Adobe Commerce system. The URL depends on whether you are using the Adobe Commerce REST API as a customer or administrator.
Customer: To use Adobe Commerce as a customer, make sure you have created a customer account in the Adobe Commerce homepage. To do so, click Account -> Register. You can then set the URL connection property to the endpoint of your Adobe Commerce system.
Administrator: To access Adobe Commerce as an administrator, set CustomAdminPath instead. This value can be obtained in the Advanced settings in the Admin menu, which can be accessed by selecting System -> Configuration -> Advanced -> Admin -> Admin Base URL.
If the Use Custom Admin Path setting on this page is set to YES, the value is inside the Custom Admin Path text box; otherwise, set the CustomAdminPath connection property to the default value, which is "admin".
![Configuring a connection (Salesforce is shown)]()
- Click Create & Test
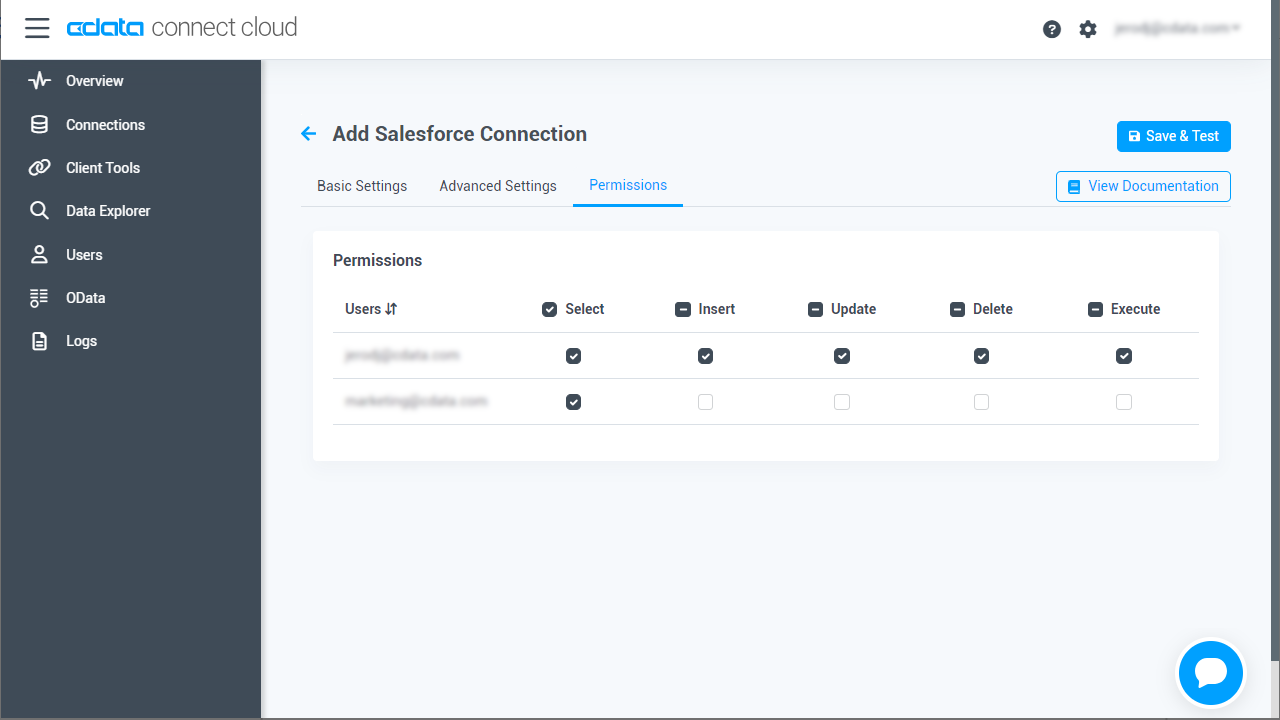
- Navigate to the Permissions tab in the Add Adobe Commerce Connection page and update the User-based permissions.
![Updating permissions]()
Add Adobe Commerce OData Endpoints in Connect Cloud
After connecting to Adobe Commerce, create OData Endpoints for the desired table(s).
- Navigate to the OData page and click Add to create new OData endpoints
- Select the Adobe Commerce connection (e.g. Adobe Commerce1) and click Next
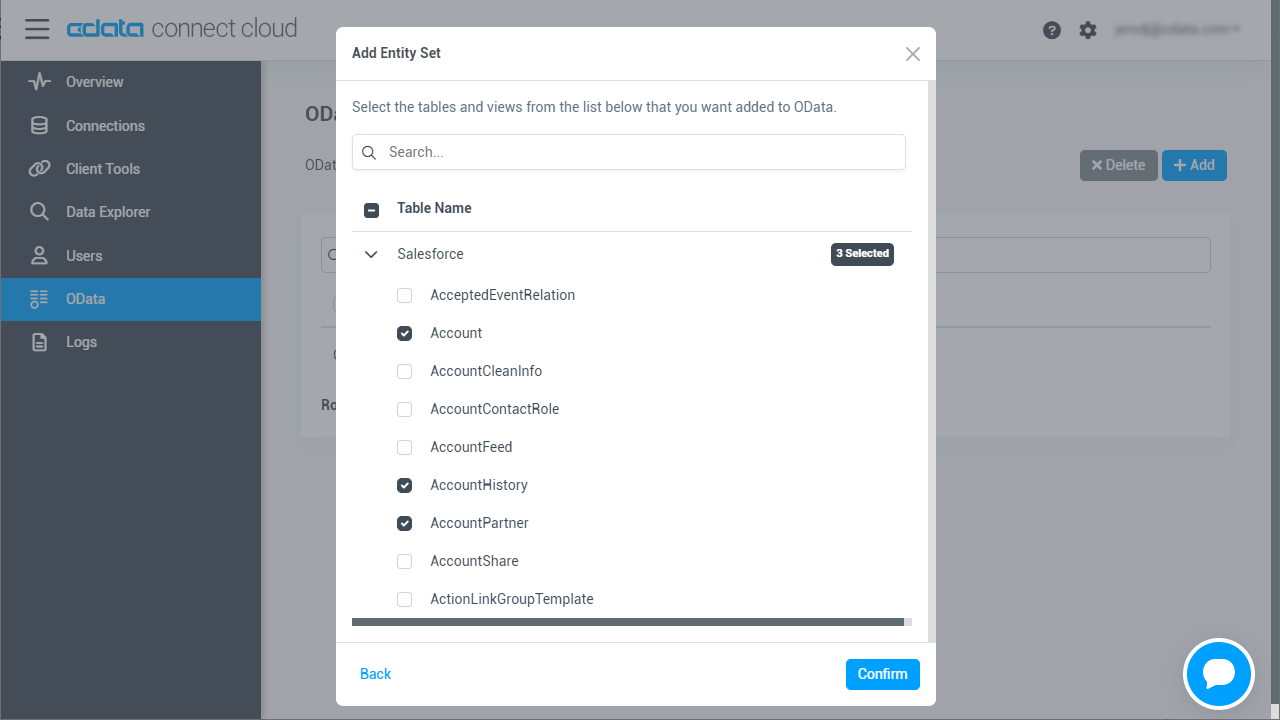
- Select the table(s) you wish to work with and click Confirm
![Selecting Tables (Salesforce is shown)]()
Sample URLs for OData Feeds
Once you have configured a connection to Adobe Commerce, created a user, and created OData endpoints in Connect Cloud, you can access OData feeds for Adobe Commerce data. Below, you will see the URLs to access tables and the list of tables. For information on accessing the tables, you can navigate to the OData page for Connect Cloud. For the URLs, you will need the URL of Connect Cloud: https://cloud.cdata.com/api/odata/service.
| Table | URL | |
|---|---|---|
| Entity (table) List | https://cloud.cdata.com/api/odata/service/ | |
| Metadata | https://cloud.cdata.com/api/odata/service/$metadata | |
| Products | https://cloud.cdata.com/api/odata/service/Products |
As with standard OData feeds, if you wish to limit the fields returned, you can add a $select parameter to the query, along with other standard OData URL parameters, such as $filter, $orderby, $skip, and $top. See the help documentation for more information on supported OData queries.
With the connection and OData endpoints configured, you are ready to connect to Adobe Commerce data from RunMyProcess.
Retrieve Adobe Commerce Data from RunMyProcess DigitalSuite Studio
With the connection to Adobe Commerce and OData endpoints created, we are ready to add Adobe Commerce data to RunMyProcess for Retrieval.
Create a Provider
- Log into RunMyProcess and open DigitalSuite Studio.
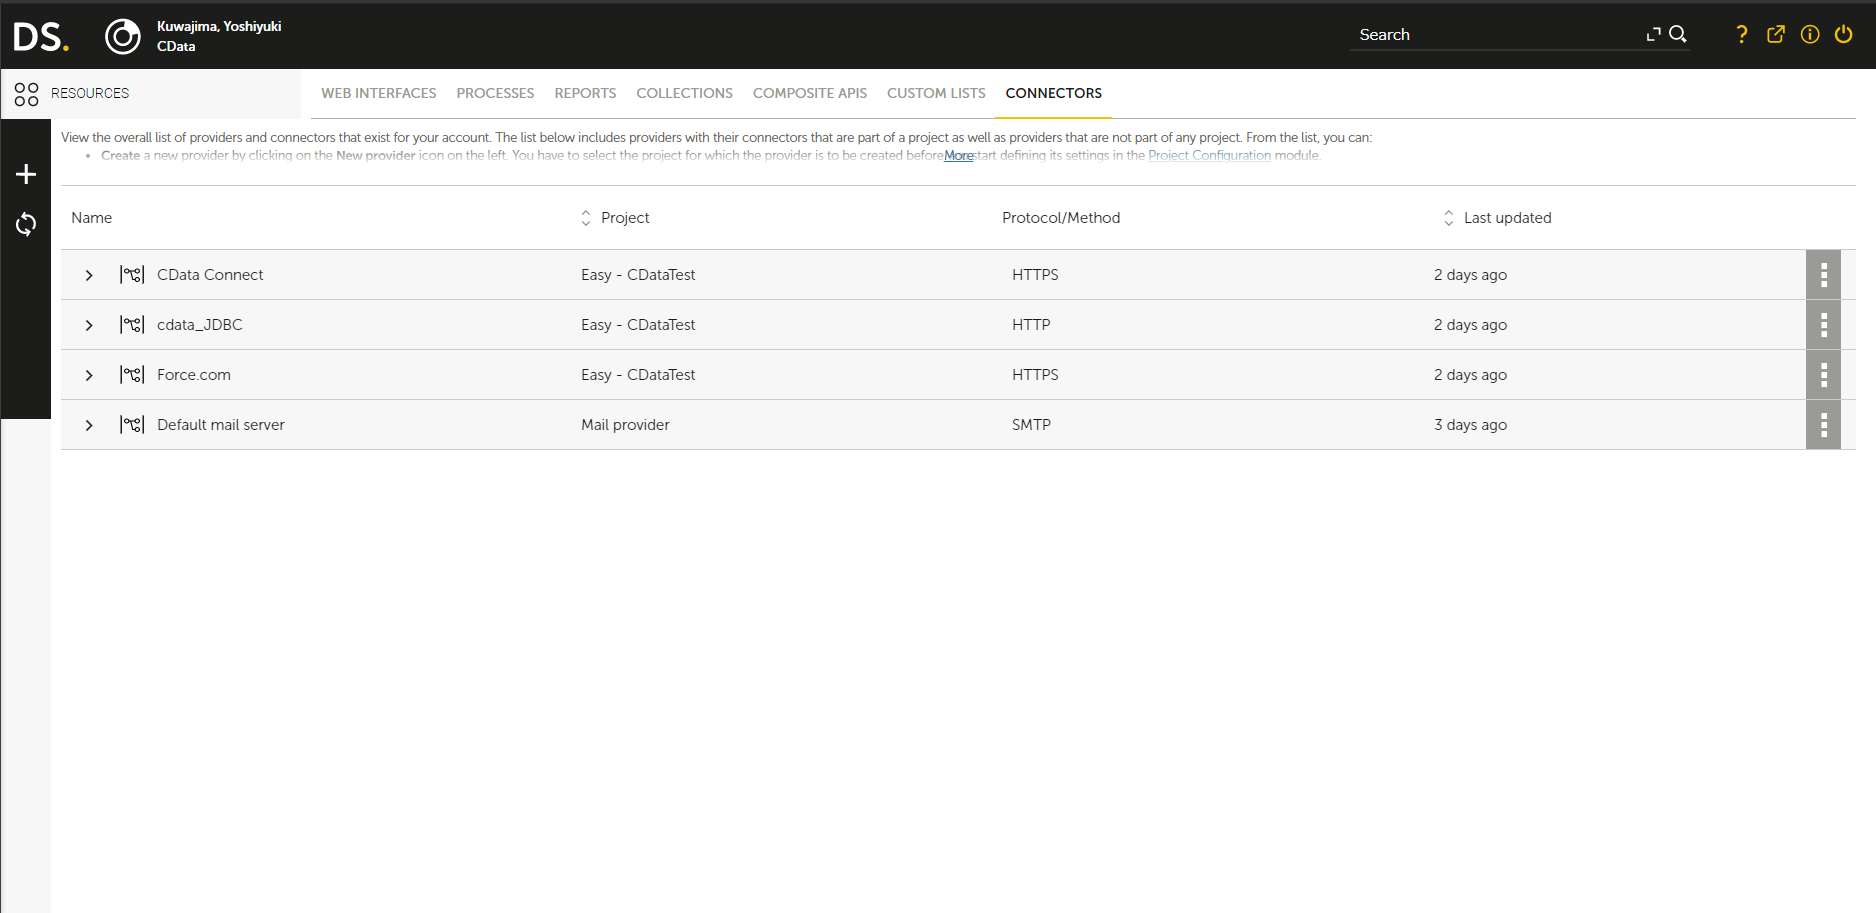
- Click Resources to bring up the Resources page, then select then the CONNECTORS tab.
![Connectors page]()
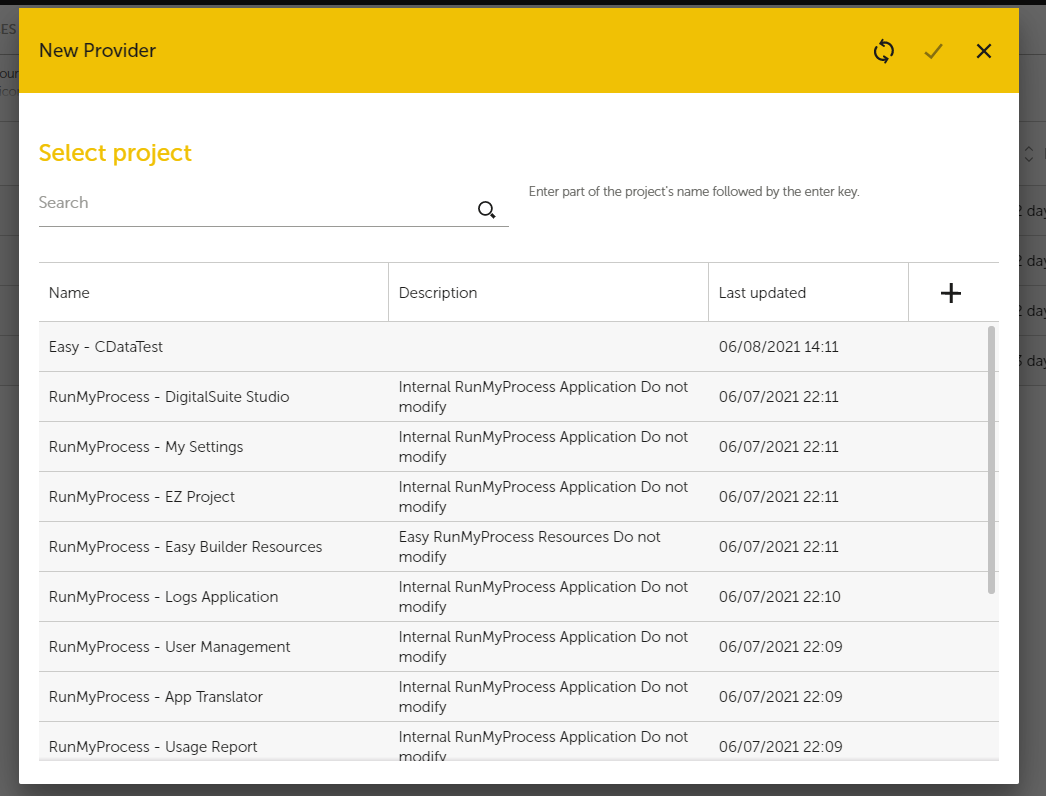
- Click the + (New Provider) button to create a new provider, choose the account to use, then click Confirm.
![Create a new provider]()
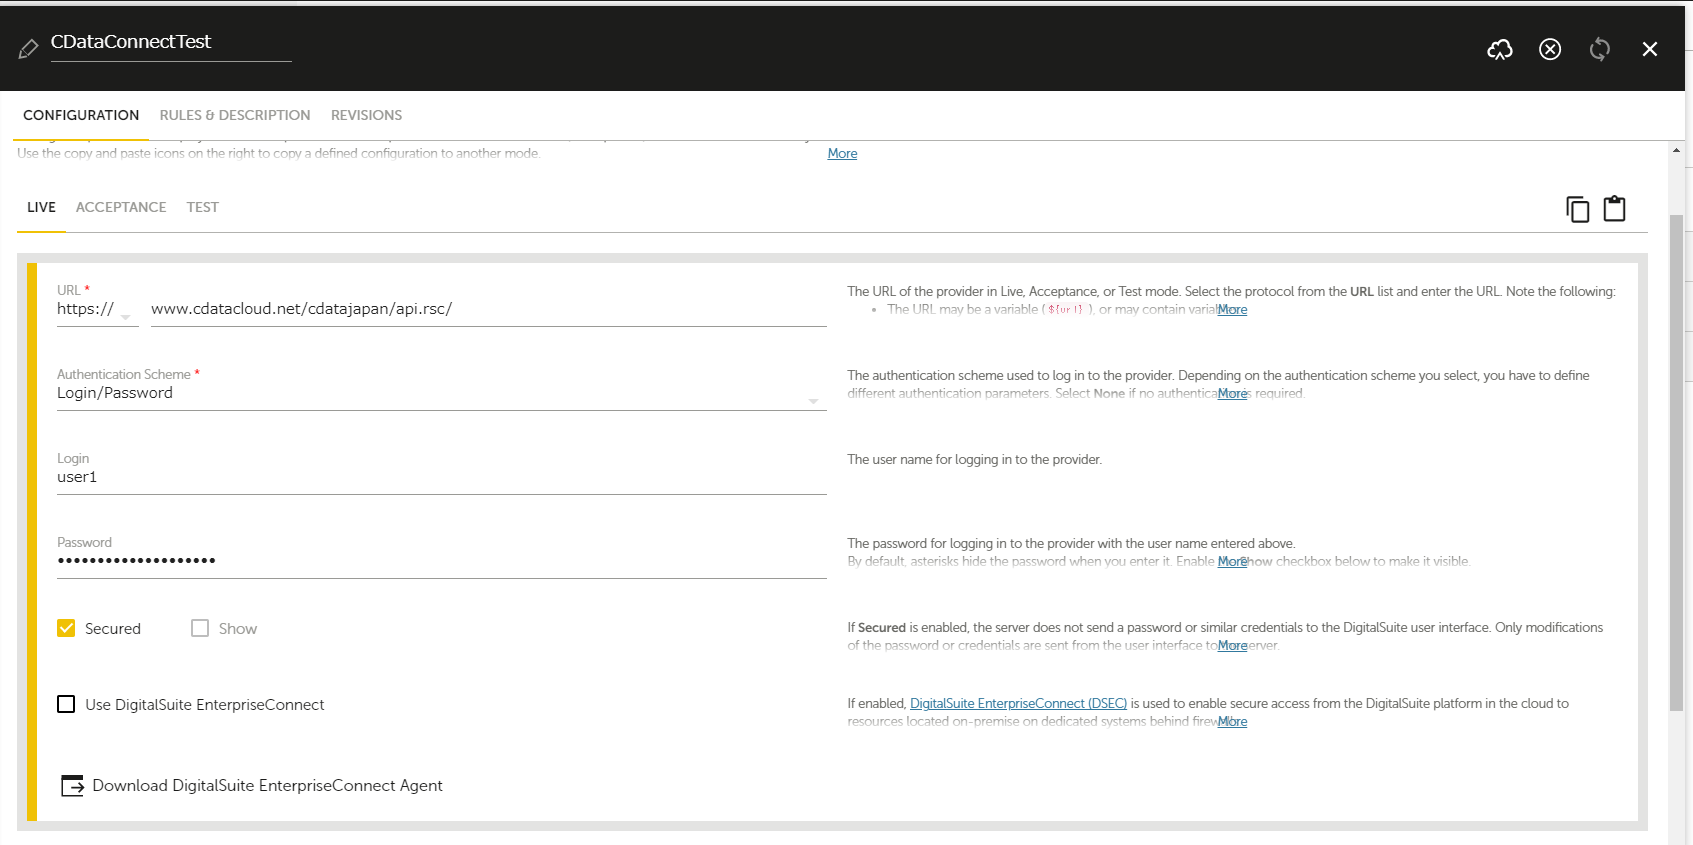
- In the provider settings page, configure the following properties.
- URL: Set the OData endpoint in the Connect Cloud OData page: https://cloud.cdata.com/api/odata/service.
- Authentication Schema: Select Login/Password.
- Login: Specify a CData Connect Cloud username (e.g. user@mydomain.com).
- Password: Specify the PAT of the Connect Cloud user.
![Selecting a connector]()
- Fill in the same properties in the ACCEPTANCE and TEST tabs. Note: You can copy the configured settings by clicking 'Copy this configuration button,' then pasting the content in the new tab by clicking 'Paste previously copied configuration.'
- Click Save to save the properties.
Retrieve Adobe Commerce Data by Creating a Connector
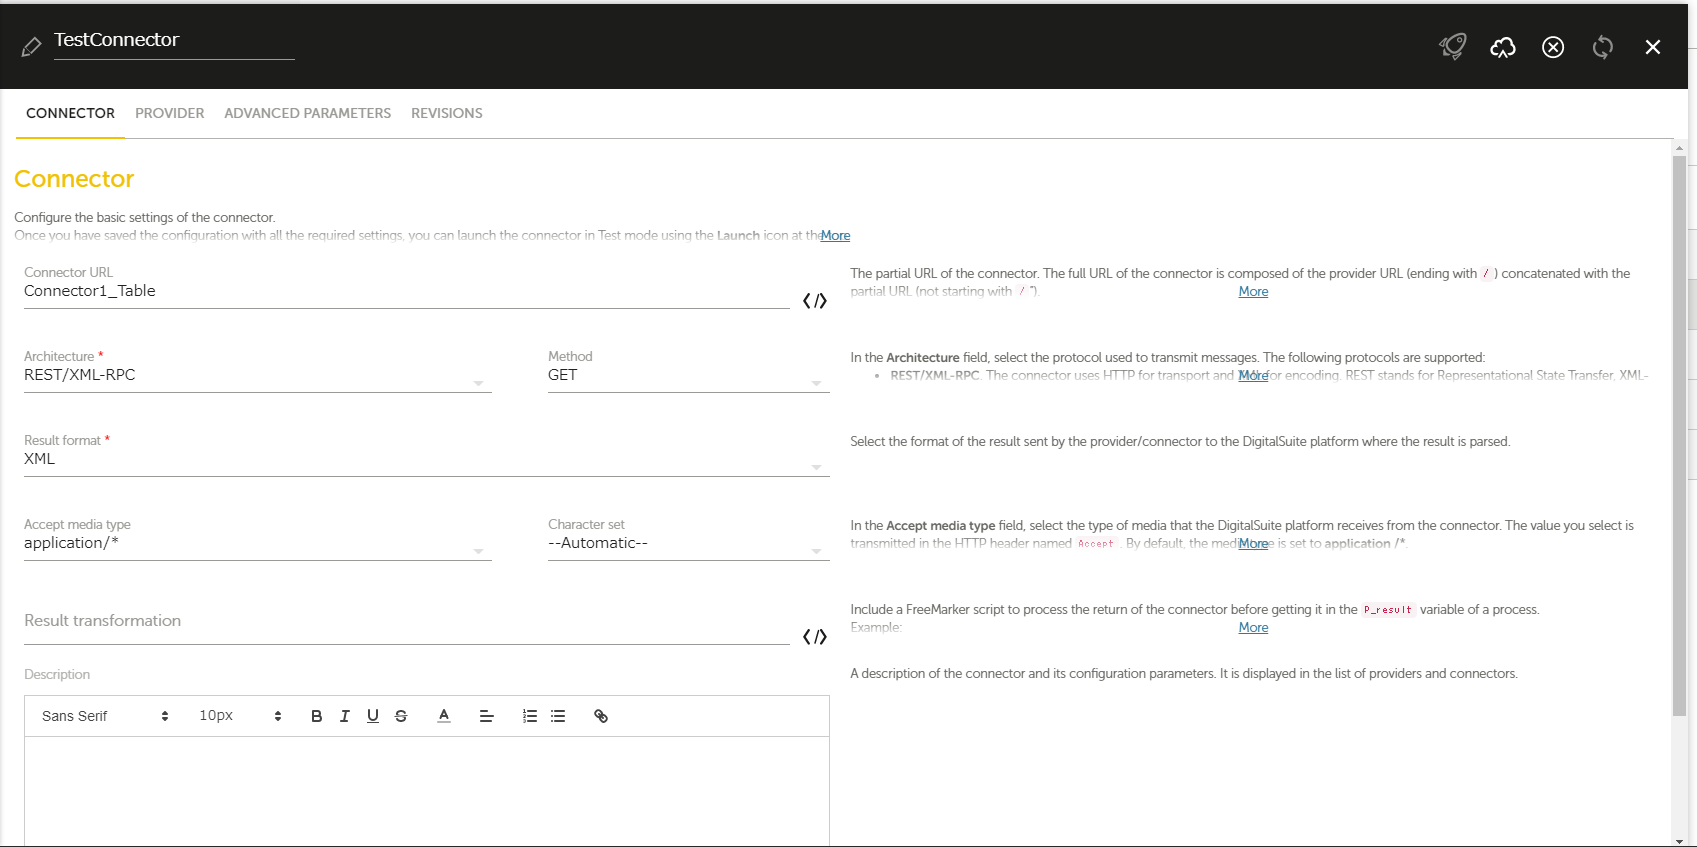
- In the CONNECTORS tab, click the button with three dots to create the provider, then select Add connector from the menu.
- In the following page, set Connector URL to the OData endpoint configured in Connect Cloud (e.g. https://cloud.cdata.com/api/odata/service)
![Connector settings page]()
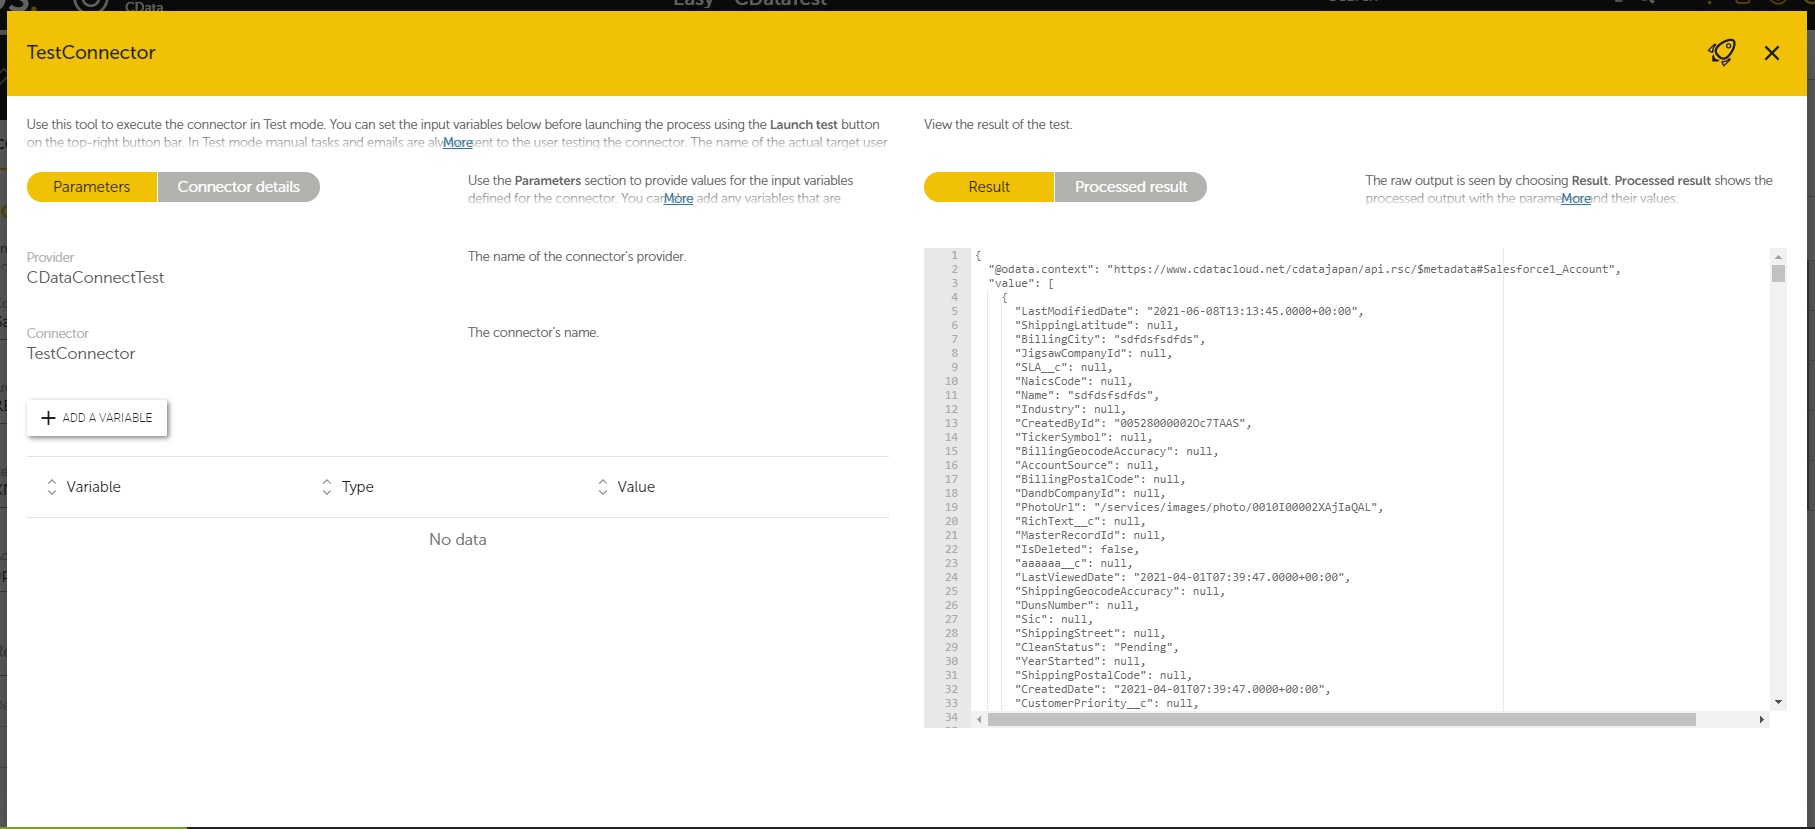
- Click Save then Launch to test the connector execution. Click Launch test to execute. The process is successful if you get the JSON response of your configured table information.
![Execution test page]()
More Information & Free Trial
Now, you have created a provider and connector to retrieve Adobe Commerce data. For more information on creating OData feeds from Adobe Commerce (and more than 100 other data sources), visit the Connect Cloud page. Sign up for a free trial and start working with live Adobe Commerce data in RunMyProcess.


