Discover how a bimodal integration strategy can address the major data management challenges facing your organization today.
Get the Report →Execute Stored Procedures to Azure Data Lake Storage in BizTalk
You can use stored procedures provided by the CData BizTalk Adapter for Azure Data Lake Storage to automate working with Azure Data Lake Storage data in BizTalk. Stored procedures implement actions available in the underlying API.
Stored procedures implement Azure Data Lake Storage actions that cannot be represented as SELECT, INSERT, UPDATE, and DELETE statements. This article shows how to generate a schema for a stored procedure. You can use the schema to execute the stored procedure from a send port.
Add the Adapter to Your Project
Use the Add Adapter wizard to add the adapter to a BizTalk Server project in Visual Studio. The adapter will return metadata about the inputs of the stored procedure and its results. This metadata is needed to create the schema.
- Right-click on the project in the Solution Explorer and click Add -> Add Generated Items.
- Select Add Adapter Metadata in the resulting dialog box.
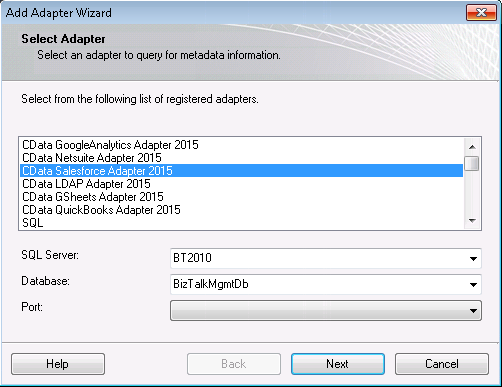
- In the resulting Add Adapter wizard, select the adapter from the list.
- In the Port menu, leave the selection blank. Or, select a receive location or send port that has been configured to use the Azure Data Lake Storage Adapter.
![CData Adapters in the Select Adapter wizard. (Salesforce is shown.)]()
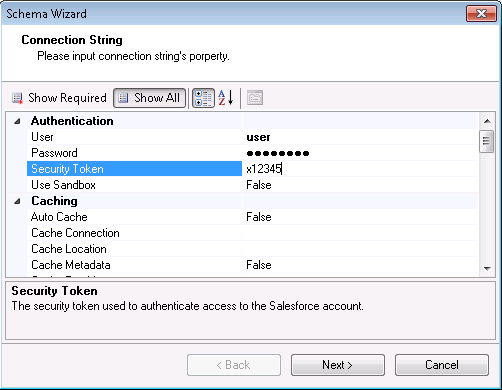
On the Connection String page, enter authentication credentials and other connection properties if they were not already configured in the send port or the receive location.
Below is a typical connection string:
Schema=ADLSGen2;Account=myAccount;FileSystem=myFileSystem;AccessKey=myAccessKey;InitiateOAuth=GETANDREFRESHAuthenticating to a Gen 1 DataLakeStore Account
Gen 1 uses OAuth 2.0 in Azure AD for authentication.
For this, an Active Directory web application is required. You can create one as follows:
To authenticate against a Gen 1 DataLakeStore account, the following properties are required:
- Schema: Set this to ADLSGen1.
- Account: Set this to the name of the account.
- OAuthClientId: Set this to the application Id of the app you created.
- OAuthClientSecret: Set this to the key generated for the app you created.
- TenantId: Set this to the tenant Id. See the property for more information on how to acquire this.
- Directory: Set this to the path which will be used to store the replicated file. If not specified, the root directory will be used.
Authenticating to a Gen 2 DataLakeStore Account
To authenticate against a Gen 2 DataLakeStore account, the following properties are required:
- Schema: Set this to ADLSGen2.
- Account: Set this to the name of the account.
- FileSystem: Set this to the file system which will be used for this account.
- AccessKey: Set this to the access key which will be used to authenticate the calls to the API. See the property for more information on how to acquire this.
- Directory: Set this to the path which will be used to store the replicated file. If not specified, the root directory will be used.
![The connection string properties used by the Azure Data Lake Storage Adapter. (Salesforce is shown.)]()
Generate the Schema
After you enter connection properties in the Add Adapter wizard, the Schema wizard is displayed.
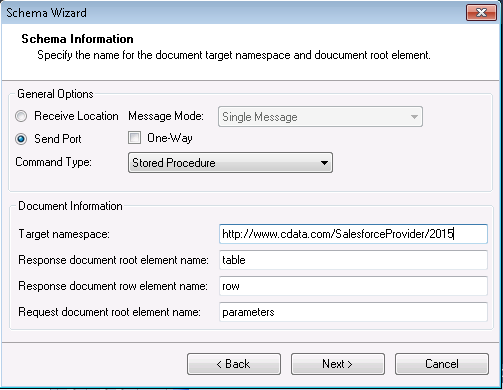
- On the next page, Schema Information, select the Send Port that you have configured to use the Azure Data Lake Storage Adapter.
- If you have configured the CData Azure Data Lake Storage Adapter in a solicit-response send port, disable the One-Way option.
- In the Command Type menu, select Stored Procedure.
![Schema options for a stored procedure. (Salesforce is shown.)]()
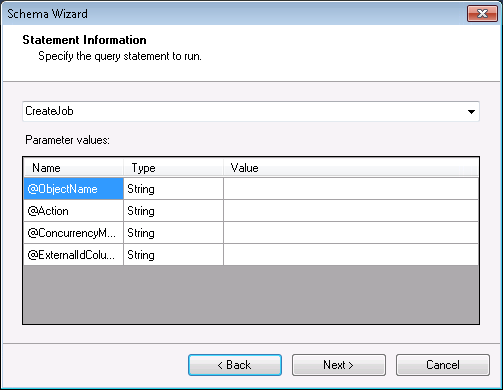
- Select the stored procedure from the menu and enter the values for the input parameters.
![Input parameters and values. (Salesforce is shown.)]()
- Confirm the settings in the summary displayed by the wizard and click Finish to generate the schema.xsd file.
Processing Schemas
To use schemas in a simple BizTalk application, see the tutorial.


