Discover how a bimodal integration strategy can address the major data management challenges facing your organization today.
Get the Report →Use CData Connect Cloud to Access Elasticsearch Data in Microsoft Power Pivot
Use CData Connect Cloud to connect to live Elasticsearch data in the Power Pivot business intelligence tool.
This article will explain how to use CData Connect Cloud to present Elasticsearch data as OData services and then consume the data in Microsoft Excel's Power Pivot business intelligence tool. Follow the steps below to retrieve and edit Elasticsearch data in Power Pivot.
Connect to Elasticsearch from Power Pivot
To work with Elasticsearch data from Power Pivot, we need to connect to Elasticsearch from Connect Cloud, provide user access to the connection, and create OData endpoints for the Elasticsearch data.
(Optional) Add a New Connect Cloud User
As needed, create Users to connect to Elasticsearch through Connect Cloud.
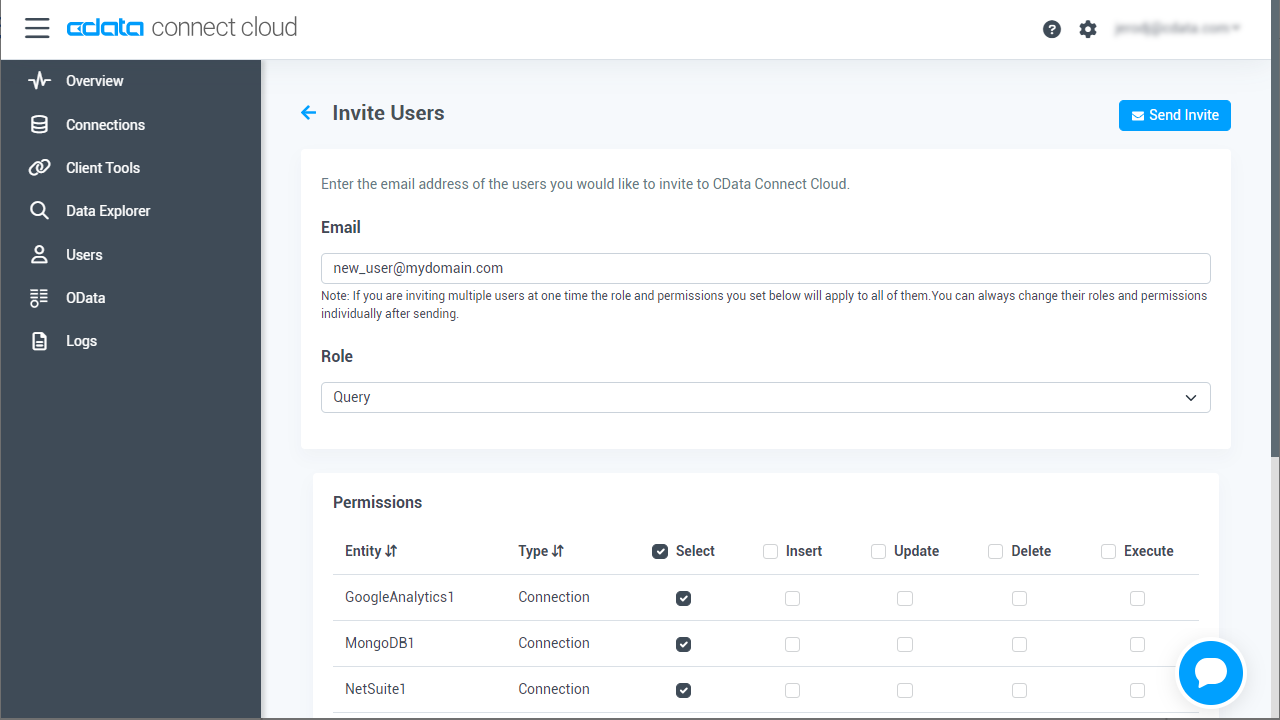
- Navigate to the Users page and click Invite Users
- Enter the new user's email address and click Send to invite the user
![Inviting a new user]()
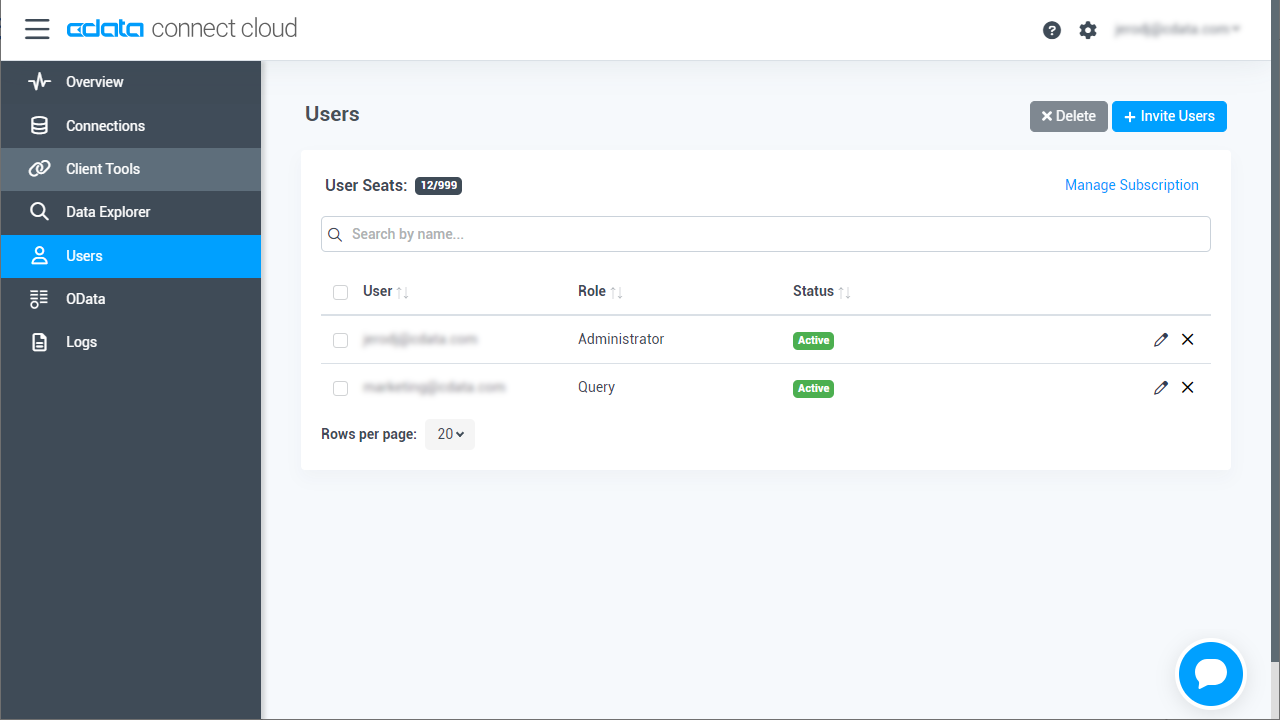
- You can review and edit users from the Users page
![Connect Cloud users]()
Add a Personal Access Token
If you are connecting from a service, application, platform, or framework that does not support OAuth authentication, you can create a Personal Access Token (PAT) to use for authentication. Best practices would dictate that you create a separate PAT for each service, to maintain granularity of access.
- Click on your username at the top right of the Connect Cloud app and click User Profile.
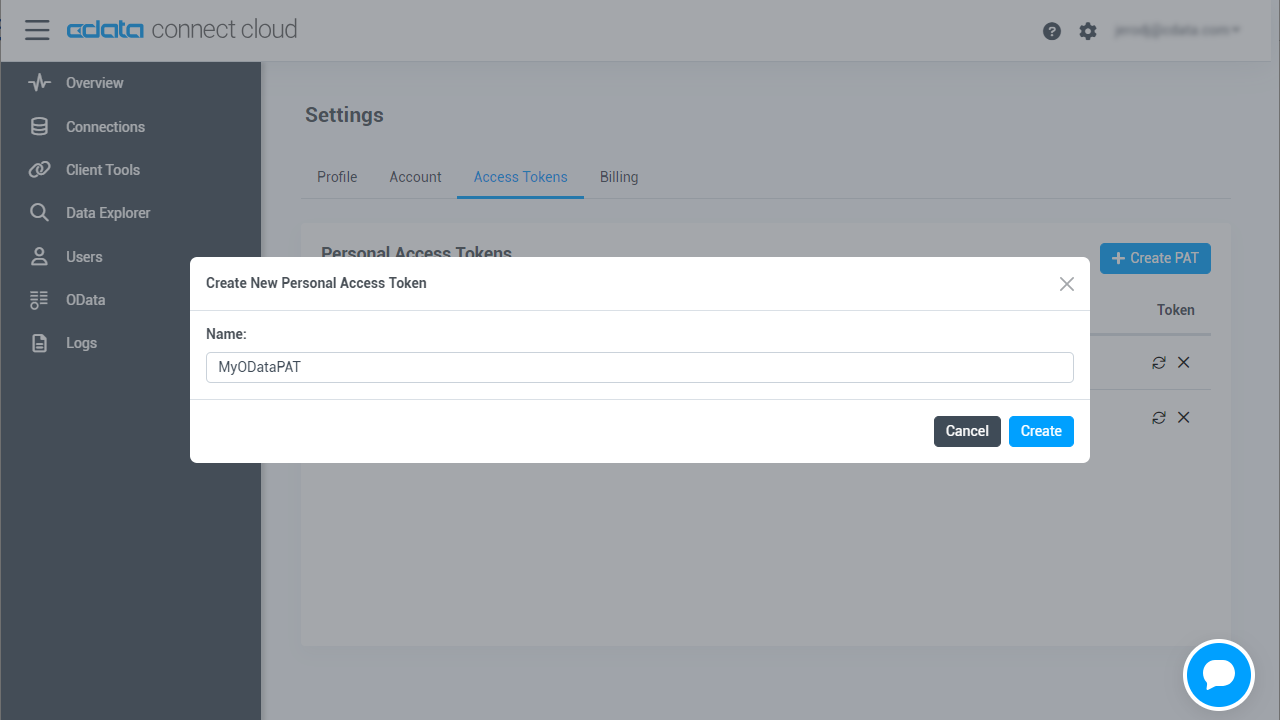
- On the User Profile page, scroll down to the Personal Access Tokens section and click Create PAT.
- Give your PAT a name and click Create.
![Creating a new PAT]()
- The personal access token is only visible at creation, so be sure to copy it and store it securely for future use.
Connect to Elasticsearch from Connect Cloud
CData Connect Cloud uses a straightforward, point-and-click interface to connect to data sources.
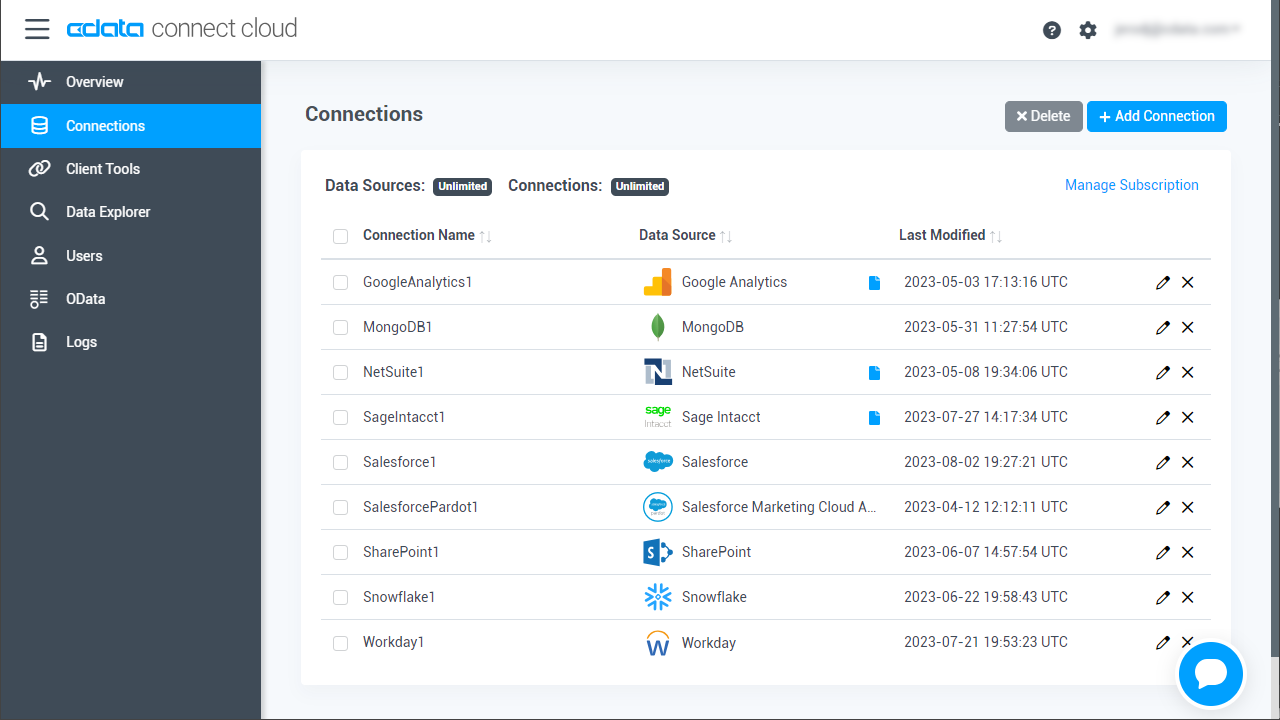
- Log into Connect Cloud, click Connections and click Add Connection
![Adding a Connection]()
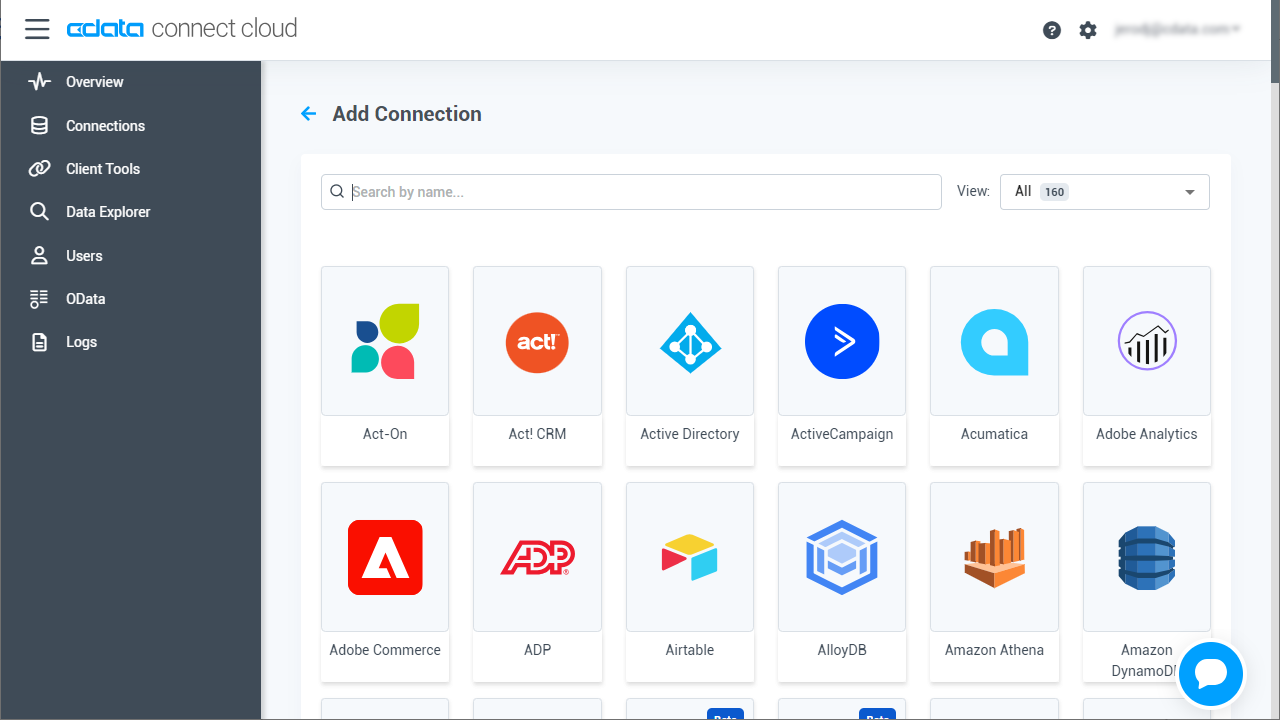
- Select "Elasticsearch" from the Add Connection panel
![Selecting a data source]()
-
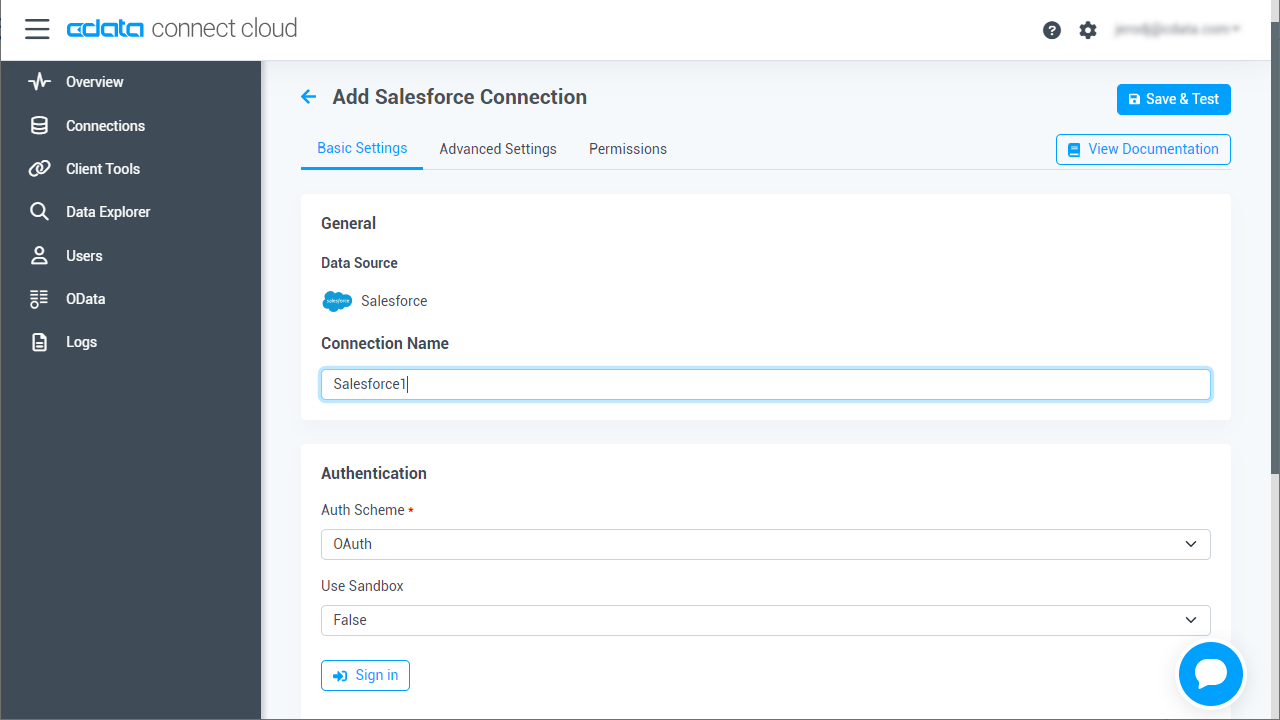
Enter the necessary authentication properties to connect to Elasticsearch.
Set the Server and Port connection properties to connect. To authenticate, set the User and Password properties, PKI (public key infrastructure) properties, or both. To use PKI, set the SSLClientCert, SSLClientCertType, SSLClientCertSubject, and SSLClientCertPassword properties.
The data provider uses X-Pack Security for TLS/SSL and authentication. To connect over TLS/SSL, prefix the Server value with 'https://'. Note: TLS/SSL and client authentication must be enabled on X-Pack to use PKI.
Once the data provider is connected, X-Pack will then perform user authentication and grant role permissions based on the realms you have configured.
![Configuring a connection (Salesforce is shown)]()
- Click Create & Test
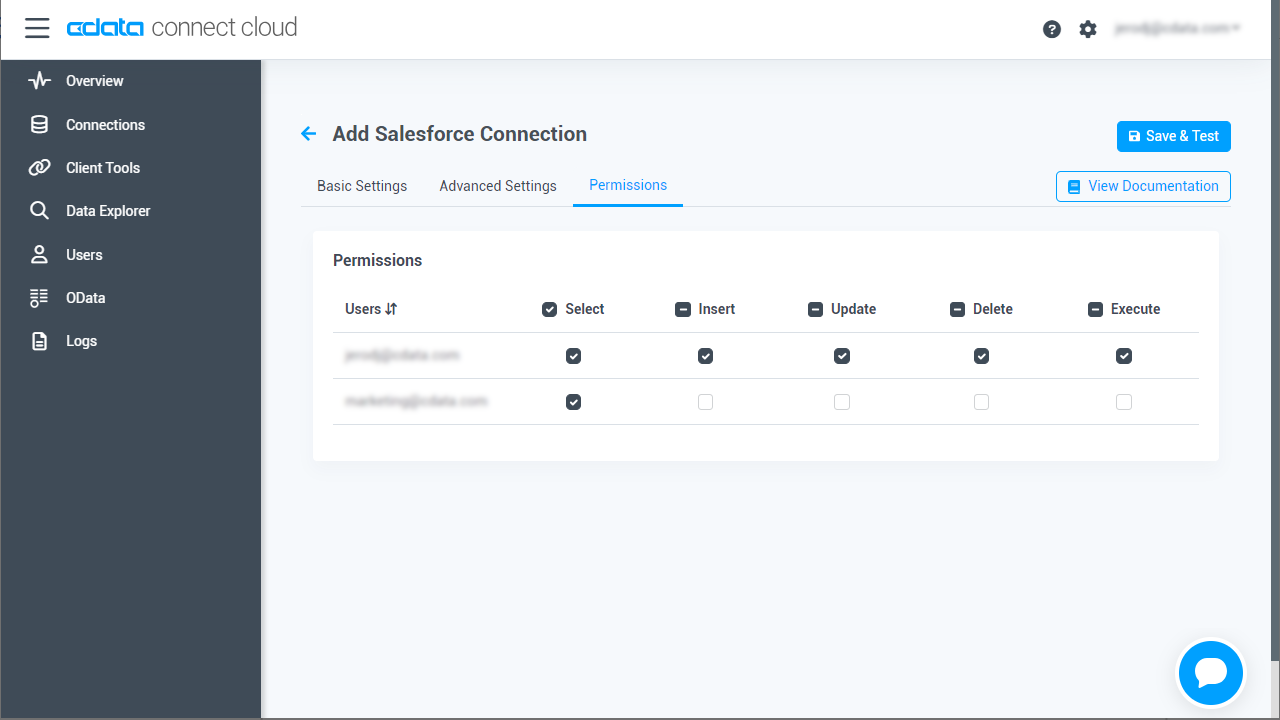
- Navigate to the Permissions tab in the Add Elasticsearch Connection page and update the User-based permissions.
![Updating permissions]()
Add Elasticsearch OData Endpoints in Connect Cloud
After connecting to Elasticsearch, create OData Endpoints for the desired table(s).
- Navigate to the OData page and click Add to create new OData endpoints
- Select the Elasticsearch connection (e.g. Elasticsearch1) and click Next
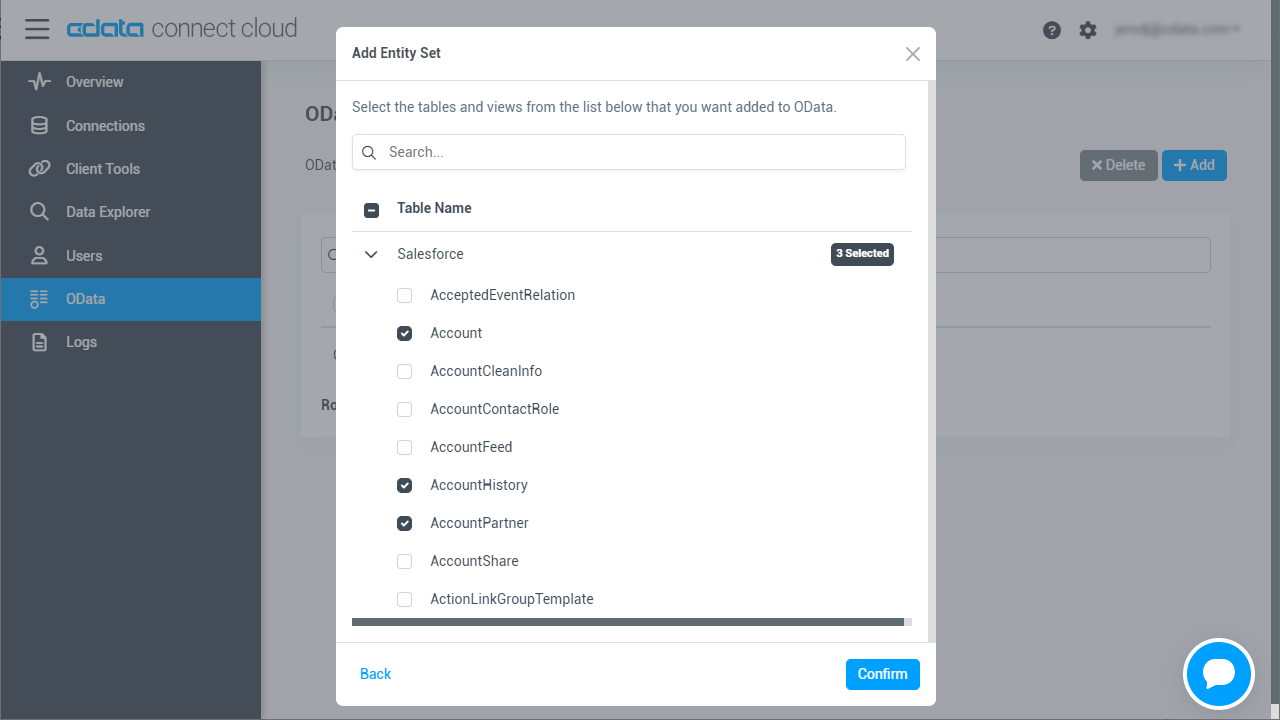
- Select the table(s) you wish to work with and click Confirm
![Selecting Tables (Salesforce is shown)]()
With the connection and OData endpoints configured, you are ready to connect to Elasticsearch data from Power Pivot.
Import Elasticsearch Tables in Power Pivot
Follow the steps below to import tables that can be refreshed on demand:
-
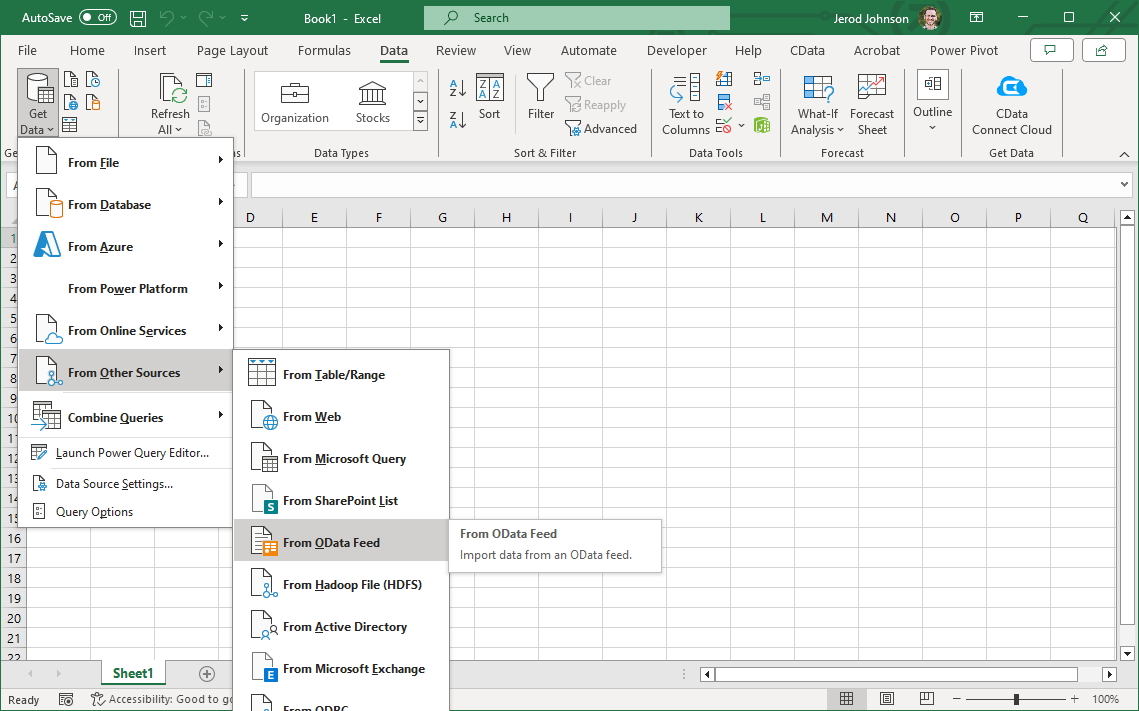
In Excel, click Data -> Get Data -> From Other Sources -> From OData Feed
![Starting the OData connection.]()
-
Fill out the OData feed URL (e.g. https://cloud.cdata.com/api/odata/service)
![The URL of the OData endpoint for Connect Cloud.]()
-
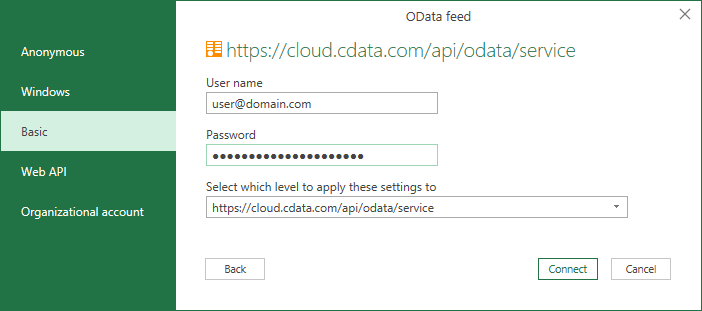
On the next screen, select Basic and configure the username and password. Password will be your PAT.
![Authenticating with Connect Cloud]()
-
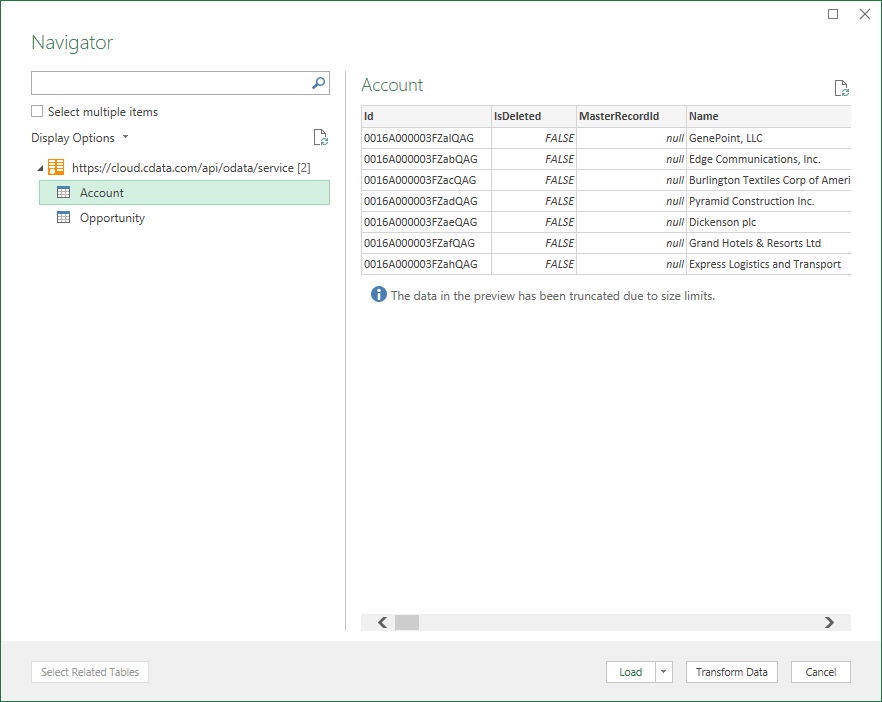
Select the tables that you would like to import into Excel
![Selecting tables (Salesforce is shown.)]()
-
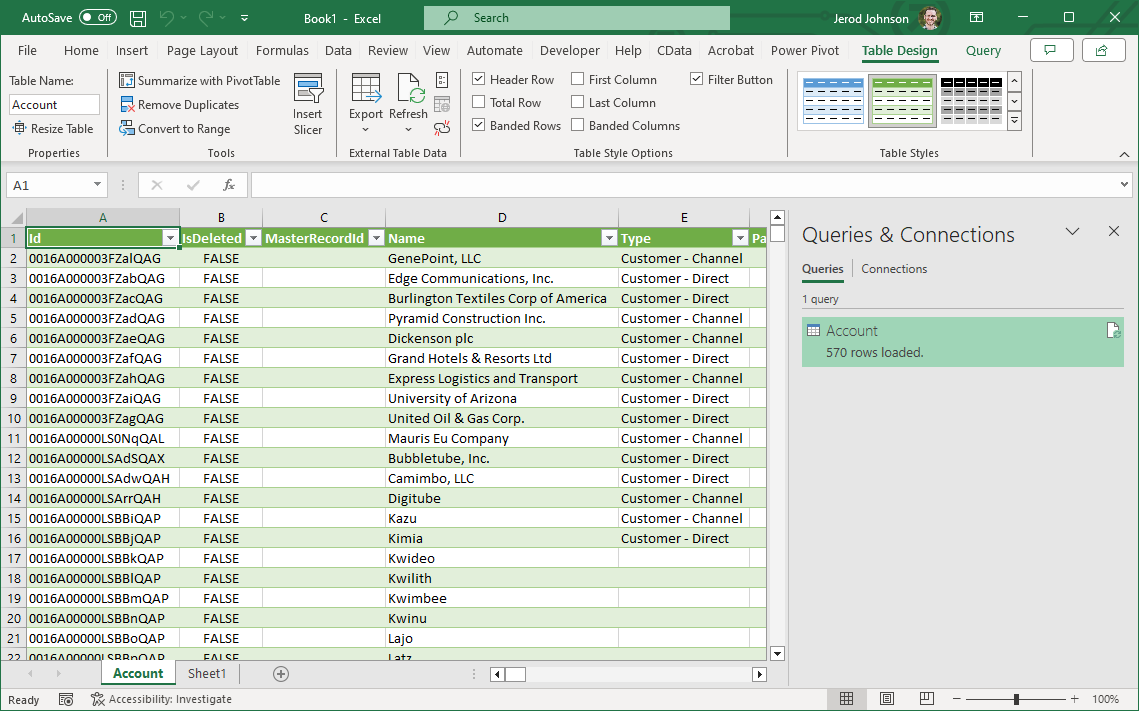
After selecting your table(s) and clicking Load, you should see the data appear in an Excel spreadsheet
![Loading tables (Salesforce is shown.)]()
-
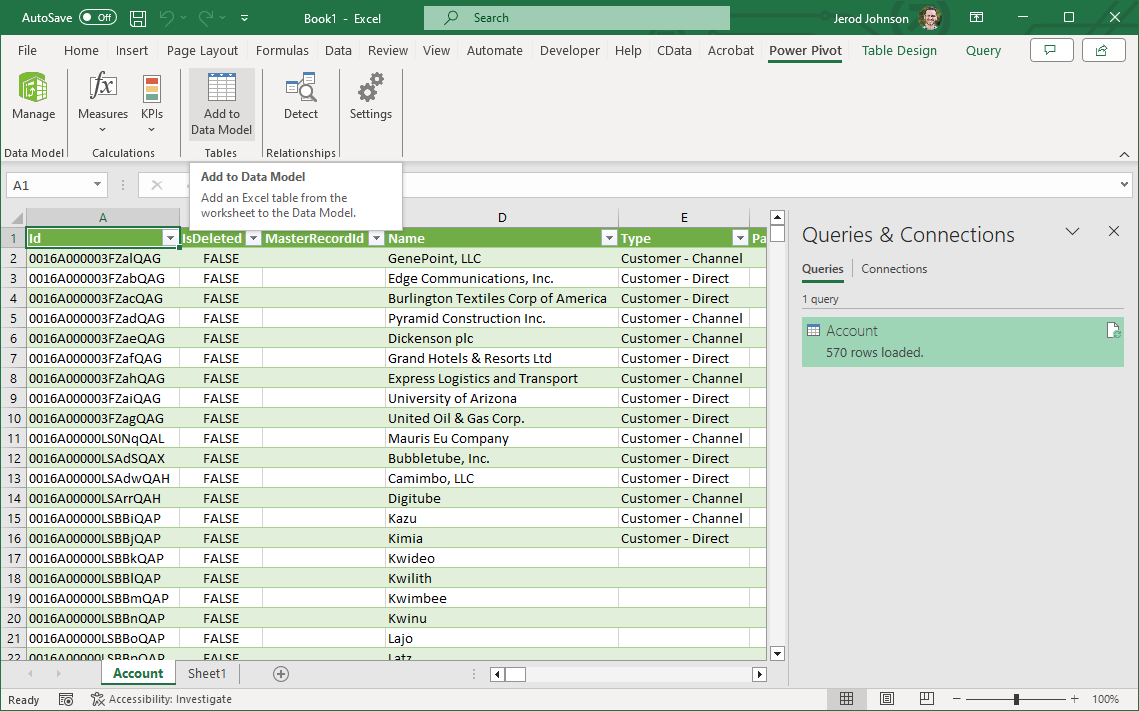
Now, click the Power Pivot tab on the ribbon, and then select Add to Data Model.
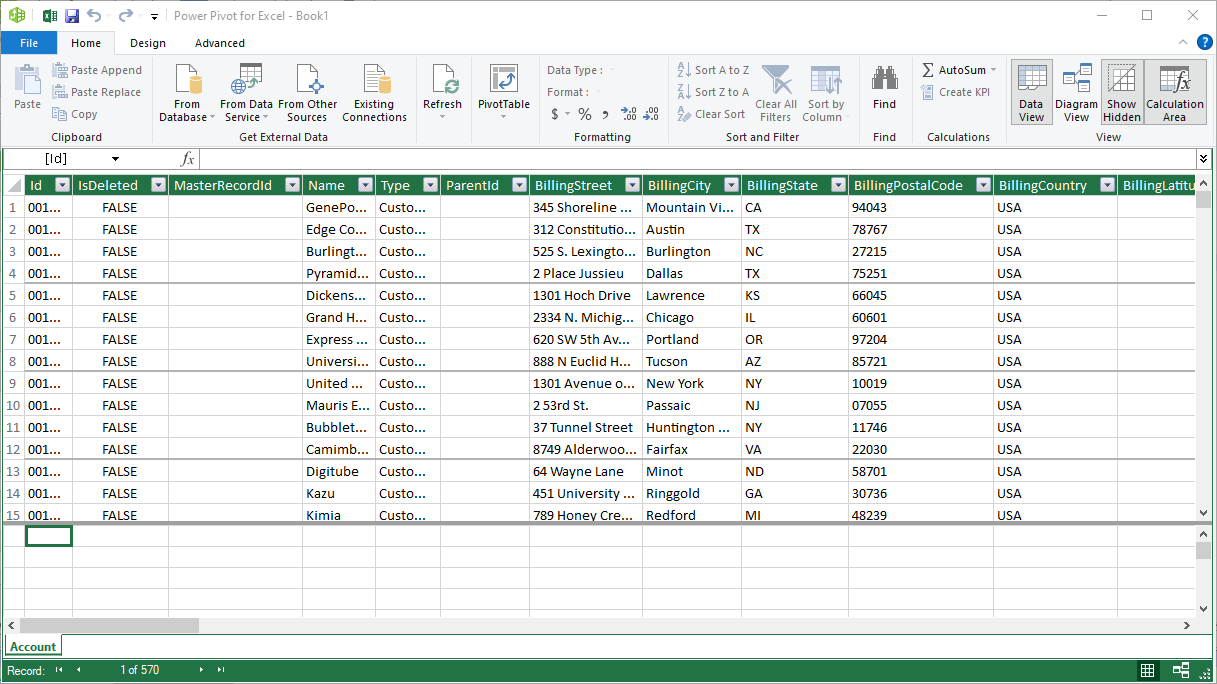
![Loading data into Power Pivot (Salesforce is shown.)]() This can now work with your Elasticsearch data in Power Pivot.
This can now work with your Elasticsearch data in Power Pivot.
![The Pivot Table that is consuming OData feeds from Connect Cloud. (Salesforce is shown.)]()
Free Trial & More Information
If you are interested in connecting to your Elasticsearch data (or data from any of our other supported data sources) from Power Pivot, sign up for a free trial of CData Connect Cloud today! For more information on Connect Cloud and to see what other data sources we support, refer to our CData Connect Cloud page.



 This can now work with your Elasticsearch data in Power Pivot.
