Discover how a bimodal integration strategy can address the major data management challenges facing your organization today.
Get the Report →Viewing Snowflake Data in RAD Studio Data Explorer
How to view Snowflake data in RAD Studio Data Explorer using the CData ODBC Driver for Snowflake.
Embarcadero RAD Studio provides a development environment for Delphi and C++Builder applications. With the CData ODBC Driver for Snowflake, you gain access to live Snowflake data within RAD Studio, abstracting the data into tables, views, and stored procedures that can be used to both retrieve and update Snowflake data. This article will walk through connecting to Snowflake using the Data Explorer.
Configure a Connection to Snowflake
If you have not already, first specify connection properties in an ODBC DSN (data source name). This is the last step of the driver installation. You can use the Microsoft ODBC Data Source Administrator to create and configure ODBC DSNs.
To connect to Snowflake:
- Set User and Password to your Snowflake credentials and set the AuthScheme property to PASSWORD or OKTA.
- Set URL to the URL of the Snowflake instance (i.e.: https://myaccount.snowflakecomputing.com).
- Set Warehouse to the Snowflake warehouse.
- (Optional) Set Account to your Snowflake account if your URL does not conform to the format above.
- (Optional) Set Database and Schema to restrict the tables and views exposed.
See the Getting Started guide in the CData driver documentation for more information.
Connecting to Snowflake Data Using Data Explorer
You can create a simple application for displaying Snowflake data by utilizing the CData FireDAC Components for Snowflake and a new VCL Forms Application:
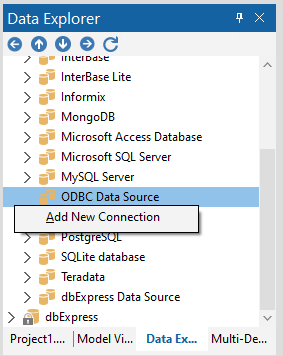
- Open the Data Explorer in RAD Studio and expand FireDAC.
- Right-click the ODBC Data Source node in the Data Explorer.
- Click Add New Connection.
![Adding a New Connection. (Salesforce is shown.)]()
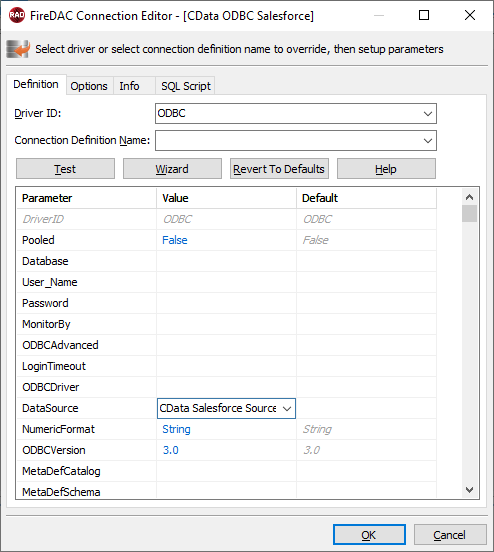
- Enter a name for the connection.
- In the FireDAC Connection Editor that appears, set the DataSource property to the name of the ODBC DSN for Snowflake.
![Setting the Connection Parameters. (Salesforce is shown.)]()
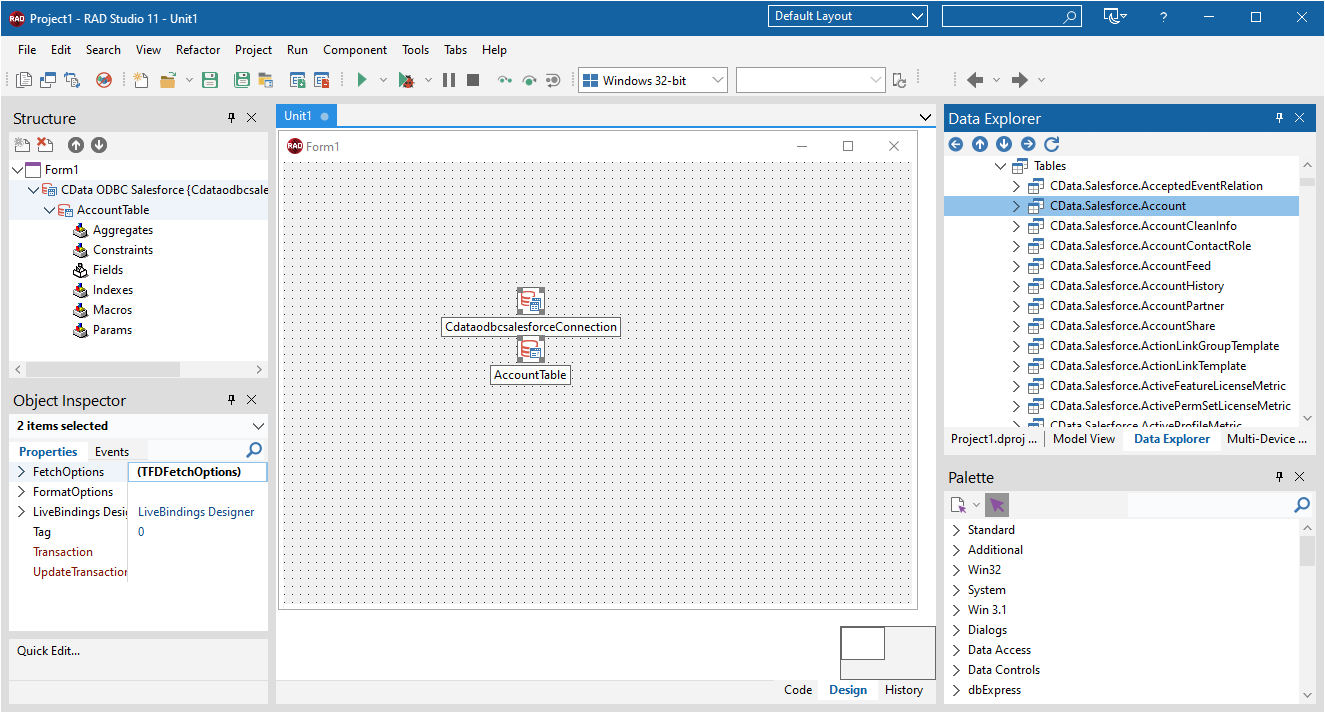
- Back in the Data Explorer, expand the tables for the connection.
Create a new VCL Forms application and drag a table (for example: Products) onto the form.
![Placing the Table on the Form. (Salesforce is shown.)]()
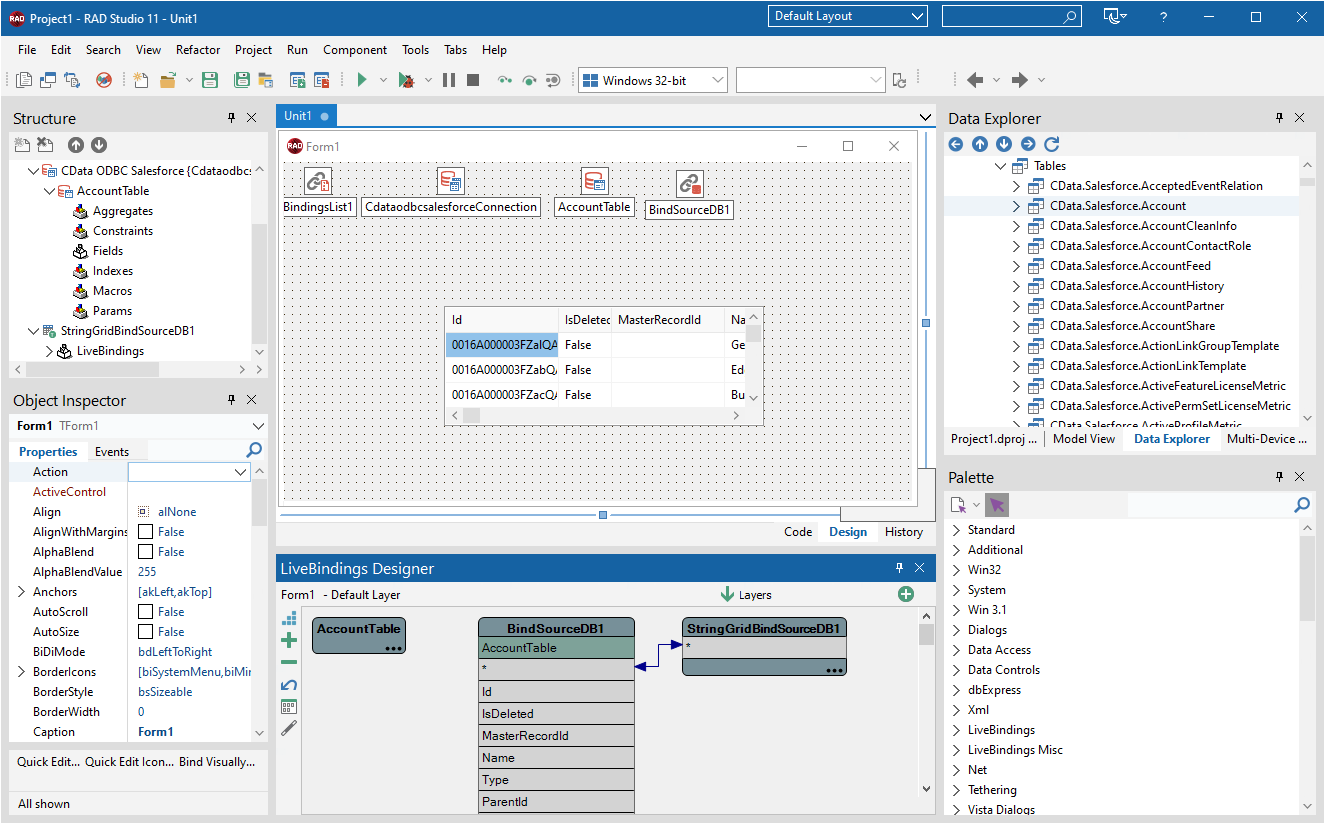
- Select the ProductsTable object on the form and set the Active property to true.
Right-click on the object, bind visually, and link everything (*) to a new control (TStringGrid).
![Visually Binding the Table. (Salesforce is shown.)]()
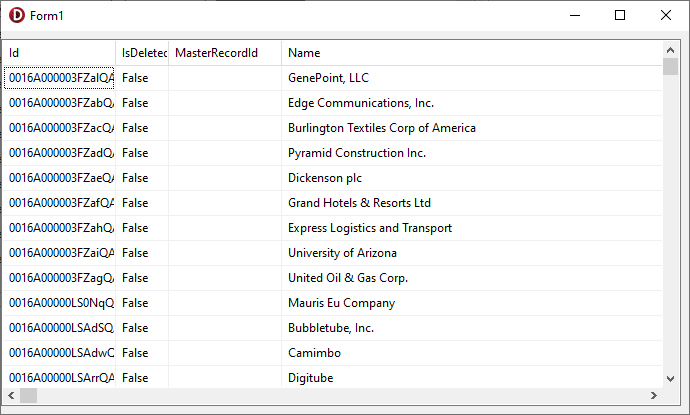
Arrange the TStringGrid on the form and run the application to see the Products data.
![The Table data on a Form. (Salesforce is shown.)]()


