Discover how a bimodal integration strategy can address the major data management challenges facing your organization today.
Get the Report →Integrate Harvest Data into Automated Tasks with Power Automate
Use CData Connect Server to create a virtual SQL Server database for Harvest data and integrate live Harvest data into your Power Automate (Microsoft Flow) tasks.
Power Automate (Microsoft Flow) is an online service that automates events (known as workflows) across the most common apps and services. When paired with CData Connect Server, you get instant, cloud-to-cloud access to Harvest data for visualizations, dashboards, and more. This article shows how to connect to Connect Server from Power Automate and integrate live Harvest data into your workflows and tasks.
CData Connect Server provides a pure SQL interface for Harvest, allowing you to easily integrate with live Harvest data in Power Automate — without replicating the data. CData Connect Server looks exactly like a SQL Server database to Power Automate and uses optimized data processing out of the box to push all supported SQL operations (filters, JOINs, etc) directly to Harvest, leveraging server-side processing to quickly return Harvest data.
Create a Virtual SQL Database for Harvest Data
CData Connect Server uses a straightforward, point-and-click interface to connect to data sources and generate APIs.
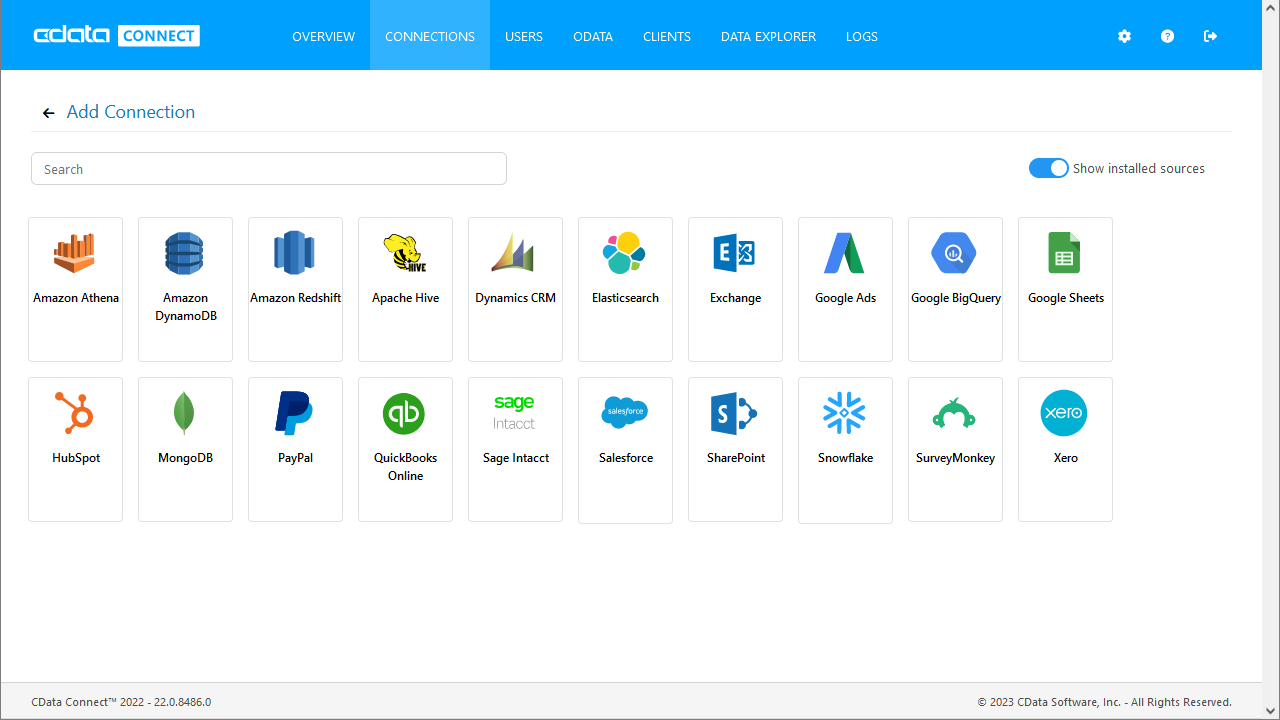
- Login to Connect Server and click Connections.
![Adding a connection]()
- Select "Harvest" from Available Data Sources.
-
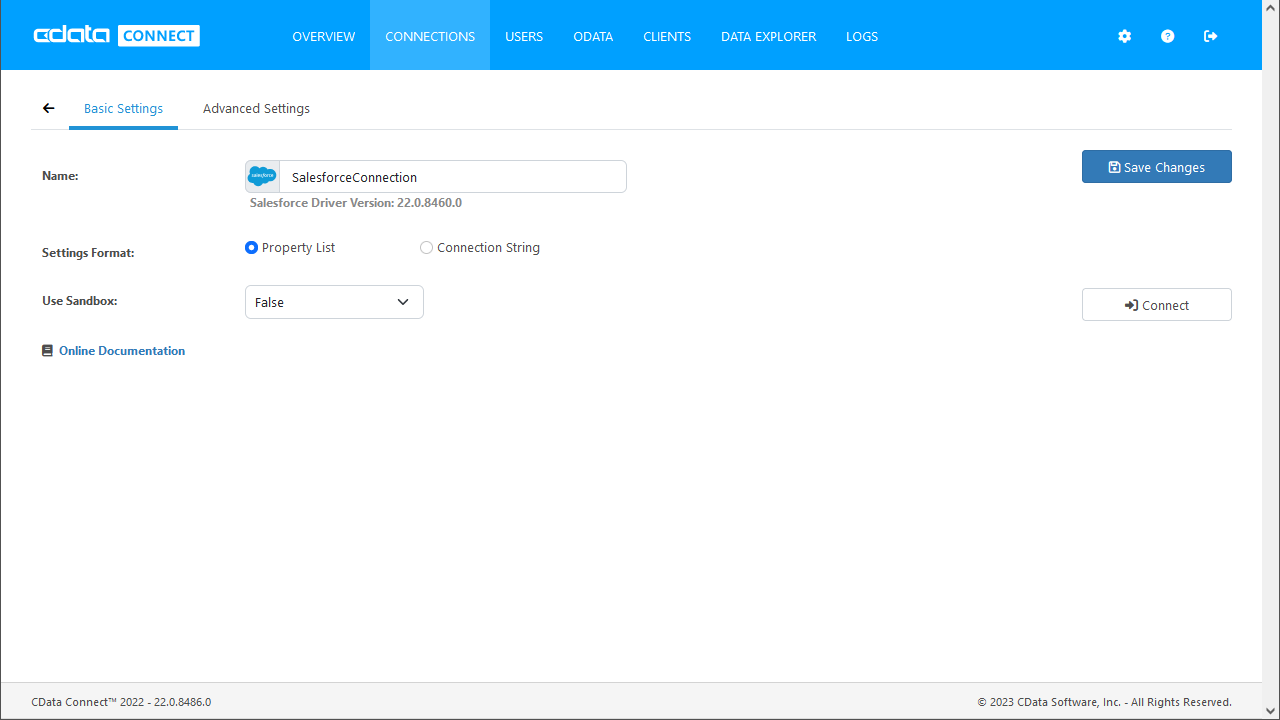
Enter the necessary authentication properties to connect to Harvest.
Start by setting the Profile connection property to the location of the Harvest Profile on disk (e.g. C:\profiles\Harvest.apip). Next, set the ProfileSettings connection property to the connection string for Harvest (see below).
Harvest API Profile Settings
To authenticate to Harvest, you can use either Token authentication or the OAuth standard. Use Basic authentication to connect to your own data. Use OAuth to allow other users to connect to their data.
Using Token Authentication
To use Token Authentication, set the APIKey to your Harvest Personal Access Token in the ProfileSettings connection property. In addition to APIKey, set your AccountId in ProfileSettings to connect.
Using OAuth Authentication
First, register an OAuth2 application with Harvest. The application can be created from the "Developers" section of Harvest ID.
After setting the following connection properties, you are ready to connect:
- ProfileSettings: Set your AccountId in ProfileSettings.
- AuthScheme: Set this to OAuth.
- OAuthClientId: Set this to the client ID that you specified in your app settings.
- OAuthClientSecret: Set this to the client secret that you specified in your app settings.
- CallbackURL: Set this to the Redirect URI that you specified in your app settings.
- InitiateOAuth: Set this to GETANDREFRESH. You can use InitiateOAuth to manage how the driver obtains and refreshes the OAuthAccessToken.
![Configuring a connection (SQL Server is shown).]()
- Click Save Changes
- Click Privileges -> Add and add the new user (or an existing user) with the appropriate permissions.
Connecting to CData Connect Server
To use Connect Server to integrate Harvest data into your Power Automate tasks, you need a new SQL Server connection:
- Log in to Power Automate
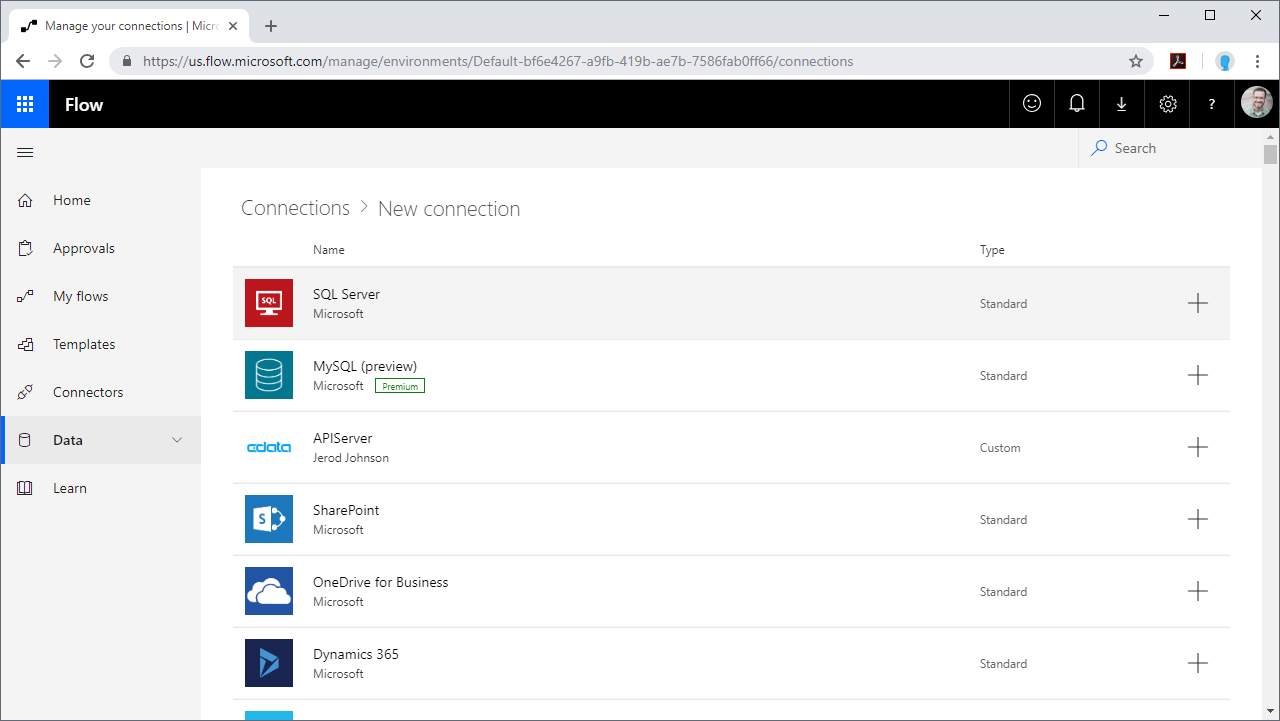
- Click Data -> Connections -> New connection
- Select SQL Server
![Creating a new SQL Server Connection]()
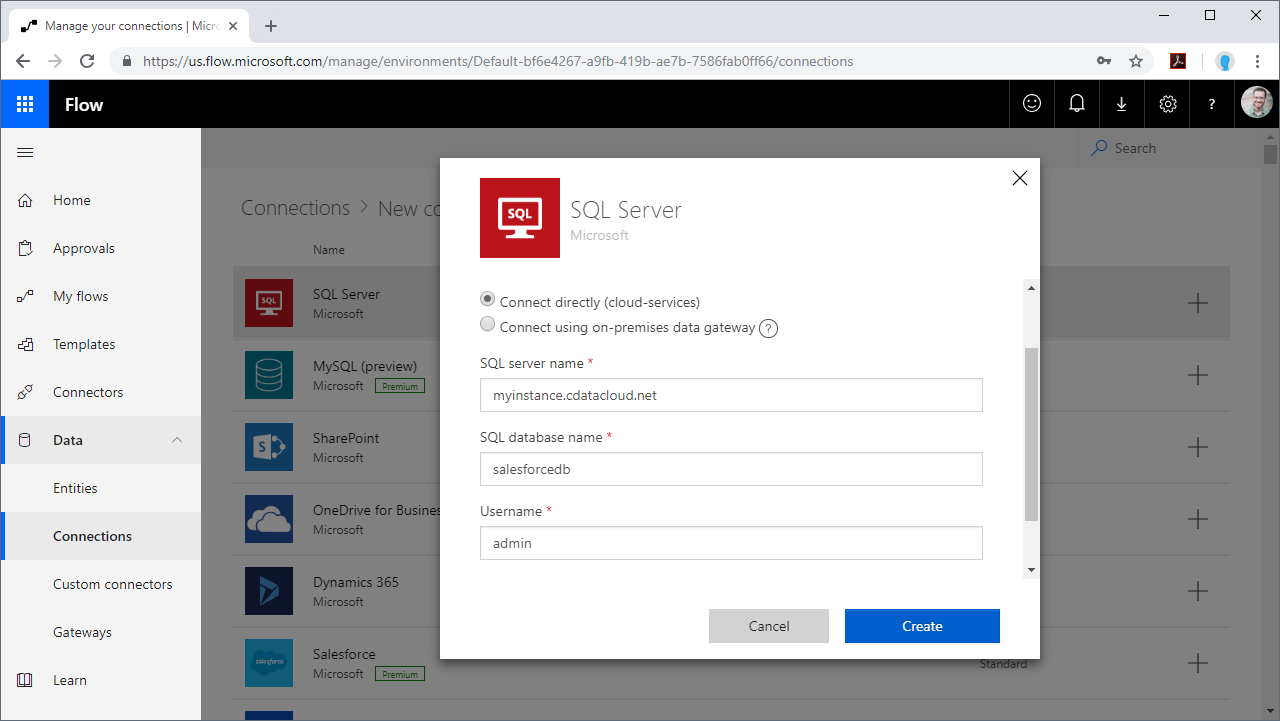
- In the connection wizard:
- Set Authentication Type to "SQL Server Authentication"
- Set SQL server name to the address of your Connect Server instance (connect_server_url)
- Set SQL database name to the name of the virtual Harvest database you created earlier (like harvestdb)
- Set the Username and Password and click Create
![Connecting to Connect Server]()
Integrating Harvest Data into Power Automate Tasks
With the connection to Connect Server configured, you are ready to integrate live Harvest data into your Power Automate tasks.
- Log in to Power Automate
- Click My flows -> New and choose to create the flow from blank or template
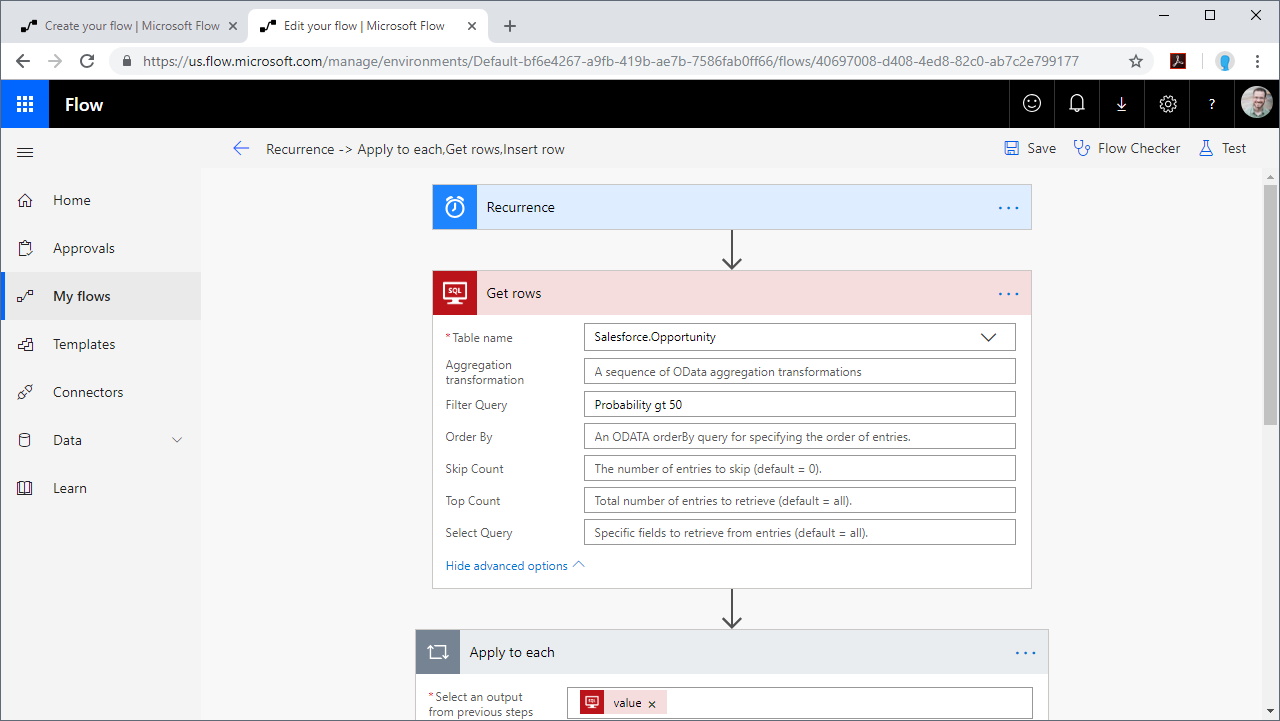
- Add (or configure) a SQL Server action (like Get rows) and configure the action to connect to your Connect Server connection
- Select a Table to work with (from the drop-down menu) and configure any advanced options (like filters, orders, etc)
![Getting Harvest "Rows"]()
- Configure any actions to follow and test, then save the flow
SQL Access to Harvest Data from Applications
Now you have a direct connection to live Harvest data from Power Automate tasks. You can create more connections and workflows to drive business — all without replicating Harvest data.
To get SQL data access to 200+ SaaS, Big Data, and NoSQL sources directly from your applications, see the CData Connect Server.
Related Power Automate Articles
This article walks through using CData Connect Server with Power Automate (Online). Check out our other articles for more ways to work with Power Automate Desktop:


